Is that the flat earth on the right?
Great Lakes forming the outline of my home, Michigan… plus Lake Ontario hanging off to the right. The Niagara River wasn’t included on the image I used.
Haha. Great Lakes were my second guess. Doing a project for someone who wanted laser images on the flat earth theory. Saw those and thought “coincidence?”
Holy moly that tree is amazing!
Is there anyway you can help me when I try to engrave on tile which kind of material should I chose?
Choose “uncertified material” and either use the set focus tool or manually input the height of the tile after measuring precisely with calipers.
1 Like
What are some good Sharpie alternatives? Not paint, or paint markers, but good knock off sharpies that anyone has used? The sharpies I used on my first tile worked great, I just see it getting expensive lol. I’m going to try acrylic paint too, see how that goes…knowing me, probably try today after work haha
Thanks a lot for a help
It’s my impression you start at Sharpies and move up. There are some expensive markers out there.
3 Likes
Was actually looking for knock off Sharpies lol, I want to go cheaper
I used these - but I can’t actually speak to their longevity as I gave the tiles away…
though looking, I’m not sure they’re cheaper than Sharpies!
4 Likes
a 12-pack of sharpies at Target/amazon costs less than a single Copic marker.
7 Likes
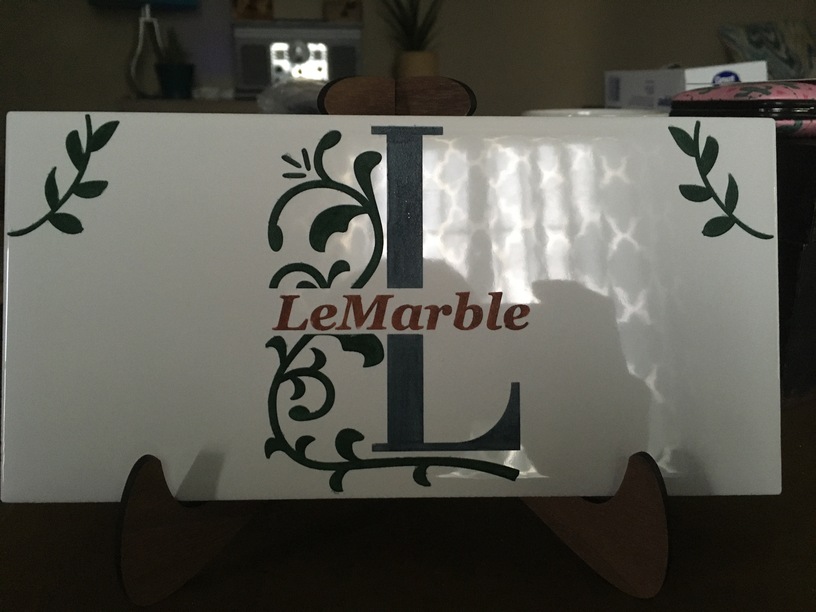
My wife got my stepdaughter some knock off “artist” markers from Wish lol. A lot of the giant package of them sucked, but, they worked well enough for coloring this latest tile:
10 Likes
For sealing, this is what I have been using: https://www.amazon.com/gp/product/B001DKPL14
It’s taken the abuse of sweaty water bottles and hot cups of coffee and has left no rings or stains or anything. But I used it with acrylic-painted tiles. I am pretty sure if you tried it on marker-colored tiles, it will cause the ink to bleed. I have yet to find anything that will properly seal and protect a marker-colored tile without bleeding or getting marks from a hot cup of coffee.
5 Likes
What height did you use? I feel like that’s where I always mess up -_- and did you just leave it on the crumb tray when you did it?
If you click on the gear icon in your browser and then select Set Focus you can tell the glowforge where to measure the distance - no more manually entering the height. The only caveat is the material should be at least a square inch or two. If you’re doing something on a really small piece of scrap you may still have to manually enter the height as the laser head may miss your material, but a tile is plenty large enough.
2 Likes
I’ve tried to use the manual setting before and it always ends up being off. Its always to the left or right of where I want it centered. Any idea as to why that is? Or am I doing something wrong?
Do you mean that when you use the Set Focus feature, the laser head moves to a point to the left or right of where you told it to go and measures? When you select Set Focus from the gear icon menu your mouse pointer becomes a square and you then have to click on the screen (iirc) where you want the measurement taken. The laser head can measure anywhere inside that box, which is why I said your material can’t be too small.
If you manually enter a height in the Select Material area, then the laser head will move to somewhere in the general vicinity of your design to measure the distance. You have to use Set Focus to tell it where to measure.
Just to be clear you’re using Set Focus like in this screenshot

4 Likes
Even if the item is small, the laser should measure where you told it to, or pretty close to it. If you accidentally click in the wrong place, you can always do it again. However, if you do it several times and it’s not measure close to where you tell it then I would email support.
Search for “alcohol based” markers. This will give you options.
1 Like