My installation had stink at first. Easily solved by putting aluminum foil tape around the connections. Can’t smell a thing until I lift the lid now.
9 Likes
Ditto. My initial results were a lot of stink. But after foil taping all seams in the connections and waiting for the GF to spool down after the print it’s not very noticeable except for right after I pull the piece out - due to a combination of smoke trapped in the honeycomb under the material and the material itself having the typical laser cut odor. The latter is minimized by using just enough power and not too much for the operation you’re doing so it doesn’t over burn.
4 Likes
I never smell anything on mine until I open the lid. (We’re hooked up with some screw connectors from Lowe’s though…you don’t need the tape to seal the seams…it’s easily detachable and re-attachable…)
5 Likes
Me too. As directed I snugged it then I pulled out the shelf it rides on and it slipped off. There is plenty of slack in the flex duct to allow the movement.
I have used those stainless clamps many times over the years and have exceeded their tightening capacity on occasion. When I was looking for the source of odor I started at that connection and tightened the clamp close to the point where the screw would slip using a nut driver.
I am confident the strength of that flange exceeds the clamp’s.
You can ‘feel’ where the clamp bottoms out, just tighten to that point. Any tighter and the screw will jump threads.
I am (was) an experienced aircraft mechanic, and I will stand to pay for any damages I incur to this loaner I have been graced with, but I have zero concern that will happen.
I do have a strong urge to clean it out though.
3 Likes
I keep the inside pretty clean and did a deep cleaning of the crumb tray over the weekend. Much nicer and less flashback schmutz…
4 Likes
Did you disassemble it and soak the grid? I had to take it apart in order to retrieve a small piece of inlay veneer that blew out and slipped through.
Everywhere I look, the quality of the build sticks out. 
1 Like
I tried @karaelena’s grid cleaning method the other day, with less than stellar results. (Probably didn’t let it soak long enough, but I was being eaten alive by mosquitos.) 
We need some guidelines for cleaning that, and I’d really like to get in at the lens and clean it, but I lack one of the fancy lens pullers that Marion has, and don’t want to take a chance on messing up the focus without it.
So cleaning suggestions would probably be a good thing to include at the release.
5 Likes
What concentration of the cleaner solution did you use?
1 Like
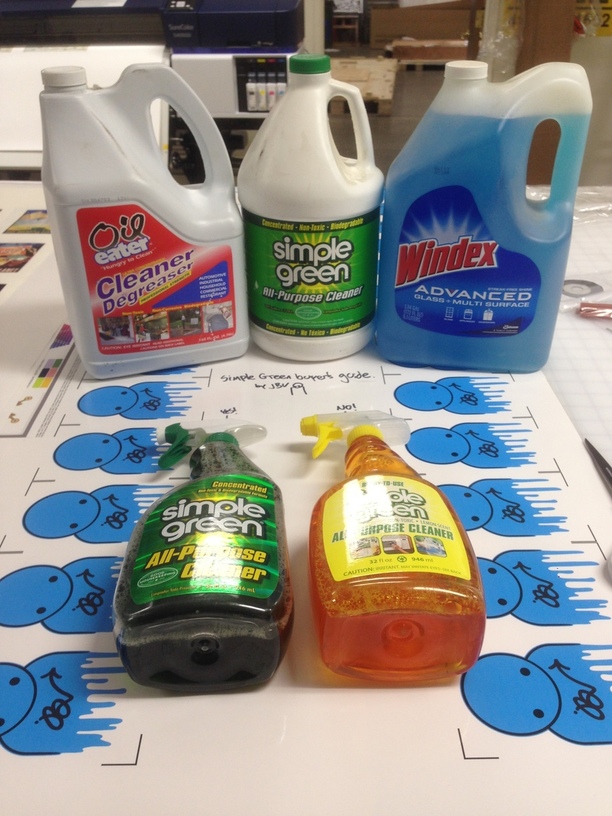
I used the same method, sans mozzies, and got acceptable results. My Simple Green mix may have been too lean (approximately 1:5). I can still faintly see the burnination areas down in the honeycomb, but the smell and grid residue are gone. 
Marion seems to have the only lens puller. I requested one, but was told to clean the exposed optics as best I could with the included lens wipes for the time being. So far so good.
Can also foresee a time in the future when I’ll want to replace the flex exhaust hose. It’s getting purty dirty, too!
2 Likes
Well, that may actually be the issue…I’m not sure. I bought it in a spray bottle, and I think it was already diluted. (Probably not enough as it turns out.) ![]() [quote=“dwardio, post:29, topic:7712”]
[quote=“dwardio, post:29, topic:7712”]
I requested one, but was told to clean the exposed optics as best I could with the included lens wipes for the time being. So far so good.
[/quote]
Ditto. It hasn’t affected performance any that I can tell, but I’m not exactly running it 24/7.
3 Likes
I’m getting there, but @Dan has said there’s a unit in the office that’s not been cleaned in a year so I’m not too worried about it - although I do cast a glance at the mirror/glass when I open the lid every once in awhile.
2 Likes
I cut a lot of dark objects. It’s much, much easier to see the material edges on a clean crumb tray than it is on a blackened one. At least until we get some brightness control of the bed image.
4 Likes
If I’m doing stuff like that I’ll tear off a sheet of white butcher paper (I don’t bbq enough to use a roll very fast so I make it serve multiple purposes) and stick that underneath. I’ve used parchment paper sheets in my other lasers because I would buy the precut ones and they fit pretty well and are rated to 500F so they don’t catch fire in the laser underneath wood or acrylic. My wife would get a little crabby though if I used it all up so I tend to use my bbq wrap instead ![]()
6 Likes
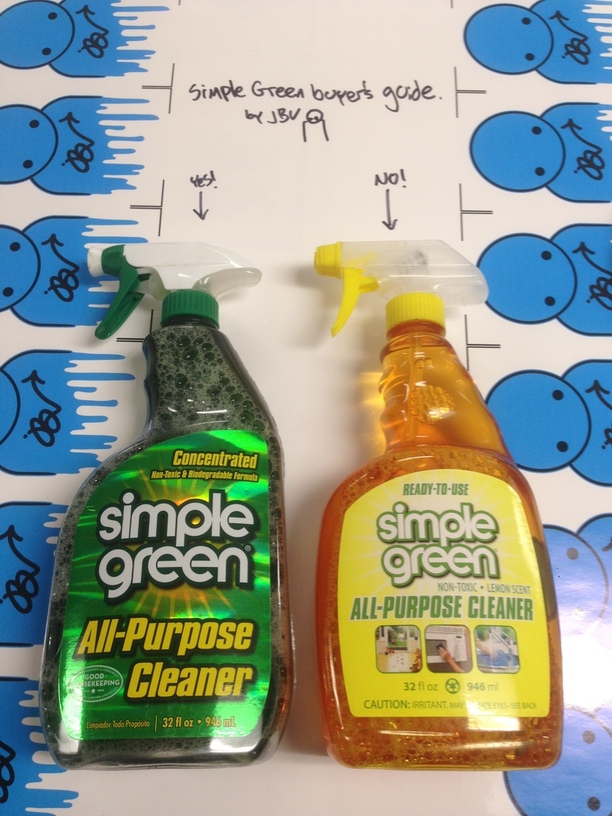
Where were you with your buying guide last month? 
4 Likes
We’ve never cleaned a crumb tray in the office, and we have some very old crumb trays.
7 Likes
Hey @rpegg, you have probably already thought of this, but just in case… most modern computers will allow you to calibrate your monitor (I’ve got a Mac and I know I can do that in the Display settings in System Preferences). You could create a display calibration file that you use when using the Glowforge, that is artificially bright, sort of optimized for those dark crumb tray situations. Then just switch back to your normal monitor calibration file when using other programs.
2 Likes
Thanks, but to pump up the brightness and contrast of the camera image to easily see things like black on black or a cut line with heavy smoke staining the rest of the display becomes saturated and almost unusable. I’m guessing they are working almost exclusively with light masked Proofgrade and don’t run into this problem. Welcome to the Pre-Release comment section.
2 Likes