One day ahead of what’s been an 8-day increment progress, the F2 Ultra UV is now nestled next to the original backer Glowforge Pro.
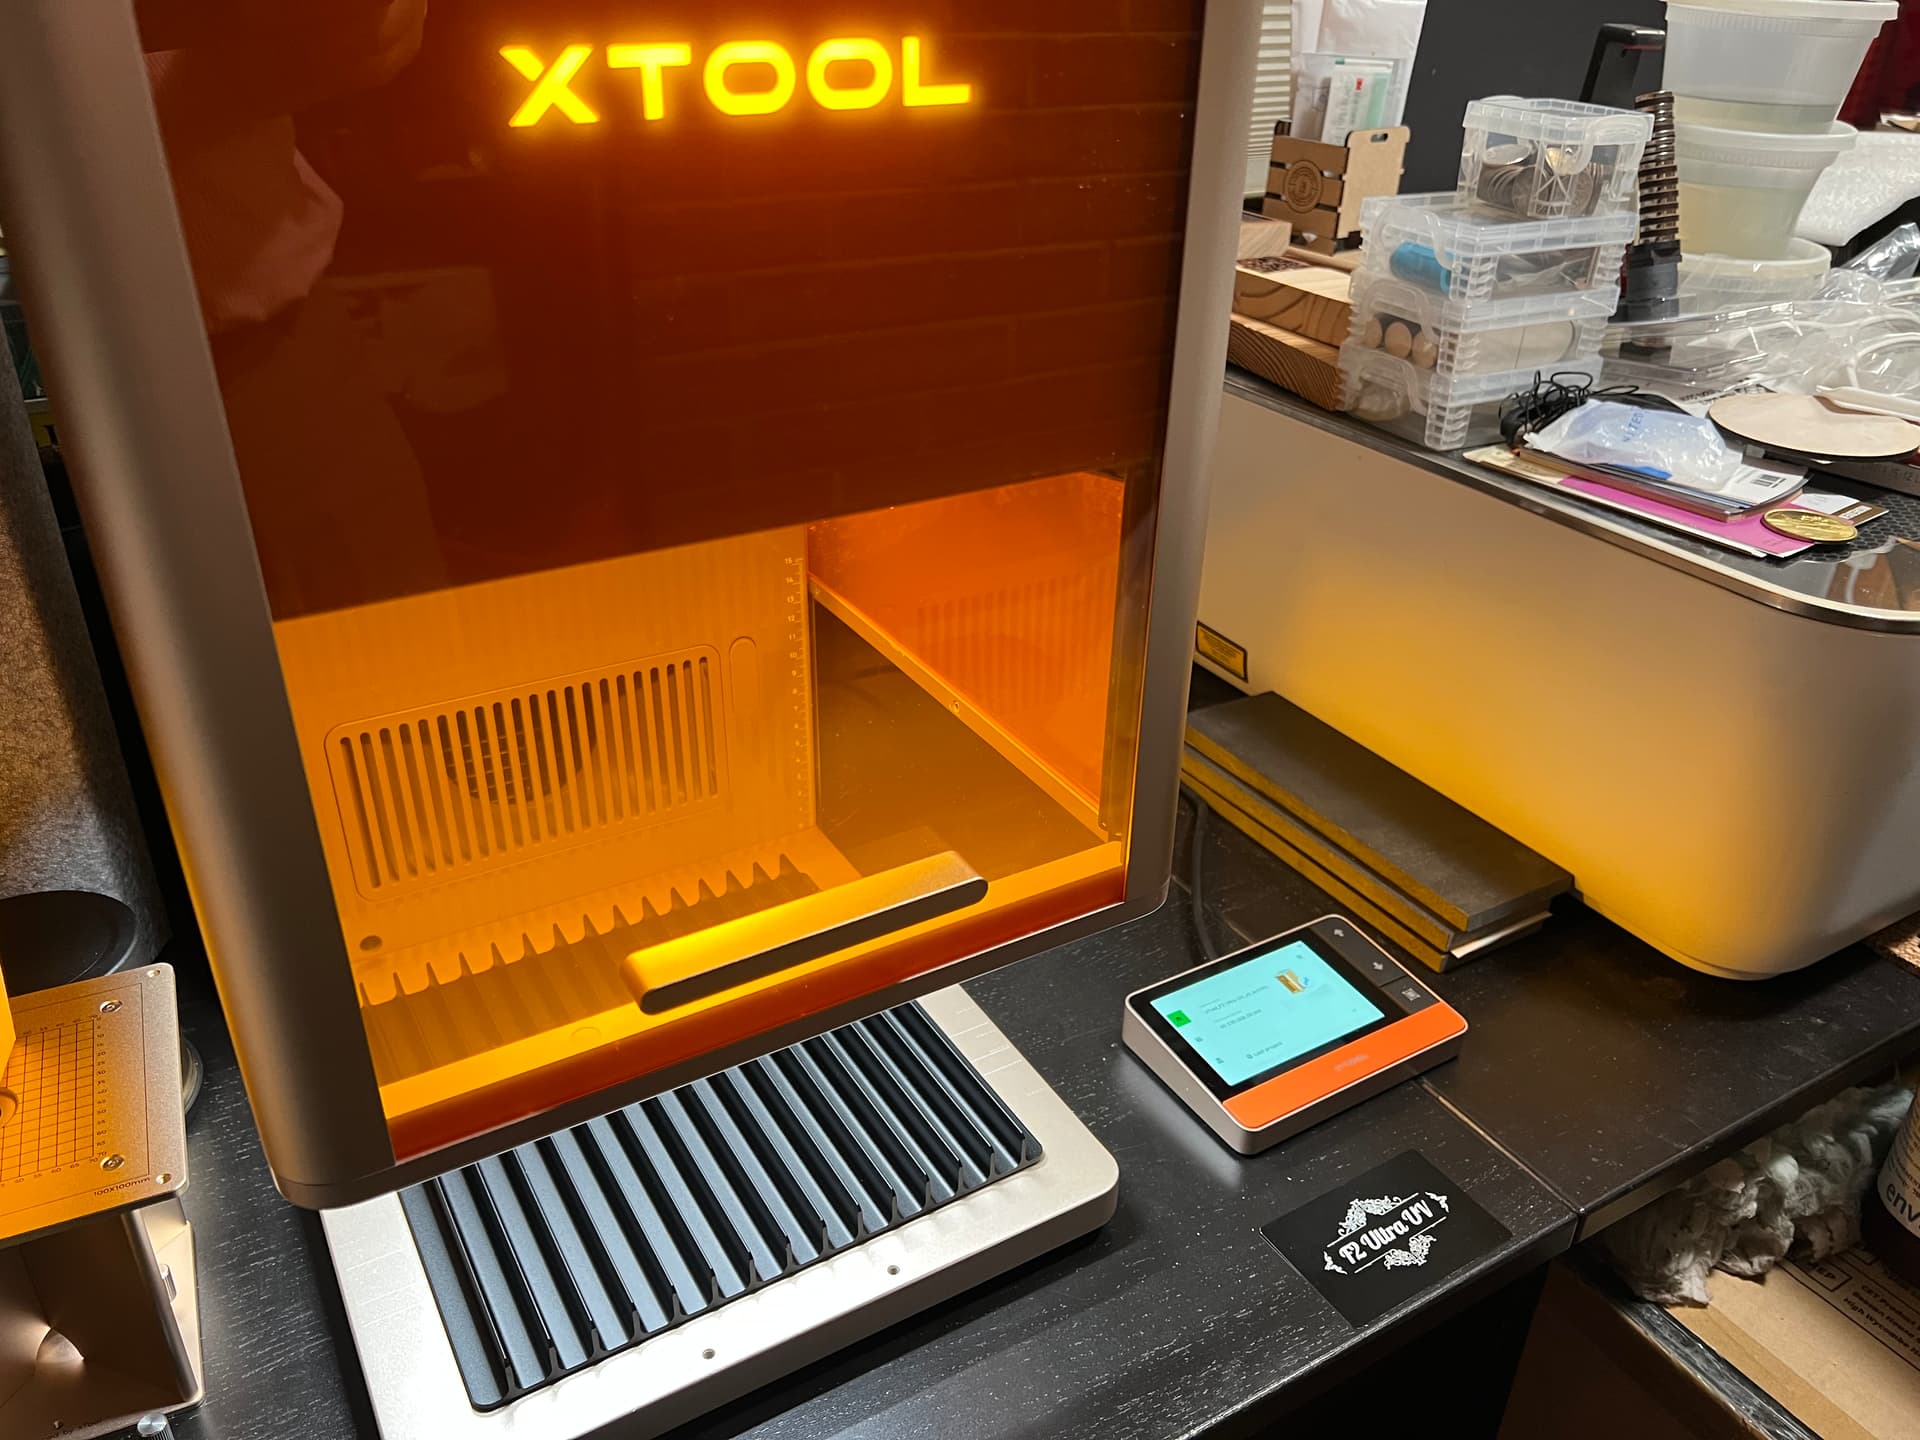
Unboxing, setup, and calibration was admirably smooth tho’ I took very cautious baby steps being this new to the XTool ecosystem. Understanding what is required and where has now become more familiar and a future XTool unboxing (F2 Ultra MOPA, perhaps??) will only take a couple hours tops as opposed to staying up til 4am!
Beyond the original operating lens for Pewing normal things on the bed, the setup also included all the things needed for Internal Engraving into K9 Crystal… a metal riser platform, a dedicated lens, and they even tossed in a 50mm x 80mm K9 block. (EVERYONE’s scrambling for K9 Crystal blocks now)

These beefy 4” wide bayonet lenses only need a quarter turn to replace where other brands swap UV lenses using a riskier thread like those found in SLR filters (bigger chance of cross threading) Everything appears well thought out from the way the fan assembly easily comes out for cleaning to the layout of thoughtful connectors in strategic spots. By comparison, ComMaker’s backside is littered with RS-232 and Parallel ports circa 1988!
After the initial USB connection to the computer, the F2 Ultra UV is given the household WiFi where it’ll happily switch over and use that to talk with any and all PC/Macs that want to connect to it. The XTool Studio software is the centralized go-to place for connecting with multiple XTool machines, loading/modifying jobs, running/defining material grid tests, calibrating lasers, Much of the basic functionality does not appear to be critically dependent on internet connectivity, so all those Armageddon preppers out there can rejoice! Custom-engraving leather bridles for the four horsemen will not be hindered.
Their version of the Glowforge ”gift of good measure” ruler is a Welcome print onto an enclosed metal card. Very same type of card I recently tested on my Glowforge. Being fully trained on laser frugality, I just flipped my spent card over where Studio’s tutorial even allowed me to replace the “Welcome” text… The result of a UV laser’s super-precise dot?
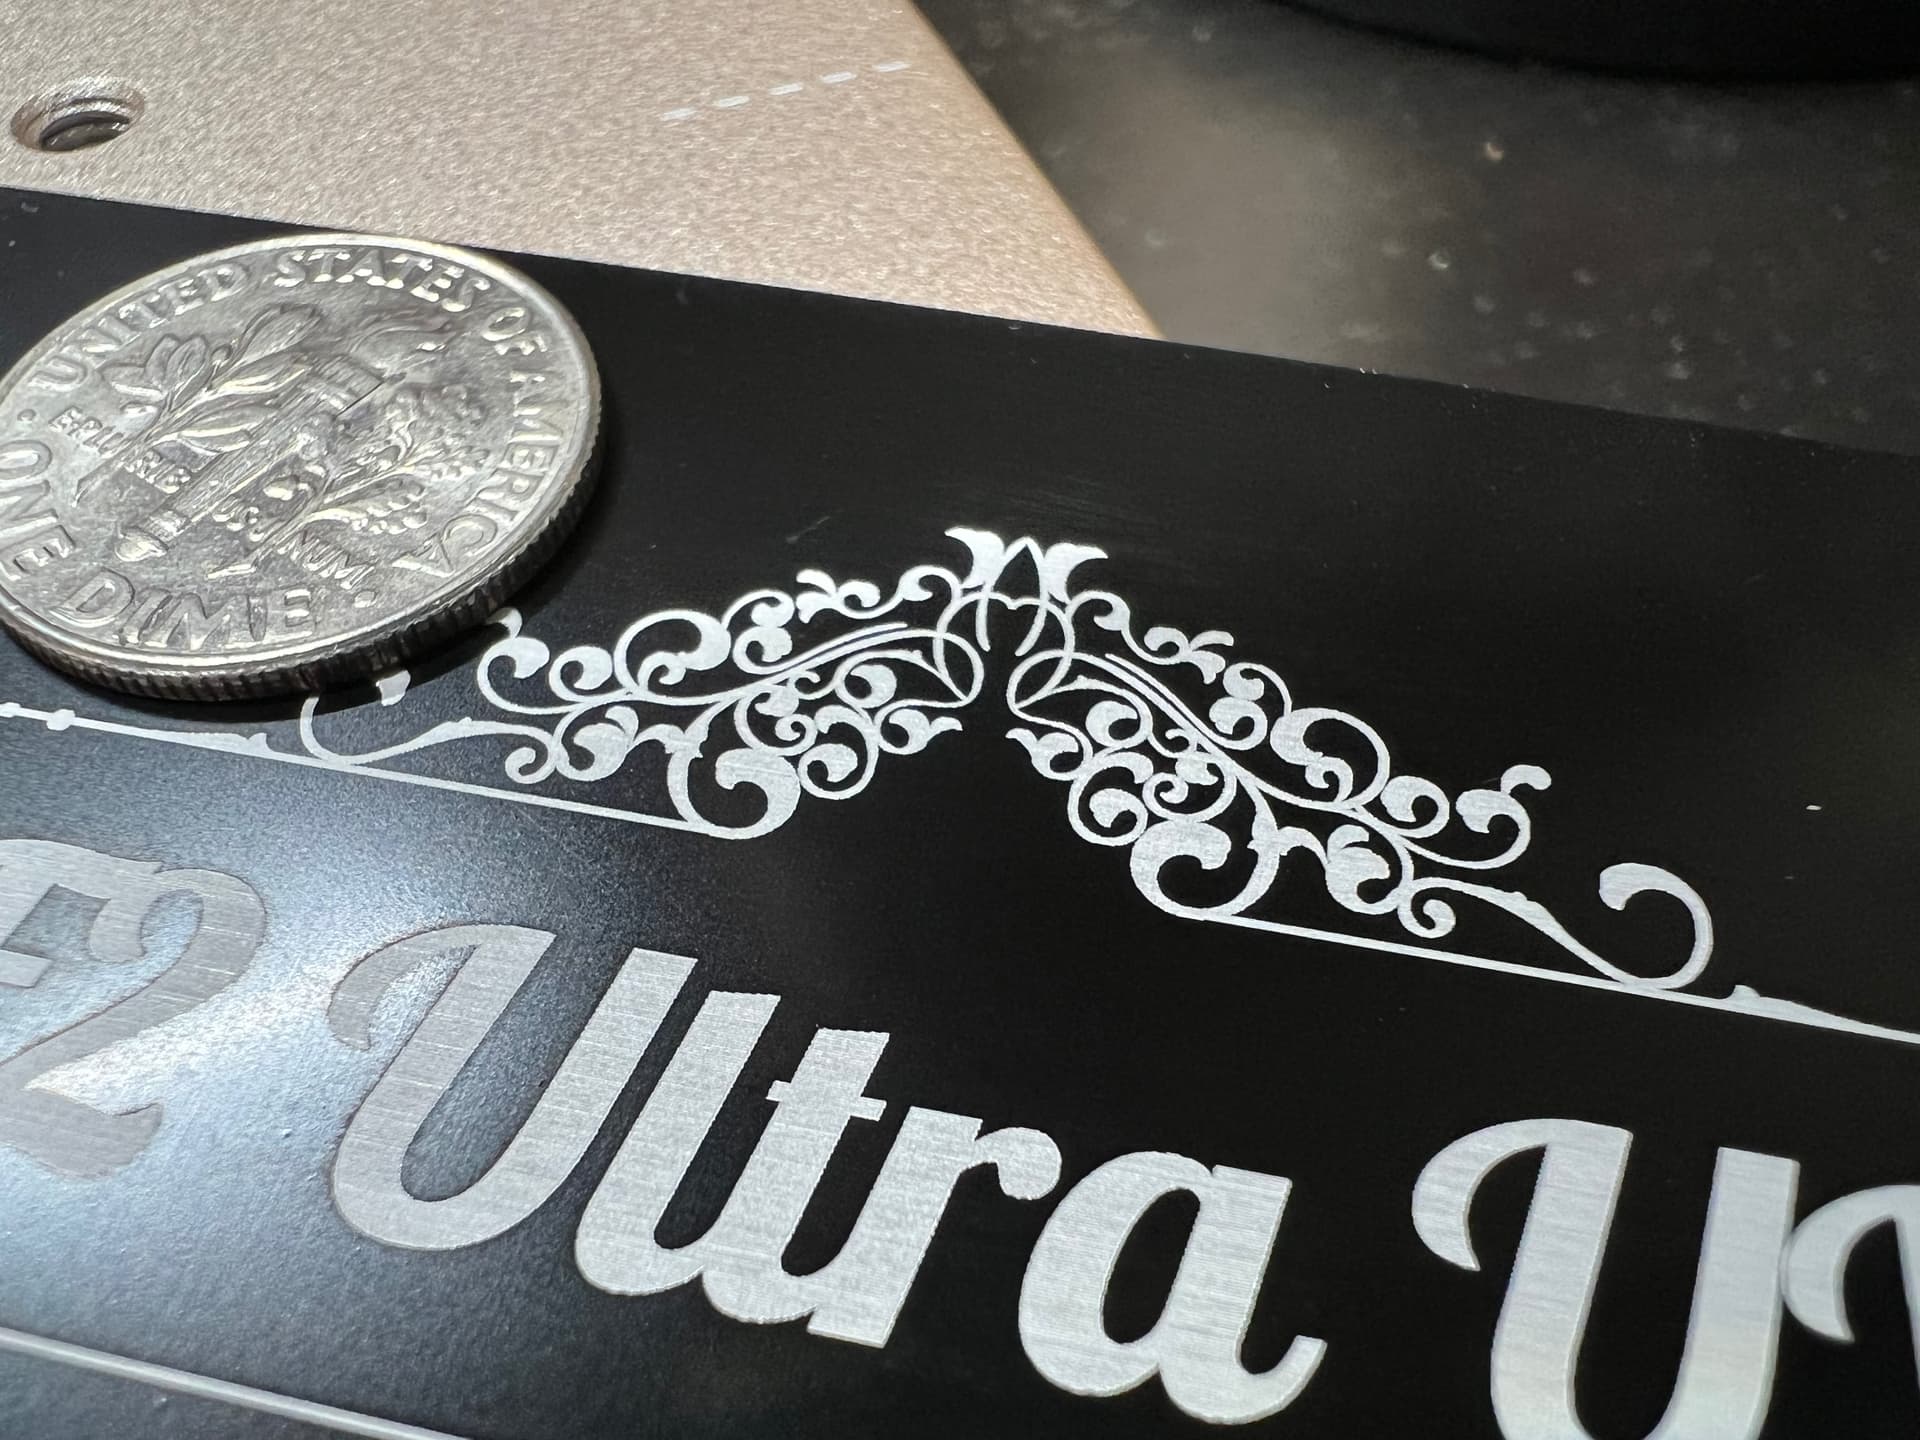
No masking or weeding needed. A very small amount of ablation powder at the letter outlines was only caught by my macro lens and a gentle swipe of a Kleenex took care of it.
In comparison to what Glowforge did in the other thread the reduction in UV heat appears to have left the natural matte white color of aluminum intact. The Glowforge’s ablation heated the metal a goldish tint. It took some 20-ish seconds to engrave on the metal card for the F2 Ultra UV.
With a secret stash of K9 Crystal cubes now in my grubby paws, I’m finally motivated to finish all my Nomad 3D sculpts!

![]()