Quickie Calibration Test Grid & metal cards

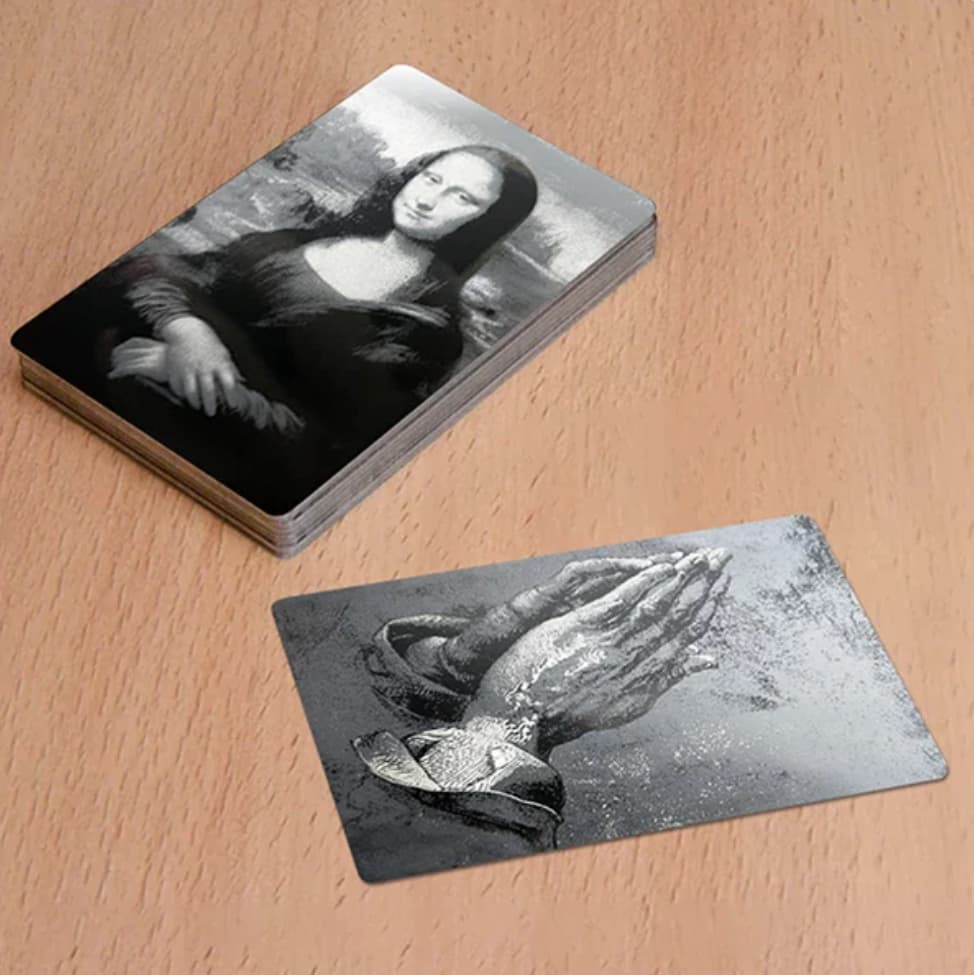
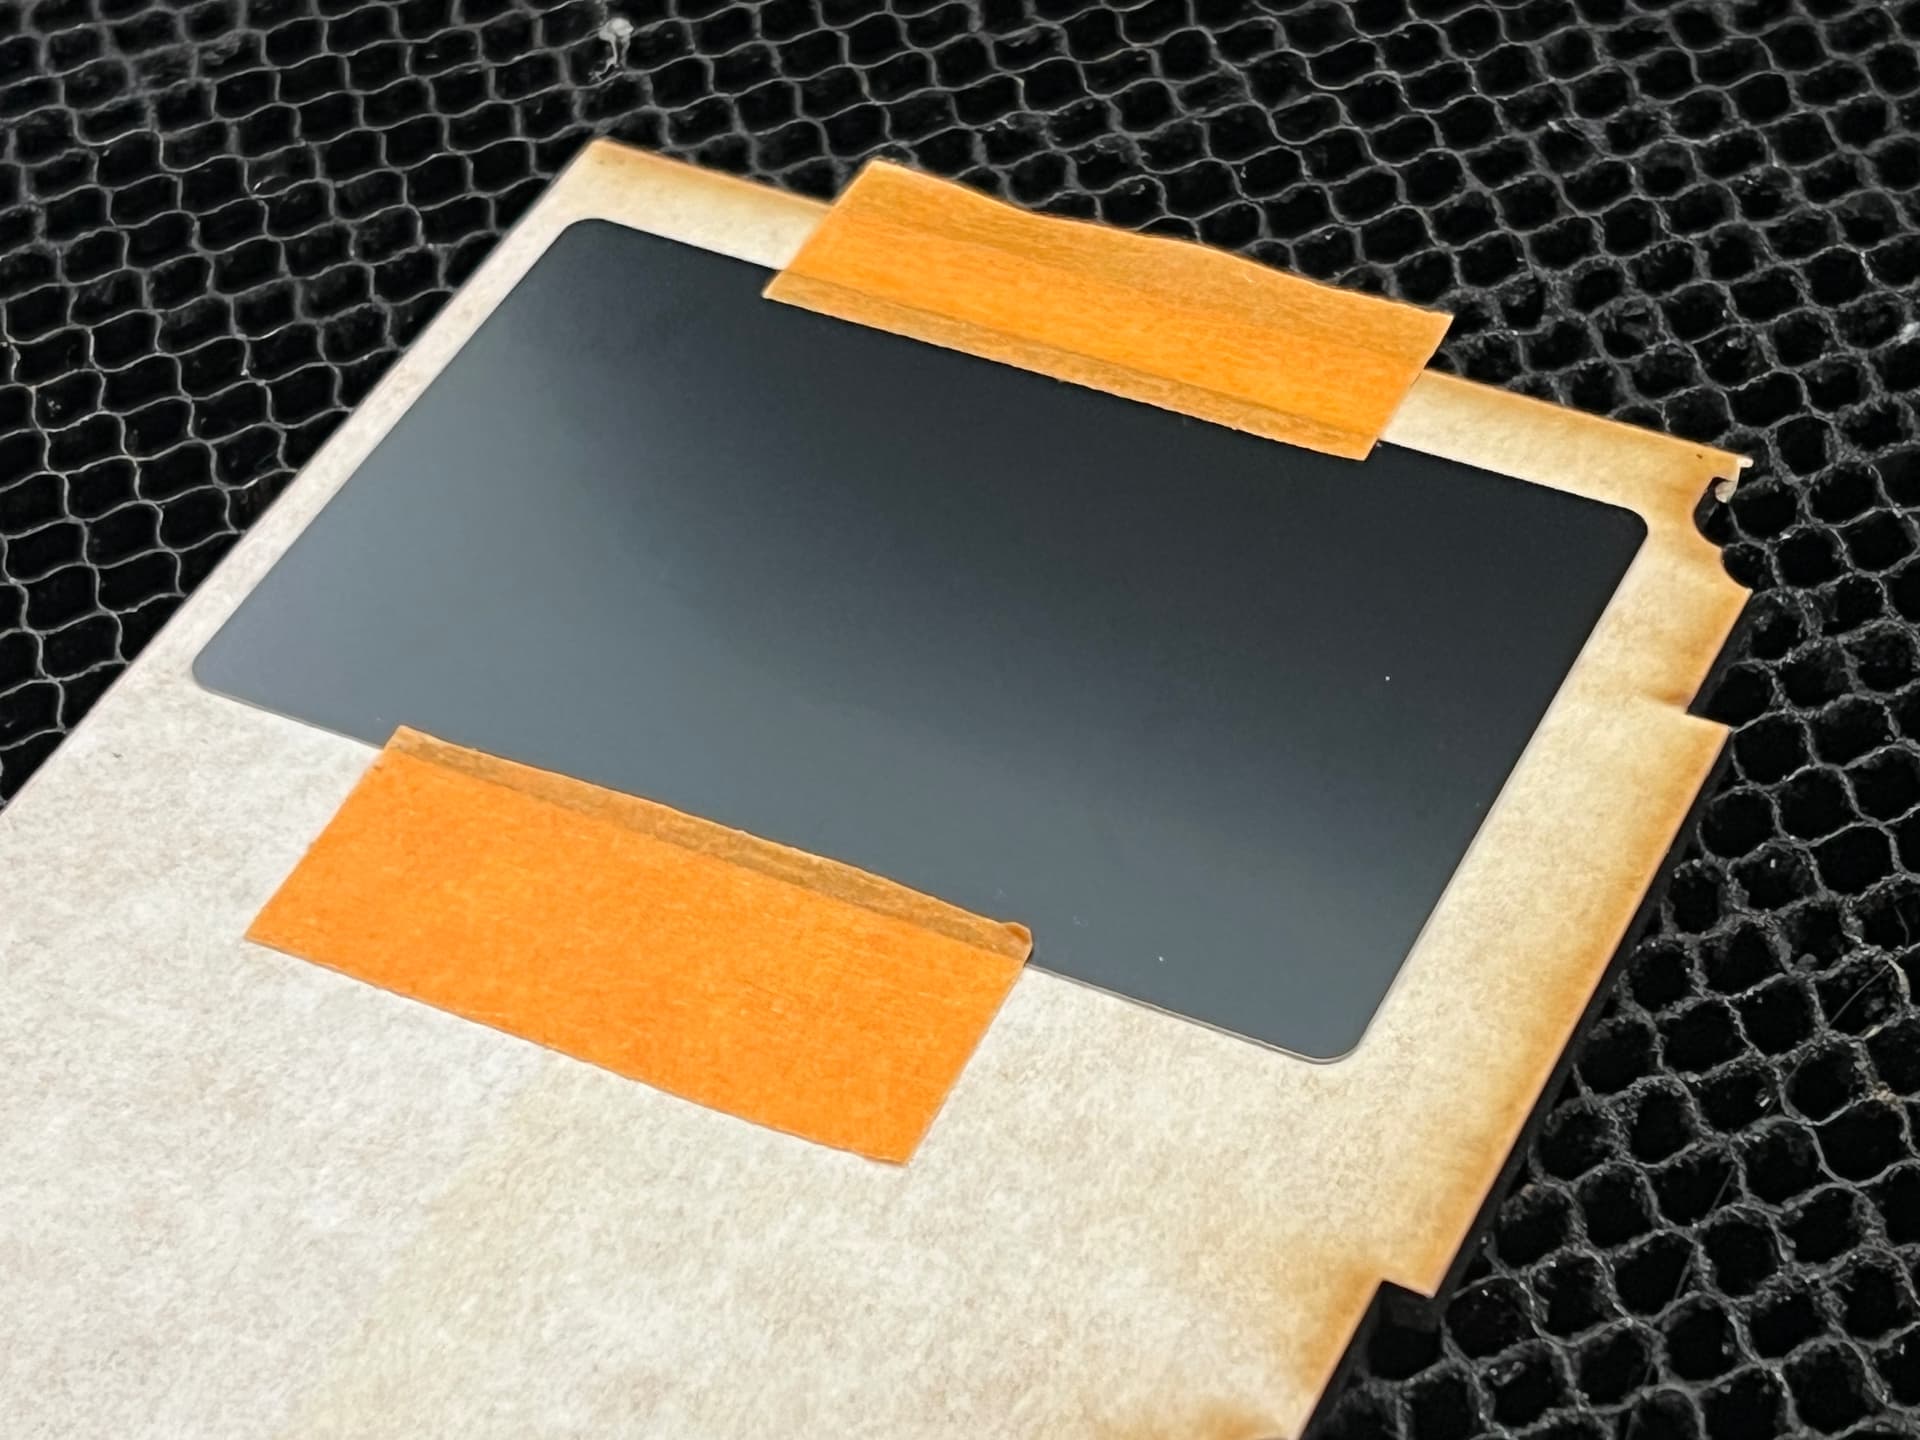
Still in the process of clearing space for the F2 Ultra UV laser, but in the meantime was curious about the pack of metal business cards I added to the order. Given how Amazon’s vendors sell these at around 23¢ apiece, xTool’s pricing (as of Dec ‘25) sliding under a dime made it a no-brainer to investigate.

Not having any exposure to metal cards, the brain kept thinking these were going to be delicate and crumple-y like aluminum foil, but in reality it behaves and flexes much like plasticized cardstock. I’m sure if bent beyond a certain radius, it’ll permanently crease, but so far it’s behaving far above my expectations of it.

So next question, how does the CO2 Glowforge Pro handle this? More specifically, I’ve been watching video of how xTool provides a test grid of sorts that users lay onto everything to determine best settings. With Glowforge relying on the “We’ll take care of you with ProofGrade, bro” approach, I can see why this isn’t a thing in our community.

Some loose forum searching showed that @jamesdhatch did some lovely early work in dialing things in with a test grid, but I was looking for something simpler. I knew I did NOT want to manually punch-in 50+ grid settings …or even 25… experience also predicted I’d get cross-eyed if I had to match every single rectangle in a grid to the identical-looking shapes that populate the left edge of the Glowforge UI.

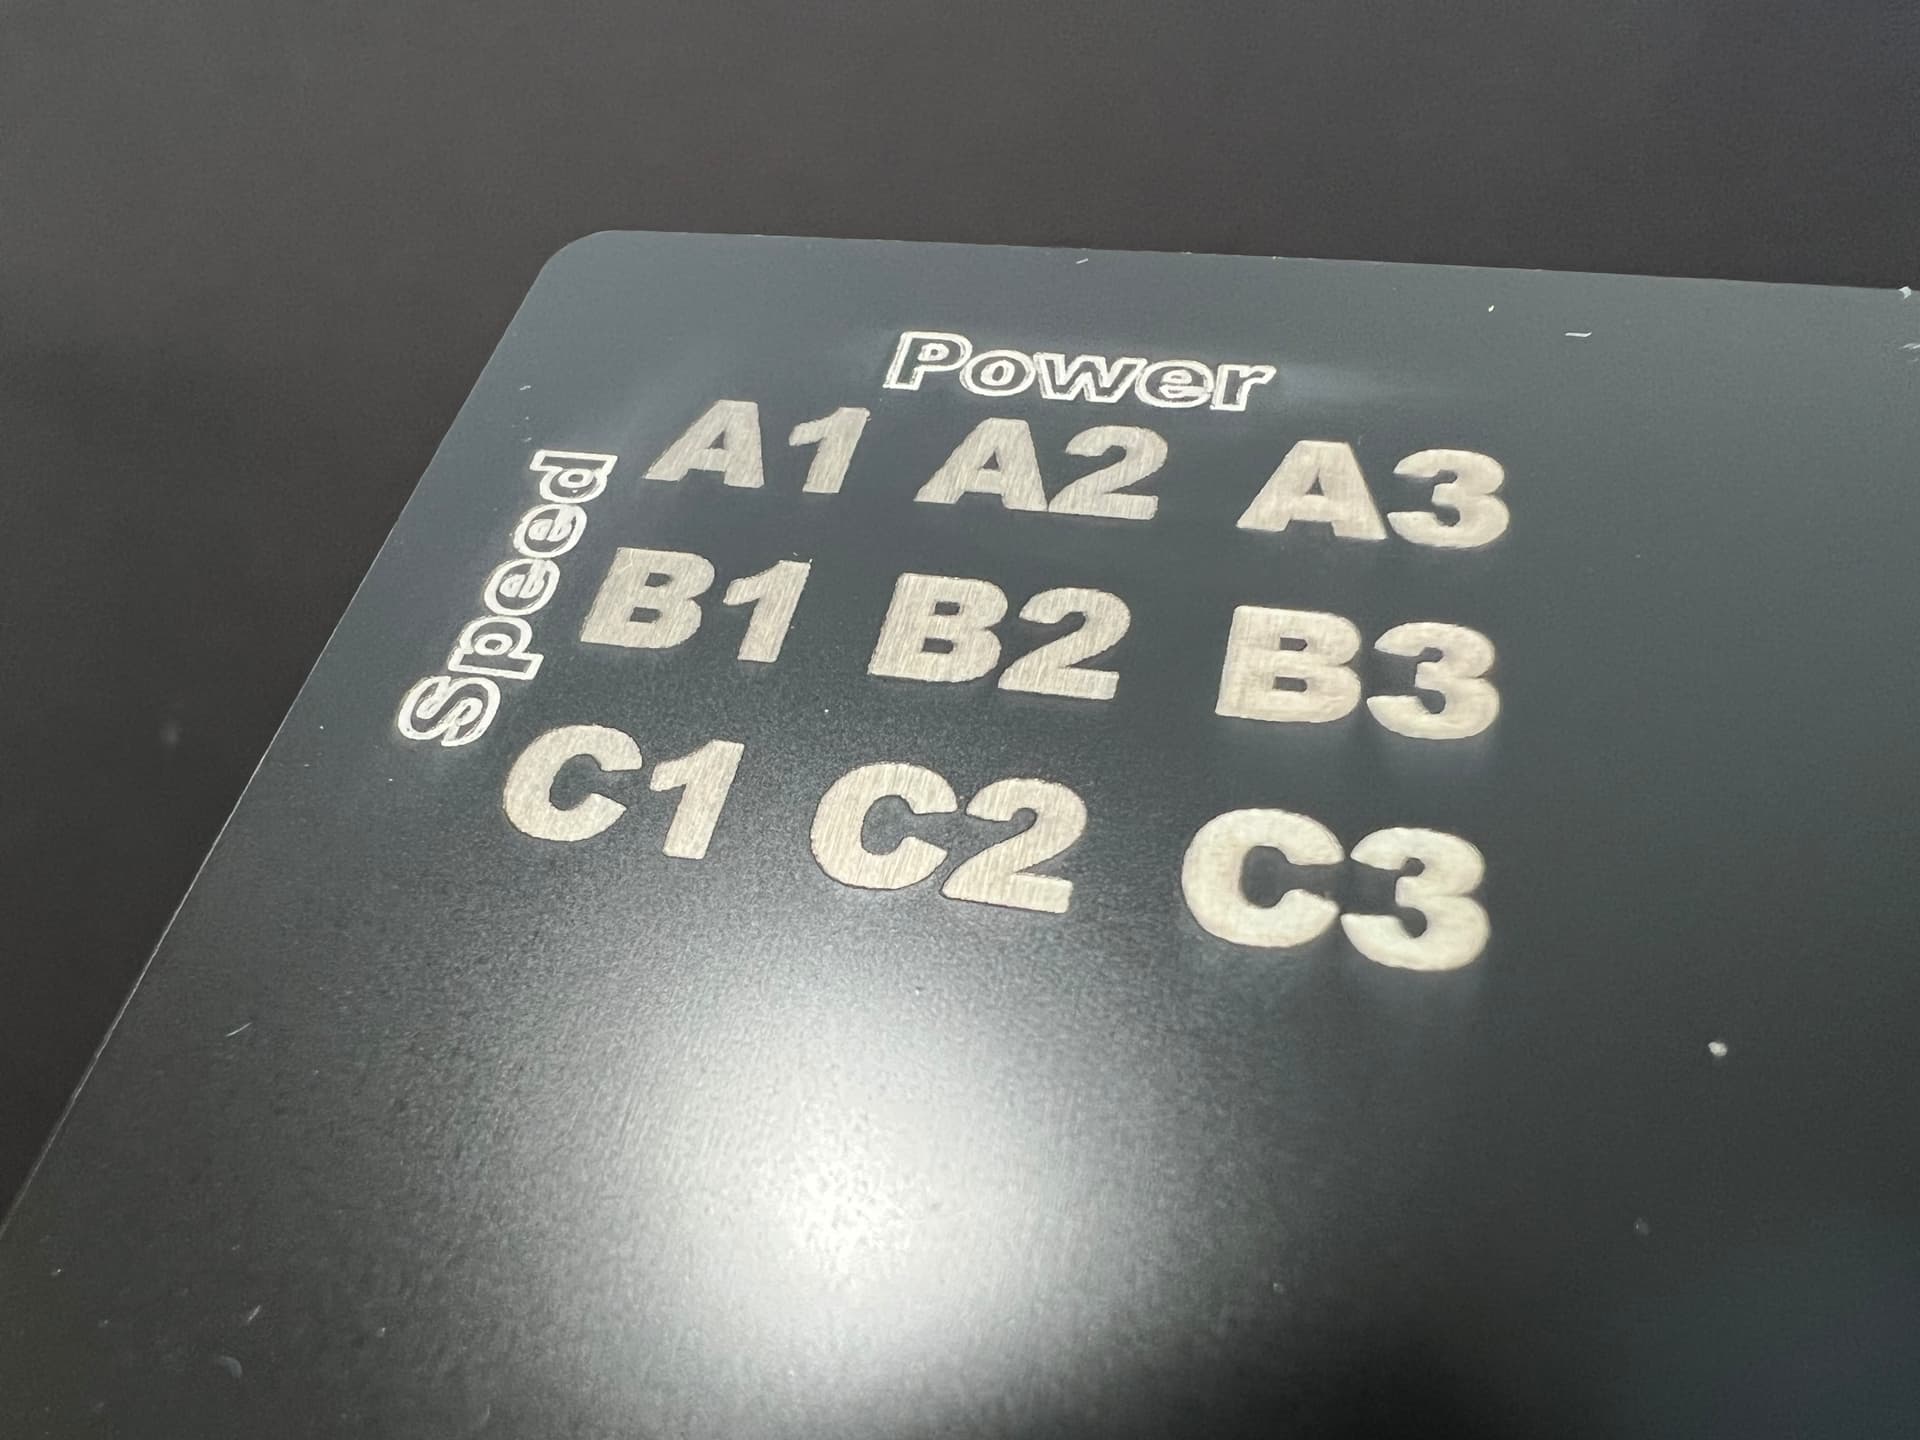
I’ll start with a 3 x 3 grid and space-out the VALUES enough to give me a sense of what’s going on. As usual, I fired up Affinity Designer to whip up the grid.

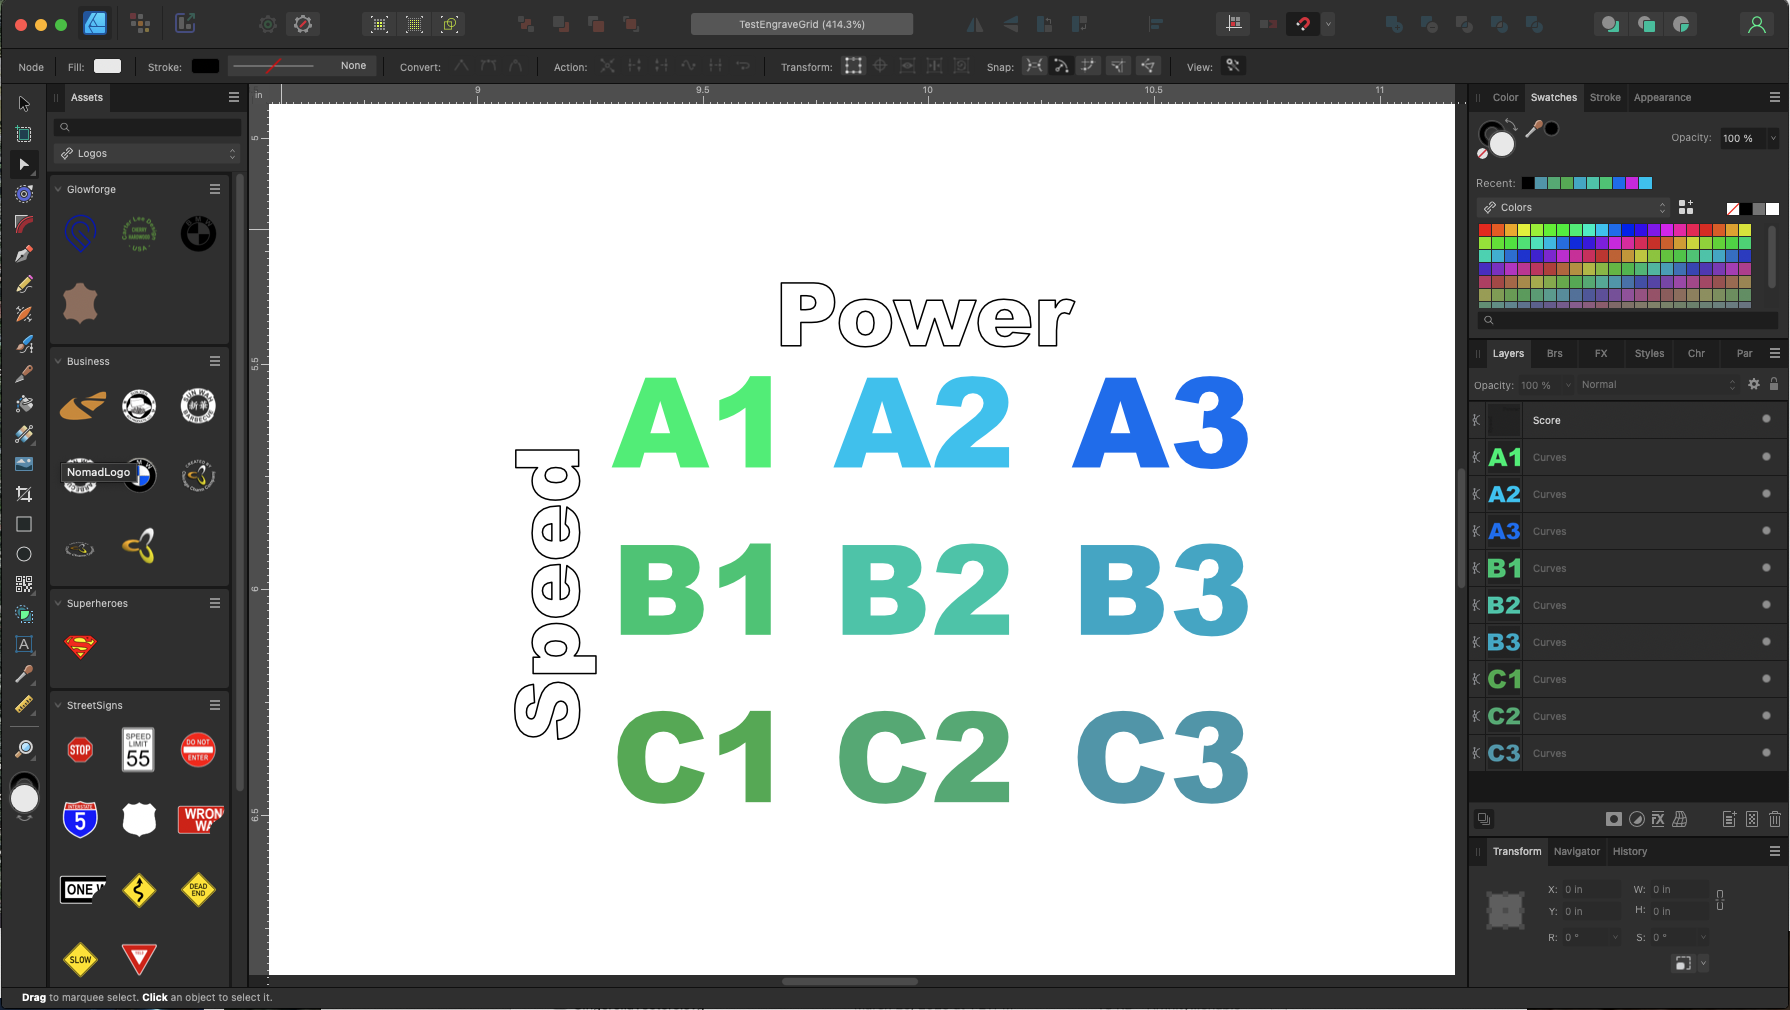
Each grid entry got its own shade of blue so that Glowforge considered it as a unique item. Also made sure that “A” and “1” were combined to a singular layer. When exported out to SVG and brought into Glowforge, the left edge thumbnails make it super-easy to tell which grid item I’m making settings for.

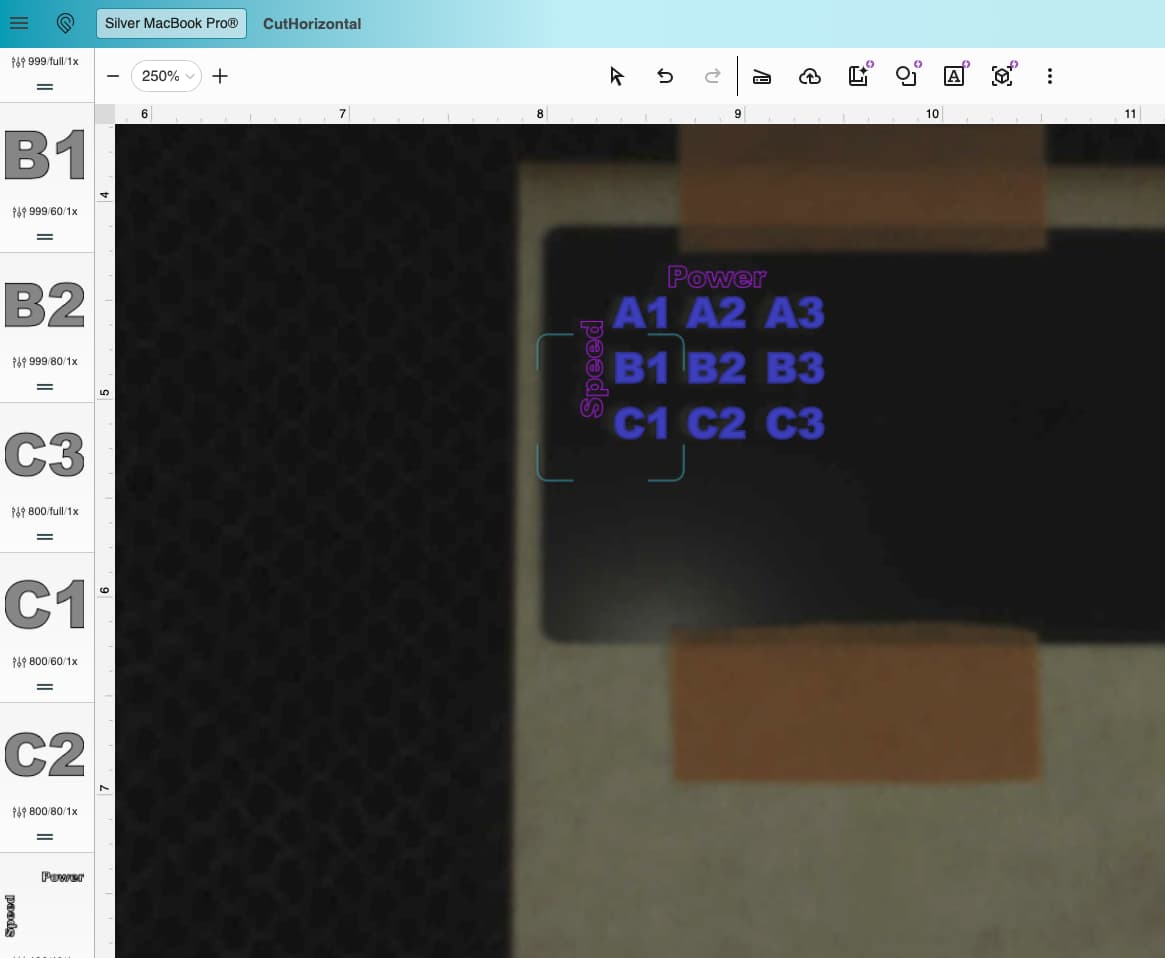
The final part of this is to populate the settings for each grid item. It helped to jot this stuff down and avoid further confusion. I pulled the Glowforge setting for engraving a MacBook as shown in the boxed value. Then, made variations to speed and power.

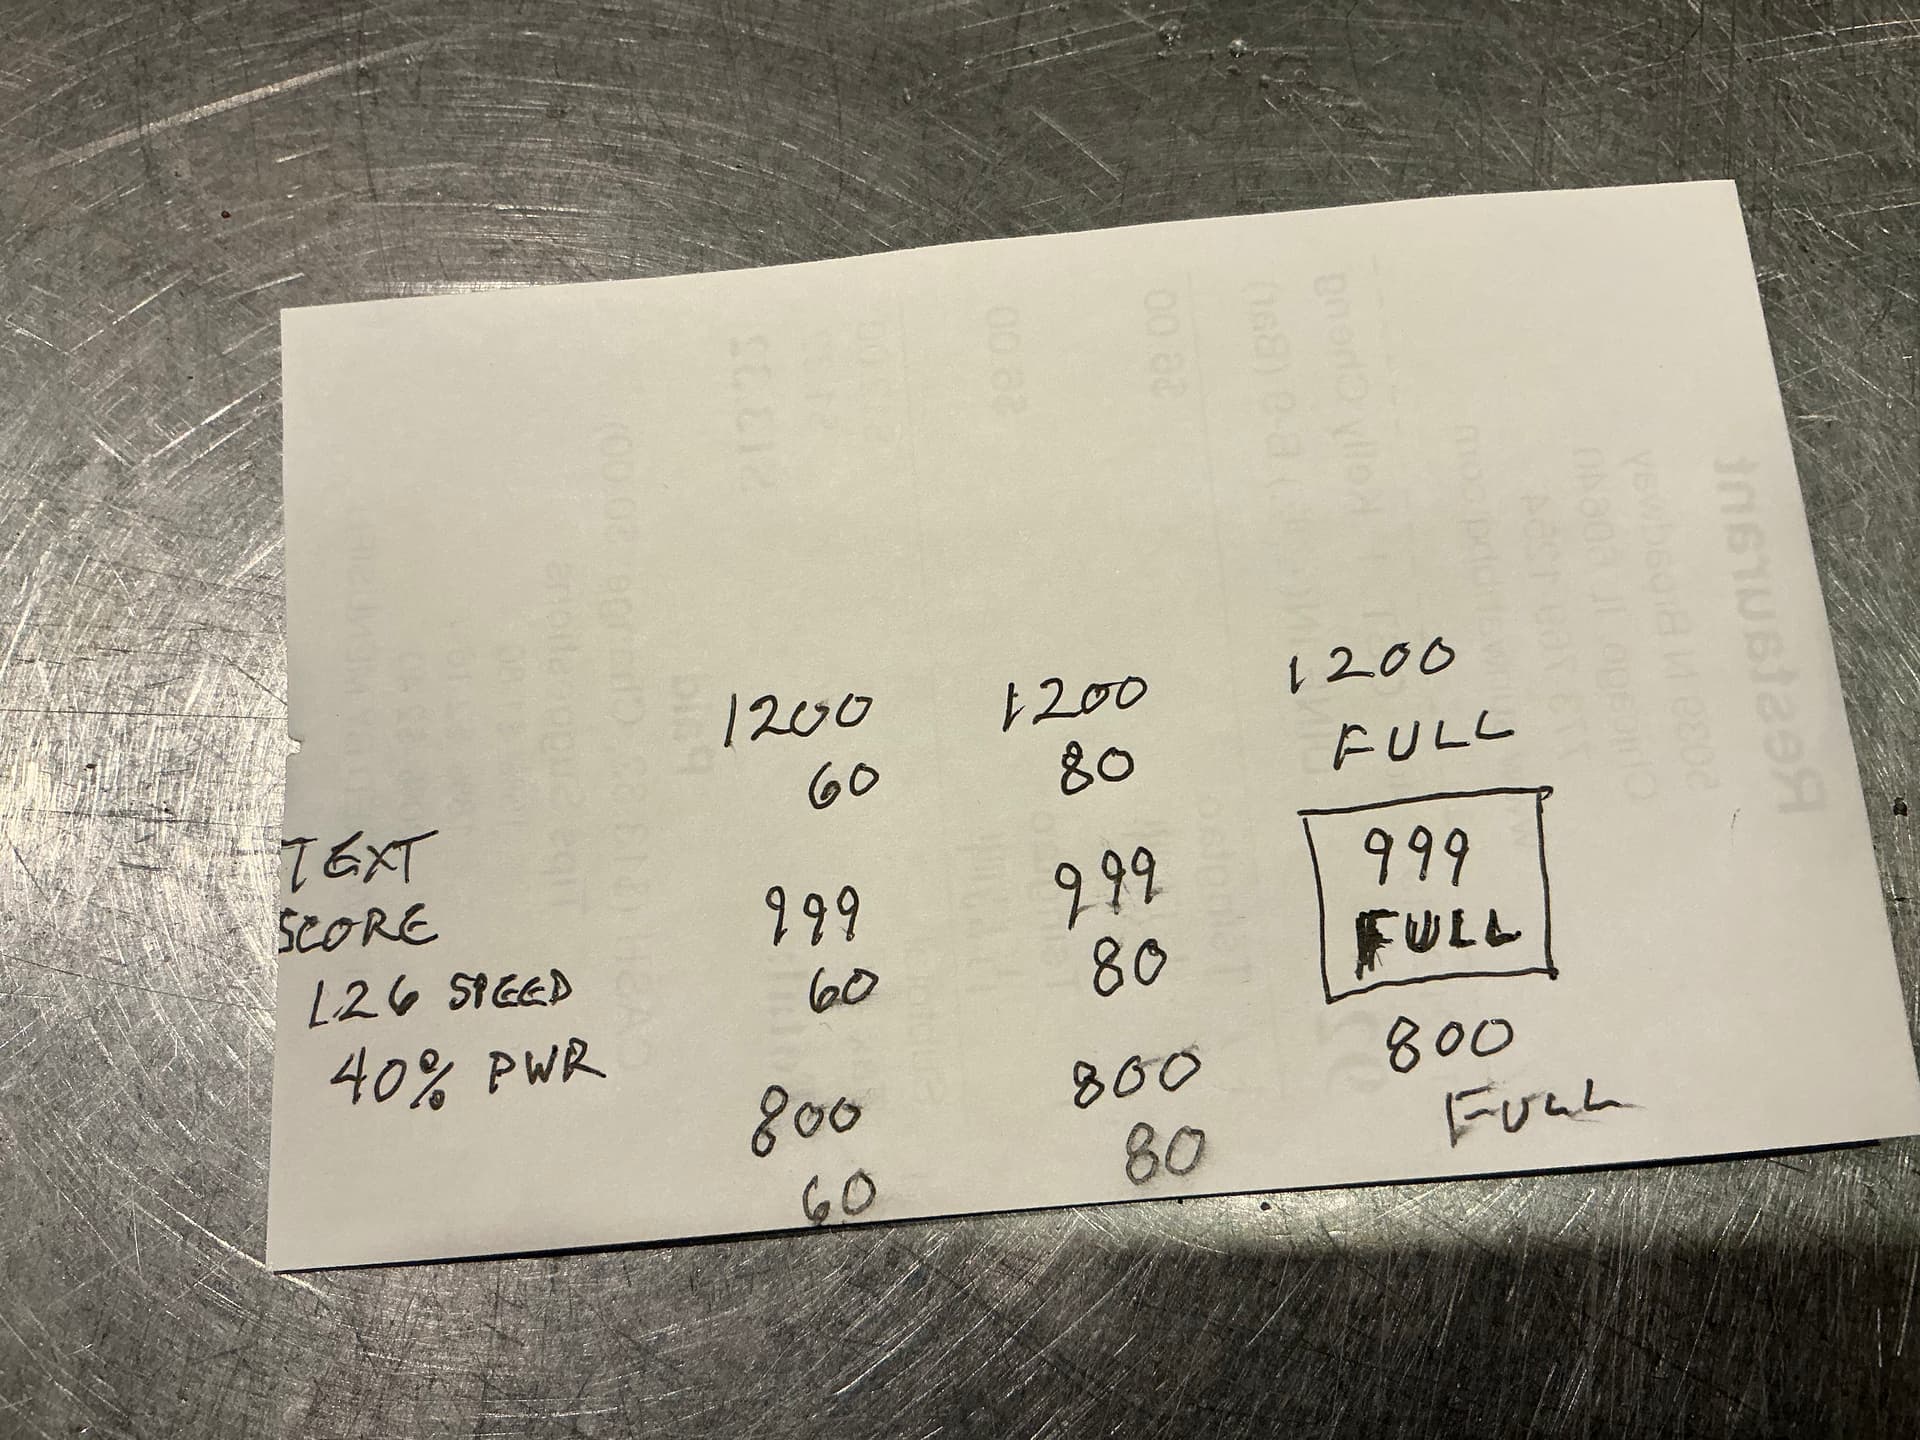
I didn’t really care about laser-scoring a business card, but made note of that value too just so I can see what the end-result was against the value settings.

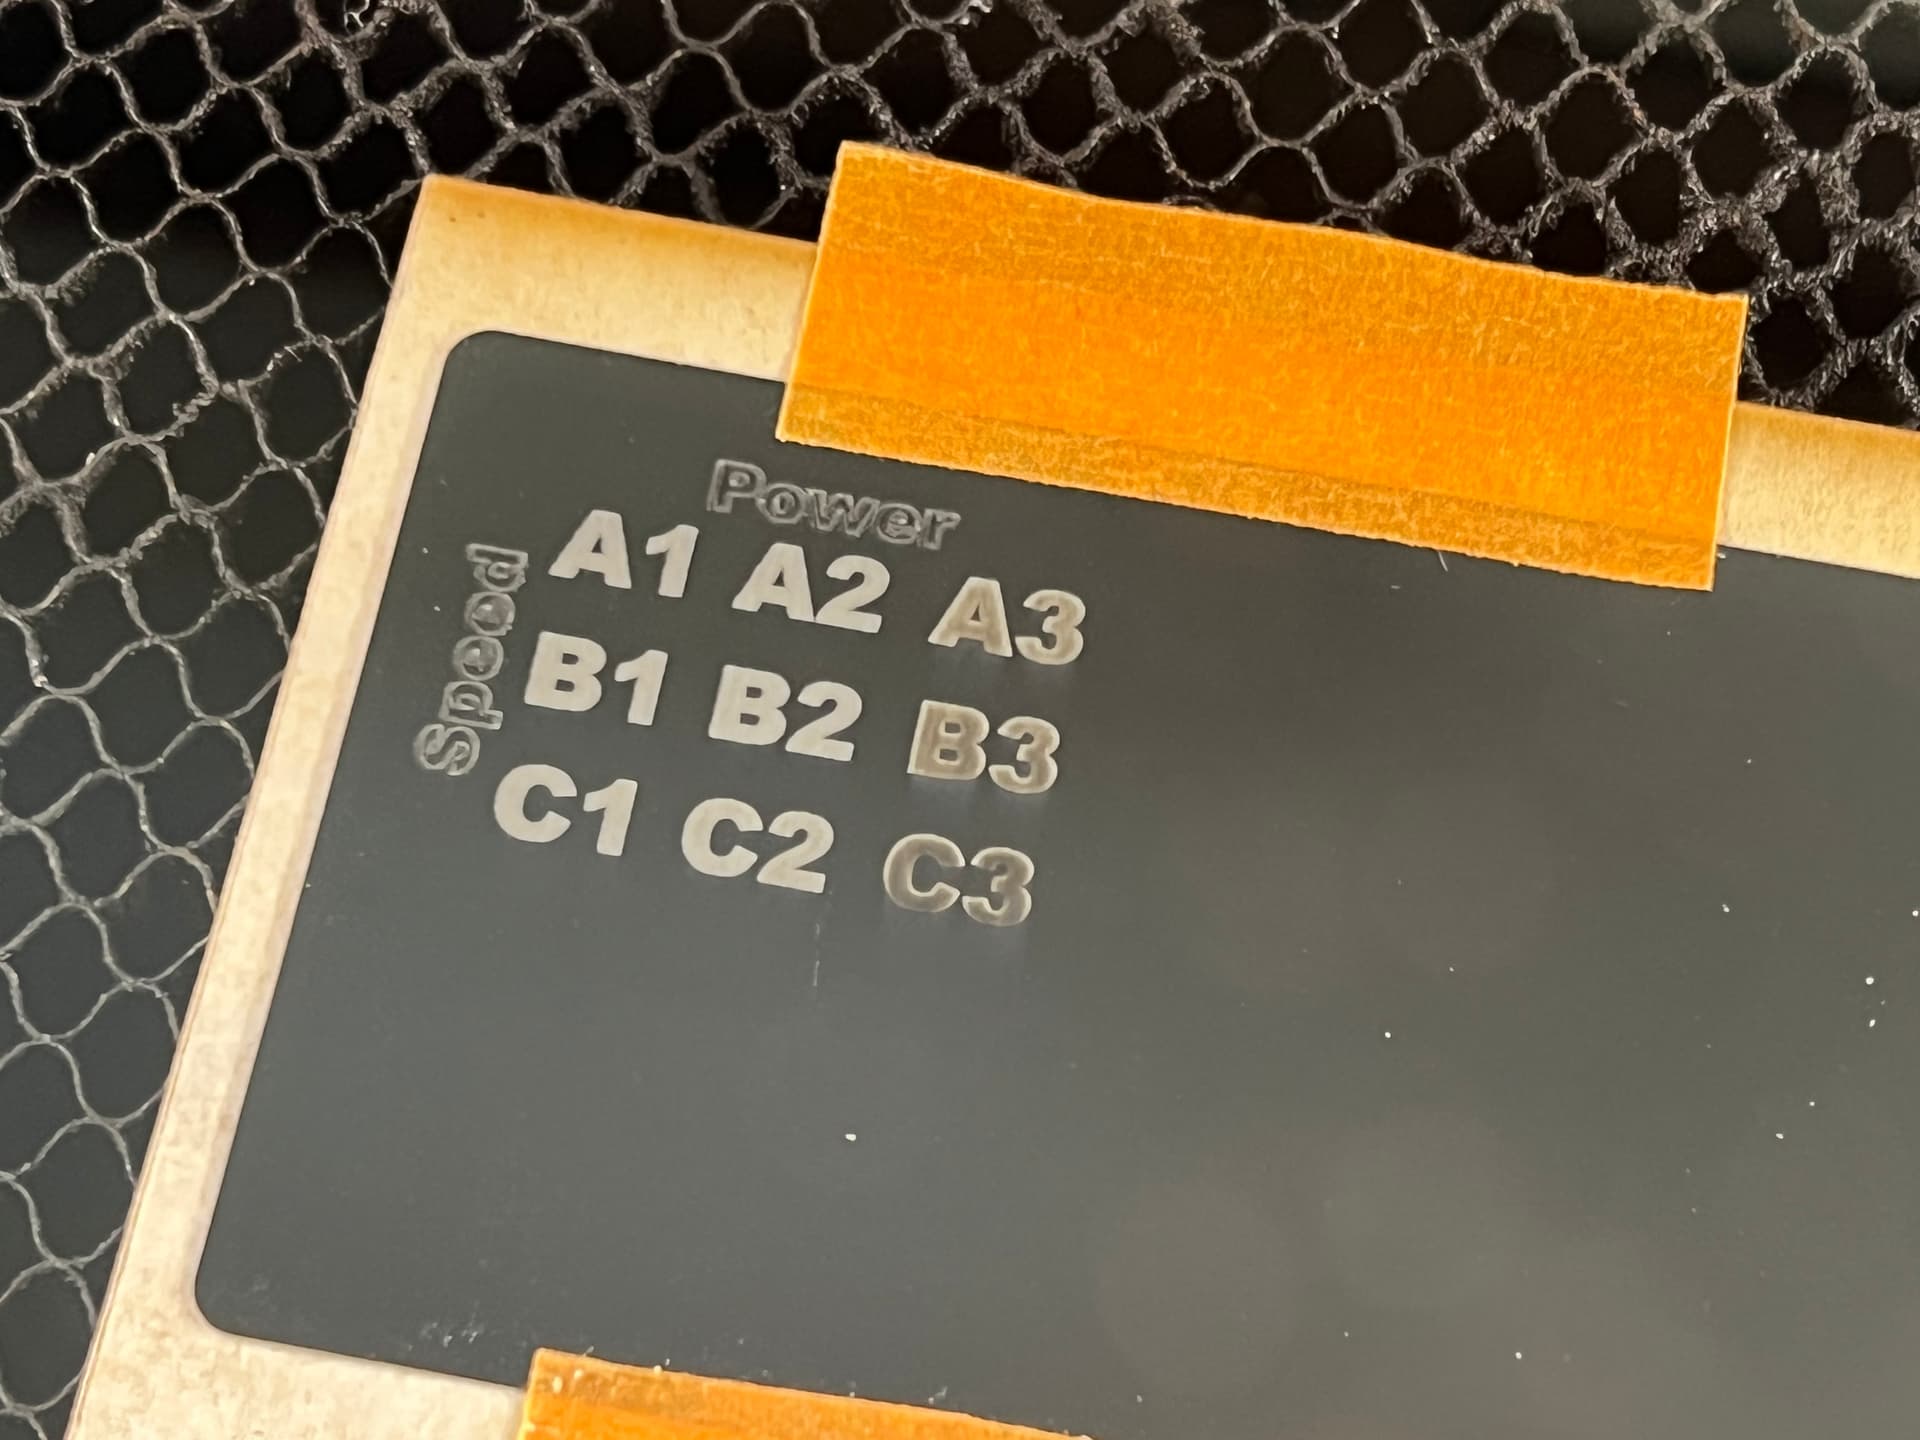
The result showed I was right to pursue testing as the MacBook default value provided an unwanted charring. In-person, B2 looked the best to me and now the values I had jotted down can be entered into the Settings Journal I still constantly curate and refer to.

I’ll leave this here for those of you who might want a quickie calibration test grid

TestEngraveGrid

It’ll help to jot down the speed and power ranges you want to try so that you can see everything laid out before punching it into the Glowforge UI.

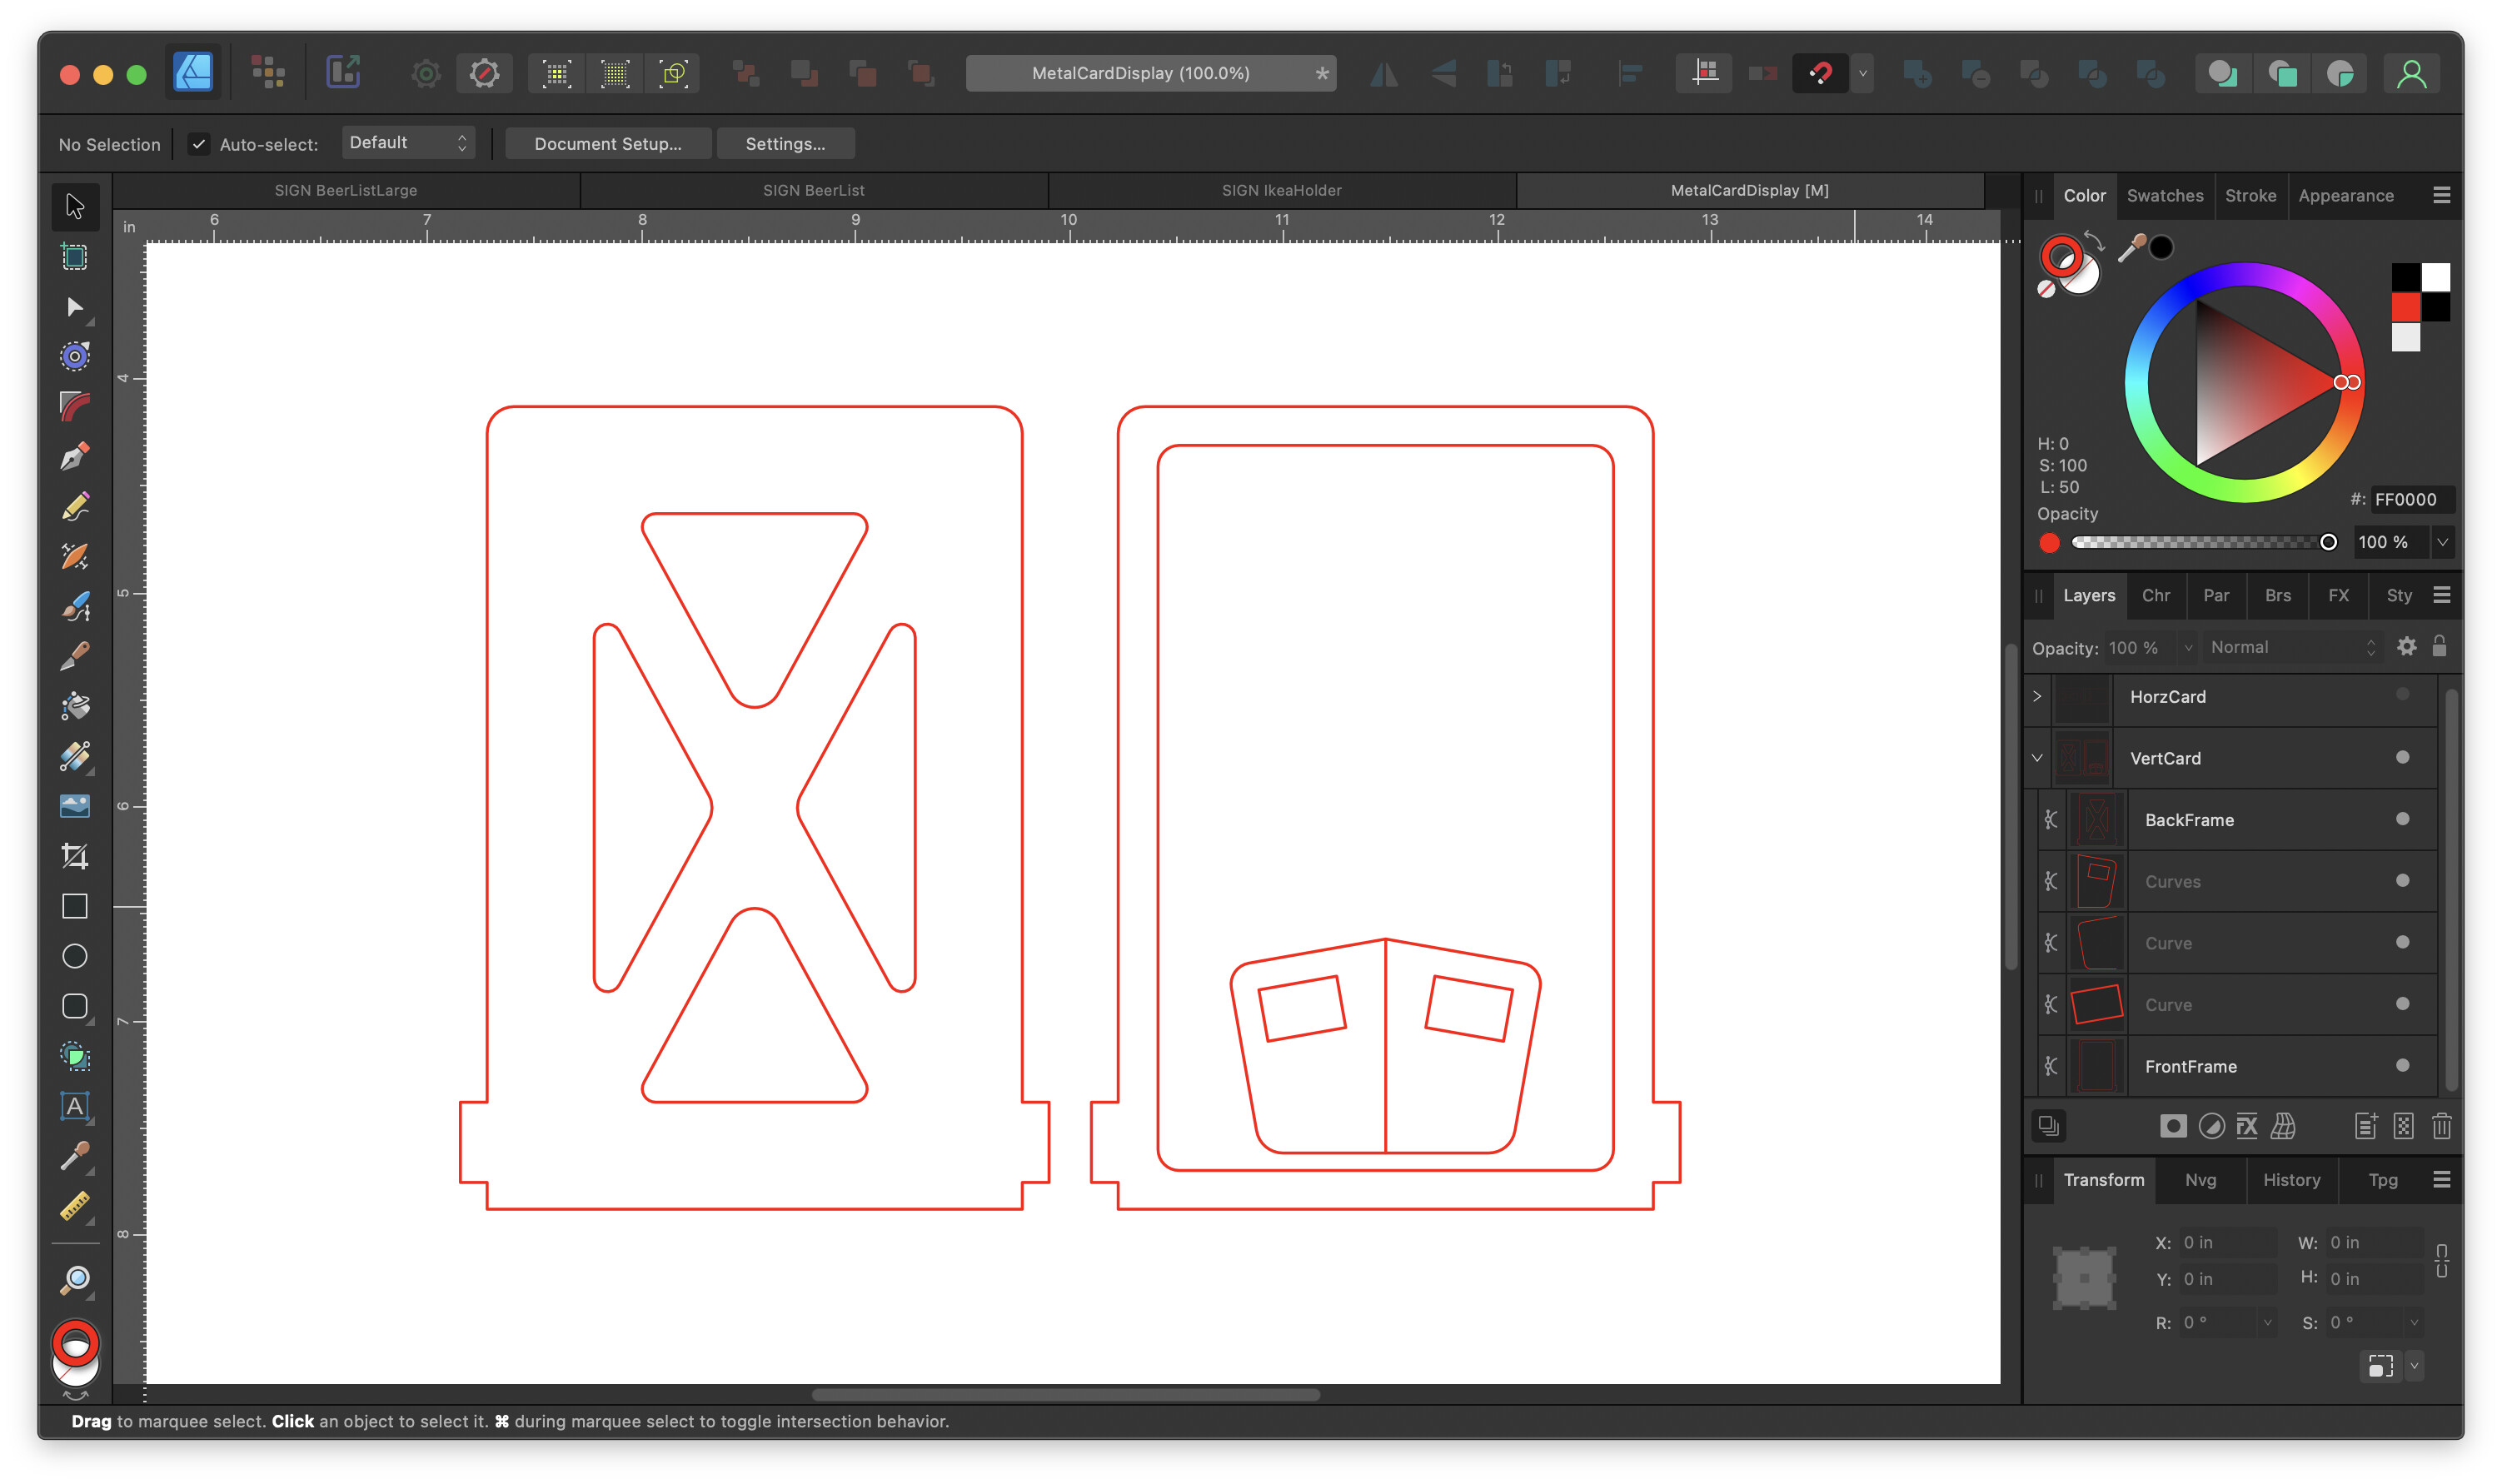
I also made a variation for testing the CUT range. Just outlines intentionally using different shades of red so that they show up as separate entities. Note that the alphanumeric characters are intentionally schmushed together so that if something DOES cut through, you won’t be wondering if a “3” sitting in the crumb tray belongs to a “B” or “C”.

TestCutGrid

Apologies if this had already been beaten to death elsewhere, but it wasn’t apparent in the initial forum search.

17 Likes

Thanks for the write-up, this will be helpful to many.

5 Likes

It’s definitely easier entering settings now that things light up when you select them, but I’ve definitely had similar thoughts about making the shape be descriptive on its own!

Plus there are a lot more cut tests than engraves on here :grin:

I’m curious.

In the images it looks like the default settings left a very silvery look, while the others were more grey. It’s that just an artifact of the image or do you see that in real life too?

If yes, that may be a reason to use them with masking to get the silvery but without the overspray.

8 Likes

Hopefully this Glowforge engraved clip illustrates the level of “shininess” from ablating the anodization. Not a high-polished shine, but certainly “reads” as metal lettering. The others have a touch of soot.

Now that I’m revisiting this, I grabbed a paper napkin and just started dry-wiping the lettering including the laser-scored words. Not a shabby clean-up, but I’d hate to spend time scrubbing a full deck of these metal cards:

When/if time permits, I may start investigating engraving with images, though I suspect Glowforge might require some dithering/halftone setting activated. XTool’s product page for these cards show some enticing examples:

8 Likes

Gotcha, so nowhere near as different as it looks in the first picture, just excess soot :slight_smile:

The Convert to dots and Convert to patterns options in the :glowforge: interface do a decent job creating halftones, but their dots are all the same sized. There’s a tutorial on here doing halftones with Inkscape’s tiled cloned feature that did a good job :slight_smile:

9 Likes

A quick wipe with alcohol will make the engraves really pop on metal like that.

From 2019:

10 Likes

Thanks for this! Definitely a lot better than trying to figure out all the squares on the left! Appreciate you sharing the svgs and describing it!

7 Likes

Was asked to print a QR code on copy paper for display.

Um. No.

With a bulk sale going on right now putting the metal cards under 6¢ each, it might actually cost LESS than inkjet printing factoring in the cost of cartridges!

For the beginners who don’t know, design programs ought to be ambidextrous when it comes to unit types. For instance, in Affinity Designer, even though the document was opened with units set to SAE (inches, feet), going into a rectangle’s Transform Settings, it throws zero complaints if I type-in a width and height of “54mm” and “86mm” A custom display frame is made and sent to the Glowforge.

A light schmear of glue sandwiched near the edges followed by the side feet keeps this together. Perfectly tailored display for the metal card.

Files made for horizontal and vertical orientations. I believe this is the same ubiquitous size for other rounded corner cards.

MetalCardDisplayVert

MetalCardDisplayHorz

10 Likes

Very nice. Thanks for the design. I’m going to use this for my neighbor!

8 Likes

Nice card and holder! And thanks for sharing the file!

8 Likes

That’s helpful, thank you!

My F1 Ultra can cut those cards as well—I’ve used that ability to make some fun miniatures.

10 Likes

That sounds like so much fun!

7 Likes