I was reading about the fiduciary alignment ruler, But the message I got was this was a beta discussion that no longer exists
Does it exist and does it make perfect alignments
There were elements of that print that are no longer available (snapmarks). However, there have been some serious improvements made in the interface that have helped alignment a great deal. For absolutely precise alignment of designs onto objects, make a jig. For most applications, using the placement tool and set focus tool are enough to get pretty close.
6 Likes
If you want a full system so you can ignore the camera and still guarantee location of work, check out @MyDogsThinkImCrazy’s setups here:
https://community.glowforge.com/t/reinsertable-grid-file-and-tutorial/93366
and
4 Likes
Thanks
I’ve learned to set focus every time and yeah that’s usually pretty accurate.
1 Like
Thanks for being the helpful person you are.
I am new to this, and you have replied to so many of my questions. I really appreciate it.
4 Likes
Aw gee shucks ![]() I’m glad I can help. I have learned so much from this forum it’s good to give back!
I’m glad I can help. I have learned so much from this forum it’s good to give back!
3 Likes
I find little to complain about with x-y alignment but rotation is another issue entirely. Snapmarks did a great job and I still have rulers with the snapmarks on them, but one degree off horizontal will have the ends 3/16 " different in height ten inches away so the difference in rotation between that and zero is hard to accomplish by eye…
2 Likes
Thanks so much for replying, everybody here, so helpful, but I’m so new to this I don’t know what snap marks are or how they would affect the rotation or whatever but I do appreciate how helpful everybody is,
I’m not the brightest bulb, but sometimes I wonder, I turned my glowforge on for the first time and the camera frame was right side and bottom corner, The camera frame didn’t see the whole crumb tray, so I’ve been operating on the belief that the bottom right corner is where you square things up and the camera doesn’t see the whole crumb tray, you just have to trust.
Sometimes I’m the worst problem, And now that I know that Cameron needs the alignment I can’t find my lens tool.
Fortunately for me a user named “beerfaced” (on my post “camera and print area”), has the plans to make my own lens tool so I can calibrate the camera?
I gotta learn to shorten my replies
3 Likes
You are correct that the camera only shows the usable area of the interface, and the lower right corner is where you should orient your material and design.
Snapmarks were a “thing” a few years ago and do not exist so don’t give them a second thought.
You probably don’t need to do a camera alignment at this time.
I suggest printing the Glowforge tutorial projects and becoming more familiar with your machine. It only seems intimidating at first, and as you have discovered, people here in the forum will help you with any issues you encounter.
3 Likes
A user, *beerfaced, on my post titled “Camera and print area”, says I should be able to see the whole crumb tray with the exception of the area behind the gantry, and he has a very detailed awesome looking design for a lens tool (which I have misplaced).
I have been using the bottom right corner of the camera frame with success but would be nice to see the left and the right sides of project.
I think you have suggested a few times there is no need for camera calibration, does your machine only see the right side of crumb tray?
And is there a process for “set focus”?
I would think it is for thickness of material only, but seems like it is left / right focus also, sometimes as focus finishes the image jumps a little so I just keep repositioning the design and setting focus until there’s no jumping and usually that works.
The set focus command is in the drop down menu of the interface. Click the 3 dots and select set focus. Move your cursor to the area of the material where you will place your design and click. The camera will adjust the view and automatically measure the height of your material. You will not see any “jump” when you hit print because you have already focused. You can use the set focus tool multiple times and places before clicking print - just make sure that the red beam lands on material and not a void or the view and the height will be wrong.
3 Likes
Here is what I see (zoomed out slightly) of my honeycomb tray with Proofgrade material on the bed. Please note: the top of what I see is not the top of my board. The printhead cannot access the material behind itself. There is always a margin there that can’t be cut. The actual cutting area of the bed is 10.9" x 19.5" even though the boards are 12 x 20. The screen view makes you think you are seeing the top of the board, but you are actually seeing the top of the usable area.
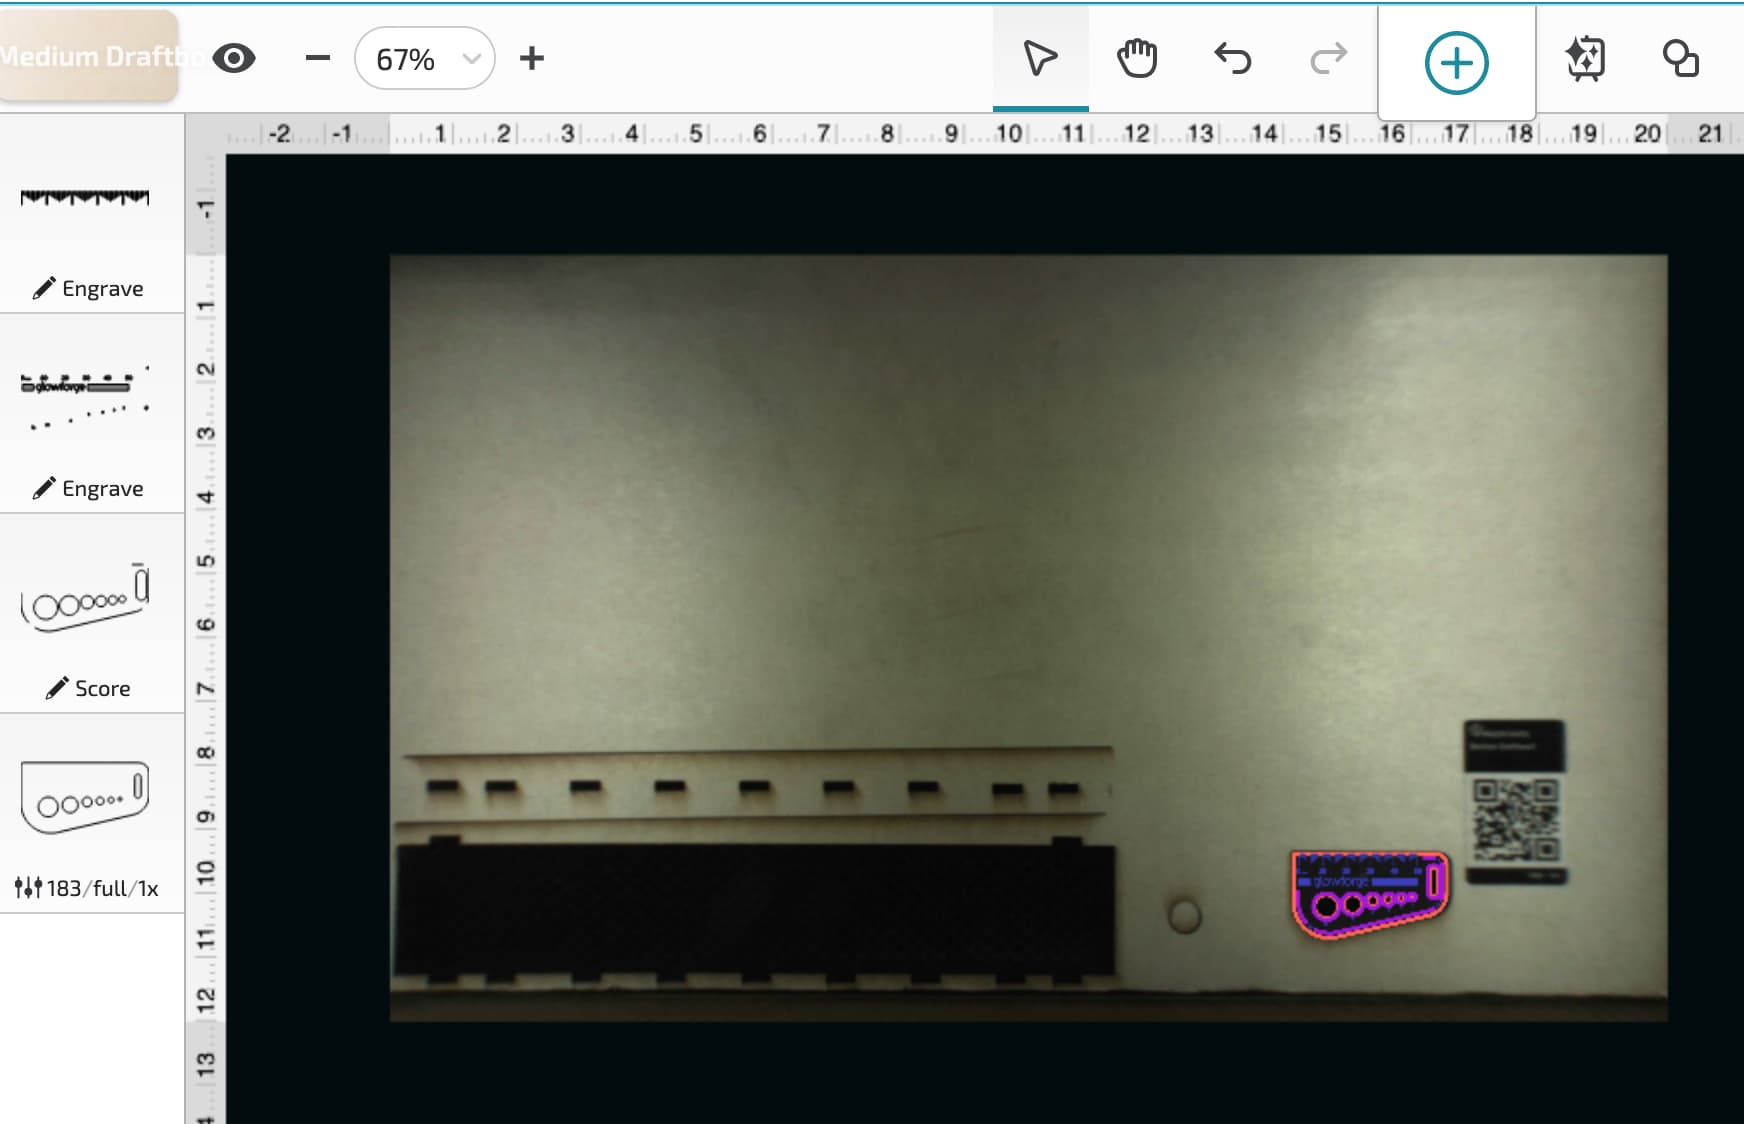
4 Likes
nice
This topic was automatically closed after 30 days. New replies are no longer allowed.