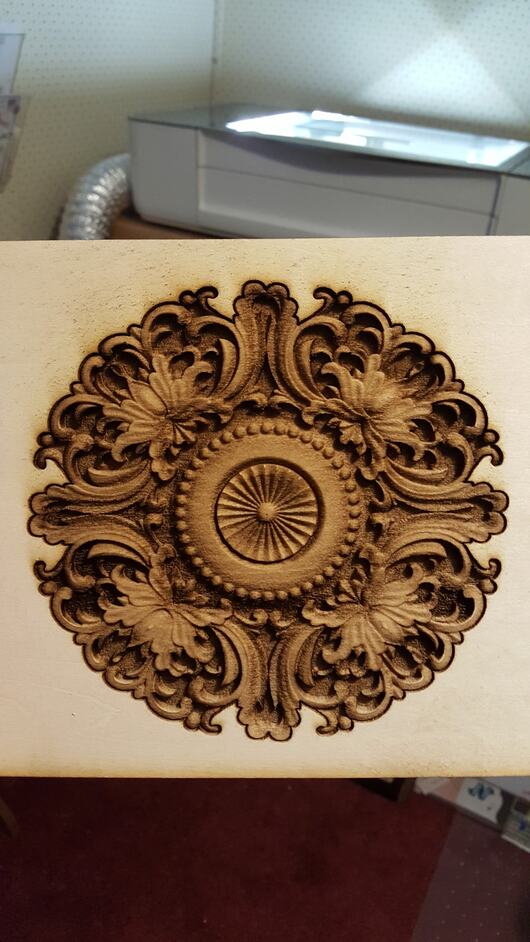
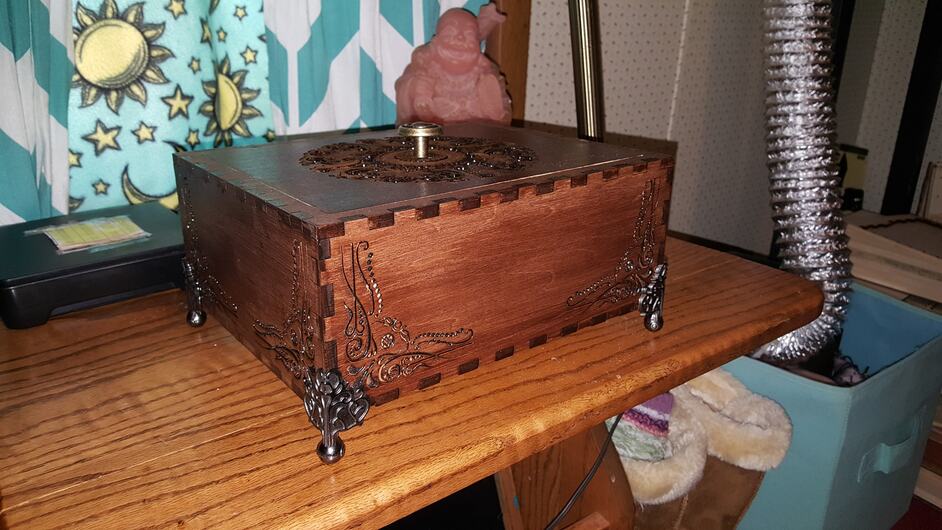
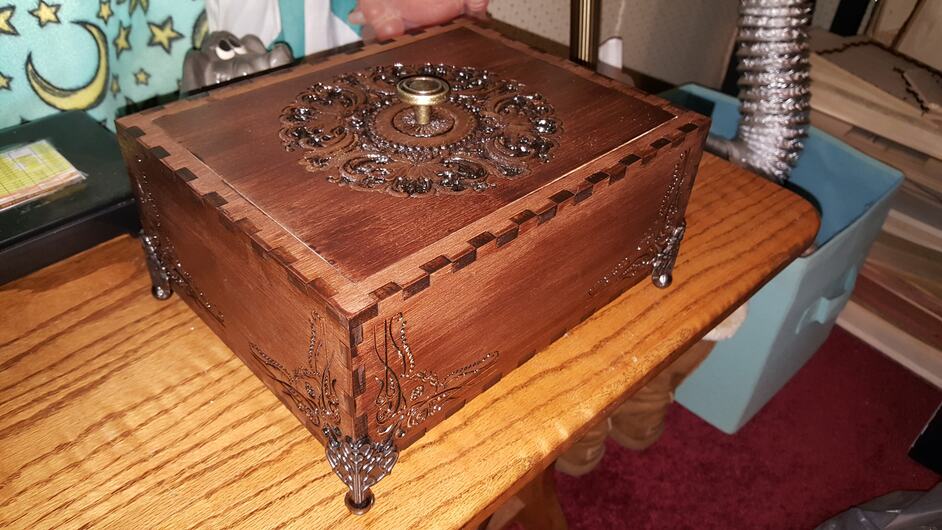
I got my forge on Nov. 1st. Had no clue it was even on its way! I played around with a few things before going all in. Go big or go home, right? I started with this 3D engrave. One shot, one kill.
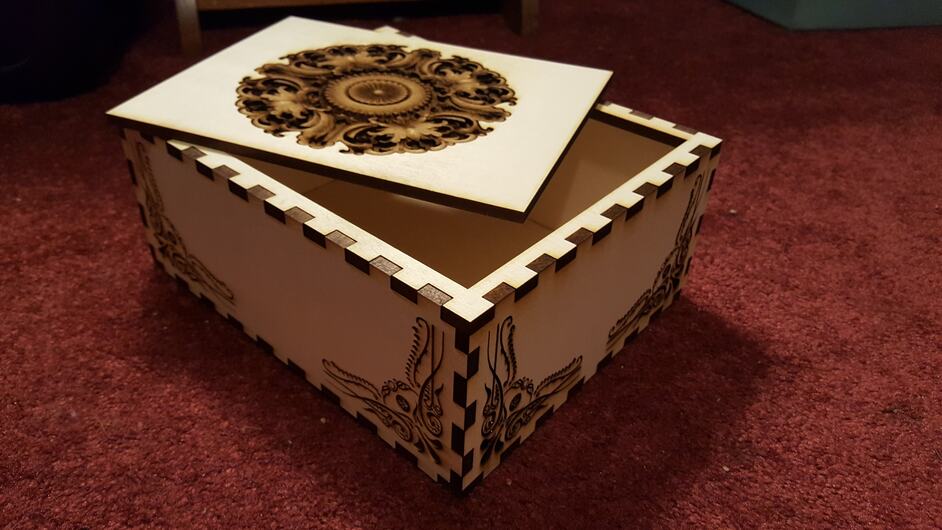
I then used a cool tabbed box generator in inkscape to create the box and added a couple of standard engraves to the sides.
Once that was done, I snapped it together and stained it with American Walnut stain & poly. I noticed that the lid was warping a bit and realized the wood was inhaling the stain and the warp was like a chest expanding out with a deep breath.
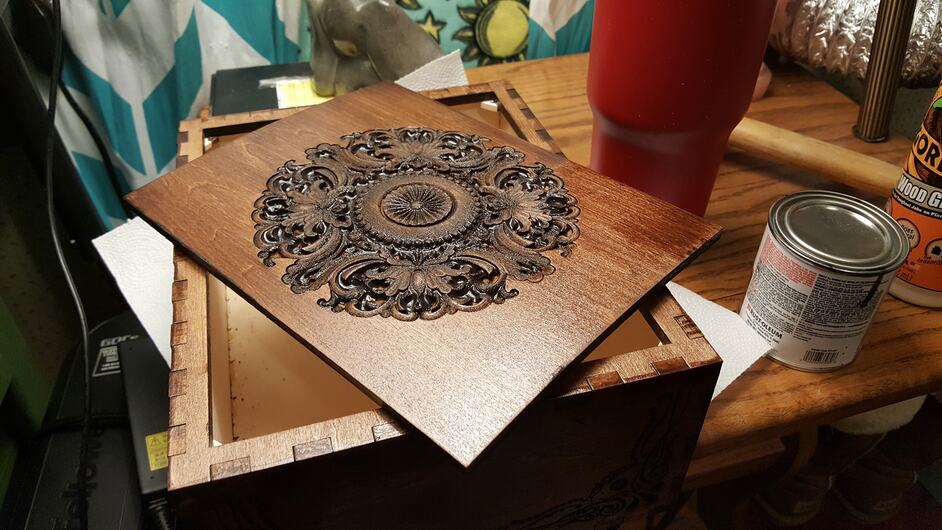
By the next morning, the wood had relaxed and flattened itself back into shape, ready to be crowned. I added the feet last, letting this box stand proud.
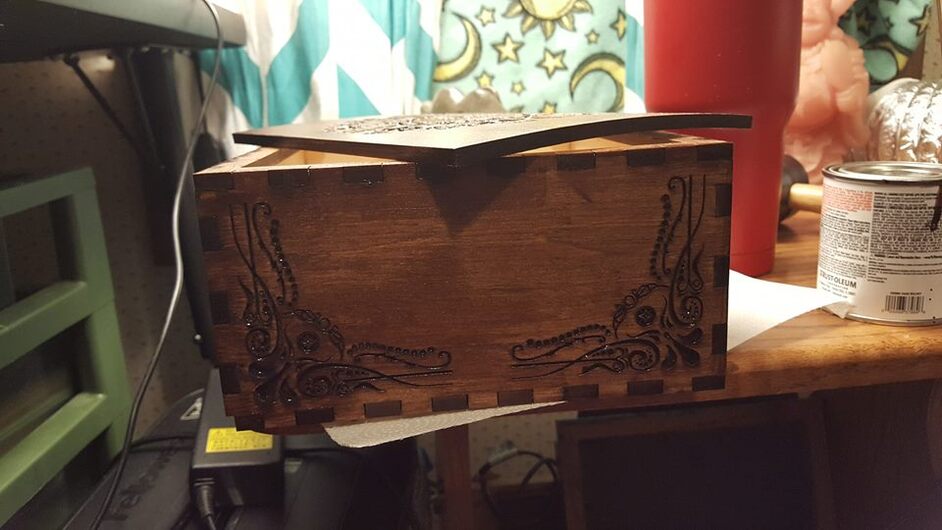
It was quite the learning process for me throughout the project. The stain is uneven. Glue ran down on one side, making an ugly scar in the stain. The engraves on the sides of the box are a lot deeper than the front. And the wood I used was barely wide enough for the size of box I designed. Some of the tabs along the bottom of the back side and the base are too short. The next time I print this design, I will use better hardwood, and I will plan it out better. All in all, I am happy with how it turned out! It already has a new home and everything. I love this new toy!
I’m glad to see the warp relaxed out too. I’m doing a 3D notebook cover, and it’s currently being squished. Hadn’t thought to experiment with stain, but I really like the look of that walnut.
It is pretty thick, and I should have used a q-tip to get the stain down into the carving on the lid. This thing is sloppy! lol I am a bit of a perfectionist.
I… am… in… awe.
This thing is gorgeous!
Seriously I’m just sitting here staring at it while I type this and I’m just blown away!
I’ve had my 'forge for… gosh… a year and a half now(?!). And I have yet to attempt to tackle a box. I really need to just do it and learn from whatever mistakes I make. Your work is truly inspiring.
Thank you! It certainly is photogenic. Lol. Get it in the right light, however, and its flaws are glaring. The next one will be much better. I think I might use some twine…