So I just got my glowforge all set up, imported a drawing, and it didn’t cut all the way through.
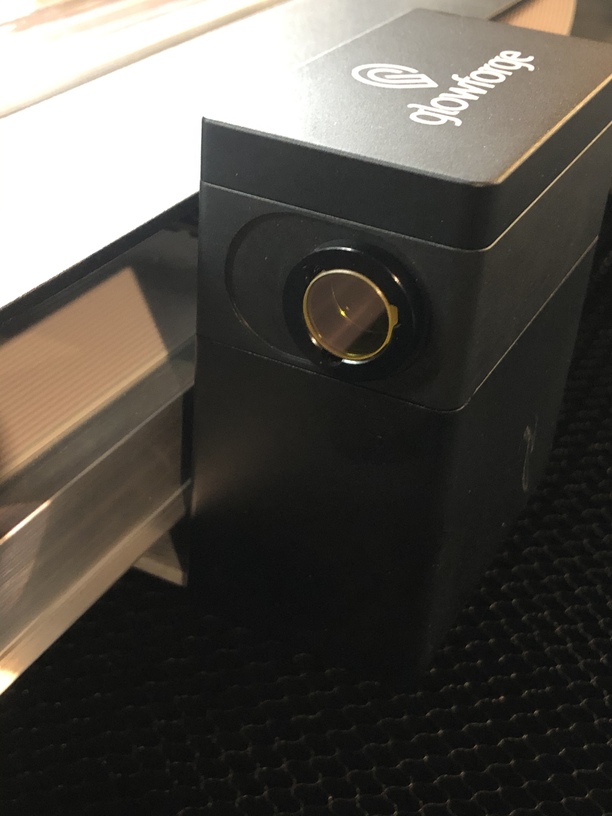
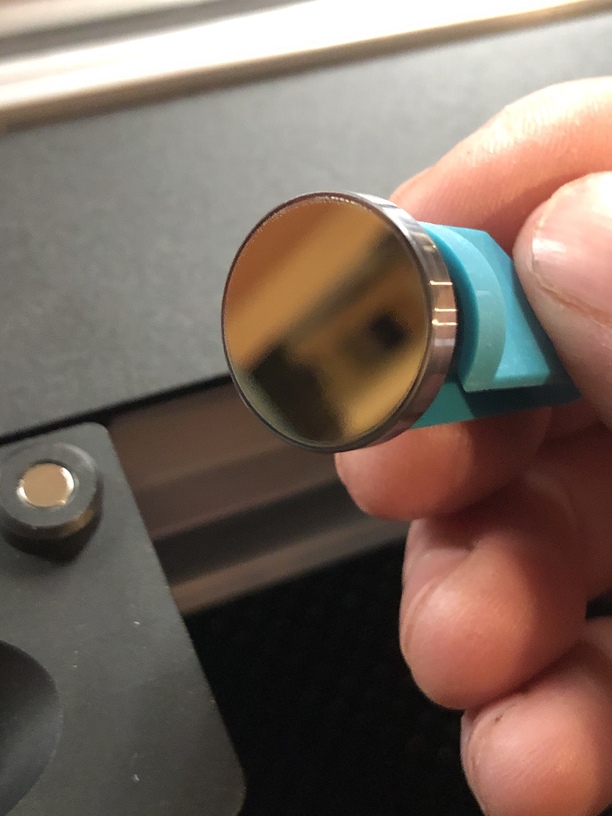
One weird thing first… there is a lens or something that screws into the print head on the left side? That wasn’t actually in my print head when I took it out of the box. I looked all through the setup instructions to see if that was supposed actually be installed, but it didn’t say. So I screwed it in.
Anyway, steps I took:
I created a drawing in Illustrator
I exported it as an svg
I imported it into the app
I selected the proof grade medium walnut that came with my free materials kit
I put the wood in the glowforge
I pressed start on my computer, then waited for the glowforge button to glow
I pressed the glowforge button
When it was done, there were some tiny holes here and there where it burned all the way through, but when I lifted the wood out of the glowforge, it will fully attached. When trying to take it out, the wood broke in several spots.
It is important that you print the Gift of Good Measure on Proofgrade medium draftboard using the proofgrade settings and insuring that the draftboard is held perfectly flat to the honeycomb tray. If it doesn’t engrave, cut and score properly, support will need to see pictures. Support uses this particular file to assess specific problems.
It’s the mirror window. It helps keep the inside of the head smoke free. It’s replaceable as you’ve found out but many here aren’t aware of
Just make sure it’s clean because the laser goes through there to get deflected off the 45 degree mirror in the head to then travel through the lens on the bottom.
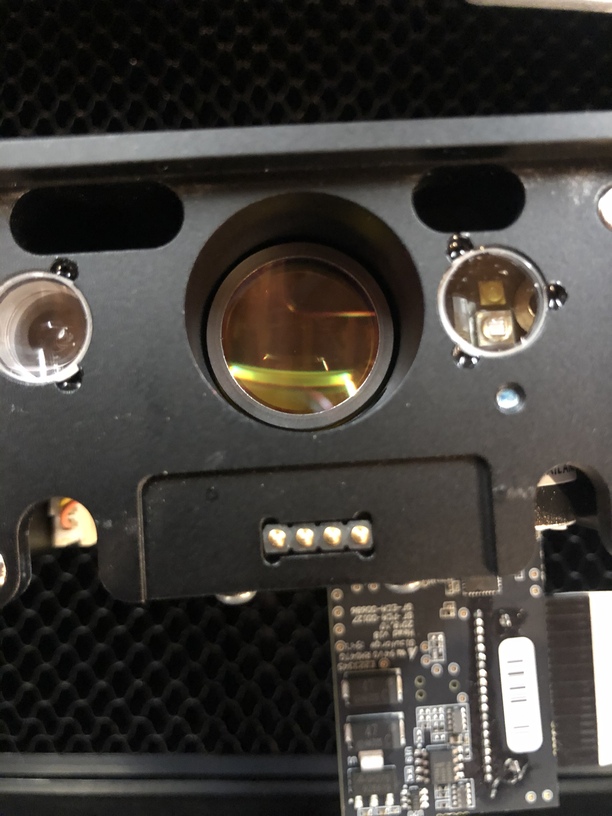
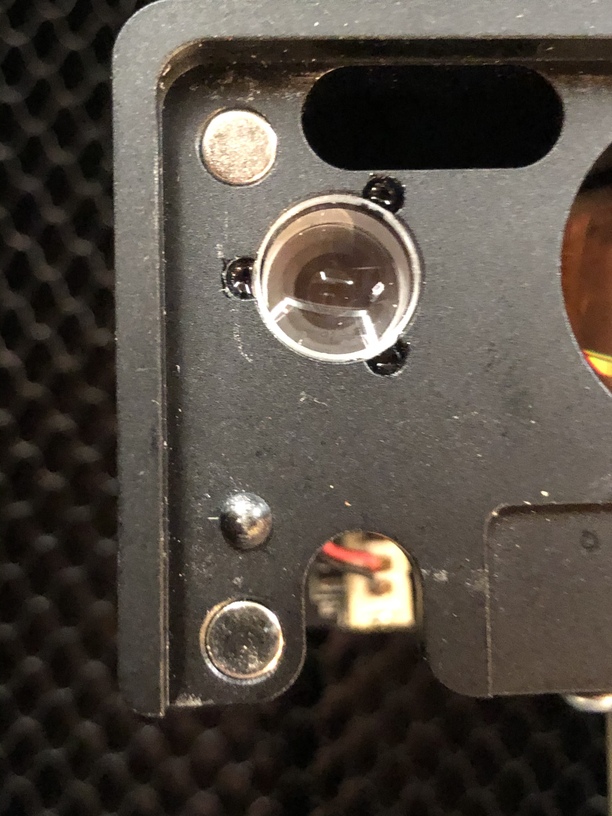
I’m sorry that your print head arrived without the window installed. In order to check that everything is in place correctly, I’d like to take a look at all of your optical surfaces.
Could you please post photos like the examples below?
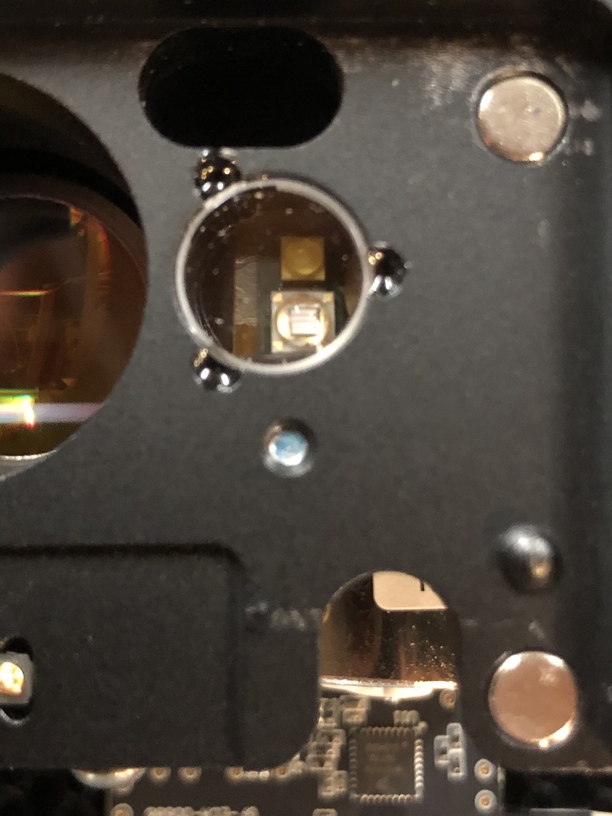
Both windows
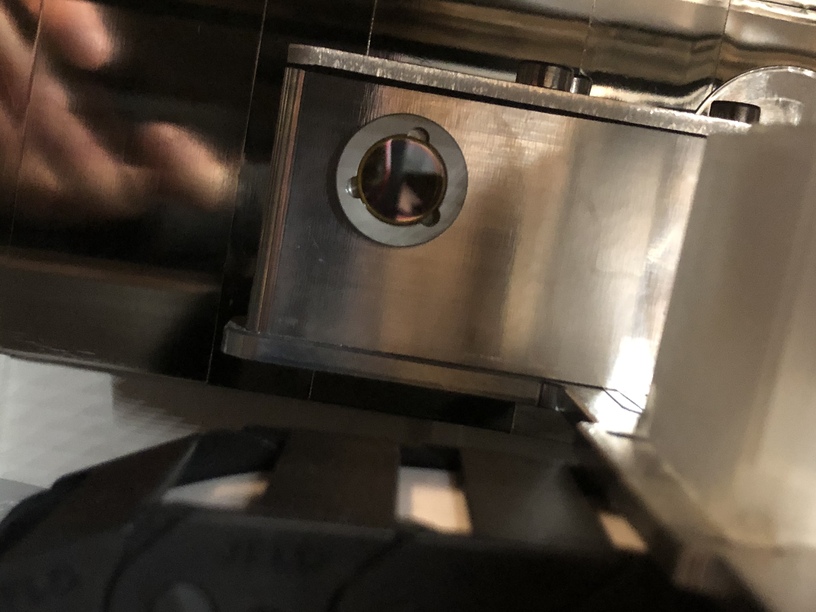
The printer head window, on the left hand side of the printer head
The laser window on the inside left of the Glowforge
Thank you for taking the time to work through those instructions, and for sending over the images of your cleaned optical components. I’d like to see how your Glowforge performs with a specific print.
We’d like to have you try a few troubleshooting steps for us:
Turn off your Glowforge.
Check for small pieces of debris or dust.
Check the lower door to make sure it closes all the way. It may require some force to open, but open it, wipe any dust off the edges, and close it all the way.
Remove the tray and clean any dust or debris from the surface underneath. Pay careful attention to remove all debris from the four dimples where the tray rests.
Check the lid to make sure it closes all the way. Small particles of material, such as dust or debris, can prevent it from closing completely.
Check the surface your Glowforge is on to make sure it’s flat. Ensure it is not twisted slightly and that there is no debris propping up one side of the machine.
Turn your Glowforge back on.
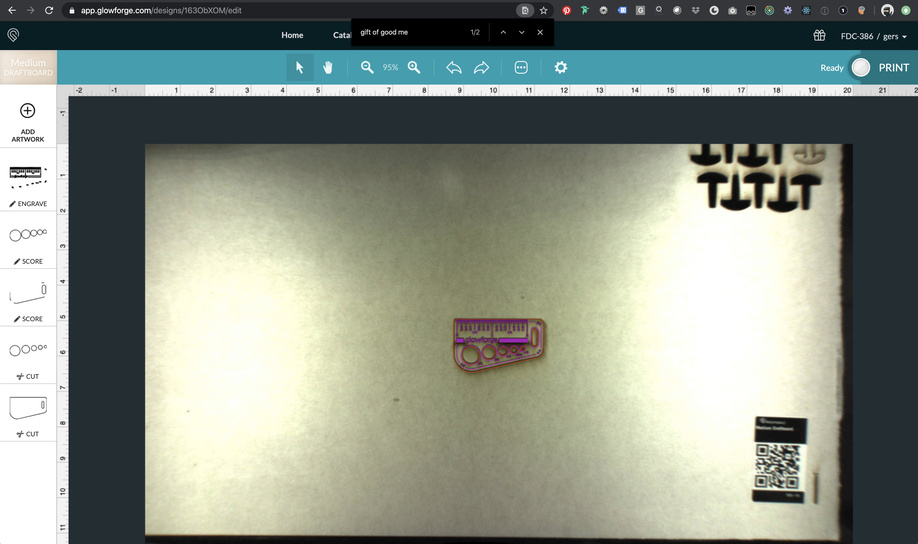
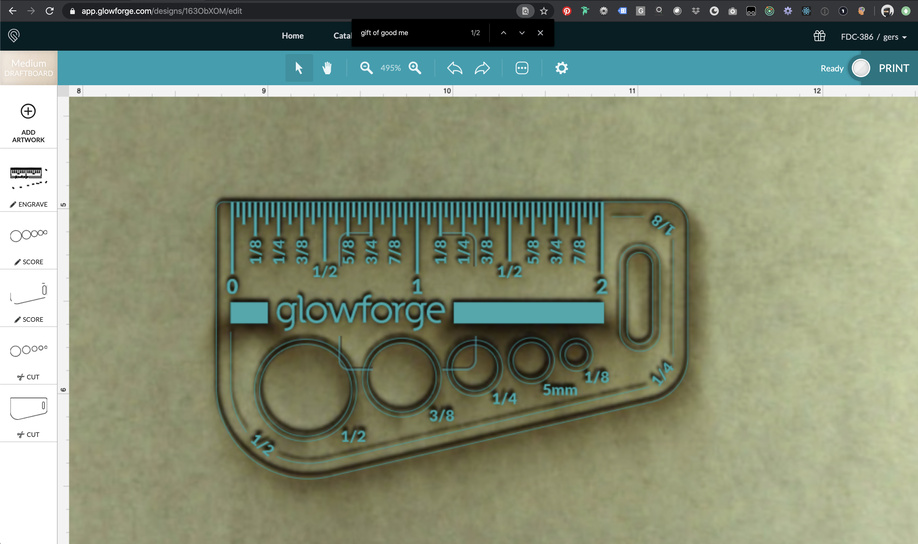
We included an extra piece of Proofgrade Draftboard with your materials shipment for troubleshooting. Place the Proofgrade Draftboard in the center of the bed and print the Gift of Good Measure using the default settings.
When the print finishes, leave the lid closed and wait until the fans stop and the picture updates. Without moving your artwork or your material, take a screenshot of the Workspace to show us the difference between the artwork placement and the actual print placement. Make sure to include the rulers in your screenshot and show as much of the bed as possible.
Mac: Press Shift-Command-4 and click and drag a box around your image. You’ll find the screenshot file saved on your desktop.
Windows: Click on the Start Menu and type “snipping tool”. Open the Snipping Tool > New then click and drag a box around your image. Click the Save icon and name and save your file.
Send us the screenshot along with the date and time of the print, and we’ll investigate.
Let us know how it goes, and we’d be happy to take a look.