Many thanks for writing up the details of your workflow’ very useful. I especially like how the turtle came out.
7 Likes
Thanks so much for a great write-up on this! I’ve not tried to do inlays before.
Would you mind sharing your etch settings for power/speed? I realize that materials may differ, but it would be great to have a starting point to test with.
4 Likes
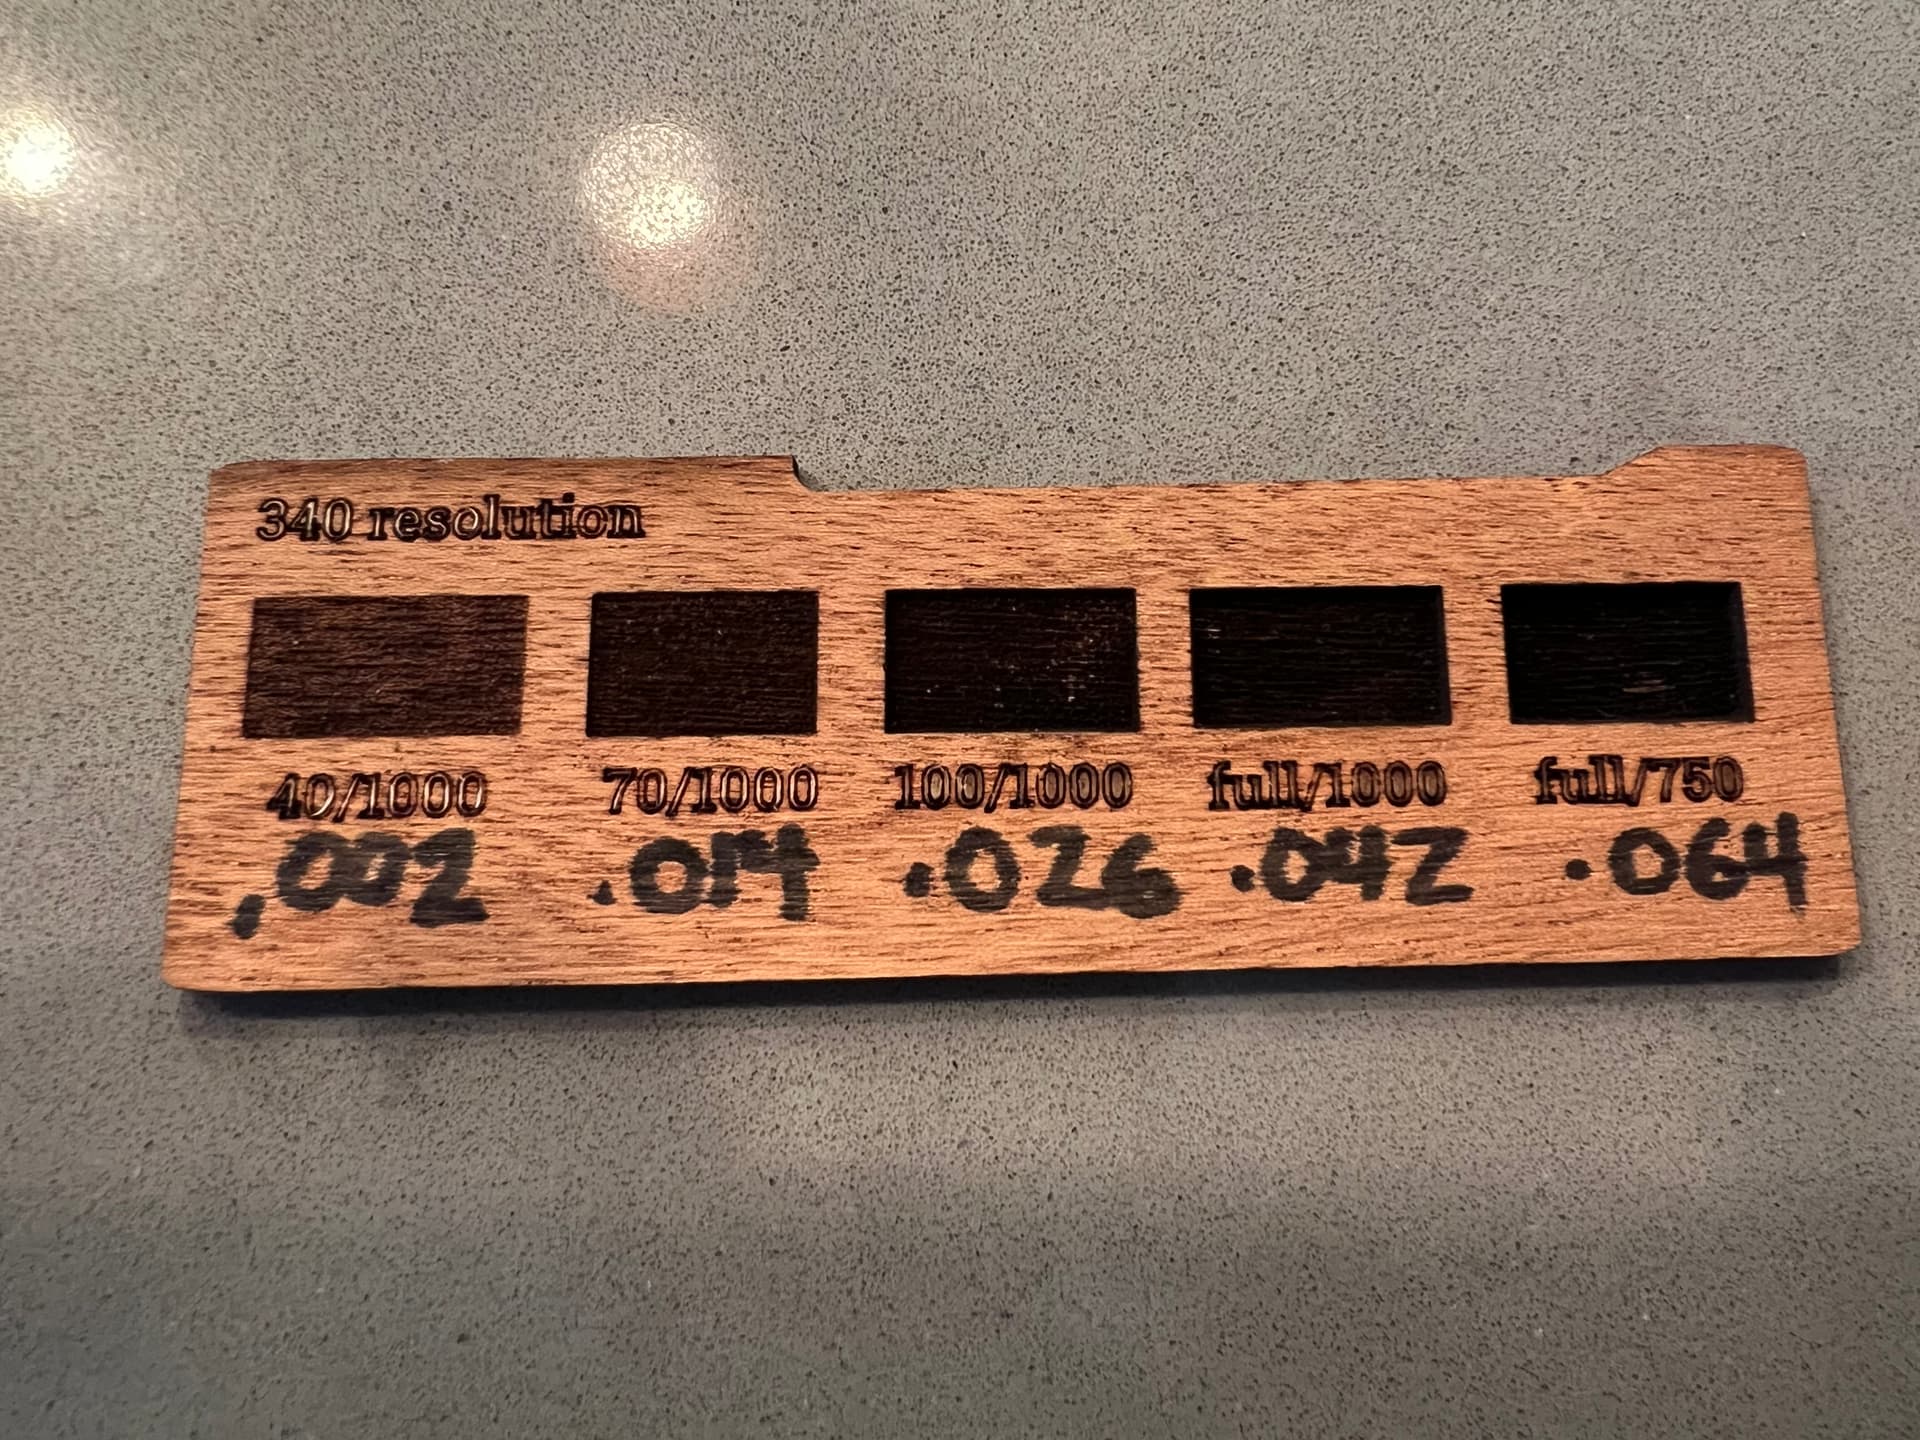
Depth is HIGHLY dependent on material so you will need to conduct your own tests, but here is a test on mahogany. 340 resolution, Power/speed. Hand written number is depth in thousandths of an inch:
Matt
10 Likes
Thanks so much, Matt! Now it’s off to the laser to try my luck. Really appreciate what you’ve done here!
7 Likes
There’s a great little engrave test layout here:
9 Likes
Thank you! I’ll check it out.
5 Likes
Those are VERY nice! Did you need to make any adjustments to inlay size vs cutting board engraving to account for laser width? I tried an acrylic inlay in wood (very fine detail) and the acrylic is loose in the cutout. ![]()
5 Likes
Hey, welcome to the forum!
Fyi this is known as “kerf adjustment”, you can find lots of threads here about how to do it.
7 Likes
The only kerf adjustment I made was flipping the inlay over and cutting a mirror image of it because otherwise it was too tight. Sounds like you are having the opposite problem. Kerf will vary with the material, cutting speed, etc.
7 Likes
I havs found that the hole made by engraving is smaller than the one made by cutting, so when a cut piece is put into an engraved hole the result has been very tight. Especially if the hole is deep and the cut piece is 1/8 thick.
7 Likes