I just finished my first two inlay projects, and thought I would share my methods. I chose a pair of store bought cutting boards ($25-35 on Amazon) as my test pieces. I used just one type of inlay wood per board. I tried to start with two inlay woods, but it just turned out to be too complicated.
The veneer was purchased online in a bundle of 25 sheets for about $33. https://www.amazon.com/dp/B08SP4GPN2?psc=1&ref=ppx_yo2ov_dt_b_product_details I was happy with the quality and variety of the samples, offering a wide range of species and gradations. Each veneer is about 0.024" thick.
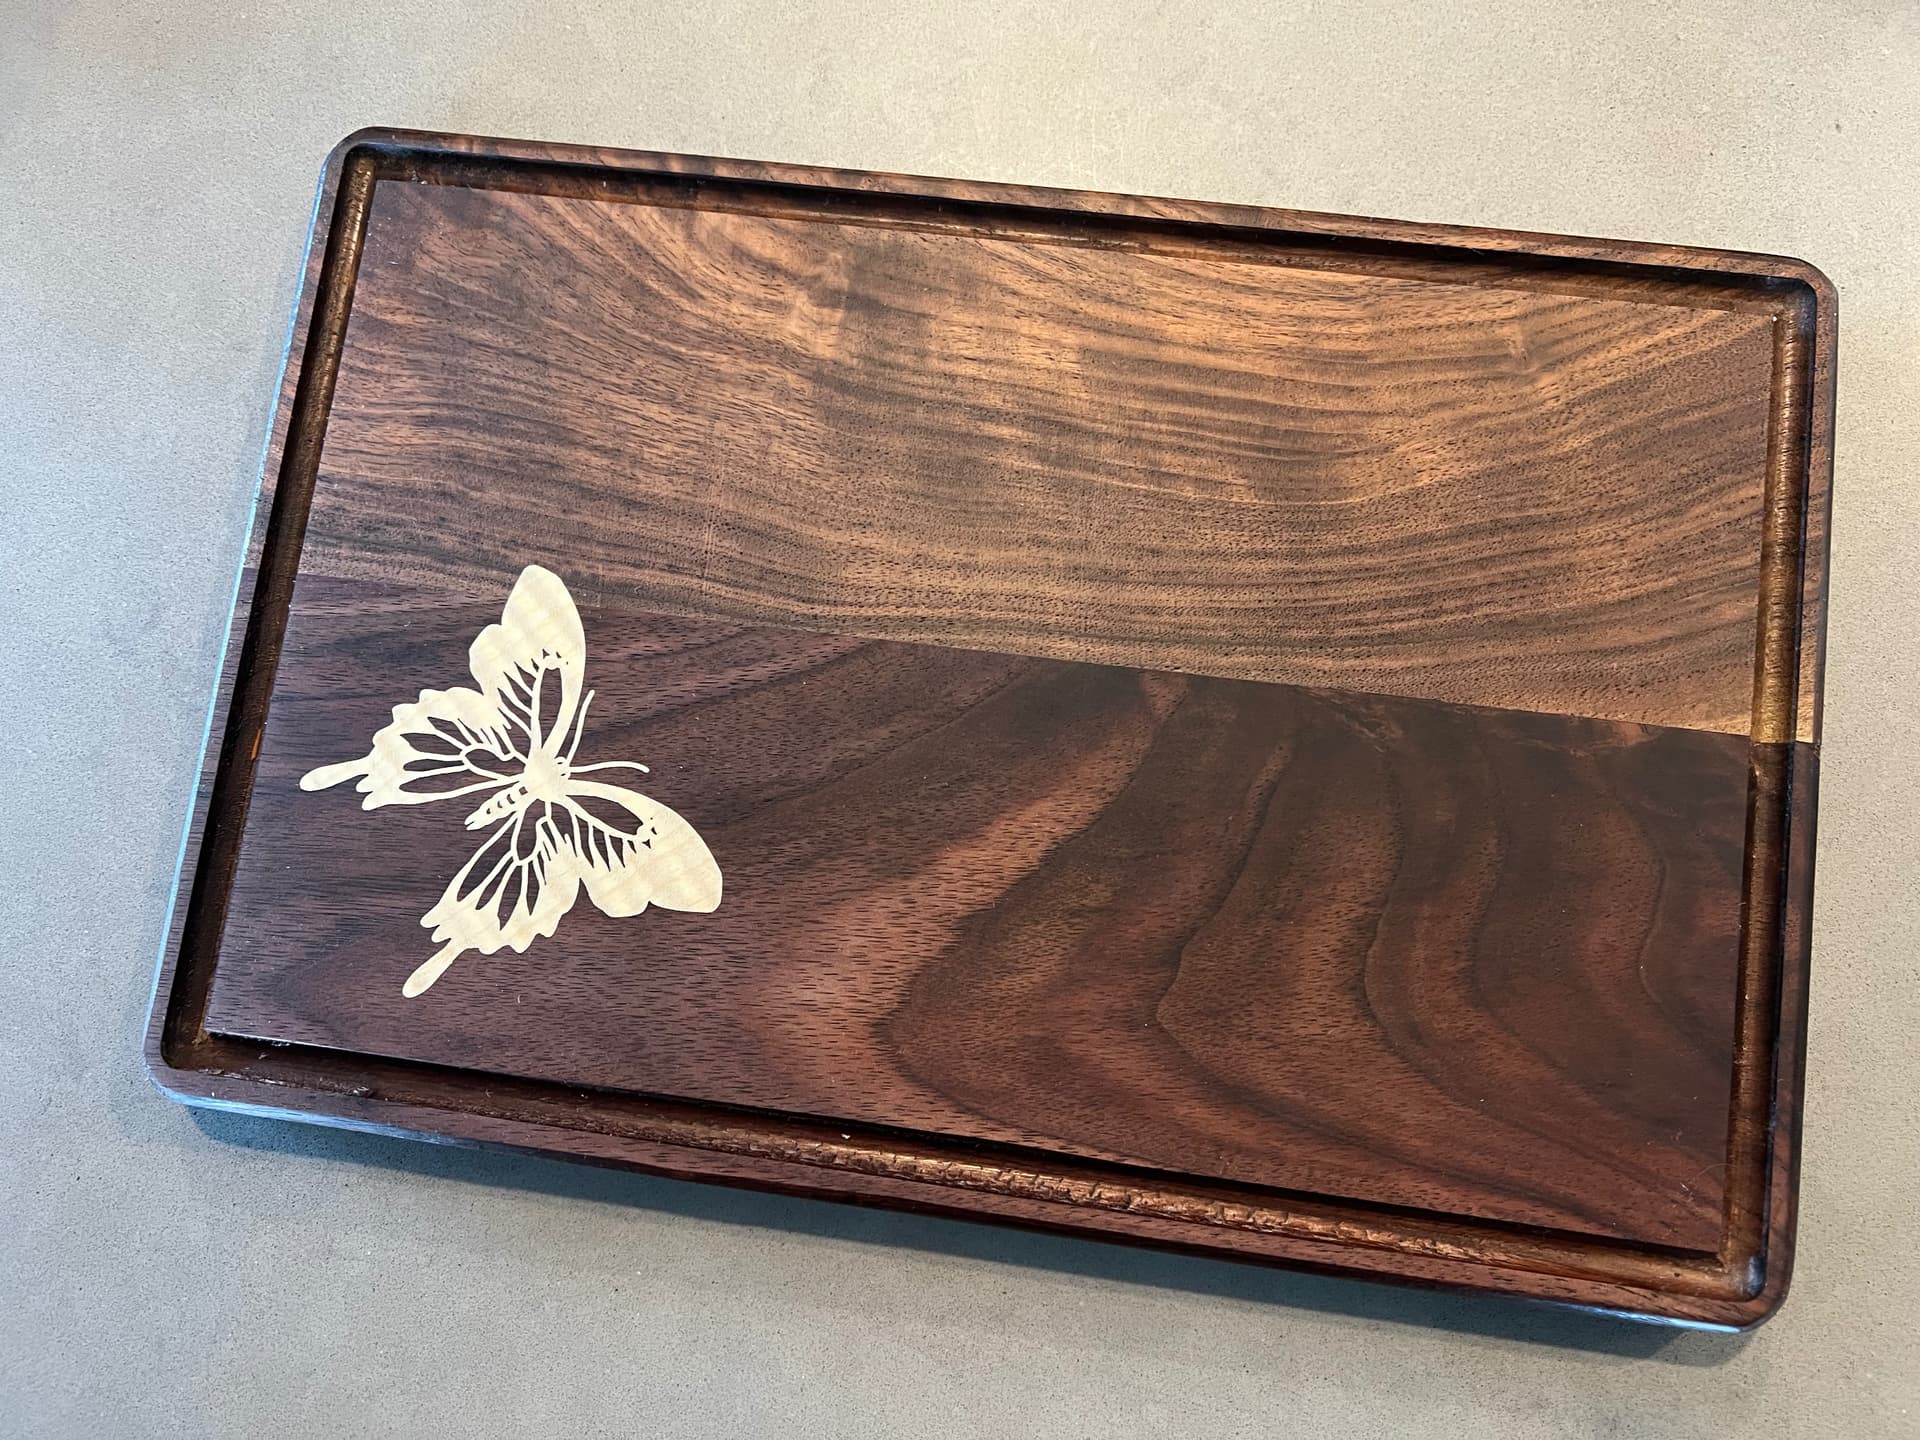
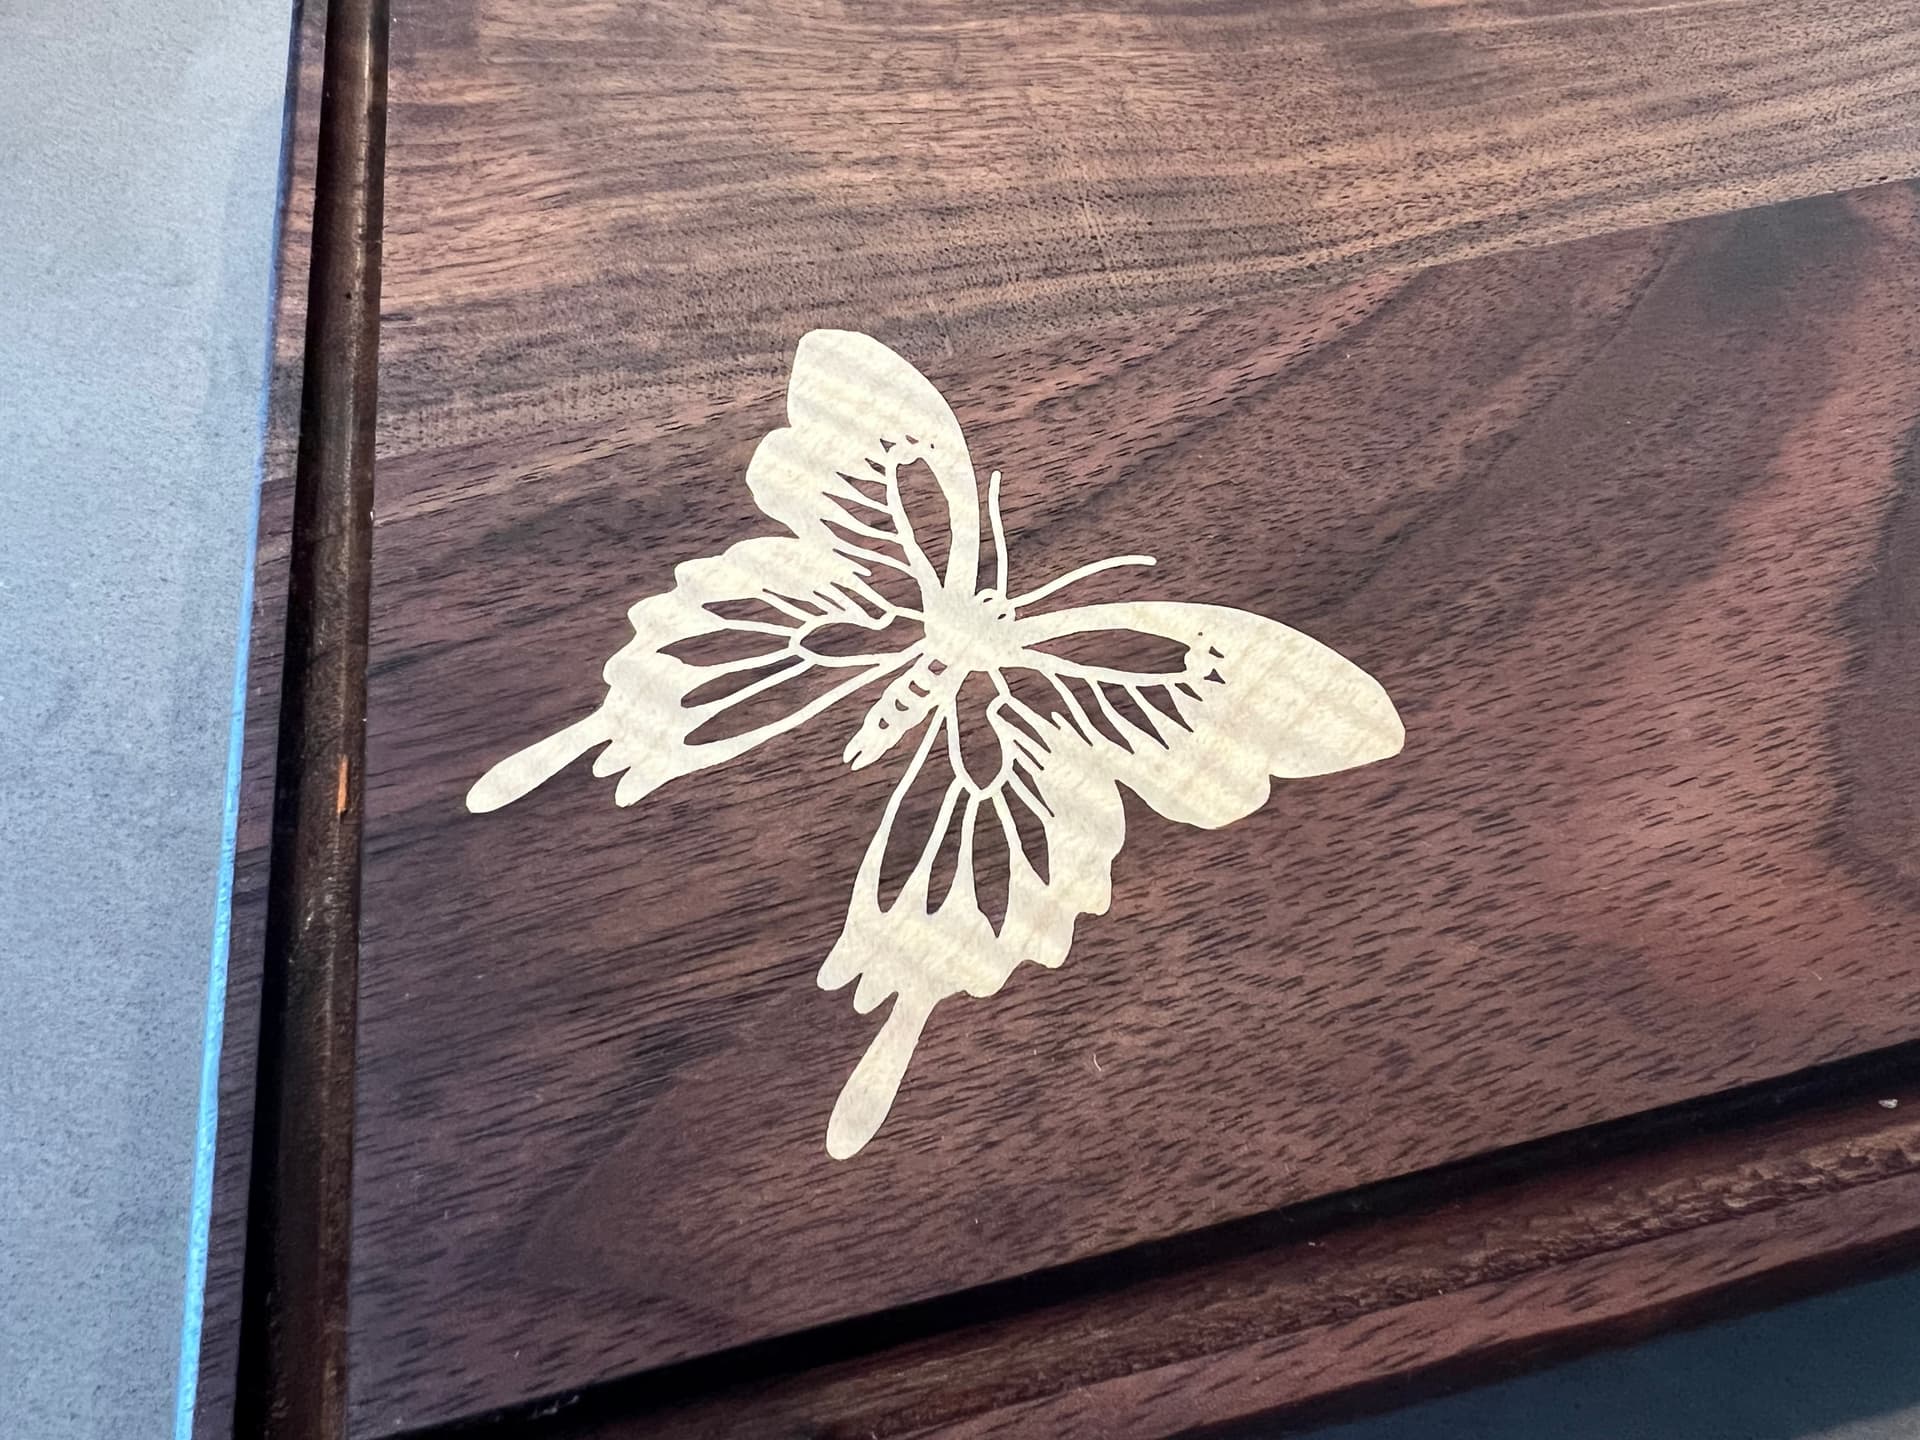
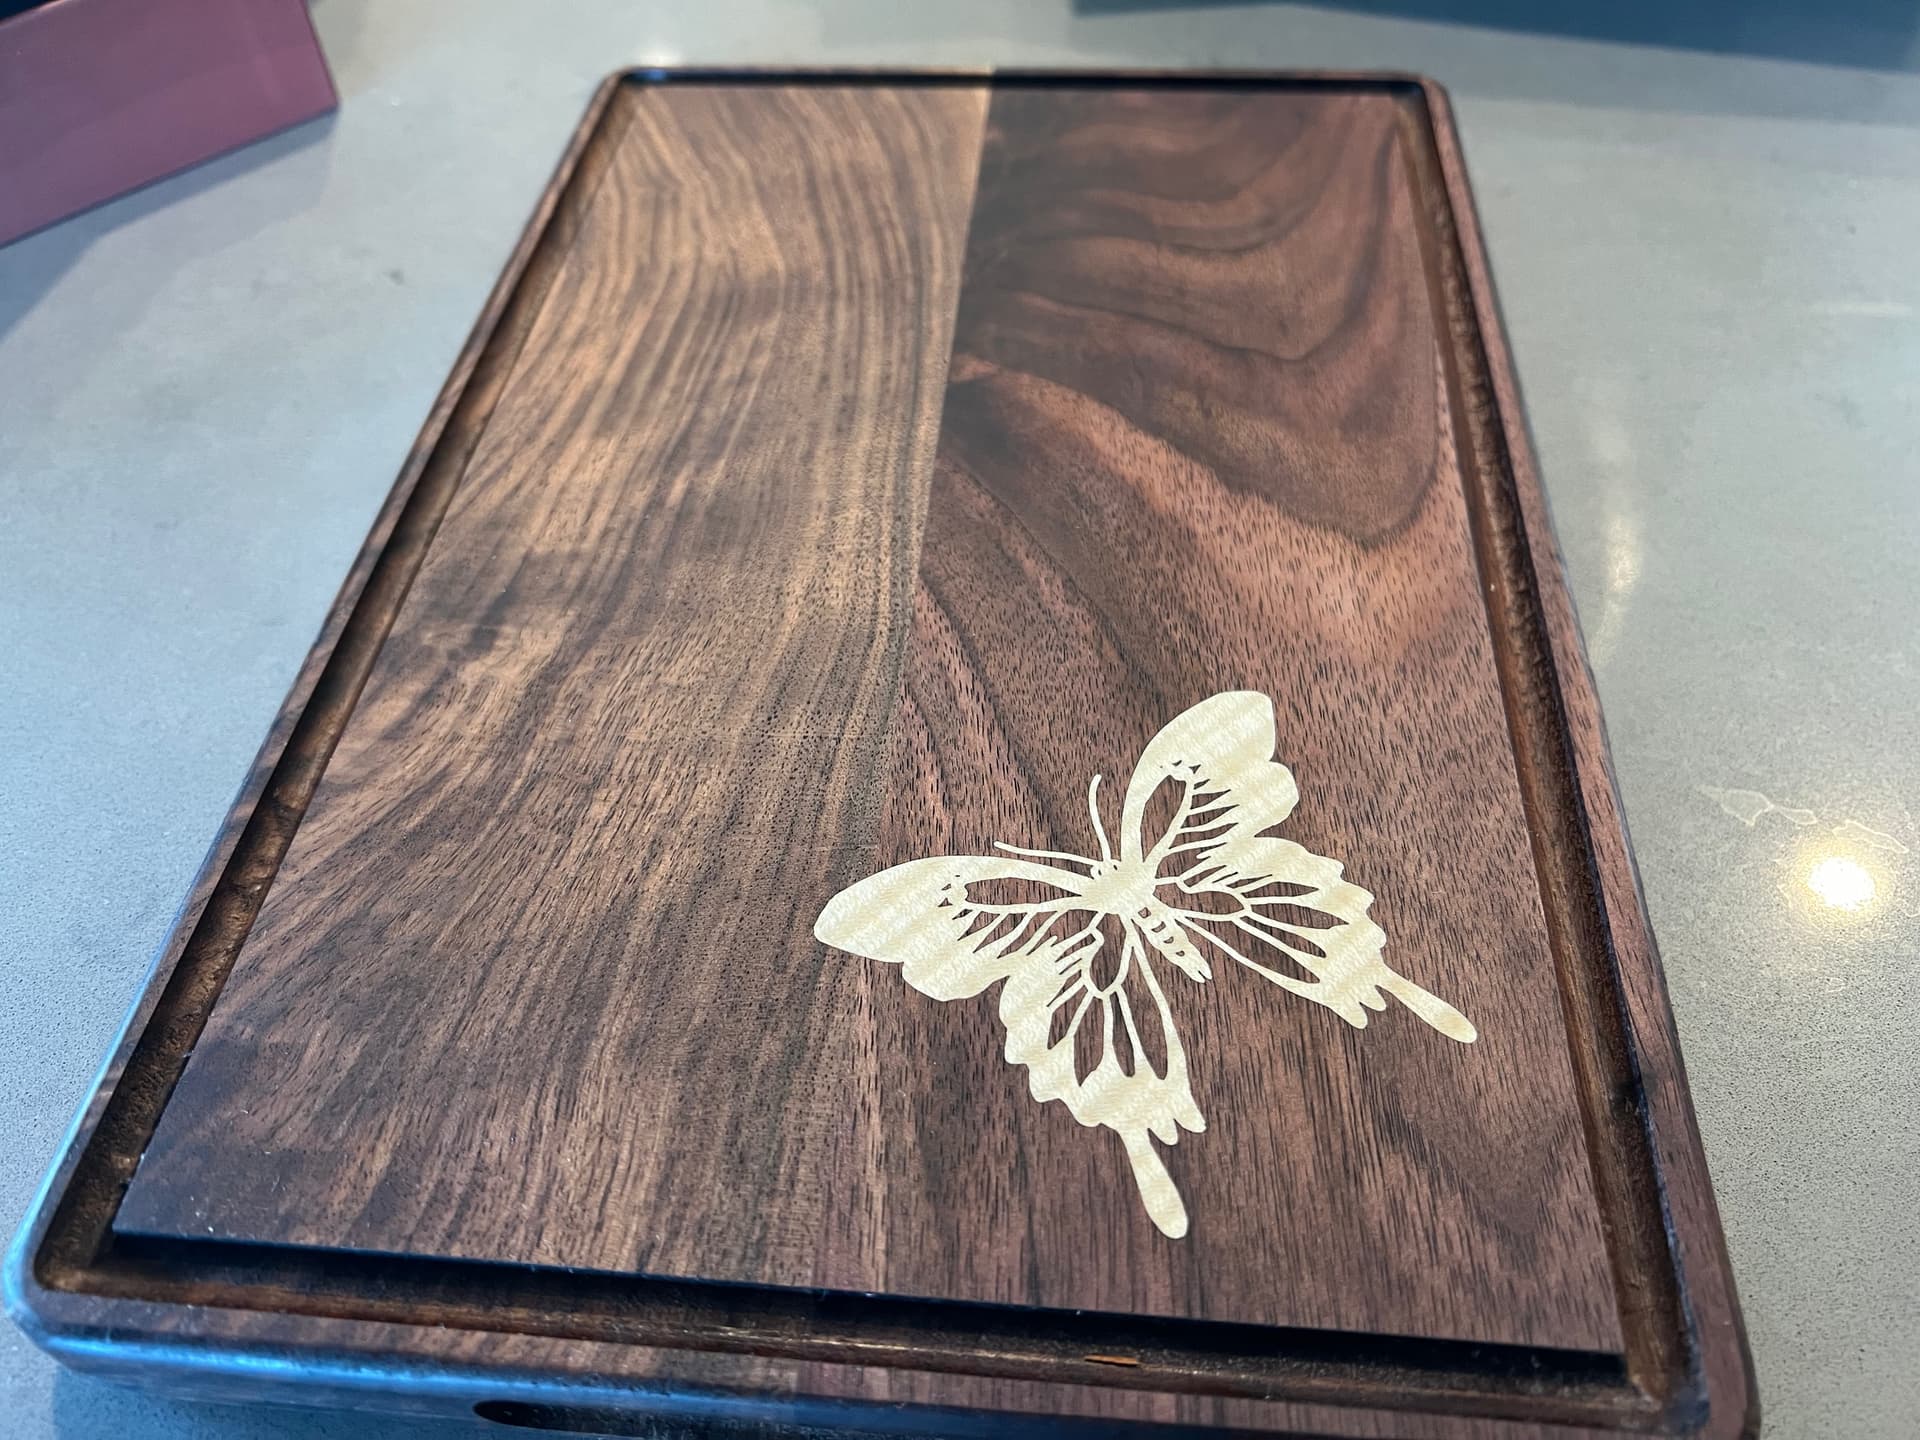
The butterfly was from the Glowforge stock image collection. I imported it into AI to expand the paths a bit so that the delicate webbing of the wings would be a little wider (and stronger). I cut it on the Glowforge with transfer paper on top, then removed all the “holes” by picking them out with an Exacto. All the bits of transfer paper need to be removed as well
The kerf of the cut is wider on the upward facing surface, and the cut is cleaner. Important: you must flip the cut veneer over to get it to fit into the engraved recess in the cutting board. Because of this, you must REVERSE the image in Glowforge before engraving the cutting board!
You will need to find the right settings to engrave the recess. Since the veneer is 0.024" thick, shoot for something slightly less, like 0.02" If you go to deep, you can’t sand the inlay flush later. Too shallow, and you may sand through parts of the veneer, eliminating it.
Once you have your recess cut, gently test fit the butterfly in place. Don’t press it in too hard or you will never get it out in one piece! Next apply good waterproof wood glue to the mating side of the butterfly and place it into the cutting board recess. It won’t go all the way in, but you are going to clamp it later. Don’t worry about glue squeezing out. I will get sanded off when dry.
Place a piece of wax paper over the inlay area, then a flat piece of hardwood over that. Clamp everything together well, and let dry. Then remove the clamps ad wax paper and orbital sand with 220, then 320 grit. Oil with your favorite food grade cutting block oil (I used coconut oil).
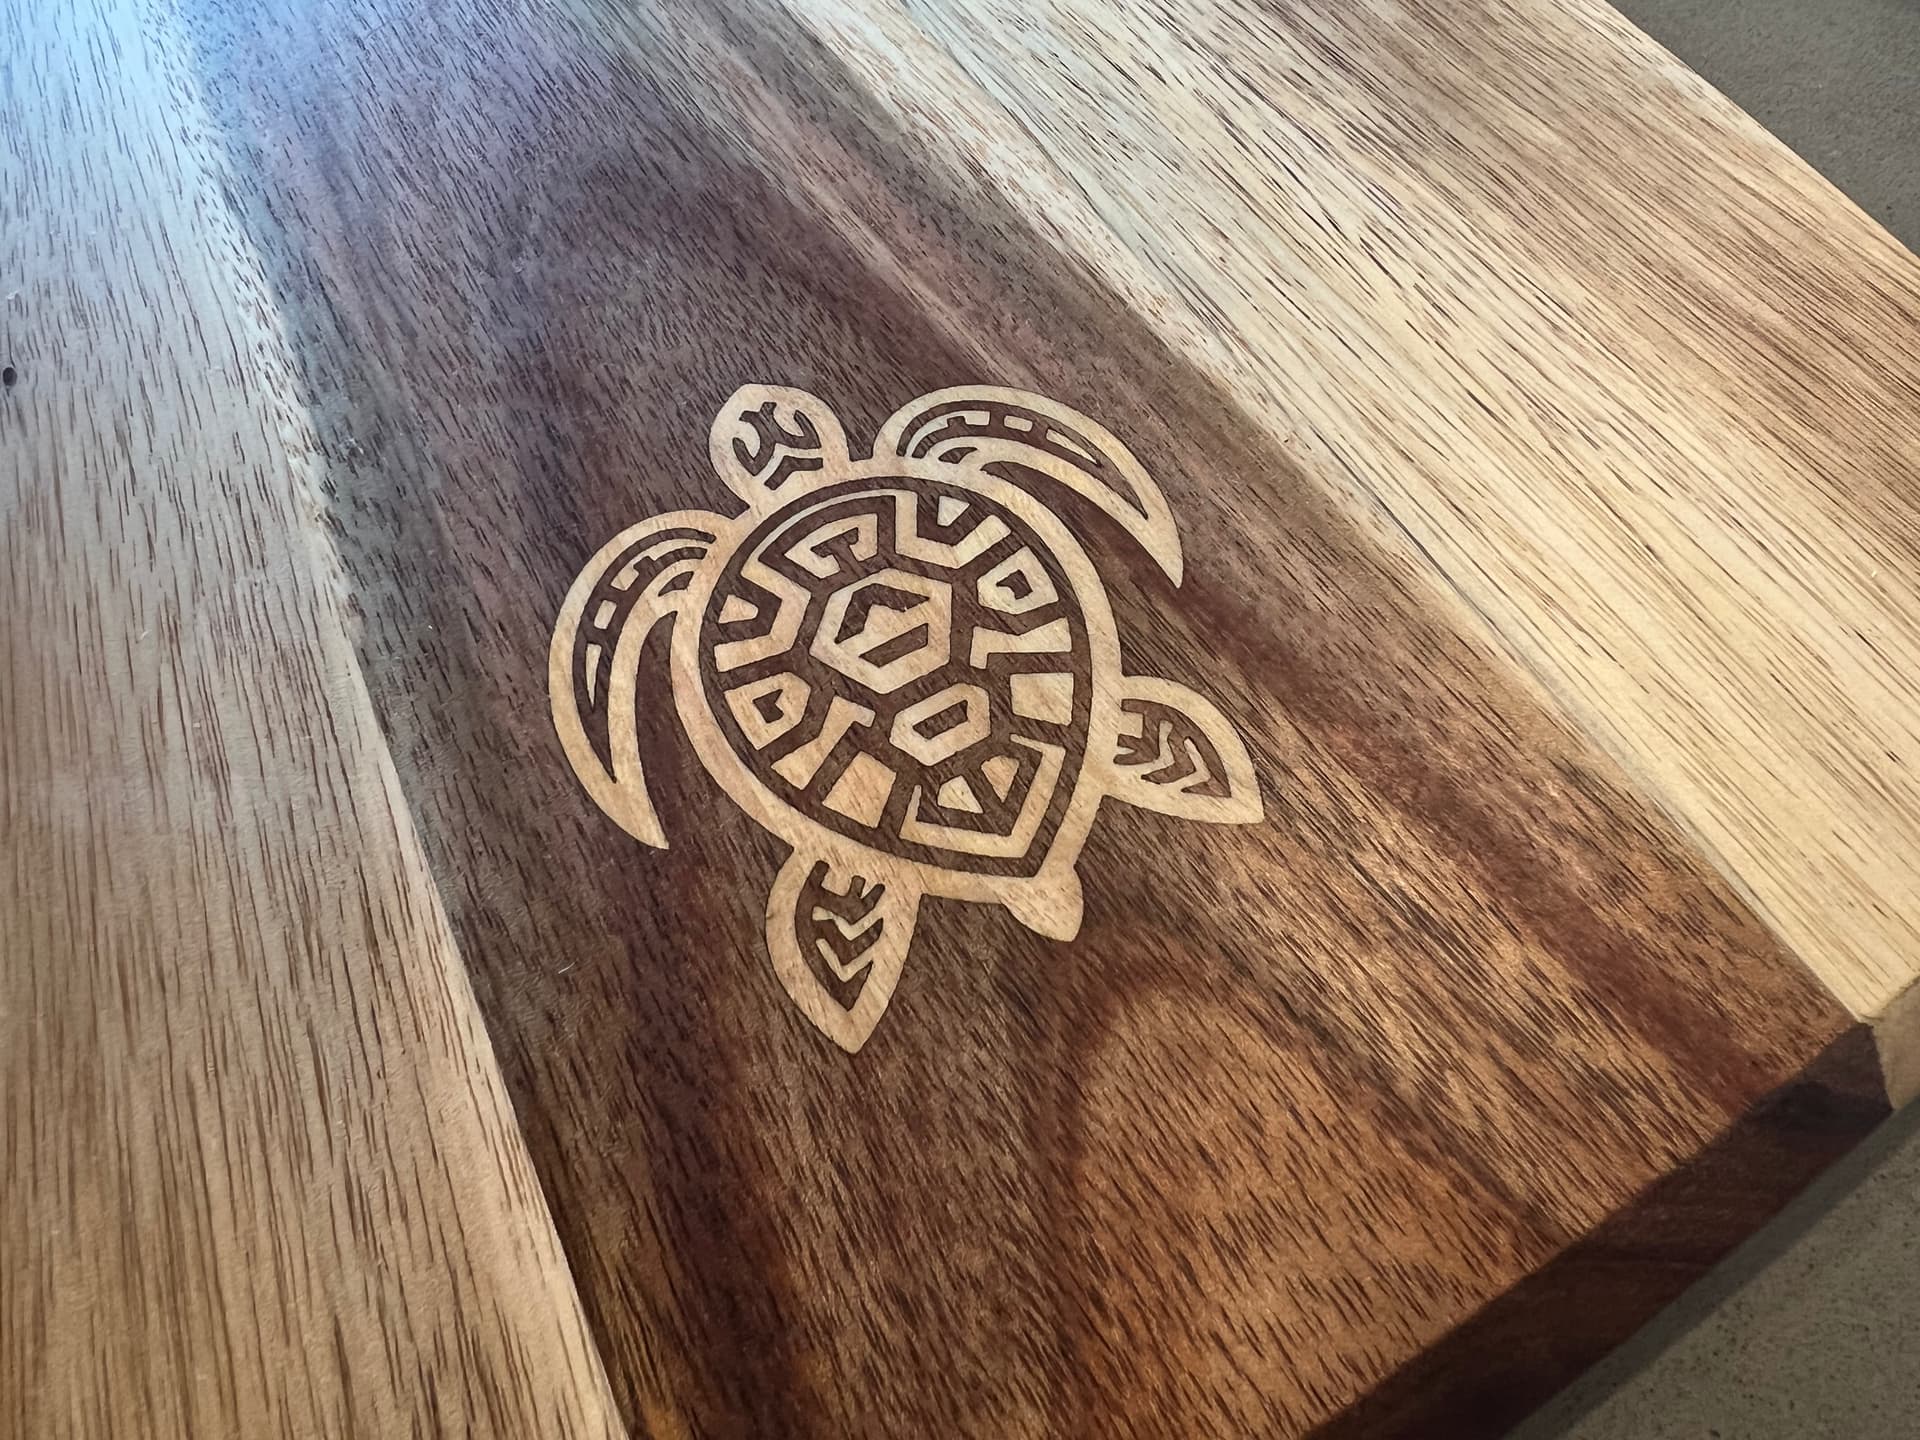
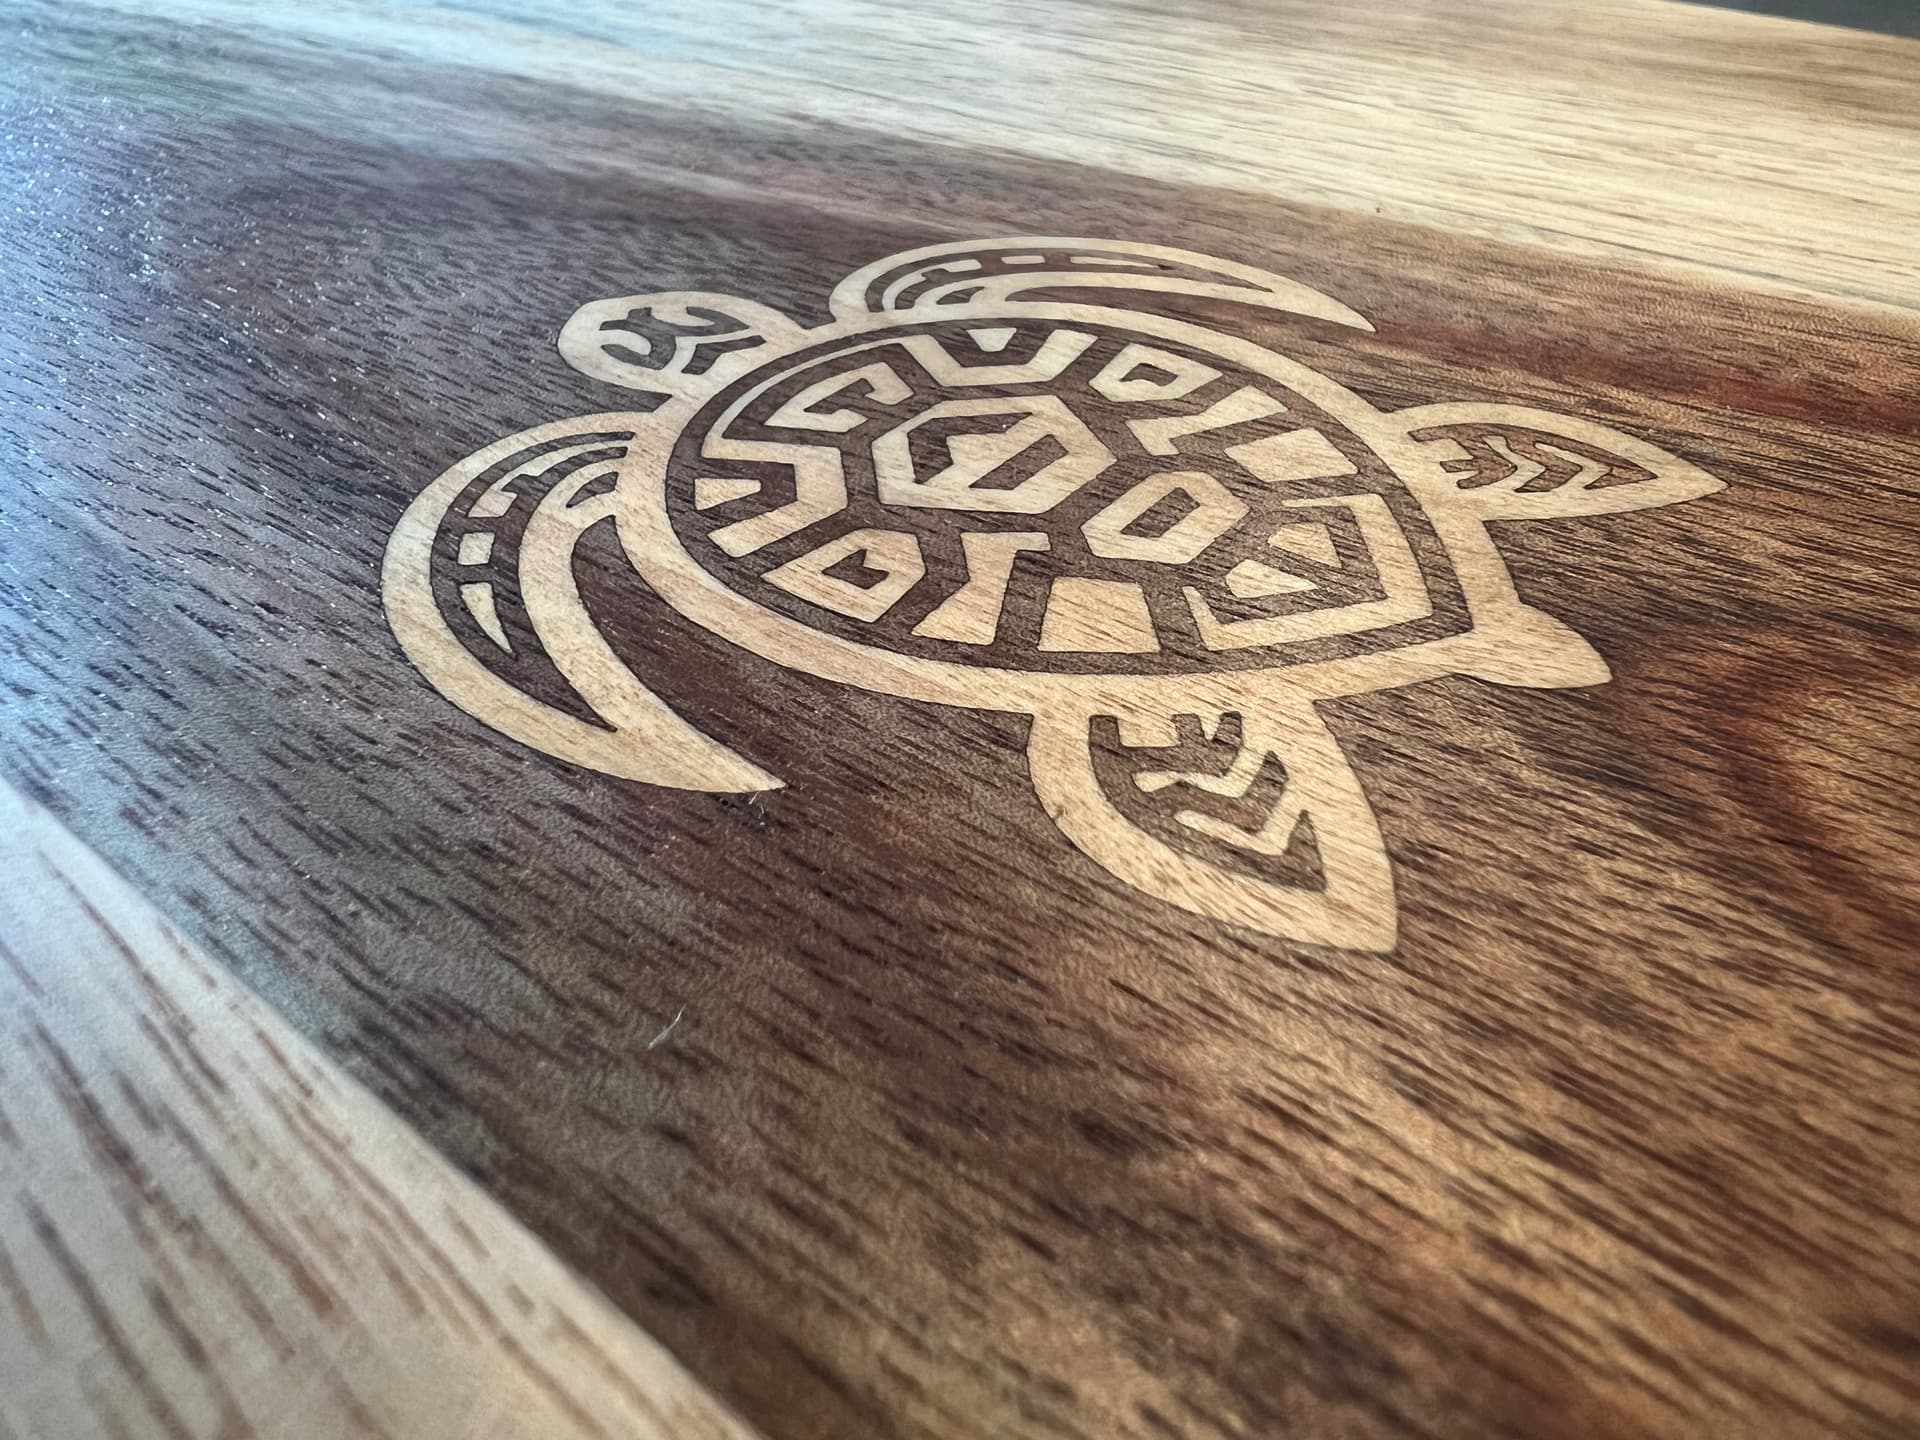
The turtle was a little more tricky. If you look, you can see that there are lots of little bits of inlay that “float”, or are isolated from the others. In order to avoid placing each piece by hand, I did the following; After cutting the veneer and Before removing it from the glow forge, place a fresh piece of transfer paper over the top of the turtle. Remove the veneer, flip it over, and pick out the unwanted wood bits from the design with an exacto, leaving the desired bits still stuck in position to the paper.
Then reverse your image, engrave the cutting board and glue in the veneer assembly of bits still stuck to the transfer paper as before. The rest of the process is just like the butterfly.
Cheers,
Matt