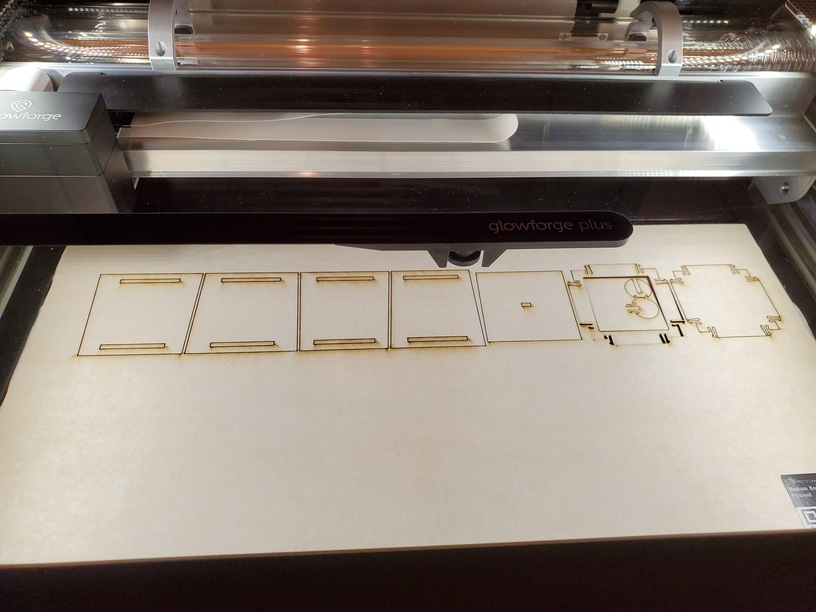
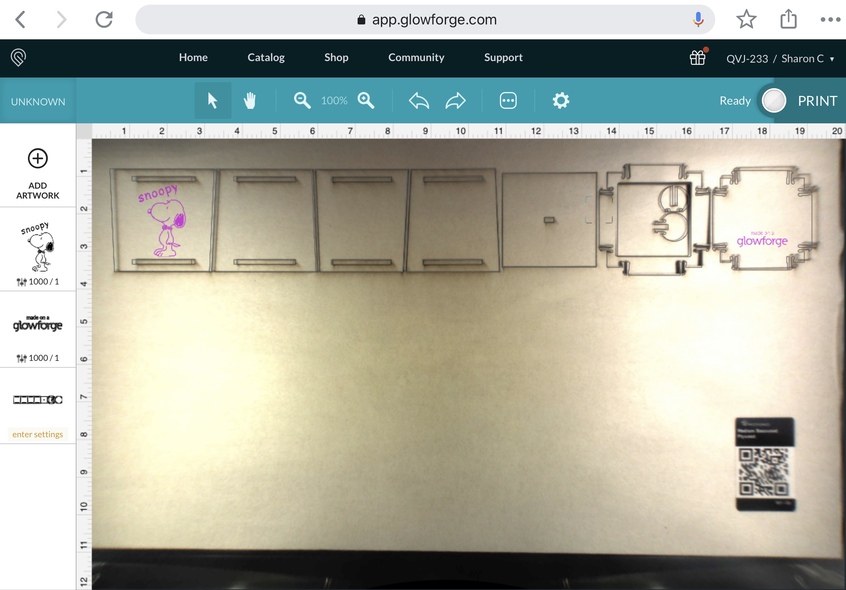
I just setup my new GF and opened up one of their projects to test everything out. I choose the little snap and store box. I put in the med basswood plywood sample that came with it. It has a GF logo graphic on it and I added a little snoopy to play around. It cut everything but did not etch the graphics so not sure what I did wrong? Screenshot and photo of cut minus the graphics
1 Like
If you look at the speed and power settings in your etches, you will see they are set to 1000/1. This means they worked, but the laser power and speed were set too fast and too low to make a mark in the material.
You will want to set your material using the drop down - click Unknown and select your material for the defaults. You may also want to go back and look at the tutorial for the first three prints to get a better idea on how to use these settings. There is also a huge resource on this forum for new users.
7 Likes
Power on 1 for Snoopy and 1000 speed. That means no marking.
4 Likes
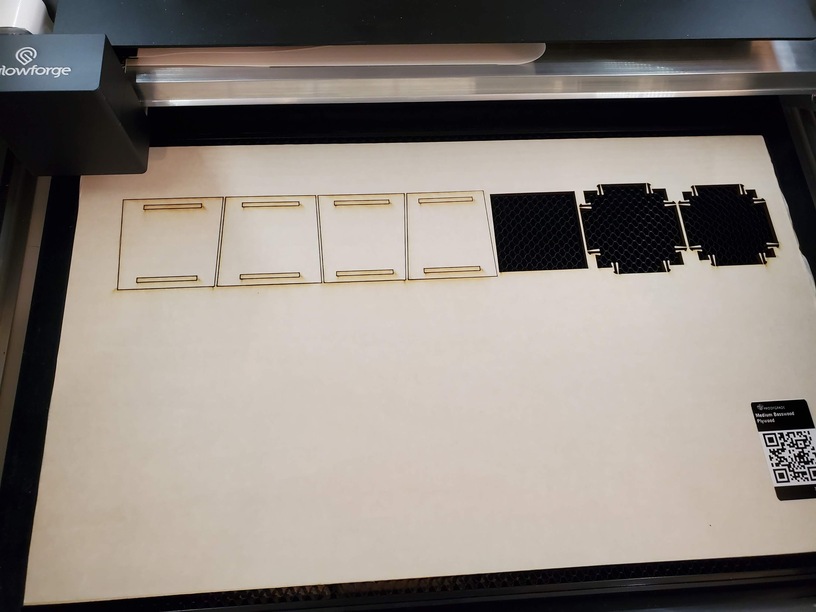
As your material isn’t set and hasn’t been autodetected it is hard to diagnose the cuts. I suspect they are close to being all the way through since the settings were the same for those and the other cuts that worked. A sharp hobby knife will probably release them. It may only be the masking that is holding them in.
With all wood products you will get some variation. This can be due to manufacturing variances or simply a difference in humidity between when they were made and when they were cut. You need to make sure the material is always flat on the tray. Use small magnets or tray pins to make sure nothing moves. Then make sure to store your material flat so it doesn’t warp over time.
If you find that one sheet isn’t cutting consistently, you can check it for thickness to make sure it is not thicker than the others. If you find it is thicker, you will need to adjust your cut settings manually by either raising the power by 5 or lowering the speed by 5 or 10. From the results you have shown, it looks like this sheet may be just a little thicker than expected and you should bump the power up a hair.
If you have doubts about a cut, always keep the sheet in place and check the cut before you move anything. Then you can always rerun the cut if it isn’t through the material.
5 Likes
As others stated, the settings are off because you didn’t select material. As a safety measure the Glowforge defaults to power 1 when settings/materials are not selected.
3 Likes
I’m so sorry to hear that you hit this snag.
As a reliability measure your Glowforge defaults to power 1 when settings/materials are not selected. It looks like your Glowforge did not automatically detect the material type. If this happens again, you can always select your material – here’s how:
- Sign in to app.glowforge.com
- Open your design
- Click “Unknown” on the left hand side of the Workspace
- Type the name of the Proofgrade material in the search bar
- Select the correct Proofgrade material
Please let me know if the same trouble occurs after properly inputting the material type.
It’s been a little while since I’ve seen any replies on this thread so I’m going to close it. If you still need help with this please either start a new thread or email support@glowforge.com.