This is the design write up of my box presented here.
3D Design
The first step was recognizing the need for a new box. Also the design intent. So I wanted to house my cauldron, it’s heater base, the pikes, the fuel and matches. I designed the whole thing in Autodesk Inventor, to 3D model the thing. Here is a view of the design.


There I designed the whole kit in different parts with the joint and kerf included (didn’t control for the kerf voluntary, because I wanted to glue it together. Should have had some)
All the sides except the top are designed in a two-layer design. It allowed me to create stair style joint, similar to dovetail, without engraving. Great idea in principle but hard to implement at gluing phase (see later)
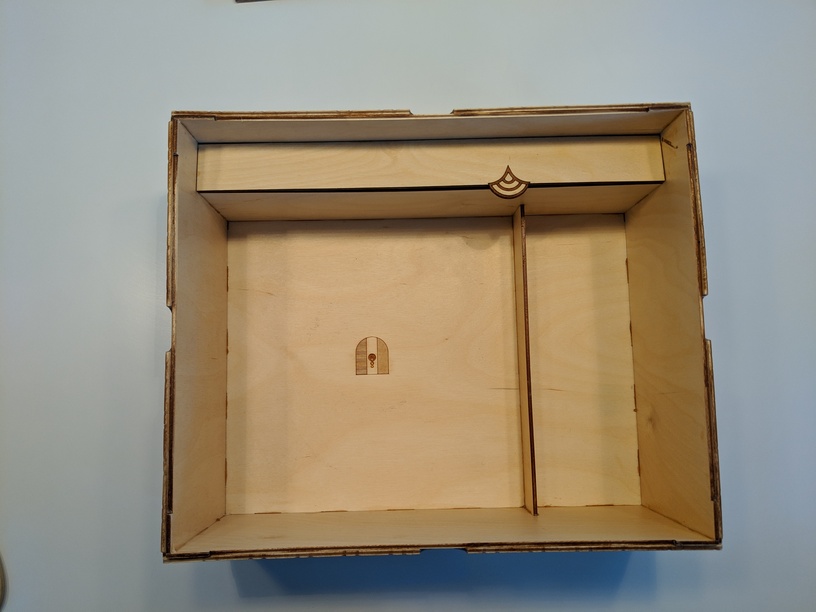
(in the image, each colour is a panel, 1/8") The step’s width is equal to the thickness. with distributed equal spacing for the short side. But 2 layer allowed me to hid the inner mortise and tenon joint for the inside separator and the inside cover opening system.
2D Design
Then I exported the parts into separate 2D files dwg, then converted it to dxf, then opened Inkscape for SVG. I combined them in one file. with many, many colours for each step.
It is here that I added the engraving design. I also added the holes and taps for the side and the inside cover. I added them to allow a flow and inclusion of the designed motif.
The design motif is a recreation/ cleanup from freepik.com, here is the pattern, in the file green.
It was a bit hard to have a perfectly symmetric pattern in Inkscape. Beware of gaps when adding/ expanding. I would suggest keeping the path with a stroke width the longest and only converting from stroke to path at the end, usually covering the misalignment by overlapping stroke width. I sure lost a lot of time on that part.
Here is the file.

Engraving and Cut
I applied the engraving and planned the design.
The cover engraving was too big to do in one pass, so I cut it in half. But since the top 2 sections were not united, the machine made them separately. creating a hair-thin unengraved line between the two half (see red arrow).
No one can see it, but I saw it and compared to the bottom half, it really bugged me. Also, since my masking was made with two pieces, there was an overlap, that changed the engraving (see green arrow). It taught me to buy 12"large tape for next time.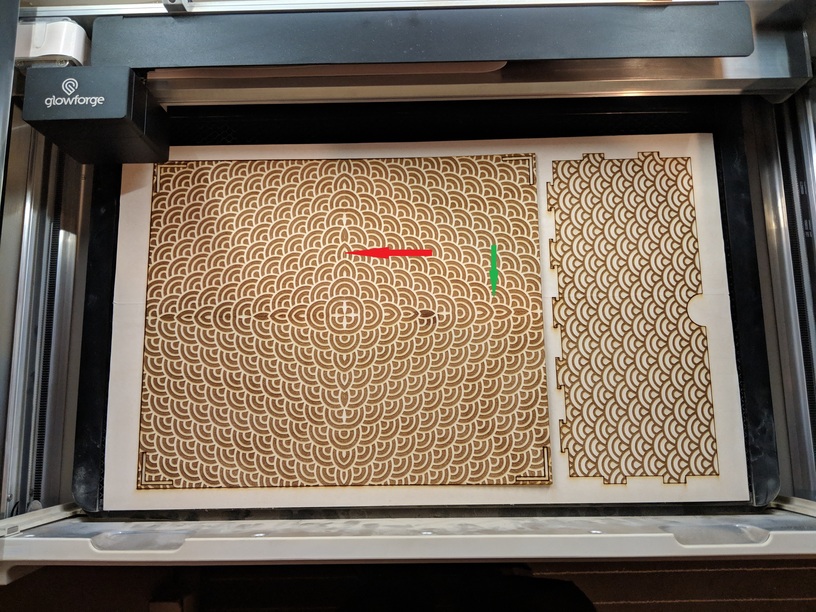
The whole engraving of the 4 sides + the top took around 9 hours.
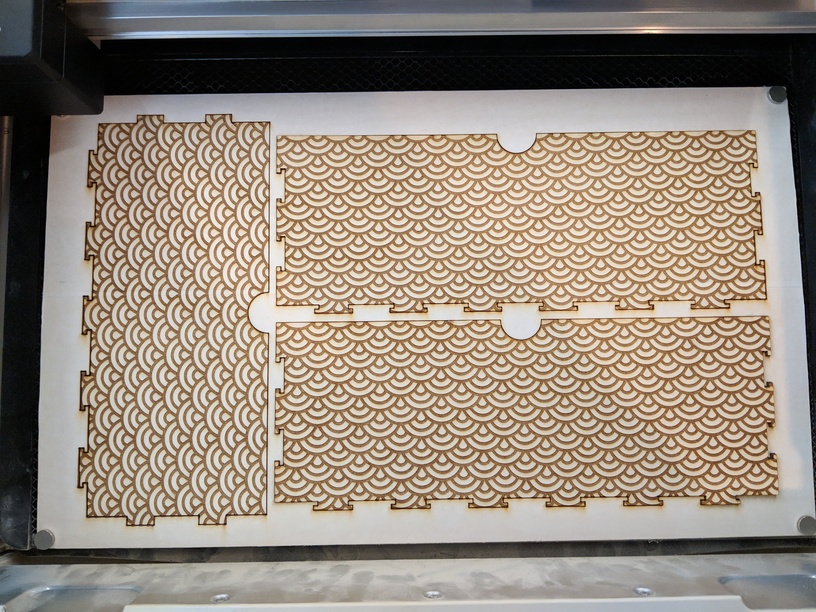
And god did cleaning the tiny pieces of masking took too long. Also, yes the top is inverse to the sides’ engraving.
The rest of the pieces took around 1 hour to cut.
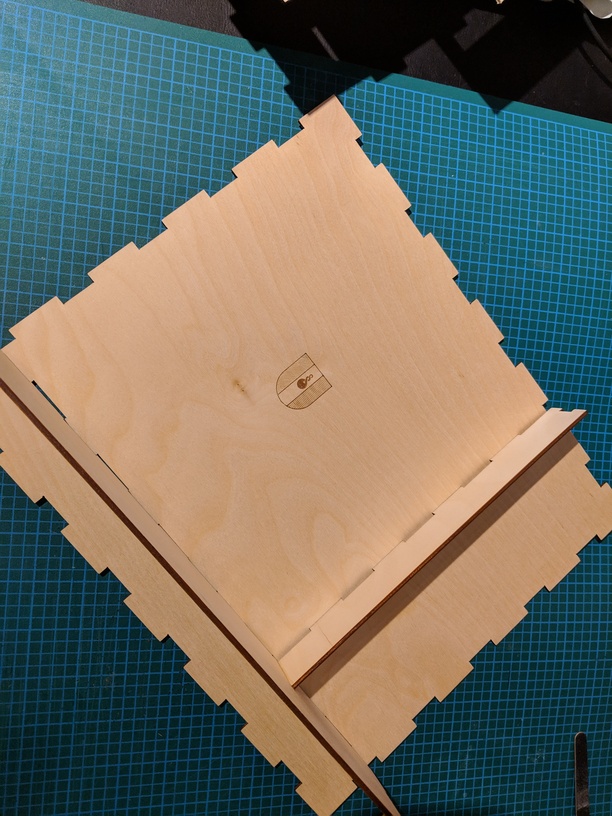
I had a lot of problem of warping between pieces, so I did a water spray on one side, place underweight and next to heat to unwrap them. It worked, but it wasn’t perfect. Also, the warping meant that in the laser cutter, some pieces were quite charred and due to the small dimension of the stair steps, they became a bit fragile and/ or didn’t cut through.
Gluing
Next was gluing time. Since I am not well equipped with clamps and it was the first time I used the two-layer design, there was a lot of swearing and hoping for better. I am happy I planned the assembly before, making the position of the pieces obvious and they move little, but joining the two-layer when they aren’t perfectly straight is a nightmare. I power through it, but evident by my multiple question post, I really would have needed an other solution to apply pressure. The wood glue + small crazy glue option, that I saw afterward, could be interesting.
PS yes this image is reverse, I glued the first three-part the wrong way around ![]() unglued and redo the engraving of my sigil.
unglued and redo the engraving of my sigil.
After much wait, I varnished with 3 coat of waterbased clear varnish.
To be noted, the inside cover had to be inserted before gluing the outside layers of the sides, to protect it from being glued in, I put a small packing tape piece over the hole between the layers, to prevent leakage.
Conclusion
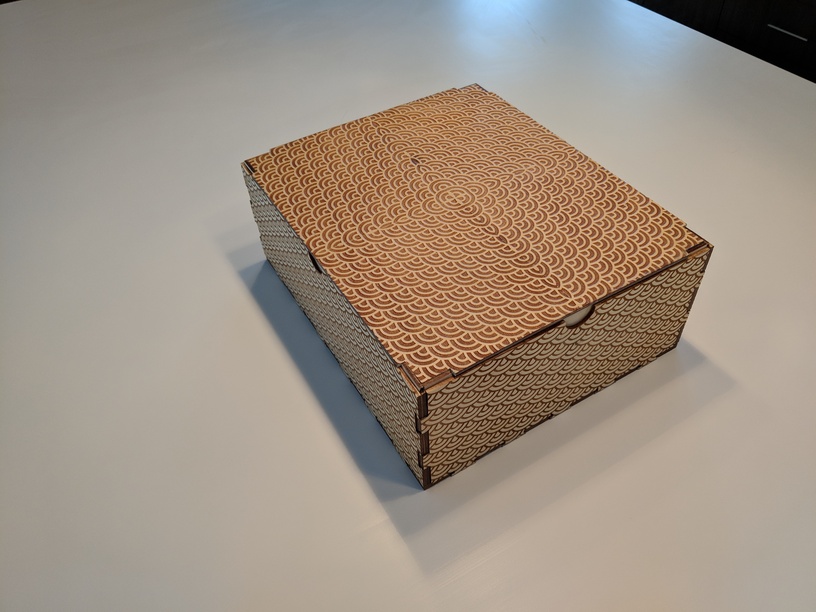
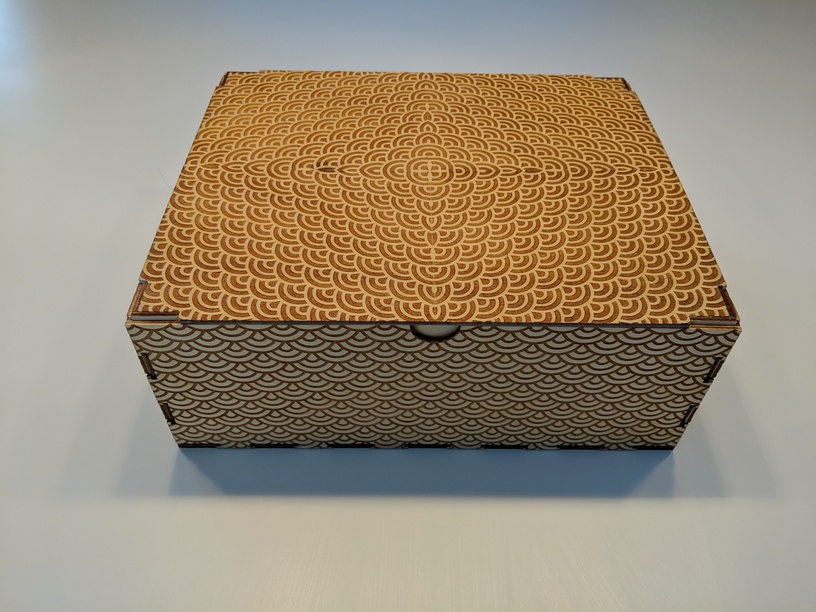
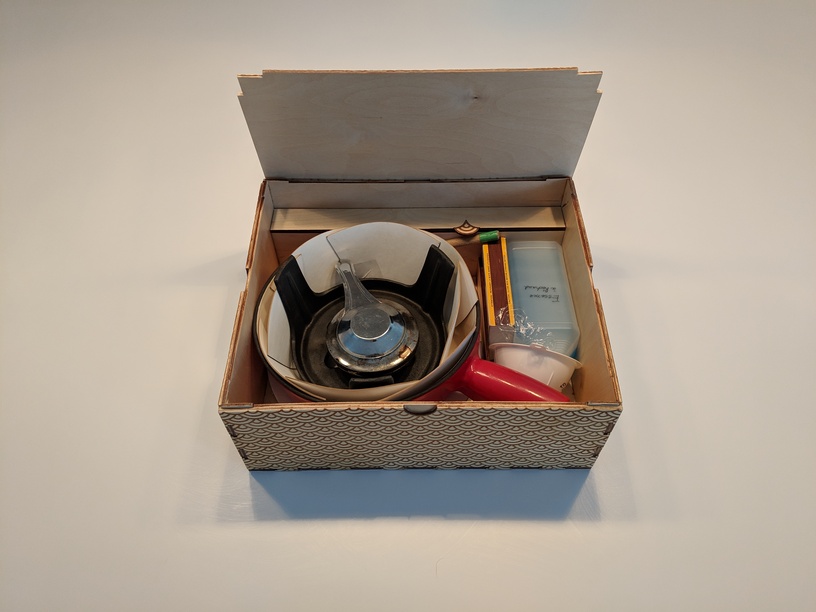
The box does exactly what it was designed for. All the pieces I wanted in are there.
The main cover designed is to be changed, the corner small pieces are too flimsy and already broke on me. But by removing them I can still use the box. It needs to be redesigned, but the side cut out helps.
My steps could have been better. for example I could have varnish then glued, so all the pieces would have been easier to do. Also, I could have joint each layer together first then assemble each side. Allows for joining flat and so use big flat weight, but it also allowed for side movement and so misalignment. Assembling layer by layer allowed a better control, prevent misalignment, but harder to glue together.
Use more magnets and hold-downs during engraving to prevent warp and warp effect on the cut.
In addition
There were old cardboard “circles” separating the pieces of the cauldron kit and I decided to reproduce them, here are the files, not convinced yet.
