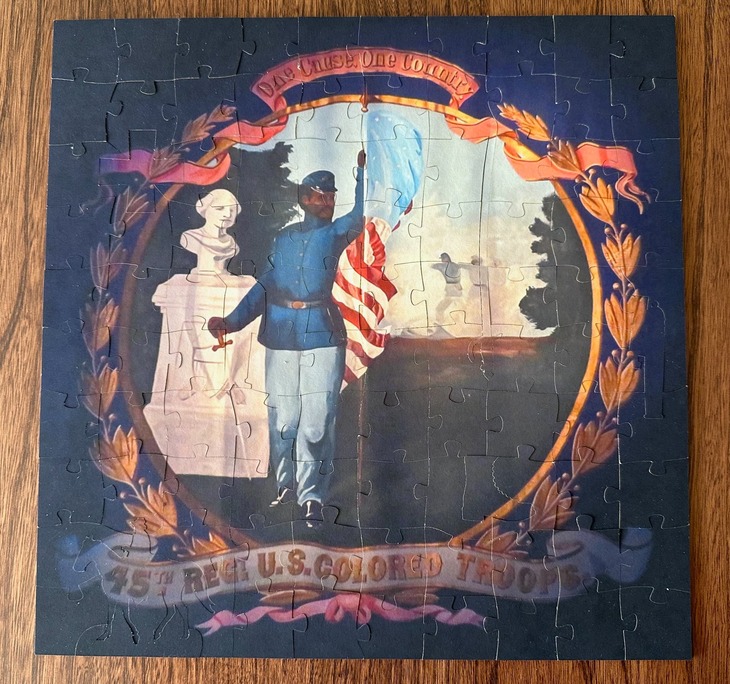
My father-in-law got uncharacteristically enthusiastic about an ancestor of his who fought in the Civil War in the United States Colored Troops.
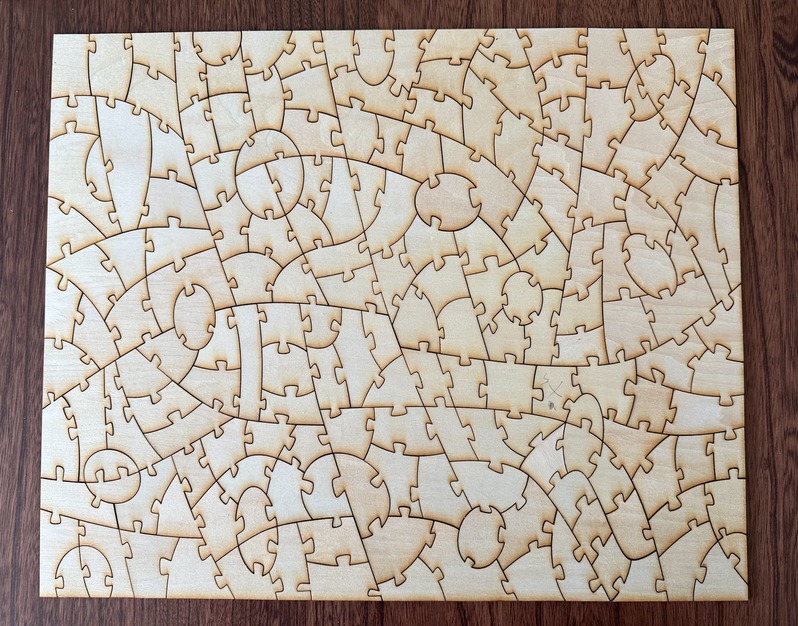
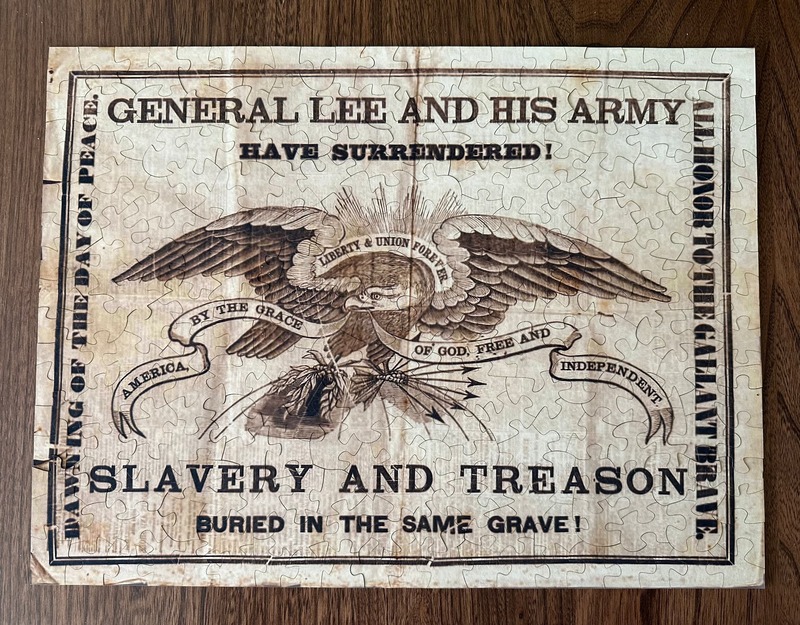
So I did a series of 3 jigsaw puzzles, printed on watercolor paper and mounted on plywood. They all came from time-worn Civil War era documents, and look it!
Those look fantastic! When we belonged to CMA, we did a motorcycle run with a group of “Buffalo Soldiers”, some of whom were direct descendants of the soldiers. Some marked remains had been found at an old hospital in Phoenix and there was a huge motorcycle procession (including many motorcycle clubs, including Hells Angels) as the remains were transferred and reinterred at a National Veteran’s Cemetery at Fort Huachuca. It was extremely moving (no pun intended). Something we were very proud to take part in. We learned they got the name “Buffalo Soldiers” because the Natives thought their hair looked like buffalo hide.
Thanks. I love doing more interesting cut patterns. If I try to draw completely freehand without a plan, I find it difficult to maintain a consistent style throughout the whole puzzle. So it helps to have a simple strategy or guide.
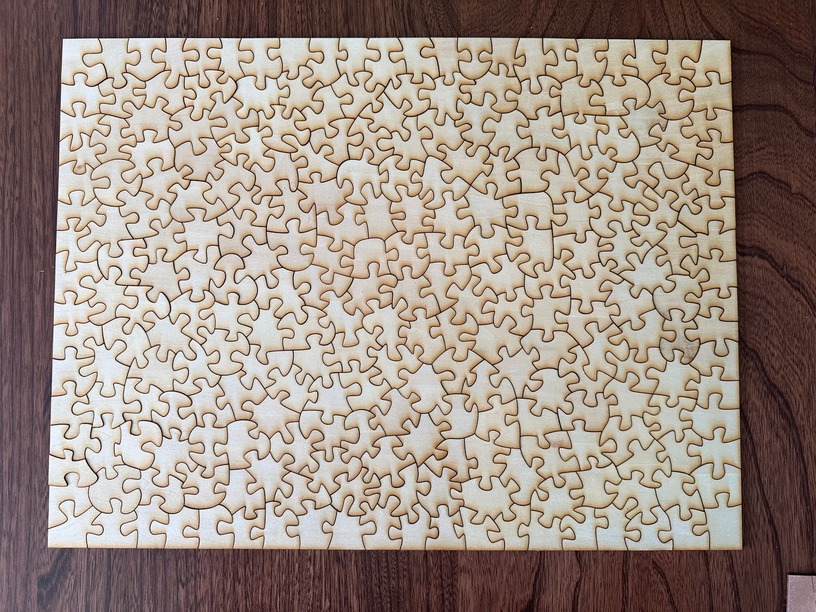
For #1, it was entirely hand-drawn (in the vector editor). The strategy was to divide the canvas into large areas using curves, throw in a few ellipses for variety, and then recursively subdivide the areas with more curves until they were the size of single pieces. Then I added all the knobs. This is (so far) my favorite style, giving interesting piece shapes.
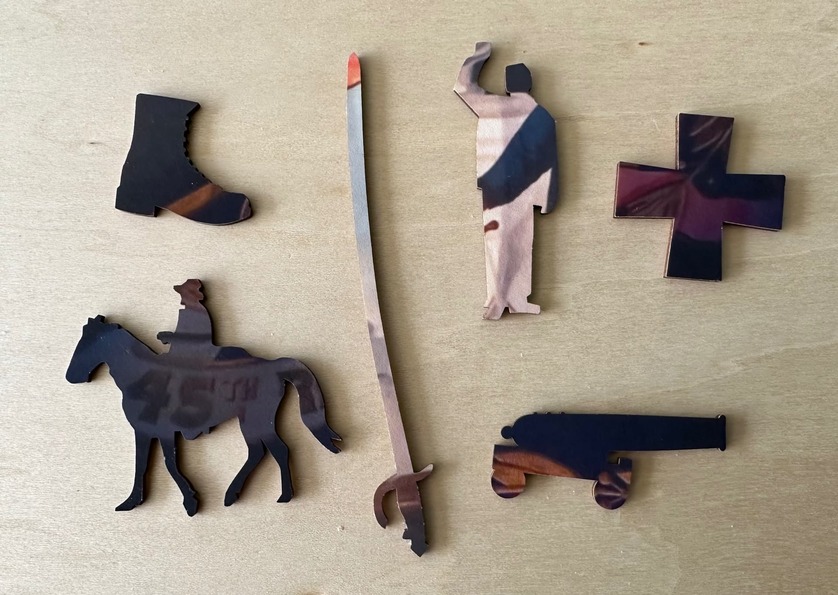
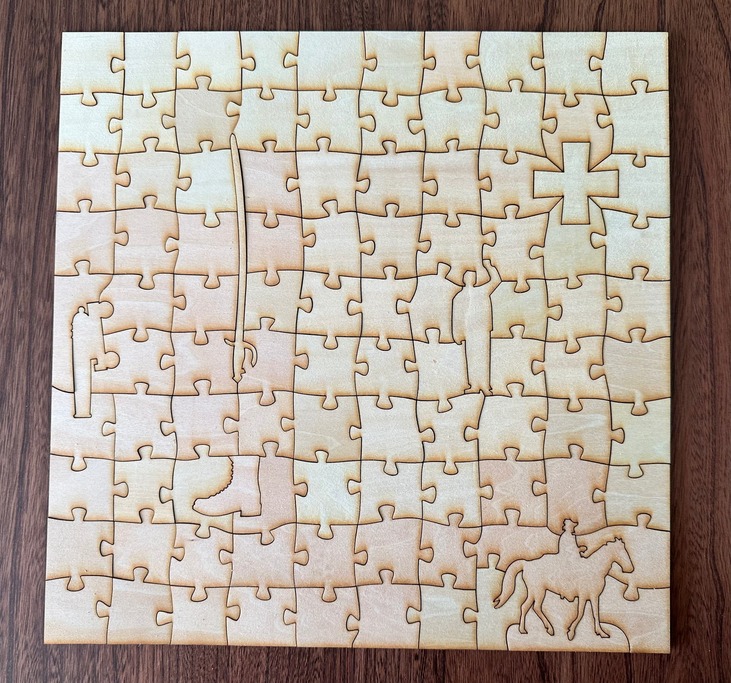
For #3, I first created a guide. I started with a random but even distribution of points, and generated a Voronoi diagram from that. This gave me irregular polygonal pieces of similar size. Then to give it an organic hand-drawn look, I loosely traced over the edges with a vector pen, rounding the lines, curving the intersections, and adding large irregular knobs.
These are awesome historical pieces. Thank you for sharing. Would you mind sharing what you used to cut the puzzle pieces? Is this something from Glowforge or a different site?
Yes, I used a Glowforge to cut them. You might think the pieces have a stamped look from the back, but that’s an illusion caused by the smoke char around the cut lines. I cut my puzzles upside-down and I don’t mask the back, because the masking can fly up and mess up the cut.
Or you may have noticed that the pieces don’t look like they came from the same board. That’s because I separate the pieces and adjust their outlines to get a snug fit (unlike the loose fit typical for laser-cut or saw-cut puzzles). Each puzzle required a handful of 8"x12" boards.
These are fab! As a sidenote, there is a great group called buffalosoldiersofseattle.com that would be super interested in these. It’s run by volunteers and your FIL may get some good information as well! They were featured on the buffalo Soldiers doc on PBS a few months ago.
These are great! A detail that might interest you, it turns out that using thinner paper is better for paper-on-wood puzzles, because the thick paper can actually separate from itself over time. You will see this in the corners pulling up white. Let me know if you want to deep dive into wooden puzzles, I am pretty connected with all the groups For example, PuzzleJamSouth.com is an event that I am helping to plan out, and will be everything puzzles, including a speed that a scroll cut jigsaw maker and I are designing, this September, 8th-10th in ATL, GA.