Thanks, I’ll have a look. Here’s me: http://www.instagram.com/florenceturnour
1 Like
Hi there! Can you share the settings you used to engrave these relief blocks and what was the material?
2 Likes
The top (printing) layer is Baltic Birch plywood. I used Medium Basswood Plywood proof grade settings for both cutting and engraving. The engraving was the SD graphic setting with 270lpi. The other layers that hold the blocks together are Hardboard from Home Depot, and I actually used the Basswood settings for that too, though you can probably turn it down a bit (kinda crispy around the tight corners).
2 Likes
For mine I have been all over the map and am still working to optimize for best printing. These are also basswood ply and the relief figures were cut at 400/Full/dots and 225 LPI single pass. For the engraved pieces (figures cut down into plate as opposed to cutting around the figures in relief) I used a much higher speed since I did not need a lot of depth to avoid ink. These plates ink the entire surrounding plate leaving the figure uninked in a kind of negative style – see fish
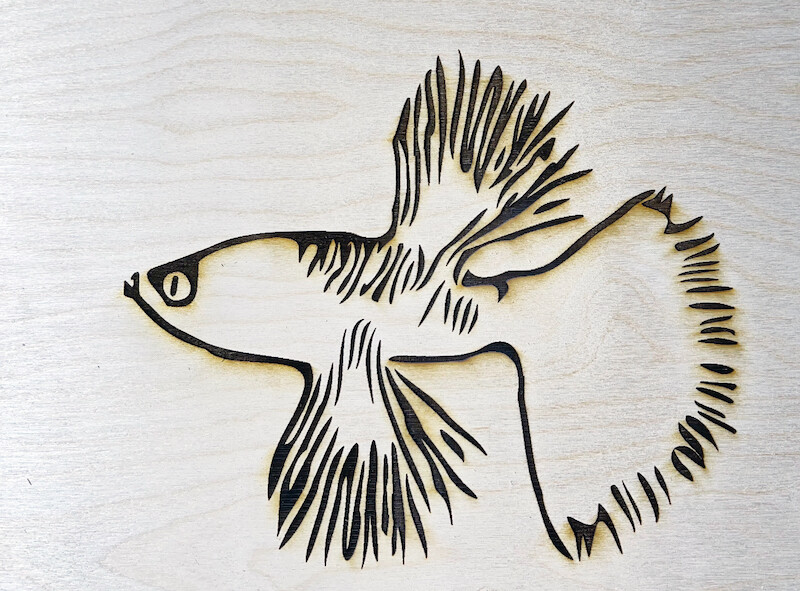
- 7000 speed, full power, 170 LPI single pass.
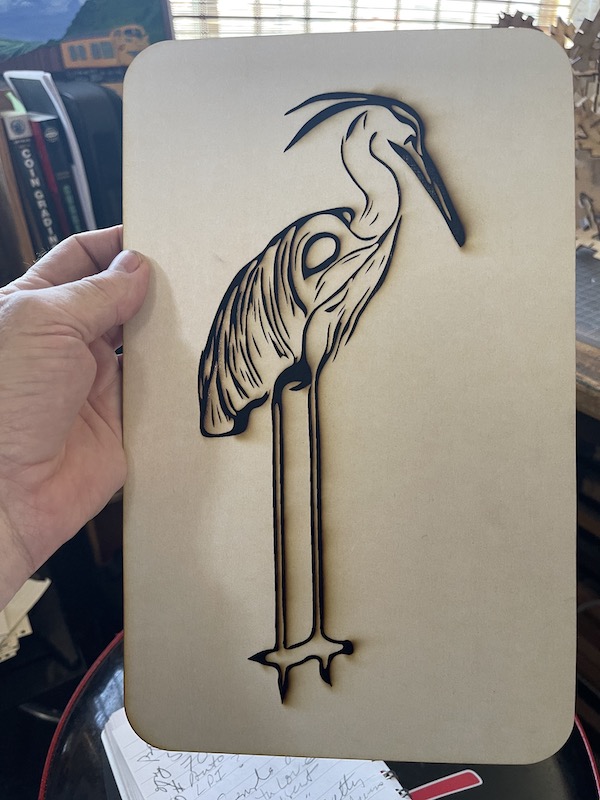
Here is another engraved figure also with deeper cut.

9 Likes
What ink are you using?
1 Like
I started trying to explain what I’ve been doing lately, but it’s kind of complicated. I have been using a combination of cutting holes and engraving, depending on the size of the area that I need to carve out. If you are interested, here’s an instagram post:
Here’s one that shows the peg board I use for alignment (hope that makes sense). These blocks are not engraved, though, just cut.
9 Likes
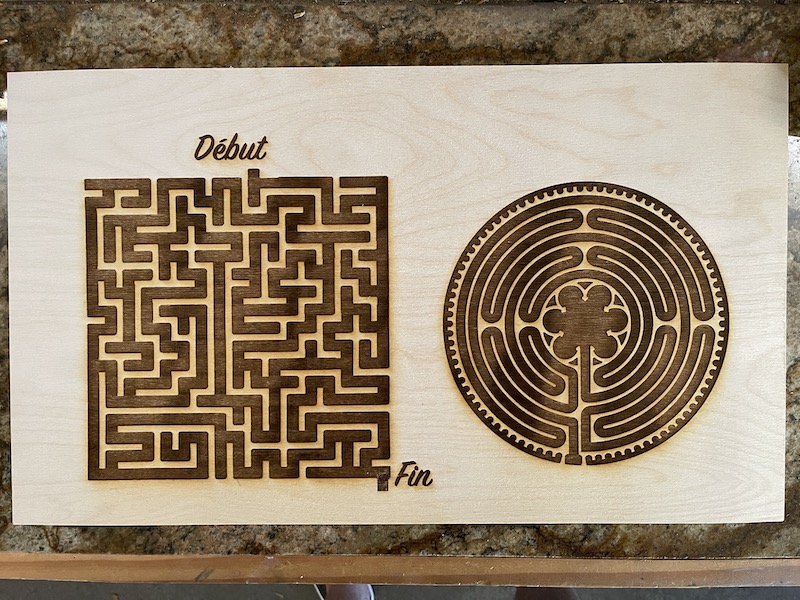
Very nice! I created a plate of a maze and a labyrinth but liked it so much on the wood I just called it good and hung it up!
6 Likes
Akua inks.
2 Likes
Those mazes are cool. I have been thinking I should just make these shapes out of wood and keep them instead of printing with them.
OK, so I haven’t tried that ink, and I’m not entirely sure of what I’m saying, but I know a printmaking professor, and she told me that inks make for block printing (gosh I wish I remembered the exact word she used, I think it was stiff) are stiffer than the inks made for intaglio. I asked her what the word (I think stiff) meant and she explained that the ink would not press around the edges of the design, instead staying on top, allowing you to get a crisper print. The one she recommended was Speedball professional relief ink. I haven’t bought any because I have an ample supply of the Cranfield Safe Wash ink which works quite well (and was uncheap, so I want to use it, seeing as I already bought it). Anyway, you might be able to get away with the faster engraving if you use an ink designed for wood blocks.
That’s why I asked what ink you were using, though after I asked it, I realized that while it might be the right question, I don’t really have the knowledge to follow up on it very well!
2 Likes
You are correct about the ink. The term is viscosity. I just experiment until I get it right. If you have any Clabber Girl Baking Powder you can add small dustings to the ink to stiffen it up. I have my best results with oil based inks but hate the solvents for clean up so I want to try your ink. Have just ordered it from Amazon. BTW Burnt Resin Oil added to oil based ink will do the opposite and loosen up stiff inks.
I am getting ready to etch some intaglio lines in lucite and see how that works. Have been told the lines will hold ink like metal plate. Will let you know if I get it perfected.
5 Likes
Ingenious and beautiful. Would you be willing to share more about your pegboard registration process?
2 Likes
What a stunning result!!
2 Likes
I was just poking around for info on block printing inks a couple nights ago and, found this:
… which might be of interest.
6 Likes
Thanks that was a great article. I have similar experiences, though I have not tried all the varieties he has. I do use Cranfield’s safe wash on fabric, but I’m not making things that are going to be washed and worn.
3 Likes
Sure… let me take some pictures of it. I’ll tag you hen I get it together.
2 Likes
The term she used was definitely not viscosity, but I know what you mean. Looking forward to seeing your results.
1 Like
So do you know if it’s just usual bakng soda that works? Such an interesting idea.
1 Like
Actually it is “baking powder” not soda. My printing mentor introduced me to the thickening concept years ago and I have used it ever since. He used to say it gave the ink more “tack”. I don’t know if anything else will work. I wouldn’t try soda but other powders like talcum will probably work. Baking powder always seemed so beautifully organic! The other side of the coin with the burnt linseed oil works especially when you have older (stiff) ink supplies.
4 Likes

For thickening, I’ve also had luck just working the ink or letting it sit out for a bit (for example, giving Akua an “overnight” sit to get it thick enough to make it an easy relief ink.)
Cranfield doesn’t have the most useful website, but like the rest of the various ink companies they do have some “how to” pages and “influencers” who do demos on social media. I have some Cranfield’s Safe Wash on hand that I haven’t used yet, so I took a look at their guidance on thickening
https://www.cranfield-colours.co.uk/printmaking-inks/
It looks like they have a specific oil and tack reducer for their inks.
Magnesium Carbonate is used often in thickening printing inks. Looking at a post on Briar Press, it seems mostly okay. But the cheaper alternative from that thread is corn starch:
Far down in the thread, they recommend calcium carbonate (not calcium bicorbonate, baking soda).
4 Likes