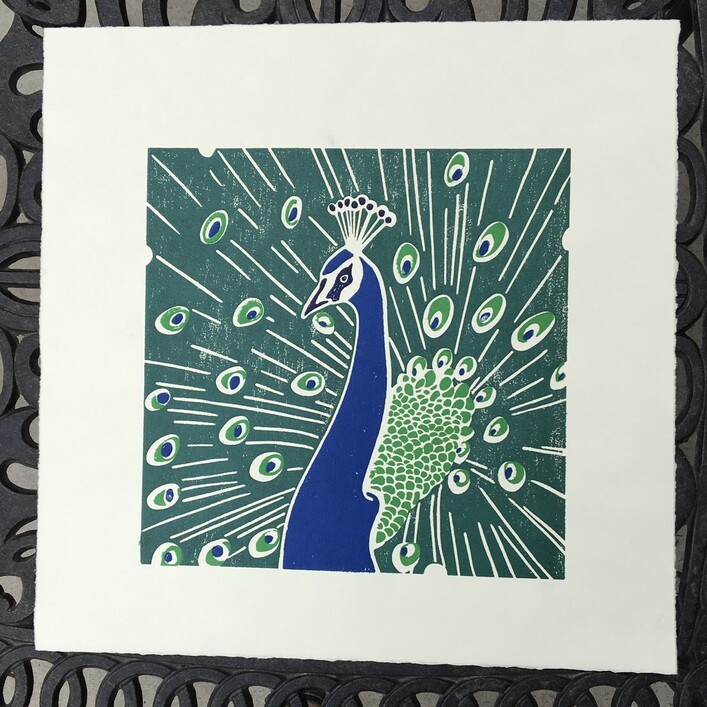
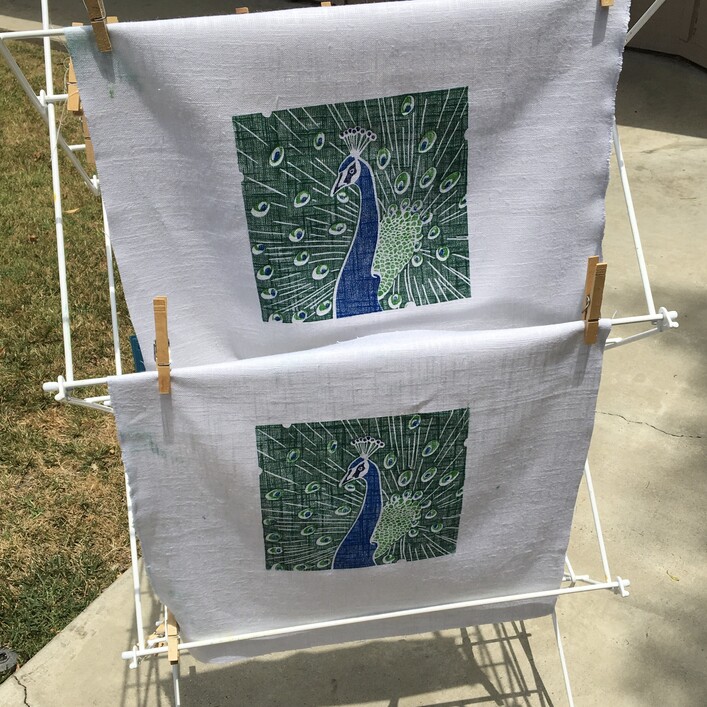
I’ve been making wooden blocks for block printing. Here is my most ambitious project yet, an 8"x8" four color peacock print. I’m printing on both fabric and paper.
The tricky part is cutting it so that it is possible to glue the bits lined up precisely, and designing the second layer of wood in the block so that it helps me line it up while printing. I got very confused while working on it, and started over in the design more than twice, but it finally sorted itself out.
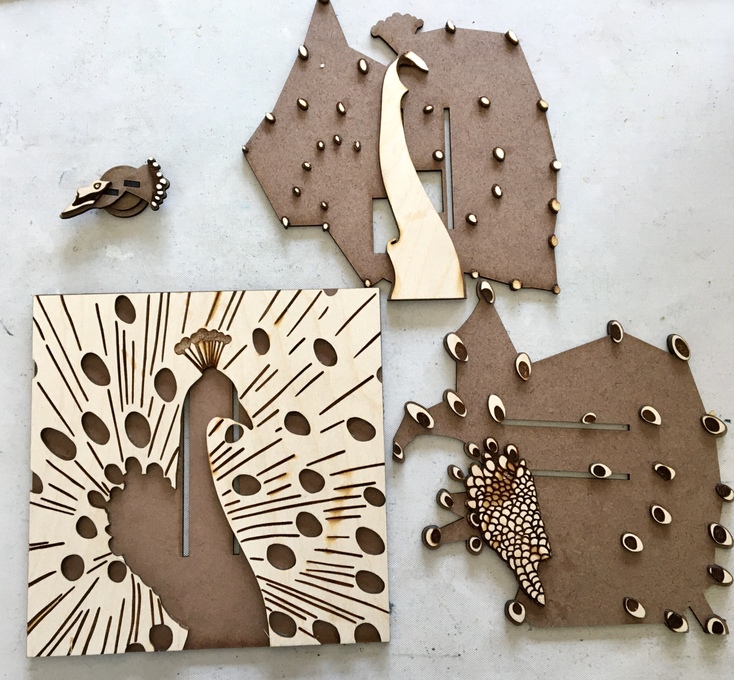
Each block has 4 layers: a birch layer (the one that will print), a hardboard backing layer that the print layer is attached to, and two hardboard layers making a handle of sorts.
Here are the blocks (before I glued the handles on the big ones, but you can see the handle on the little one). You can see I use a combination of engraving and cutting to get the design.
I never thought of wood block like this where you cut out one design and glue the pieces to separate boards, as opposed to carving/engraving each separate color. You’ve done an amazing job lining everything up!
Wow…this is amazing! I’m afraid my brain hasn’t quite untangled exactly what you’ve done here, but its sure worth looking at again until I figure it out. Great process and a beautiful result.
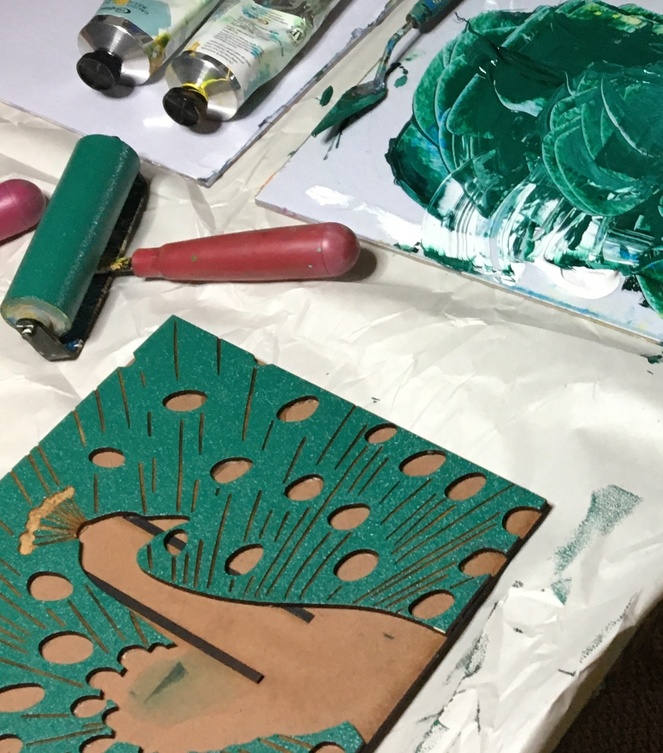
I separated the colors in the computer and made the blocks separately (as if they were carved separately). It’s not a reduction print, though; the colors do not overlap. That way I can print them all in one day, since I don’t need one color to be dry before printing the next.
However, the little pieces would have been too small to glue precisely if I had just used the cutouts from one block to make the next. I engraved away some around the edges of the smaller bits, so the think I was gluing on was a bit bigger and easier to handle.
Yes, I made the wooden layer that I glued the printing bits onto match the shape of the ink that I print in the previous color in some places, so I can see what to align with what. This innovation came after watching a lot of Indian block printing on Youtube lol.
There’s a video here of printing with a border block that I made a while back: www.instagram.com/fturnour
The link should go right to it,
I put the block face down on the paper or fabric and whack it with a mallet. I made the alignment easier for myself by shaping the block so that it lines up with the print that would be there from the pervious color. I’m copying Indian wood block printing, except I use a big hammer instead of my hand to whack.