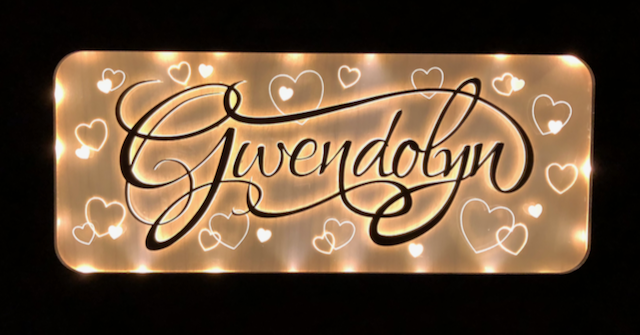
As promised, here’s the basic design I used for the night light panel shown in Gift for baby Gwendolyn.
You’ll need a string of fairy lights like these
I’m uploading the layers of the SVG individually, so I can explain what’s going on with each one:
Lit panel: (The “Baby” raster image is just a placeholder for your own rasterized text or image) (Edit: “Baby” isn’t showing in the uploaded SVG, so I’m putting a PNG below the SVG to show it, but I won’t bother trying to make it show in the SVG since you’ll be putting your own artwork there anyway!)
SVG:

PNG:

This should be cut from ![]() thick (1/4") acrylic (with paper masking left in place) in two steps. Front and back are separated out in the pattern for better visibility, but before sending to the GFUI you should align them to each other (the back layer is already flipped in the SVG). If you don’t change any colors, the steps below should work out as shown:
thick (1/4") acrylic (with paper masking left in place) in two steps. Front and back are separated out in the pattern for better visibility, but before sending to the GFUI you should align them to each other (the back layer is already flipped in the SVG). If you don’t change any colors, the steps below should work out as shown:
Steps for printing: (Illustration follows)
- Move the “Baby” raster down so it’s step 3. (Visual learners, see illustration below.
 EDIT: Discourse refuses to show it in the proper proportions, sorry.)
 - Move the second set of engraved hearts below the first cut rectangle, and “ignore” it.
- Set the first set of “cut” hearts to “score.”
- “Ignore” the second set of “cut” hearts.
- “Ignore” the second cut rectangle.
- Set the active engraves to HD engrave.
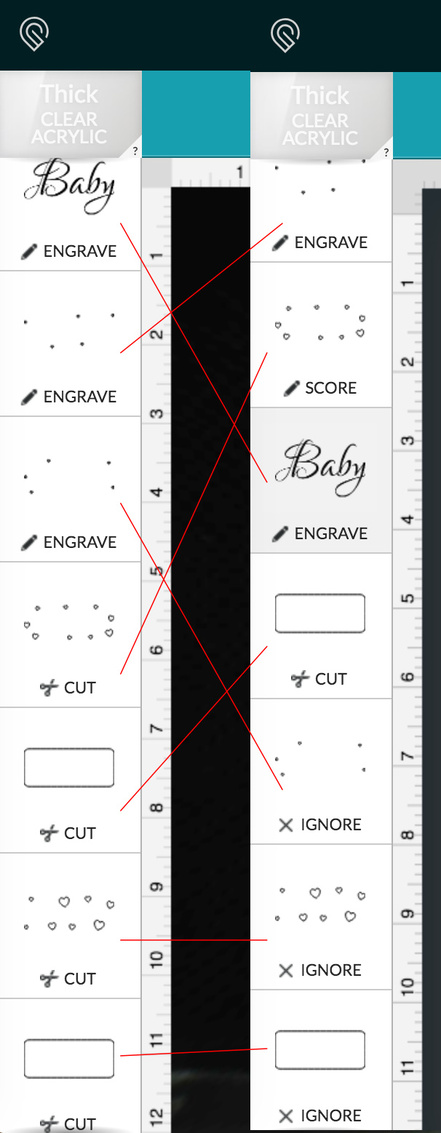
Run the print, then without moving the base material, flip the cut out rectangle end for end. “Ignore” everything you just engraved, scored, and cut. Set the remaining engraved hearts to HD engrave, and the remaining “cut” hearts to score. Leave the last rectangle set to “ignore.” Print again.
Using the same artwork you used to create the raster for whatever you replaced “Baby” with, create a cut file of the same exact size, and cut out the artwork to glue into the engrave you just created. (I used ![]() medium maple plywood for Gwendolyn.)
medium maple plywood for Gwendolyn.)
NOTE: I highly recommend leaving the masking ON the acrylic while you glue on the cut out artwork, and KEEPING it on until the very last minute before you actually glue everything together, especially on the back, where it’s going to be inaccessible for cleaning, so you don’t want dust / smudges getting in there. I unmasked mine right after cutting, and had a hellacious time keeping it clean during assembly!
Backing Layer (the one that shows through the acrylic – I used medium ![]() cherry ply):
cherry ply):

The artwork shows the layer with the back side facing you, so the side of your material that is against the crumb tray will actually be the side that shows in the finished piece. The engraved circle allows a 1/4" x 1/16" disc magnet to be counter-sunk into the wood that will be used to hold the battery pack in place for the fairy light string. The rectangular slot below it allows the fairy lights to be strung through to the front side. Before removing the outer portion of material from the crumb tray, check the fit and depth of the magnet hole, in case you need to make it deeper or wider.
Bracket / Frame Pieces (Medium ![]() draftboard) : These two pieces stack together and surround the thick acrylic. The tabs are staggered so that there’s a continuous “channel” around the acrylic for the fairy lights to travel through.
draftboard) : These two pieces stack together and surround the thick acrylic. The tabs are staggered so that there’s a continuous “channel” around the acrylic for the fairy lights to travel through.

At this point, you should glue the two draftboard pieces together (make sure the tabs on the two pieces DON’T line up, or your wires won’t fit), and then glue them to the front of the backing layer. When the glue has dried, feed the fairy light string through the small rectangle from the back. Place in the (still masked) acrylic, and arrange the fairy lights around the edges, making sure nothing sticks up above the top of the draftboard. Set the whole thing aside and print the front frame.
Front Frame: (I used medium ![]() walnut hardwood)
walnut hardwood)

When you’ve got this cut out, you can go ahead and remove the masking on your acrylic, replace it in the base, do a final smudge / dust / debris check, then glue the front frame on to hold everything together.
Next, cut the inner back piece (I used ![]() medium draftboard):
medium draftboard):

Again, this piece is cut front side down. The large cutout gives you space to fit the unlit portion of the fairy light string into.
And finally, the outer back (I used medium ![]() walnut hardwood):
walnut hardwood):

Now you can finish putting everything together:
- Glue a magnet into the hole you made for it in the backing layer.
- Glue the inner back onto the backing layer.
- Arrange the leftover wire in the rectangle area (use tape if you want, since it won’t show).
- Glue on the outer back.
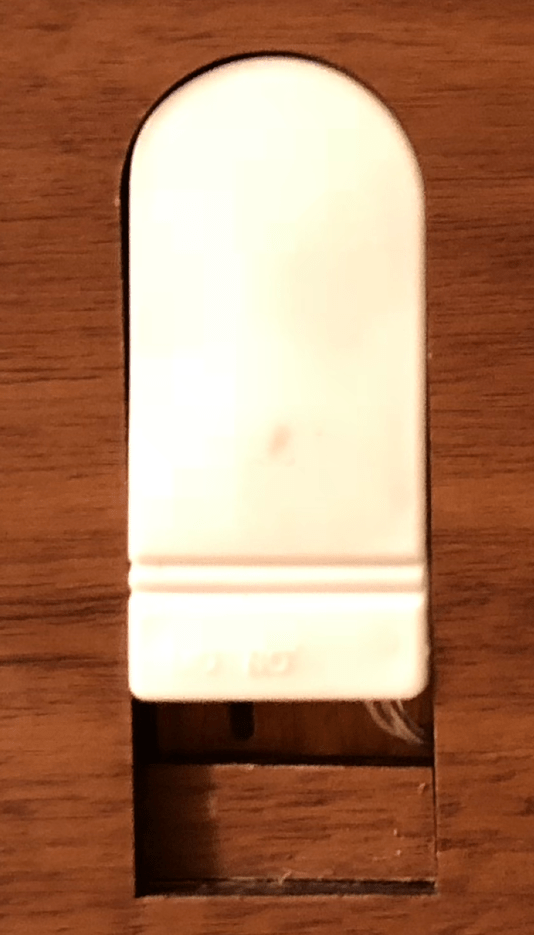
- Stick a second magnet onto the glued-in magnet, put a drop of super glue on it, and press the battery pack into place.
The cutout piece for holding the battery pack provides you with a small rectangle you can glue over the draftboard at the bottom (while still leaving room to access the switch), so it doesn’t show through after final assembly.
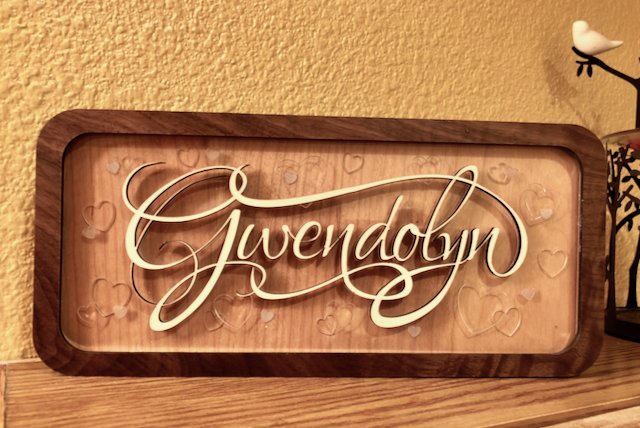
Now you’re ready for final finishing – sand the edges and apply veneer if desired, etc.
Let me know if you have any questions, and definitely post your creations so I can see what you do with it!
