Slide in the Crumb Tray
a. Slide it in until you feel the feet settle into
the dimples in the base of the Glowforge
unit.
5. Make Sure the Handle is in Front
a. Check that the handle’s in the front, and the wide black part is in the back, just
like the picture. Otherwise, you’ll have mysterious printing problems, and feel silly
when we ask you if your tray is in backwards.
6. Close the Front Door.
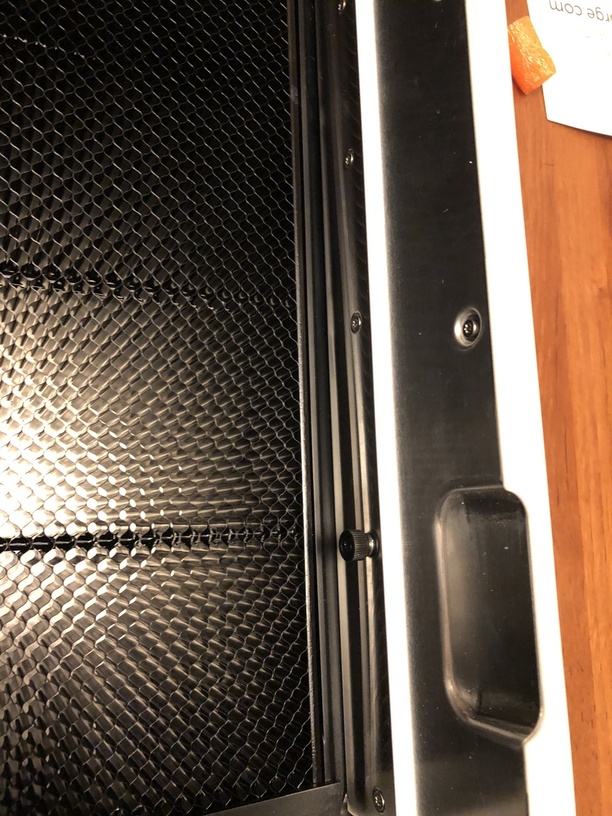
With the crumb tray in the dimples, I try to close the door and it seems be binding up a bit, and not allowing the door to fully close. there is a small metal plate on the front door that seems to come to rest on the front lip of the crumb tray. I had to loosen the thumb screws on that metal plate and apply a little pressure to slide the plate up, then retighten the thumb screws. it’s still tight, but it just barely closes now. seems like the tolerance is a little too tight.
Interesting. Can you possibly take a picture of what you’re describing?
There are only a couple of thumb screws I’m aware of, and those are the ones you’re supposed to remove completely. But maybe there are others I’m just not aware of. Maybe there’s something different about a Pro?
Some people who had tough doors reported that better leveling of the machine removed the bind. Also the lid sticking up higher on one side or the other.
That makes the Forge appear to be 3 large chunks fitted together, so it could be a little off level and not necessarily rock.
I can’t say yours is typical. But I can say that mine… firmly closes. Takes effort. I tend to press on both sides to close it. I believe mine is typical because I’ve had a couple of replacement machines and the door was similar on all.
May sound silly, but wanna take a video of closing it?
It looks like you are one of the first to receive the Pro Shields. Those block the pass through slots front and back.
I don’t have them yet. What I have noticed is that the handle fits into a groove in the front door. The bottom of the slot is a white plastic channel that fits just over the handle so it feeds to the top of the crumb tray.
It looks like there is a channel between the front door and the front lip of the tray. My guess is the bottom of the shield is supposed to fit right down there.
You could take off the shield to see how the door fit is without it. Mine is actually very smooth and easy to open and close. That will give you some context for putting it back on. Maybe loosen the thumb screws, close the door, and then tighten them with everything closed?
Had the exact same problem. I reported it to Support. The bottom of the Pro front shield can rub against the top of the crumb tray and keep the front door from fully closing. The installation tolerance for the front shields is very, very small. Three possible solutions:
Unscrew the black captive thumb screws and remove the shield. Problem solved. The shield needs to be removed anyway if you intend to use the pass thru.
You may be able to loosen those same screws creating just enough play in the shield that it will slide over the crumb tray. On mine one of the thumb screws was bent and it would create an up and down movement in the shield as it was tightened.
The machine was assembled on a dead flat surface. If yours is even a little off of flat it may twist the frame and cause the shield to rub. Check that the lid is fitting the same on the the front left and front right. Slightly shimming the frame under the foot runners may create a better fit.
No. The fit was not perfect and one of the shield screws is bent. If everything is installed perfectly it shouldn’t rub. The door closes now with the shield in place.
In my case, the thumb screws were fine, but the tolerance is too close.
fwiw, one of the other screws (in the door, that show up in holes in the shield is installed poorly).
I’ll take a picture tonight. Only noting as a possible QC improvement.
with respect to the tightness of the shield against the crumb train, IMO, it’s unreasonsble to expect someone to remove the shield before opening the door.
Support wanted me to take a picture of the shield in place so they could tell if it was misaligned. I also told them in my initial email that I did not want to return the unit for a shield fit problem. Since that time I’ve been able to get the door to close reasonably smoothly. Though a new front shield might be better because of the bent screw.
Thanks for letting us know about this. Would you mind taking a few photos of the inside of the door and the area where the Pro Shield rubs against the crumb tray when you try to close it? A video would work as well.