Sometimes when I upload an svg file that I make on Adobe Illustrator, the GF Viewer app will move the image slightly to one side or the other and the image for the engraving is no longer centered to the shape of the cut. How do I fix this? Am I just saving the file incorrectly or is this a software problem on Glowforge’s end?
Are you Embedding the image? There’s a writeup on the correct way to save the SVG files here:
1 Like
In AI, I select the embed option at the time of saving. I switch it from linked to embed. Is there another way to do this or is this the correct way?
That sounds right - just check the settings for saving the SVG in the writeup - there’s a radio button on the Save As SVG popup that you have to select.
The relative positioning shouldn’t be moving if you have them saved in the same SVG file.
What is slightly (guesstimate)? Could it be a decimal place problem?
Do you mean as a focal problem?
No. When you save as SVG, you can enter the number of decimal places that coordinates are saved out to. That’s why I was asking approximately how far off the image seemed to be from the middle.
Screenshots and a zipped up example file can go a long ways towards figuring out what the problem could be.
I see that now. I have had it set to 1 decimal point. How many would be best to set it to? I think the max is 7 decimal points.
1 is fine if designing in metric. If imperial, use 3-4. The thinking behind the decimal place thing is that less decimal places creates a smaller file, which is useful for creating web graphics.
Not sure if this is the problem you are experiencing - if it’s a minute shift, it could be. Make sure you also have Responsive not checked. This will rescale your files - it shouldn’t move components around but it’s possible.
It could also be something in the file set up/design. It could look aligned but you might be using an inner or outer aligned stroke, which the Glowforge won’t like. Or a thicker stroke that appears to be aligned, but when the stroke is reduced to a line in the UI, it’s not truly aligned.
Could be several things. An example file helps…
1 Like
Thanks for the help @Jules and @jbmanning5.
@TimothyHand, if the decimal places setting doesn’t resolve the issue for you, if you can share a copy of a file with us, we’d be happy to look at it.
You can post it here, or email it to us at support@glowforge.com.
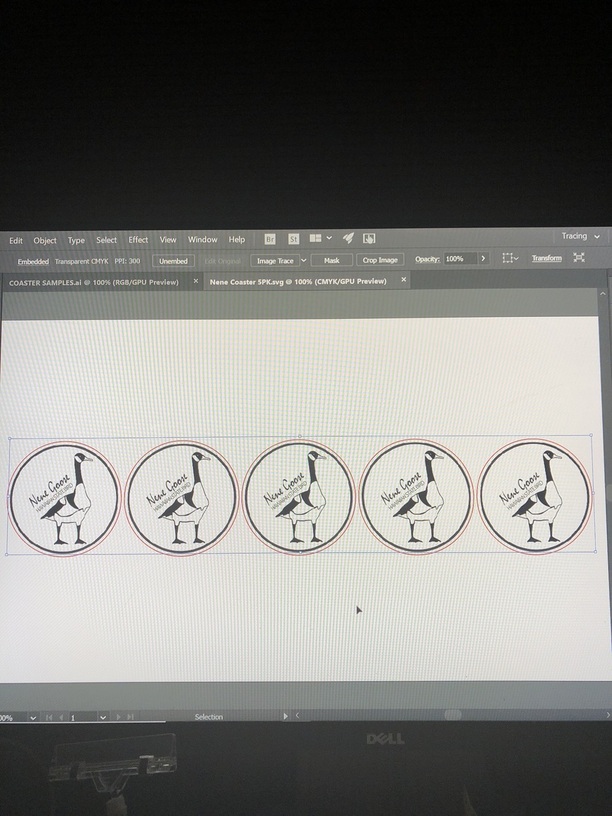
Here is copy of the files. I’ve added the ai file. I make coasters commercially and instead of having them individually added to the GF Viewer and then multiplied within the web app, I make a file where the raster is all five coasters and the cuts are in line with each segment of the raster. This way the GF does all five in a row and it saves me about 45 minutes per sheet. !
Unofficial Chicken 5pk.ai (2.0 MB)
This is the svg
I’m sorry you had trouble uploading these files. But I think I have the solution: In Illustrator, you should save-as instead of export-as to create the SVG.
I opened the files using Illustrator, and I was able to upload them to the Glowforge app after choosing “Save As…” SVG when saving them. I encountered the same issue you saw when I used “Export as…” SVG instead.
Could you please try the following, and let me know what happens?
- Open your files in Illustrator
- For each file, choose File > Save as… > and save as .SVG
- Upload these SVGs to the Glowforge app, and print!
Odd, because I didn’t even know that there was an export option. I have always been using the file>save option.
Most interesting!
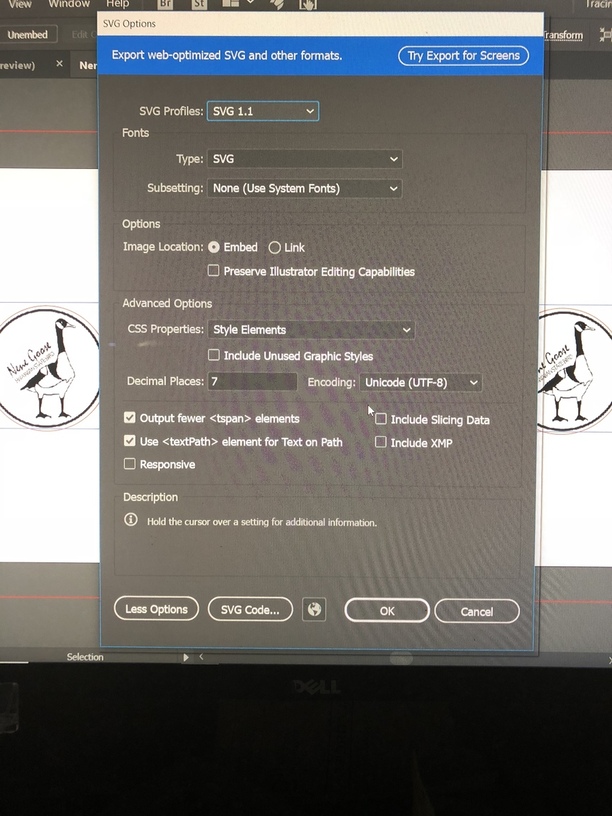
What version of Adobe Illustrator are you using? I’m using Adobe Illustrator CC 22.1.
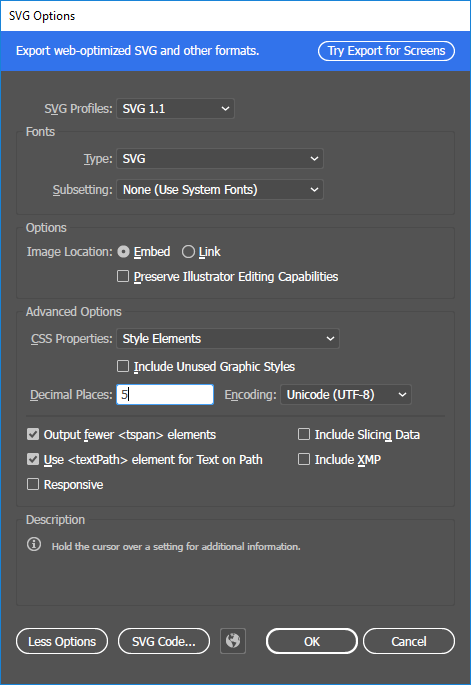
Can you take a screenshot of your the SVG Options dialogue box when you save your file? It looks about like this:
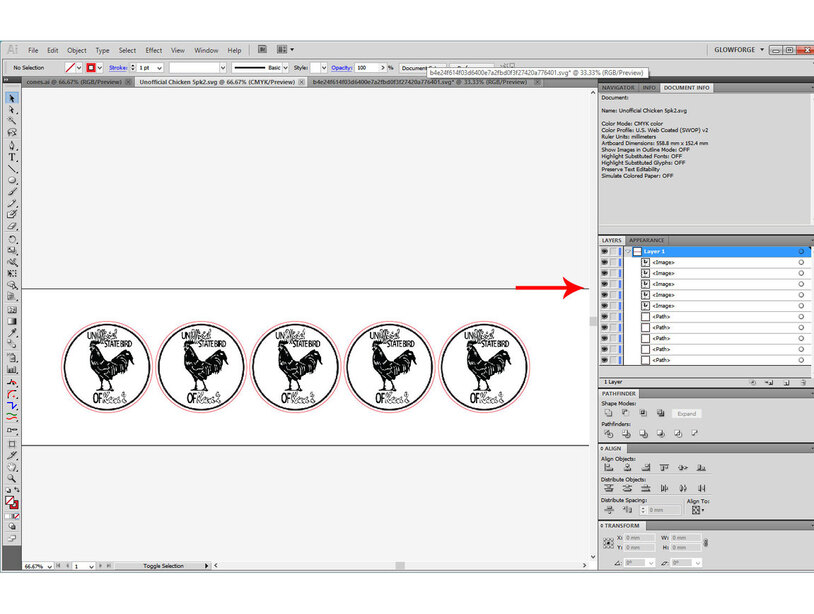
Here are some screenshots. You can see between the AI software and the GFUI that there is some misalignment of the cut layer and the engrave layer.
Okay…I’ve got a theory about what I think is going on, but I can’t test it since I don’t have the linked files, and the SVG you saved up top doesn’t have the files embedded in it - you can just skip to the bottom for the steps to take to keep it from happening if you don’t want to read my musings.
The cutting lines (circles) are spaced too far apart for the engraving limits of the machine.
When you are bringing in the linked files they are spaced far enough apart that the limits of the bed might be shifting them over a bit in order to get them on the engravable area of the page. So they are not lining up exactly with the cutlines any more.
That shouldn’t happen if the files are embedded correctly in the AI file before saving it as an SVG, but those were set to link, not embed.
Everything was also grouped many times in the SVG. I don’t know if that is a function of me trying to open a newer AI file type though in my older version of Illustrator, I seem to pick up a lot of problems trying to do that.
So long dull story short…after cleaning up the file, I get something that looks like this: five image files embedded in the file, and five circles for cutting, one layer. The cleaner you can keep it, the better the results.
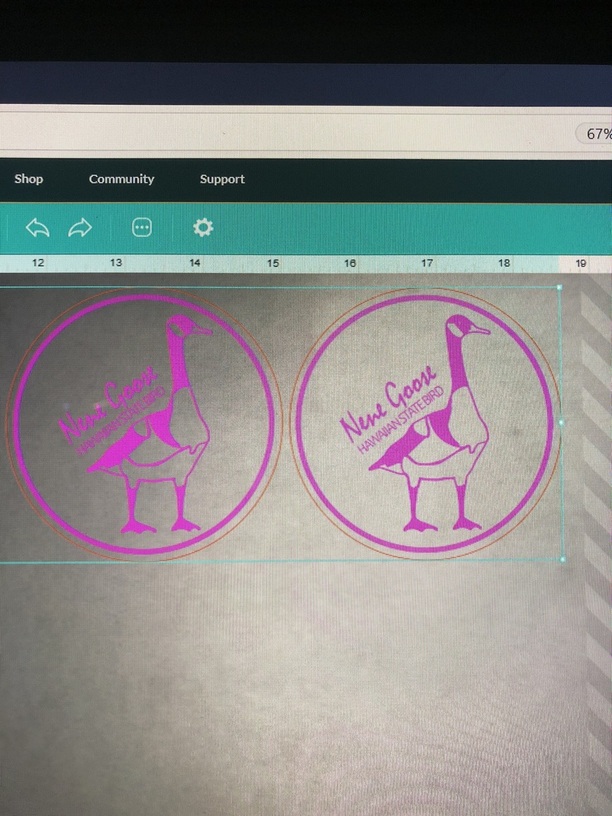
I saved the file, making sure to Embed the results this time and it opened up in the interface with everything aligned relative to each other, but with two of the buttons grayed out because they extended too far into the gray engraving zone.
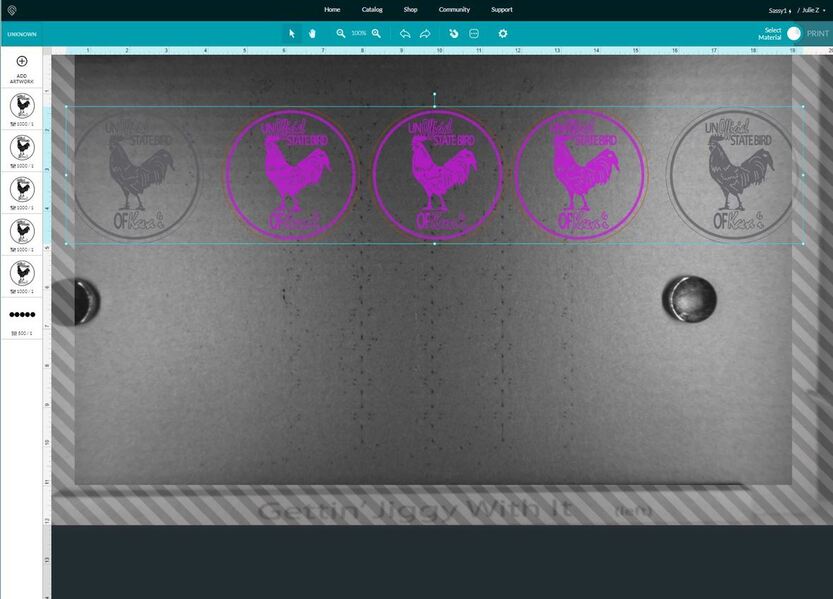
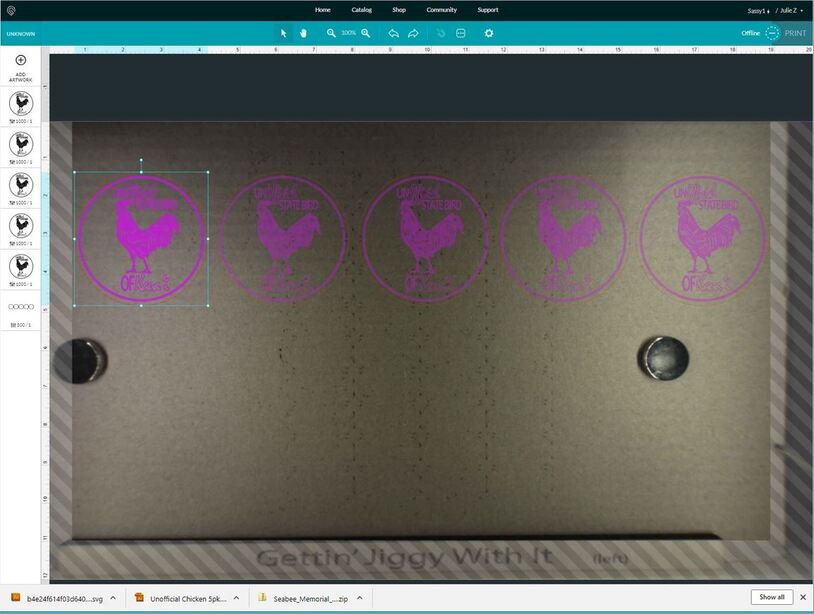
Slight spacing adjustment in the original file and they open just fine in the interface:
So, TLDR steps to keep it from happening:
- Make sure to embed the image files in the SVG file.
- Make sure that the spacing on multiple engraves is small enough to fit inside the limits imposed by the machine for engraving at high speed. (It’s smaller than the cutting area of the bed due to the need for the head to decelerate during engraving. But if a cutline is associated with an engrave, it becomes part of it and has to be inside those limits for the purposes of spacing.)
Either one of those things will keep the problem from happening - both will ensure it doesn’t.
1 Like
Thanks for sharing those screenshots. After taking a look at these details I think I’ve determined what’s happening. It looks like your design is set to scale as necessary, depending on the dimensions of the space it’s viewed in - in this case, the Glowforge app Workspace. While vector elements retain size and scale easily, bitmaps do not.
I’ve included the steps that I took to retain the scale between the vector and bitmap elements when I uploaded the file. Could you please give this a try?
-
Open the .ai file in Illustrator
-
Choose File > New
-
Set height to 12in. and width to 20in., then press “OK”
-
Copy and paste everything in the old design to the new design
-
- Mac: Use Command-A to select all in your old design, then press Command-C to copy. Move to the new file and press Command-V to paste
-
- Windows: Use Control-A to select all in your old design, then press Control-C to copy. Move to the new file and press Control-V to paste
- Choose File > Save As, and change only the following options:
-
- For Image Location, choose “Embed”
-
- Uncheck “Responsive”
- Save the file, upload it to the Glowforge app, and let me know how it goes
1 Like
It’s been a little while since I’ve seen any replies on this thread so I’m going to close it. If you still need help with this please either start a new thread or email support@glowforge.com.