How are you trying to load it? Using the Upload button inside the User Interface? (The bed screen.)
Yes, I save it to my desktop just like it did before when the Glowforge worked and then upload it onto the material. I make sure none of it is overlapping and looks great and then hit print.
Okay, so you might be having an issue with the upload button. That has happened before.
Try this…drag and drop the file (and it has to be the correct file type) directly from your desktop onto the opened page in the interface. Don’t use the Upload button.
It worked with a font I pulled out of paint. but not with images I’ve pulled from online.
Can you share one of the files that won’t work?
![]()
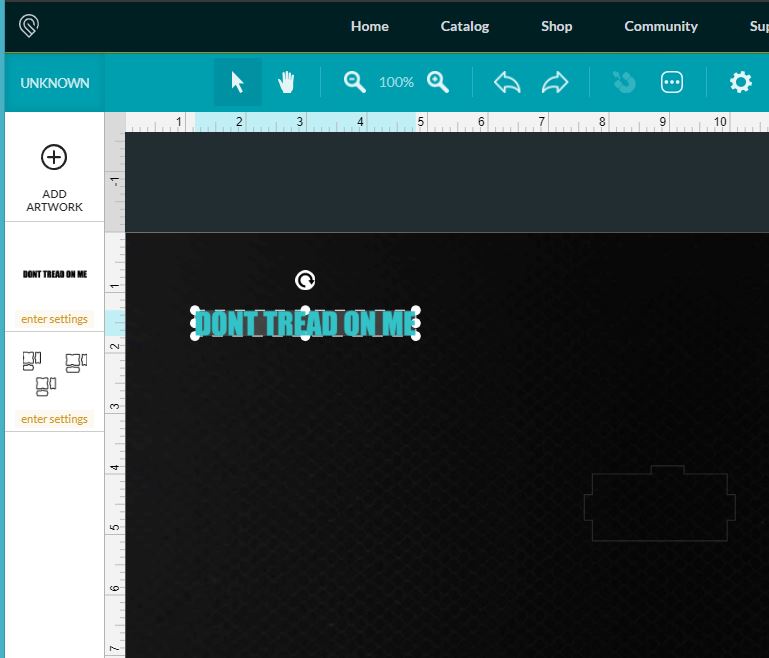
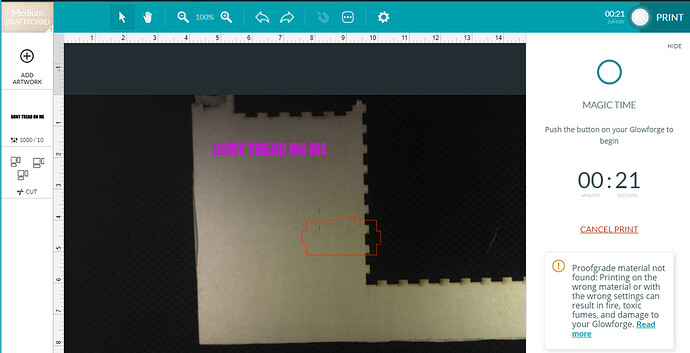
Okay, I was able to drag that PNG file into an open file and it loaded without any problems into the interface:
If I give it some settings information, and put some material in the bed, it prepares to Print just fine.
When you drag it onto the open screen and let go, it’s not uploading for you? Or is it not uploading when the processing is being done…after you hit Print?
I’m sorry about the frustration when trying to run your prints. It looks like you’ve already received some excellent advice and guidance from other community members. Thanks folks!
I extracted the logs from your unit and it looks like you were able to print successfully with one of your designs. That’s great! I also looked back at some of your recent prints which didn’t succeed.
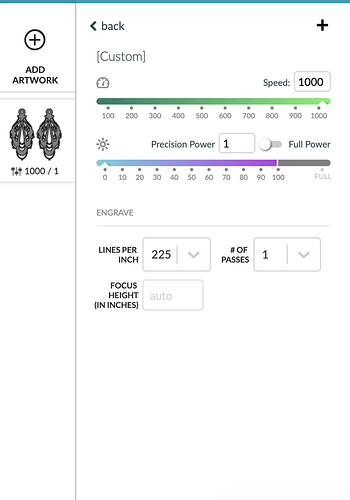
In some of the prints which were cancelled, I noticed that the engraves had a power setting of 1. One example of when this can occur is if a print step is set to “ignore”, and then you switch back to “engrave” and then open up the manual settings.
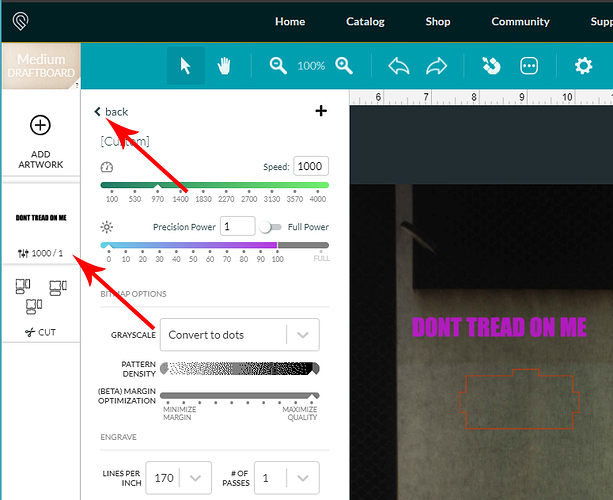
Another example is if manual settings are entered and then the “back” button is pressed. In either case, if you open manual settings again, it will show a power setting of one, and the thumbnail on the left side will show a “1” in the right-hand number below the print step.
A complete guide on manual settings can be found here: Working With Manual Mode
Please let us know if this information resolves the issue!
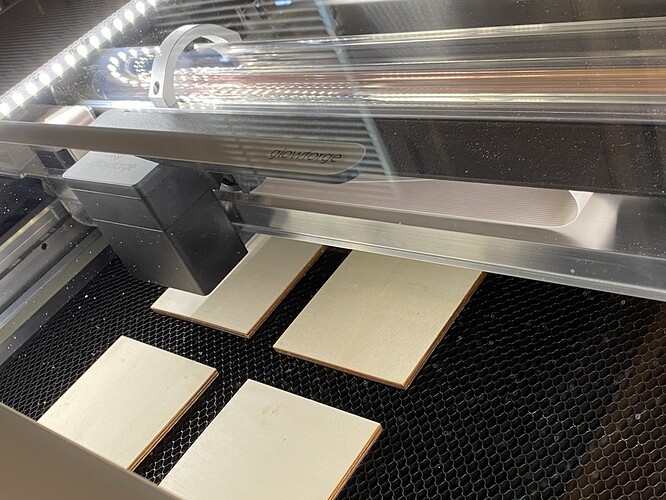
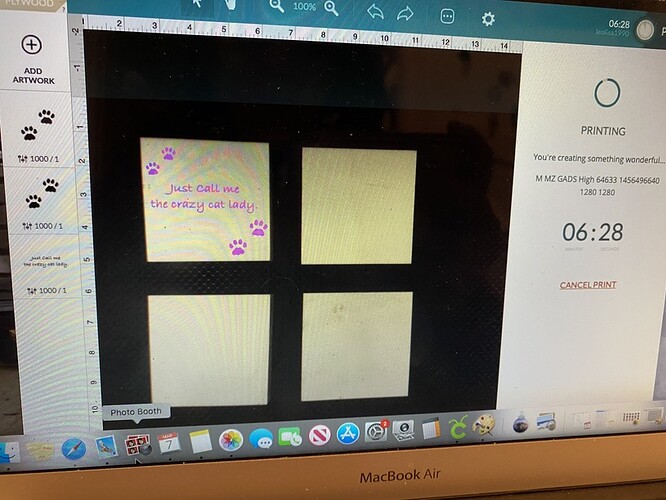
The image will drag and drop. it is there. I hit print because everything looks right. it is within the printing limits and 1000/1 to engrave the image. it starts printing and just acts like its working and nothing is happening on the wood. no image. no laser turns on. nothing. it will run the entire estimated print time without producing any product.
I can’t even get a simple cat cartoon to print.
Okay that 1000/1 number you typed is very important… it lists the speed/power being used, and it means that the laser is only printing with 1% power. It’s working fine, but that is not enough power to even mark the masking paper.
@ivan1 explained what is happening in the yellow post right before your post. The system will default to 1% power as a safety measure whenever you open the Manual settings, or if it does not recognize the material.
So the next time you see this happening, check the settings. Here is how you can reset the default Proofgrade settings for your files that you are having the issue with:
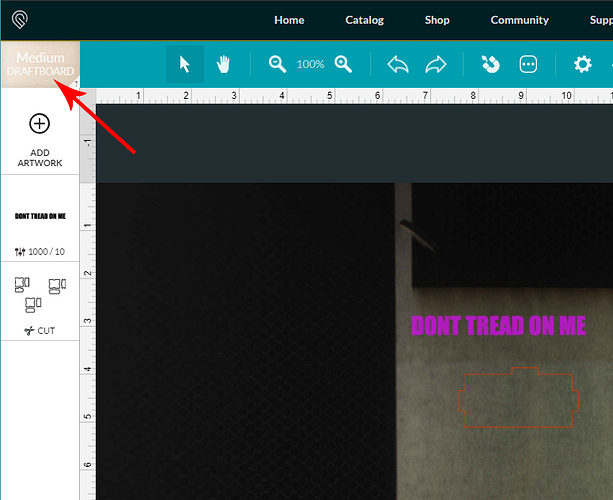
- Select the Material you are using from the Materials Button at the top of the left column.
- If there are numbers showing on the thumbnail for the operation itself, click on the thumbnail to open the settings panel and click BACK.
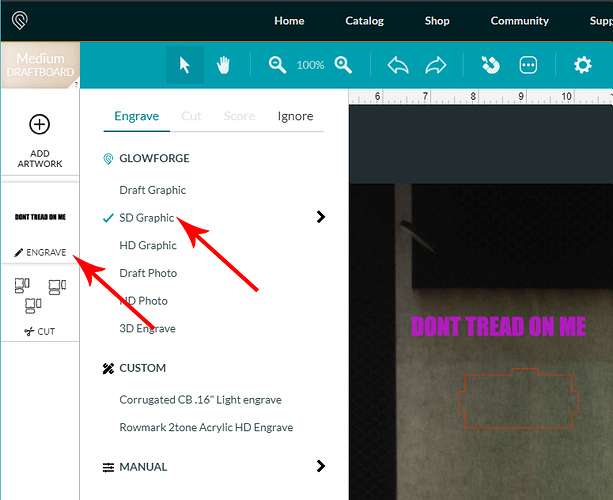
- Click on the Words (ex: click on SD Graphic) for the type of default engrave operation that you want to perform. Those numbers in the Thumbnail column will be replaced by the word Engrave, and there will be a blue check mark next to the operation you have selected for the default.
That will load the default settings for you again. (If you want to see what the default settings are, you can click on the little black arrow on the right next to the words SD Graphic, but when you do, that takes you out of default, and the numbers will then show up as 1000/Full on the thumbnail. Backing up and clicking on the words SD Graphic again so that it has the blue checkmark, will reload the defaults.)
The thing to watch for is the 1% power in the thumbnail column. If you see that, reset the defaults using the method above.
It’s confusing to everyone at first, and Ivan was the one who figured it out. (Just remember to check when you open one, they will be auto-saved with the wrong settings sometimes.) 
Maybe you didn’t realize it, but @ivan1 is a GF employee. That’s why his post is in yellow. 
I know he’s an employee. He also emailed me it seemed I was already getting advice from other glowforge users and he closed my email ticket instead of offering to help further even though my issue wasn’t resolved yet.
That’s because you opened a duplicate ticket by posting here. Having multiple tickets open for the same problem would just confuse the issue, so they close the extras. As long as this thread is still open, he’s still working with you – he’s just waiting to hear back from you regarding the advice and information he gave you up above.
I’m really sorry to see you had a frustrating start with your replacement machine, @leolisa1990. Thanks so much to @dklgood, @jules, and @geek2nurse for springing into action. Our community is seriously amazing!
@leolisa1990, I don’t want to leave you hanging if you have any other questions about this particular issue, so I’m going to leave this thread open for now. If I don’t see another post from you in the next couple of days, I’ll close out this thread. That said, please don’t hesitate to start another topic if you run into any other challenges. We’re here to help!
It’s been a little while since I’ve seen any replies on this thread so I’m going to close it. If you still need help with this please either start a new thread or email support@glowforge.com.
