Right click this
in the original post.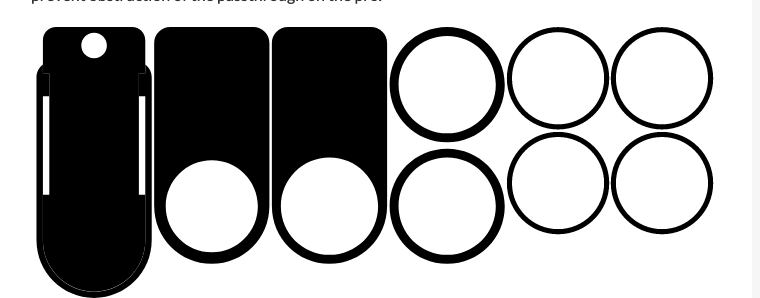
3 Likes
OMG now I feel like an idiot  Thank you for being so helpful with my brain just not working today
2 Likes
You are very welcome, now back to forging.
1 Like
Yes I am 95 ornaments in out of 150 due tomorrow its been a long day 
1 Like
ok so…I printe this file out…Or cut it out, however you choose to say it, and this is what i got… this isn’t right, is it?/uploads/db6859/original/3X/9/c/9c9fd56c380f745a4fa443d24c2c45809b7585e0.MOV
and am I supposed to make an extra one that the branding on it is not on the one I use to make this?
OKAY…now. one more question guys…I know this is something that will get easier with time, too…but how the heck does this thin go together?
ok…back the truck up…I Got it! YAAAY!
1 Like
Yay! It does make sense, but there are a lot of seemingly useful pieces that don’t get used!
I had the same problem with the logo cutting - I ended up having to recut one anyway so I went in and manually changed the color so I could score it.
what do you mean manually change the color/ I am not catching on to SOMETHING. or missing SOMETHING. If I bring something to the GF interface… I can not change anything besides manual, cut, score, or engrave?!?
In order to change colours you need to open it in your drawing program - not the GFUI
I have updated my original post by removing the svg file and replacing it with ready to cut PDFs. Hopefully this will resolve the engraving issues. I’ll also make an assembly video for this thing since it’s a little confusing.
7 Likes
I prefer Svg files usually but do not currently need a blast gate,
That is incredibly generous of you!
3 Likes
this may sound dumb but do you have instructions to where each piece goes lol
1 Like
Cutting one right now! Thank you so much@!
4 Likes
I have read through all the replies, but I don’t see how this blast gate is assembled. I did see where a video was going to be made, but I didn’t see it posted. Any help would be appreciated.
1 Like
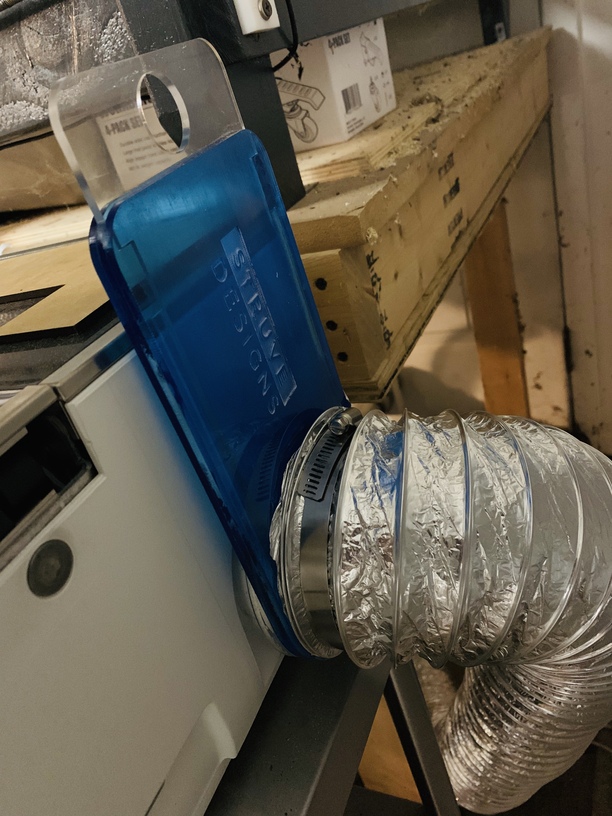

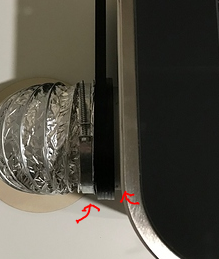
Pretty design. Love the look. I printed it today. and used WeldOn #4 to weld together. it’s TIGHT. wow. I ended up packing the thing with grease just to get it to slide. I think it’s two things: 1.) micro dust really ads friction when there’s no tolerance between plates. 2.) the WeldOn #4 made a little bit of a tacky surface (especially during curing) in the corners where pieces mate, and the sliding piece’s edges slide against that kicking up little rubbery bits that impede sliding
Didn’t see anyone posting technique for solvent welding this together (do it all at once, do one end at a time, make sure not to slide until X hours, etc…)…
But this is what I did
- glue (drip WeldOn #4 using capillary action) between the U piece to the bottom plate - easy
- Test fit the sliding piece while still tacky to ensure it slides well
- place the top plate over
- with the sliding piece out, “glue” the plate at the end farther away from the sliding piece (bottom of the U).
- wait 4 minutes…
- with the sliding piece 1/2 way in to minimize contact, “glue” at the top of the U at the two top points. minimize WeldOn #4 going too deep in…
- wait 4 minutes.
- test the slide
- at this point… for me, the slide was tacky, lots of friction. I wonder if I could have waited 24 hours instead of trying it right away.
- fix the friction with some grease appropriate for plastics
- glue on the rings…

11 Likes
where do the 4 small rings and 2 big rings go?
a set of rings goes on the inside to slide into the  and a set goes on the outside to have the hose slip over
6 Likes
do you happen to have a video or pictures of how this is supposed to be put together?
This looks great! I will try this once I get my confidence up.