So the problem is when I set the print the pic shows it’s good, but when it prints it’s bigger than what the pic shows. Tried alignment, and always set focus before each job. Any suggestions? Also how do you set manual height? Thanks for any help!
Welcome to the forum.
Can you share a photo to help us visualize the problem? How much bigger is the print than you expect?
You set manual height in the operations panel. You toggle manual to “on” and then set a height.
1 Like
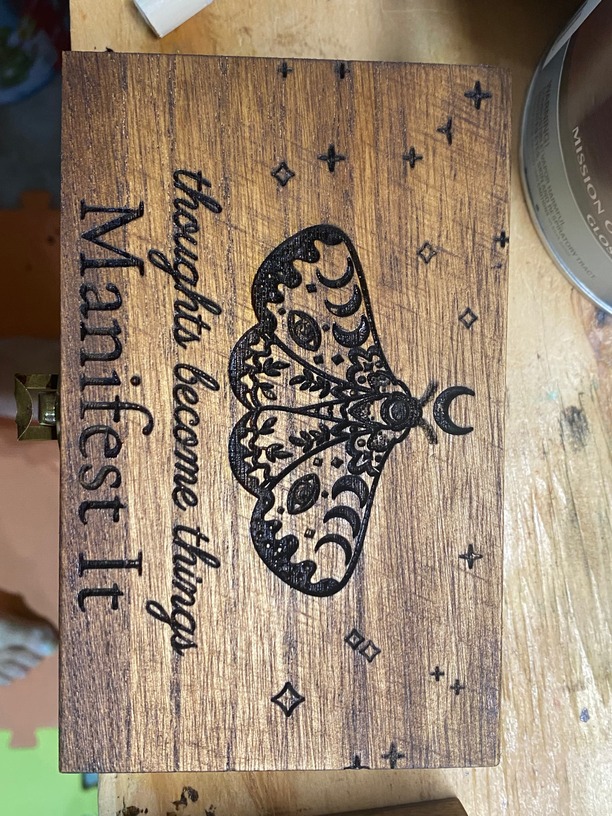
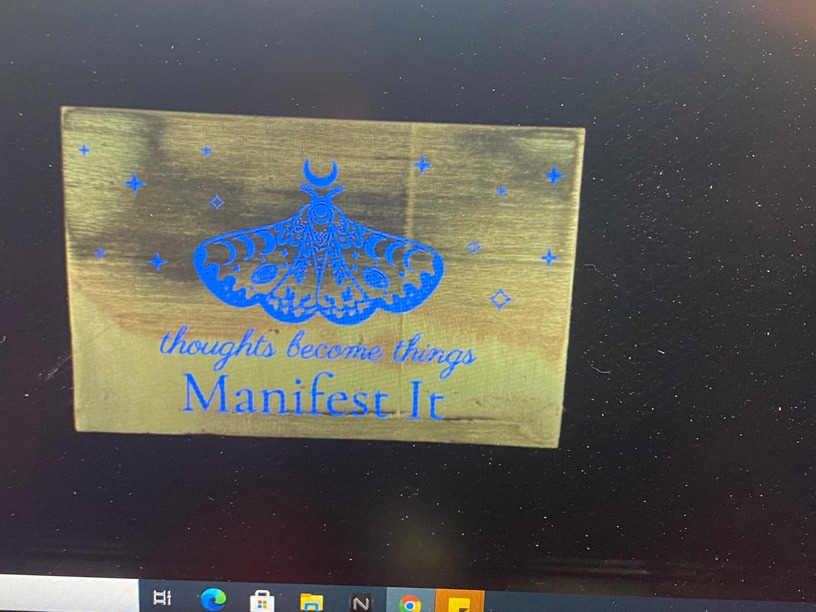
So as you can see when setting the pic it looks good but when it prints as you can see it makes it bigger.
So there are two components here:
- A graphic overlay
- And the bed image
The graphic overlay is your file and the size will correspond to the rulers in the app, or the size stated in the little dialog box where you can change the size and location of an element.
Then, the bed image. The bed image is cropped and displayed based on an algorithm that uses the material thickness to give an accurate representation of the material.
I assume you’re removing the crumb tray and building the material up to be in focus range of the lens (so original height of crumbtray up to a 1/2” above that)?
Are you using a default Proofgrade material setting?
What it looks like to me is that possibly you don’t have the material stacked up high enough (below the crumbtray surface level). The set focus measurement is probably not reading correctly, which means it defaults back to the material thickness setting that is either inputted manually or that is associated with the Proofgrade material.
If it’s basing the bed image (of your material) off of an incorrect material height, the representation will be incorrect.
1 Like
Have you worked through the tutorial prints to get a basic feel for how the Glowforge works with your artwork? If not, I recommend doing at least the Gift of Good Measure.
Your picture makes me think that you have a focus problem. Here is an article tht discusses the Glowforge lid camera, the set focus tool and how they interact with the user. I doubt that you need to run the lid camera calibration at this time, but you do need an understanding of how your image is interpreted by the Glowforge.
1 Like
Hi @jrpalmer I’m sorry to hear that you’ve been running into some trouble with prints coming out larger than expected. @jbmanning5 and @dklgood gave some great advice and tips. Can you let me know they were able to help you get this resolved? If you are still running into any unexpected print results, it can help to have you run our Gift of Good Measure test print for troubleshooting with the steps below:
- Turn off your Glowforge.
- Check for small pieces of debris or dust.
- Check the lower door to make sure it closes all the way. It may require some force to open, but open it, wipe any dust off the edges, and close it all the way.
Remove the tray and clean any dust or debris from the surface underneath. Pay careful attention to remove all debris from the four dimples where the tray rests.
Check the lid to make sure it closes all the way. Small particles of material, such as dust or debris, can prevent it from closing completely.
- Check the surface your Glowforge is on to make sure it’s flat. Ensure it is not twisted slightly and that there is no debris propping up one side of the machine.
- Turn your Glowforge back on.
- Place Proofgrade material in the part of the of the bed that you are having the most trouble and print the Gift of Good Measure using the default settings.
- When the print finishes, leave the lid closed and wait until the fans stop and the picture updates. Without moving your artwork or your material, take a screenshot of the Workspace to show us the difference between the artwork placement and the actual print placement. Make sure to include the rulers in your screenshot and show as much of the bed as possible.
- Mac: Press Shift-Command-4 and click and drag a box around your image. You’ll find the screenshot file saved on your desktop.
Windows: Click on the Start Menu and type “snipping tool”. Open the Snipping Tool > New then click and drag a box around your image. Click the Save icon and name and save your file.
- Post a screenshot along with the date and time of the print, and I can review that for any next steps.
Sorry it took so long to respond. We cleaned it and made sure it was level and it started working again. We realized that it need cleaned more often since we started venting outside. Needs cleaned once every couple uses compared to once a week.
Jerald Palmer
On Oct 15, 2021, at 11:03 AM, Glowforge <support@glowforge.zendesk.com> wrote:
Thank you for the update. It’s great to hear that cleaning got you back up and printing! I’ll go ahead and close this thread. If you run into trouble again, or have any questions for our team, feel free to create a new topic here on the forum or email us at support@glowforge.com and we’ll be happy to help.