First, clean the ash off of the metal plate on the bottom of the machine, or place a mirror underneath the carriage arm so you can see underneath it…it makes it easier to be sure you are hooking the wheels onto the right ledge. Turn off the machine. 
Next, remove the belt from the pulleys at both ends, you need to get the carriage plate seated before attaching the belt at the ends.
I’m going to show you some shots of the correctly loaded carriage plate from underneath, using a snakecam…it makes it easier to visualize what’s going on.
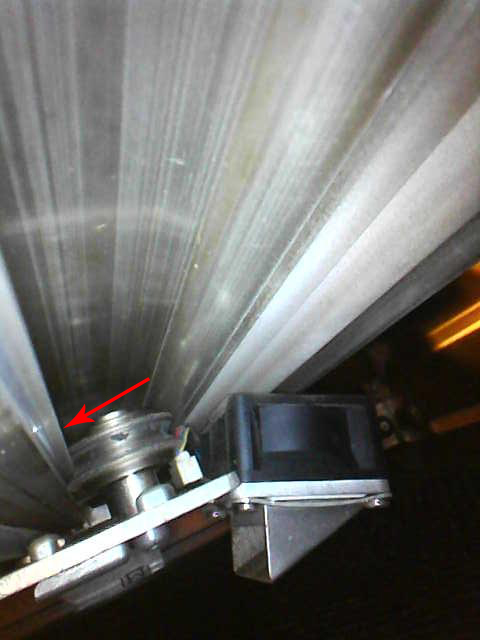
Put your hand underneath the metal arm…feel underneath about 2 inches back from the front of the metal bar. You will feel another metal ledge extending down. That is the ledge that you will hook the rear wheels of the carriage plate to. (You’re going to get smudgy, don’t worry about it.)
The picture below shows the rear wheels hooked onto that ledge, with the fan extending behind it underneath the tube. But do note how the rear wheels rest on that little lip.
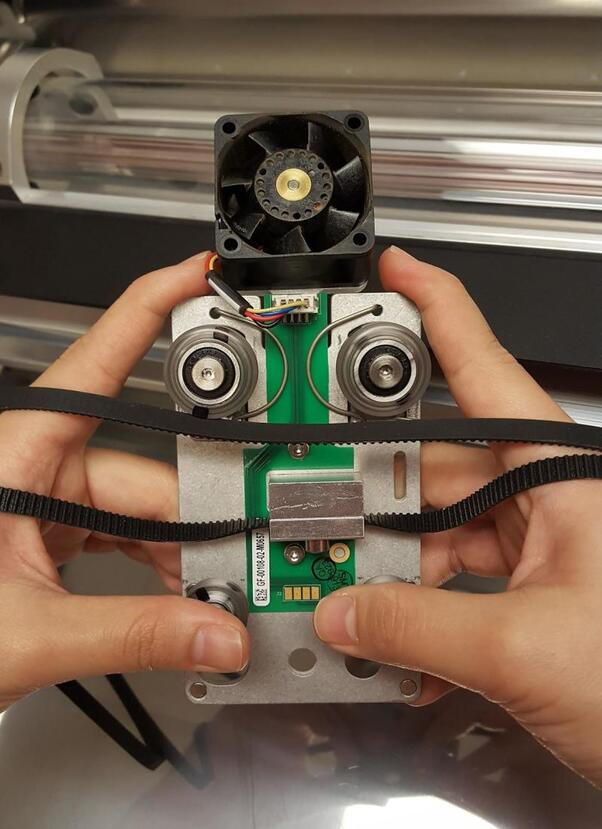
Okay, what you are going to do is hook the rear wheels on that lip, holding the carriage plate as shown below:
Place your index fingers on the back corners of the carriage plate and your thumbs on top of the front wheels.
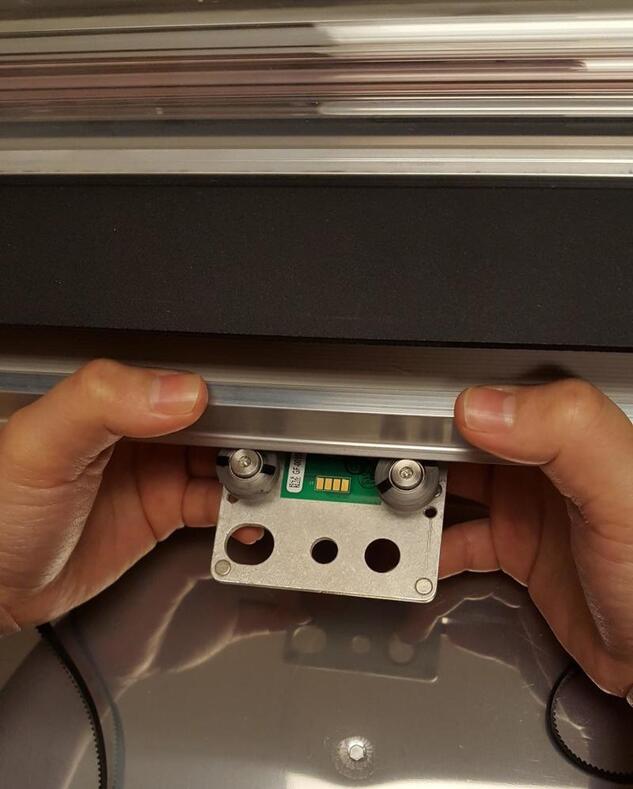
Reach underneath the laser arm with the assembly held as shown above, then up and hook the wheels on the ridge in back. (Glance into the mirror underneath to make sure you caught it.)
The front wheels are not going to clear the front of the bar at first, that’s okay, just hold it there for a second.
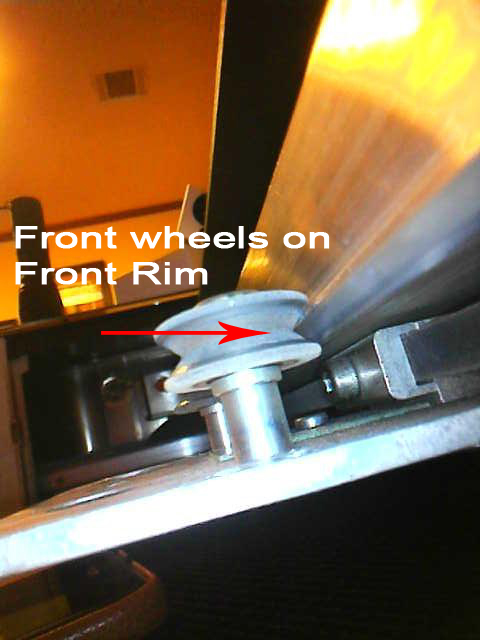
What you then do is gently pull forward until the front wheels clear the front edge of the bar, then up until the wheels are seated evenly on the front rim. There are springs in it and you might need to pull a bit to get it to move forward. When you release it, it should be set level with the front wheels on the rim and it will stay in place.
After you get the carriage plate seated correctly on the laser arm, you can attach the ends of the belts following the instructions shown here:
Let me know if that helps.