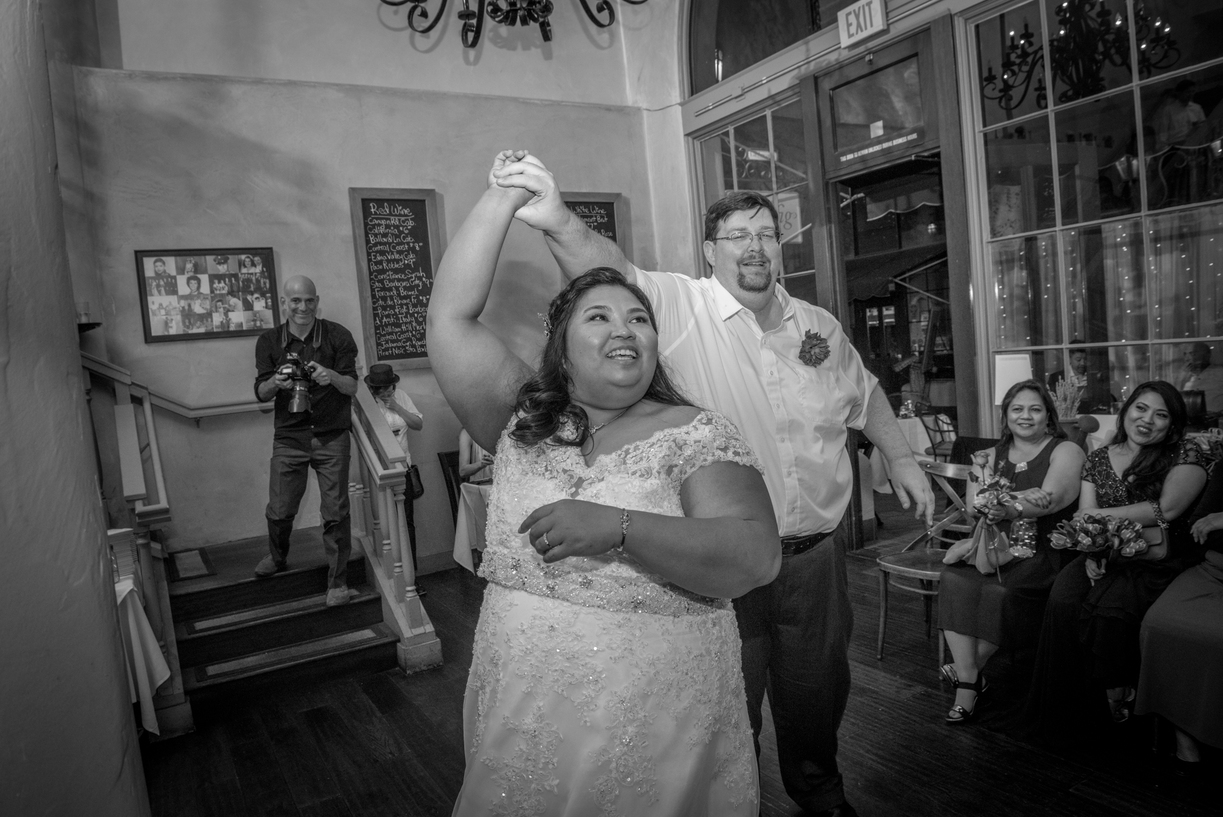
Projects like this are why I bought and really love my Glowforge. I got married on the 12th and we had made all of our decorations. Supplies were purchased on Amazon and via the GF store.
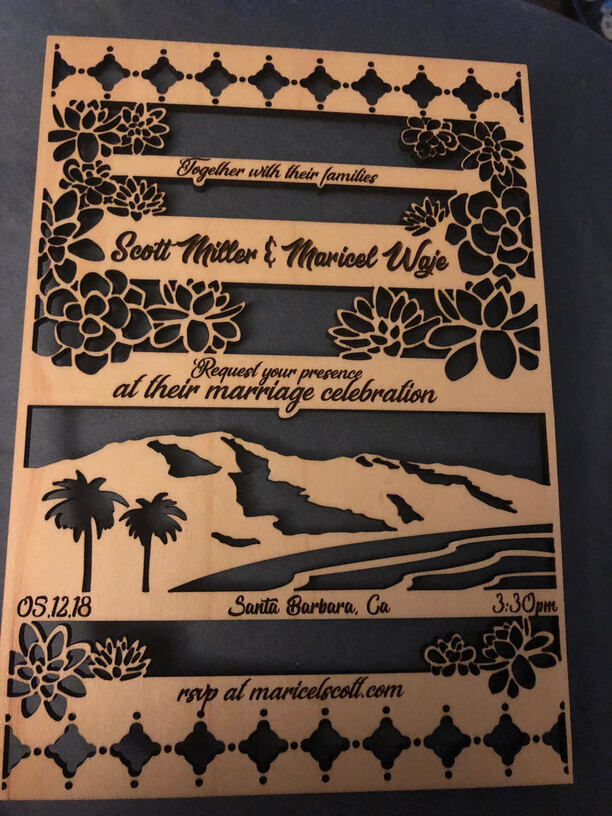
Wedding invitations:
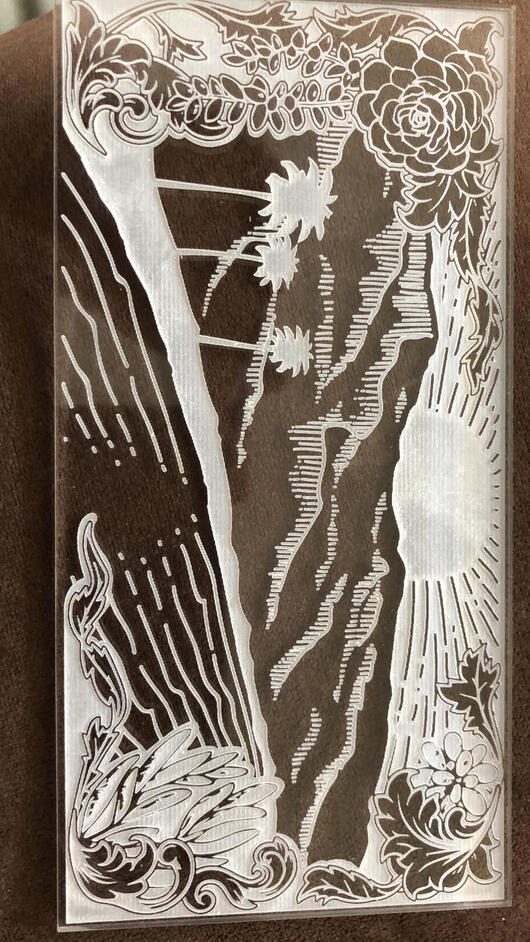
My brother Victor (www.vabart.com) designed our wedding invitations. Each invitation took 25-30 minutes to cut/engrave on 1/8th maple plywood or 1/8th draftboard.
We didn’t end up painting the invitations we sent out, the wood looked great without it.
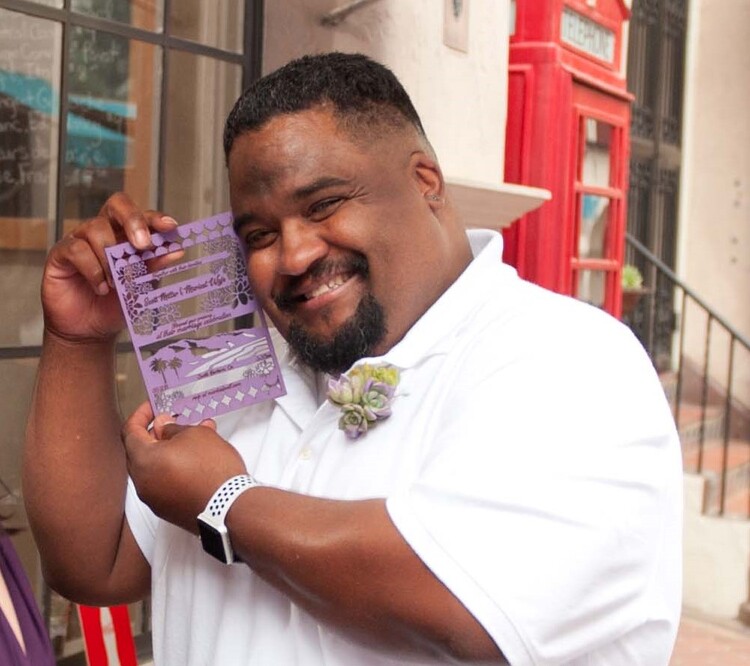
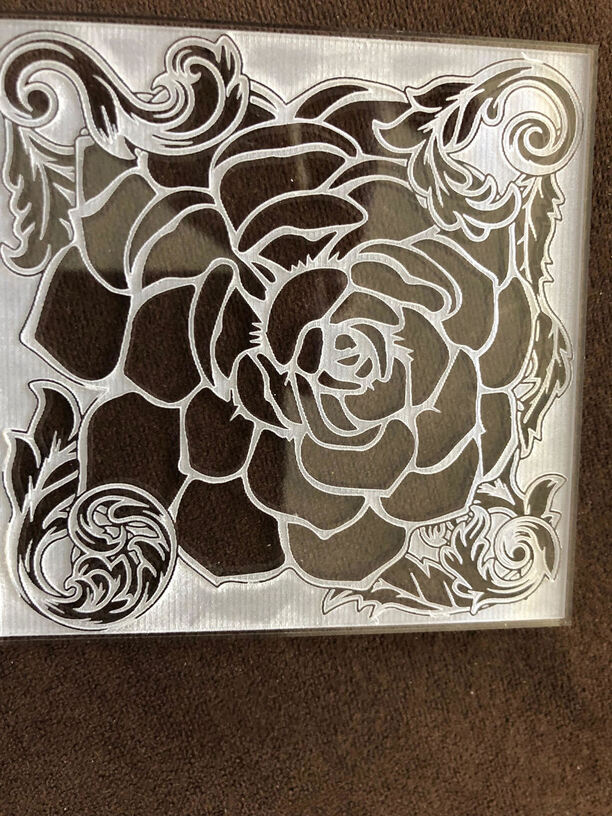
We had some extra’s and brought them to the wedding. Ended up painting these ones:
What I learned from this:
- Cutting out the flowers left a narrow section of wood to represent the pedals. Next time I would leave a bit more space on that wood as sometimes they got burnt on the second pass.
- The machine got dirty very quickly with this much cutting. I lost several sheets of proofgrade until I realized I needed to clean it after every other run of draftboard.
- I would have increased the power of the laser 5%-7% to account for the not cutting through problems I was having.
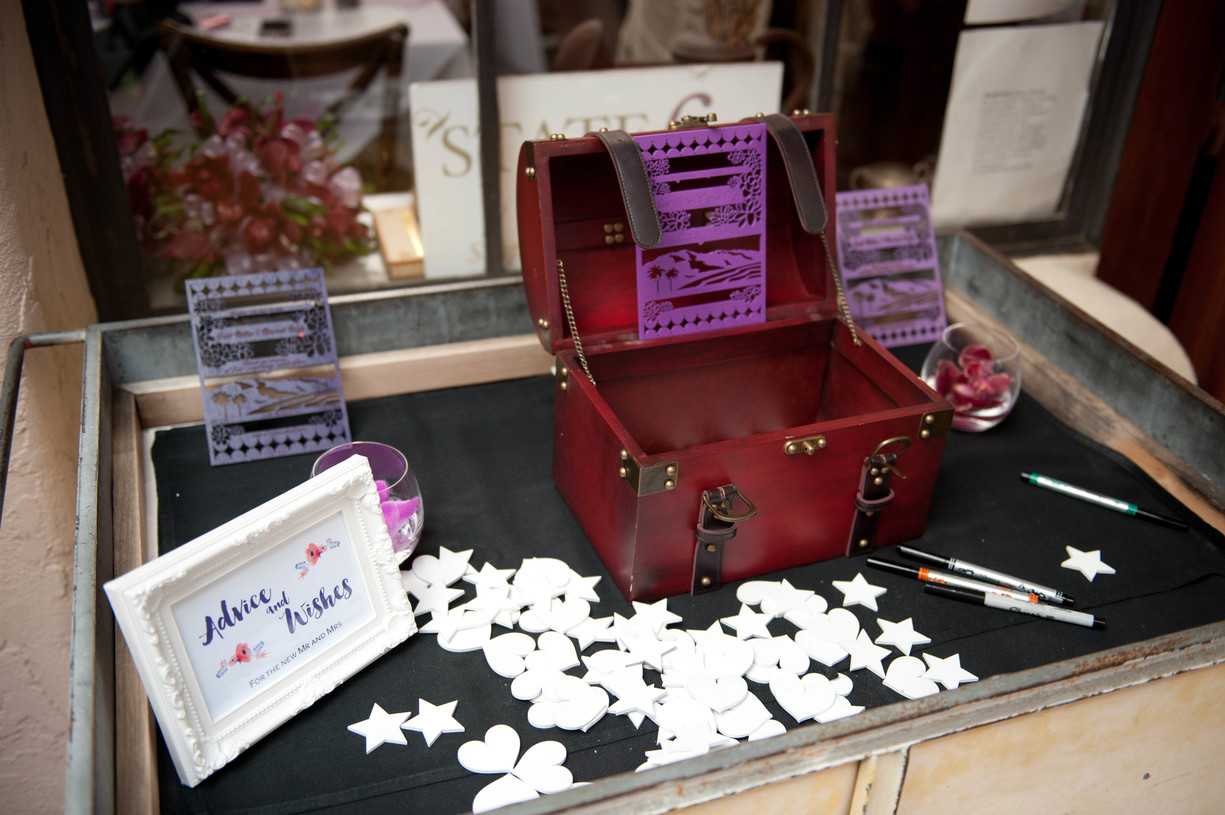
Wedding guest book:
We didn’t want a traditional guest book, so after some googling, we found a drop in guestbook frame: I really didn’t want to pay $200 so we did a bit of forging. I haven’t completed the frame yet, but the stars/hearts were a big hit!

What I learned from this:
- I didn’t expect people to write on both sides of the stars/hearts. Going to have to figure out how to display things properly.
Succulent Planter Box:
I had initially hoped to do acrylic planters for the succulents, but I ran out of time due to a breakdown of my Glowforge and its replacement being damaged in shipping. Also, I lost a week due to noise complaints from the HOA. Here is what the planter would have looked like:
Since I had already cut the front and sides of the box, I ended up making these into coasters and giving them away to our wedding guests.
What I learned from this:
- It’s a huge pain in the ass to take the tape off the small sections of the engraving, even with Gorilla tape. Initially, the design was inverted, which was partially impossible to remove any of the small stuff due to the acrylic dust. We ended up inverting the design and I think it not only looked better but was easier to clean.
- When creating a box, think about all steps from start to finish. Trying to assemble a box out of acrylic without any support was practically impossible. We ended up spending a day designing and building jigs to hold the pieces we were going to glue.
- Always expect that it’s going to take 3x longer than you think on any project, at worst you will be pleasantly surprised it didn’t take as long as you expected.
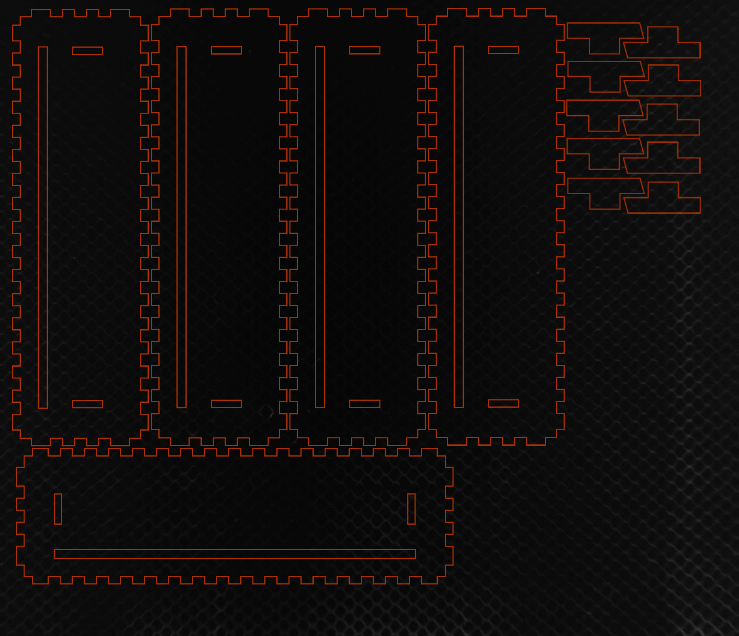
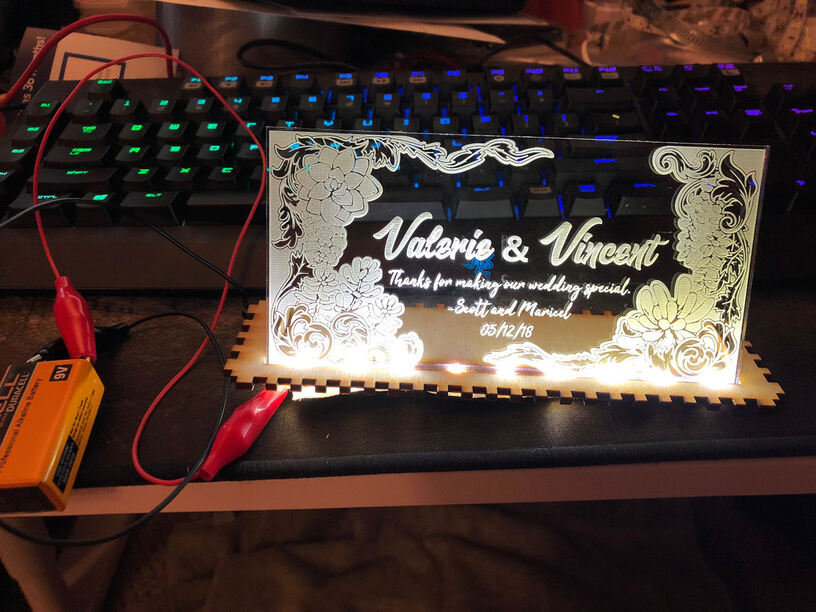
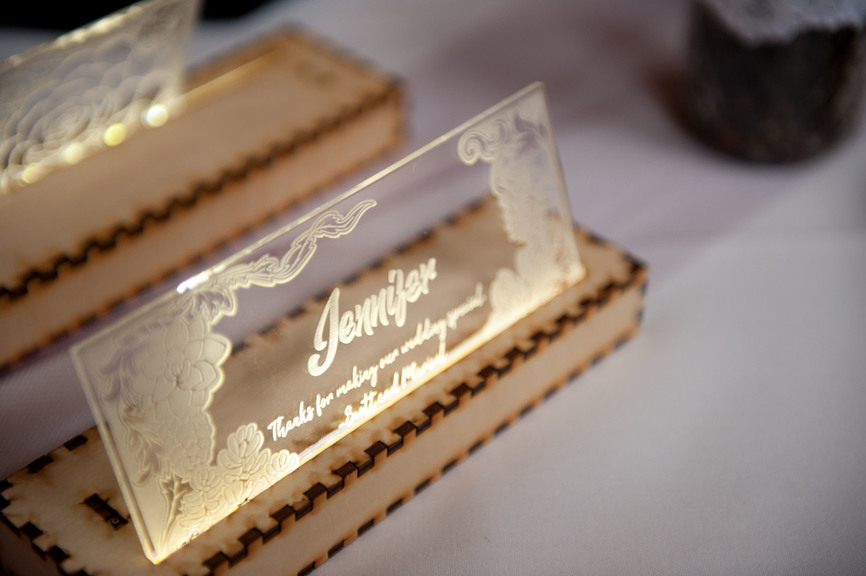
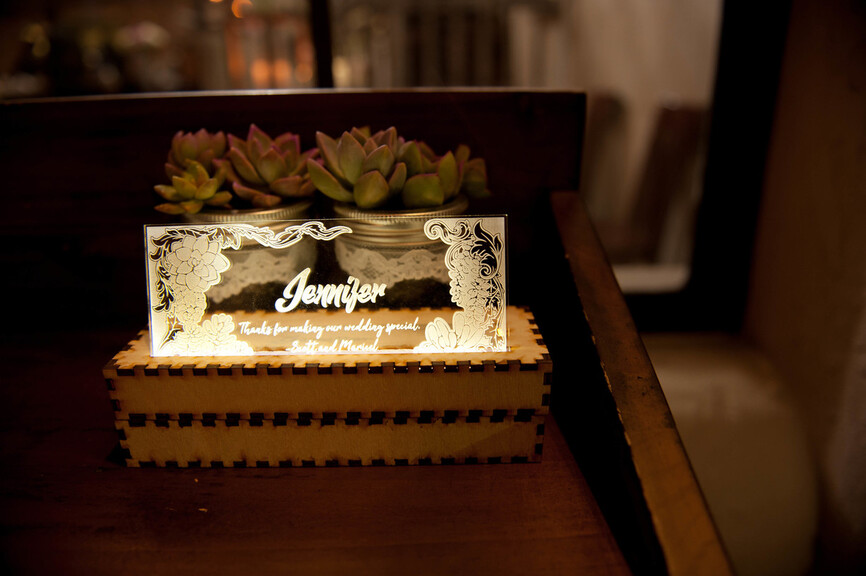
The Pivot to Table Signs:
When it became apparent that I wasn’t going to get the boxes done in time, I ended up pivoting to creating table signs. I had already cut the personalized front of the acrylic planter box, so I created a 7.5x4x1 box using http://www.makercase.com/. I then took the box into illustrator and added the slot for the acrylic and a spot for some inserts for it to rest on. Lighting the signs was easy, I cut LED light strips down to 6 inches and soldered clips for a 9-volt battery to the strips. During testing, the battery lasted for more than 4 days, with approx. 50% reduction in brightness by end of day 2. The lights were rated for 12v and no resistor was needed.

What I learned from this project:
- Don’t forget the damn pegs at home.
- Don’t forget the damn pegs at home…
- I envisioned people leaning the acrylic signs so they could see the whole thing, but instead, everyone promptly plopped the sign into the box, cutting off the first 3/4th of an inch.
- It’s really difficult to solder to the led strips, they don’t hold the solder well. Next time I will buy some LED connector clips from Amazon.
During the reception, we invited our guests to take the decorations home with them. Nothing was left and the demand was so high that people were actually discussing who could take what. It was really great to see everyone enjoy our creations and it made our wedding special.