#Glowvember - a design-make-share challenge

I’m really glad you started this. It will force me to get better at using Cuttle. I’ve decided that they all will be designed in Cuttle so I can better learn it. :slight_smile:

1 Like

Nov 3. Quote

I’d been looking for the right project to test some flooring I have as engraving material. This was perfect and I love the results. The results right after the engrave wasn’t optimal. The material doesn’t leave a good burn color behind. Much of it looked like it had been scraped out, not burnt. So I gave it a coat of black paint before weeding.

This may be the most professional looking item I’ve generated on the Glowforge to date! :smiley:

7 Likes

That is lovely!

Whatever you’d like it to be- I’m making a times table disk for my youngest son to help him.

1 Like

Nov 4: Bookmark

This project allows you to alter the width, height, text, font and if you’d like to leave space for an image to be placed before engraving.

The leather split I used for this is so thin, I was able to use my settings for cutting paper. On the bright side, there was no need for masking. :smile:

5 Likes

Nov 5: Earring Stand

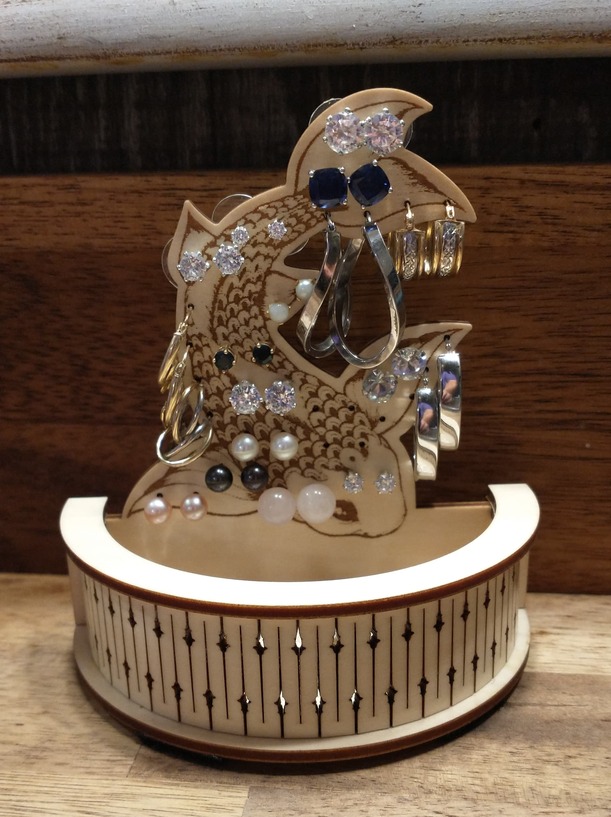
I asked the wife what kind of earring stand she’d like and she suggested something with fish. Since we have koi in our pond and she really likes them, I thought I’d do it koi themed. However, I did seriously under-estimate the number of earrings she has. LOL

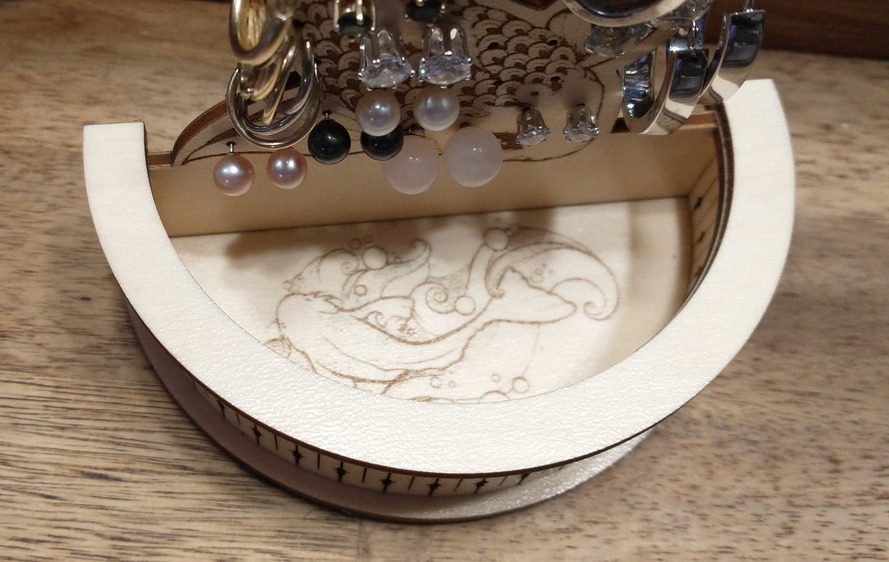
I put a Japanese koi pond image in the ring tray.

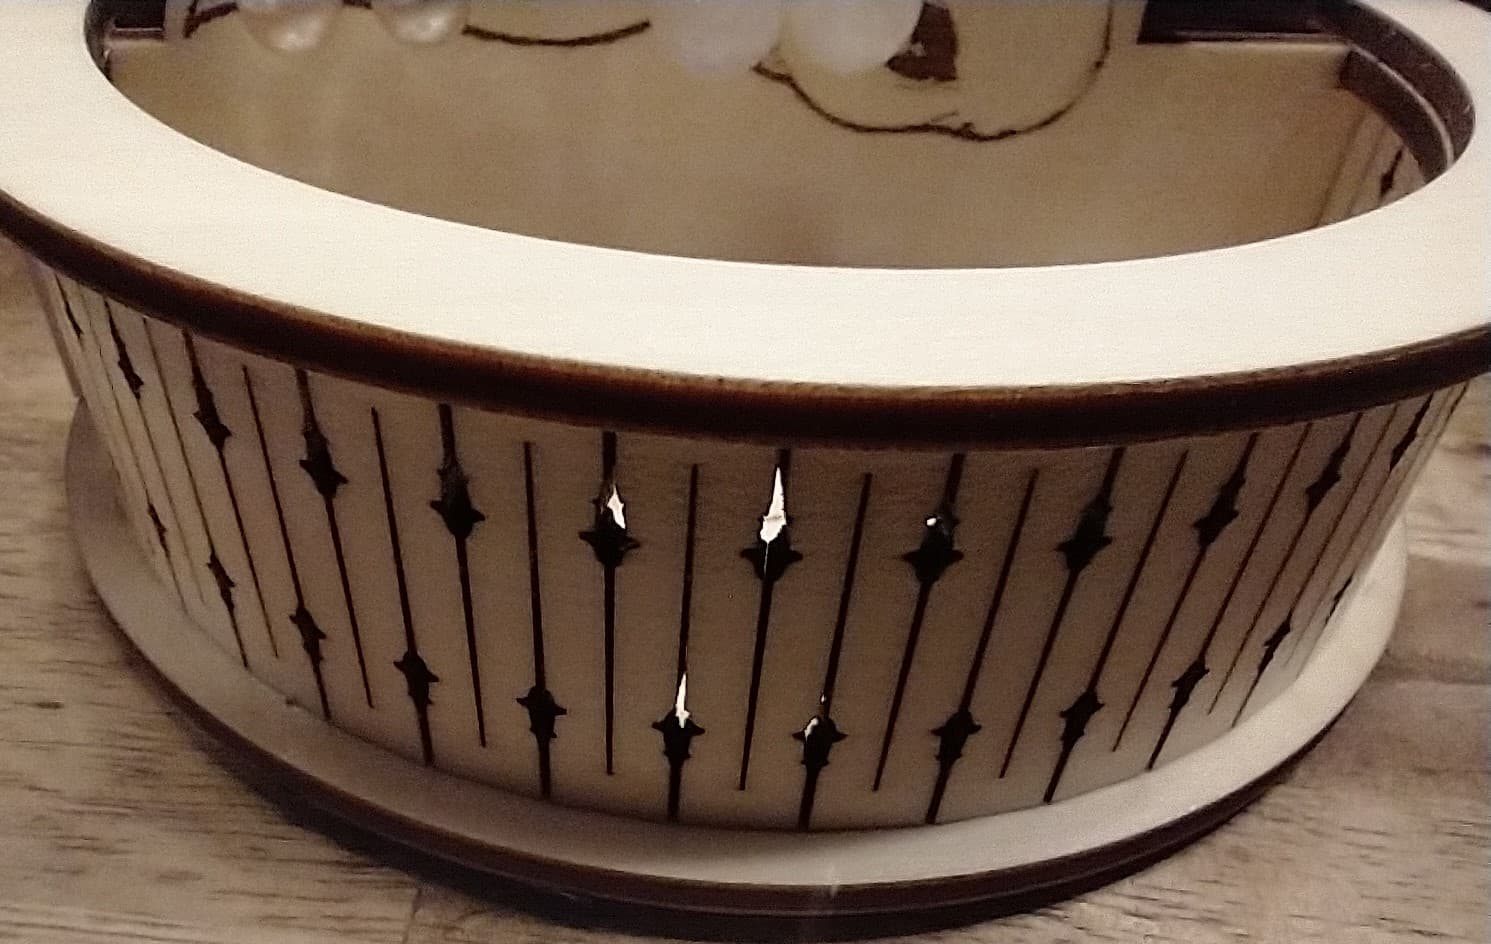
I like trying to push the limits of the detail I can achieve using the Glowforge, so I tried making little fish as part of the living hinge. I’m not sure I pulled it off. I think they look more like sharks than koi.

9 Likes

That is phenomenal! I really love that design, especially the Living Hinge!

2 Likes

Nov 6: Egg Stand

I’m not sure if this was what was meant by an “egg stand”, but the interpretation is part of the challenge, right? :wink:

Bigger image for those who don’t want to click to Cuttle…

I left the sign kind of rough to make it look hand painted, but I think I might give it another coat of white.

11 Likes

Nov 7: Coaster

Of course the best one to add electricity to is the one holding a condensation-laden cup, right?

I could have done a better job with the flames, but it’s a one-day build and I have to work late tonight, so this is it. :wink:

Here it is lit up in the dark. It’s amazing how much light can be put off by a coin battery and a couple of small LEDs.

It’s 3 layers thick (well, 4, if you count the cork ring on the very bottom). The bottom layer (not the cork) is a ring of thick acrylic. This leaves enough room for the battery and LEDs. The middle layer is just a solid medium transparent acrylic circle with a few score lines to try to make the flames pop a little. And the top layer is an outer ring of medium acrylic and the cork design in the middle.

9 Likes

Love this idea!!! Would be interested for a new one to go up each month. Can you imagine - 365 days of laser?! (Right now I’m at about 4 days/month… lol)

1 Like

Right now I’m at about 4 days/month

Until this month, you were way ahead of me! :rofl:

2 Likes

Nov 8: Business Card

Infomercial (i.e. setup a situation NO ONE has and offer a solution NO ONE needs):

Announcer: Have you had this happen to you?
Client: I know I was supposed to call you last week to set up that great deal, but I gave your business card to a friend and didn’t know your number.
Sad Guy: If only there were a way to hand out two business cards at once.
Announcer: And now there is! Introducing the SHARABLE business card! Your client can keep your card while sharing the pop out card with a friend. Amazing!!!

I really wanted to do this in cardstock, but the engrave just wasn’t visible. The top one is my best effort at pulling off cardstock anyway. I put a thin layer of black acrylic paint on yellow stock and engraved that. I won’t call it a success, but maybe someone can learn from my trials. :slight_smile:

And the little tabs holding the embedded copy in place need to be a bit smaller. I torn the card getting the embedded one out.

Information is all parameterized in the Cuttle project:

7 Likes

Nov 9: Tie Hanger
I’ve had a long day and I have to get up super early, so this is a simple one. Just cut and assemble.

4 Likes

I love LEDs and acrylic. What does the circuit look like? Is like a LED throwie? A coin cell and a LED?

I tried to post this yesterday, but the forum software won’t allow more than 3 consecutive posts by the same user. I couldn’t post again until someone else did. Thanks, @bwente !

Nov 10: New House Tag
Ok, I wasn’t sure what was meant by this one, so I made a configurable house sign.

There’s a flag, invertCorners, that can be flipped to give the following instead:
Sign

7 Likes

Yes, it’s a throwie, just no magnet. :slight_smile:

1 Like

Nov 11. Christmas Ornament
I’ve been wanting to make a parametric snowflake for quite some time. I finally have a reason to just do it. :slight_smile:

If you go to the project, you can change the multiple aspects of the snowflake. Here are a few samples in some different colors of acrylic:

This picture doesn’t quite do them justice, especially the transparent blue ones.

10 Likes

Love these! Here are some ornaments I made for mine: #

(These have a puzzle built in too!)

4 Likes

Nov 12. Wine Glass Marker

You just need to add one of the following:

  • Jewelry Hardware
  • Ribbon
  • Colored String

These are also pretty great for using scrap acrylic material from other projects. I wouldn’t cut the hanger piece from wood, but the markers themselves could be.

Close up of the completed ones and additional markers.

6 Likes

LOL I had to look up the key to your puzzle. Very nice!

1 Like