Gosh Da Nang It, I goofed up

After the Howitzer Diorama that my niece loved, I decided to go to the planes of my youth which was during the Vietnam War, so the planes I mostly associate with the war were the A1-H Skyraider, F-105 Thud, and of course the F4B Phantom. I decided to start with the Skyraider, as I have always viewed those pilots as some of the most heroic pilots to fly in our military, often returning with tree branches in their bomb racks as they flew escort missions as the “Sandy” planes for the “Jolly Green” rescue helicopters; it was often noted that no “Sandy” ever paid for drinks at a bar, and everybody I knew who flew in Vietnam regarded the as both crazy and heroic. Flying below treetop level to make an armored fist protecting the downed flyer.

As making an actual flying diorama is insanely difficult, I chose the “easier” route of the diorama on the base. This has of course turned into the ongoing saga of my Da Nang Airbase/A1-H Skyraider build, I have had the wonderful pleasure of using both @davidgal2 and my cousin Bill who both served in Vietnam, although my cousin served at An Khe. I have struggled for reliable reference photographs that aren’t either terrible quality or faded kodachrome images that distort the colors beyond belief. Recently I found this image on Wikimedia of the Jolly Greens of the 37th Air Rescue Squadron that were the helicopters that were escorted by the Skyraiders to retrieve downed airmen. In in this both remarkably clear and unusual viewpoint (I have no idea what the guy was standing on to take the photo), but I was shocked to discover the Revetment walls were not solid, but were filled with dirt and open on the top.

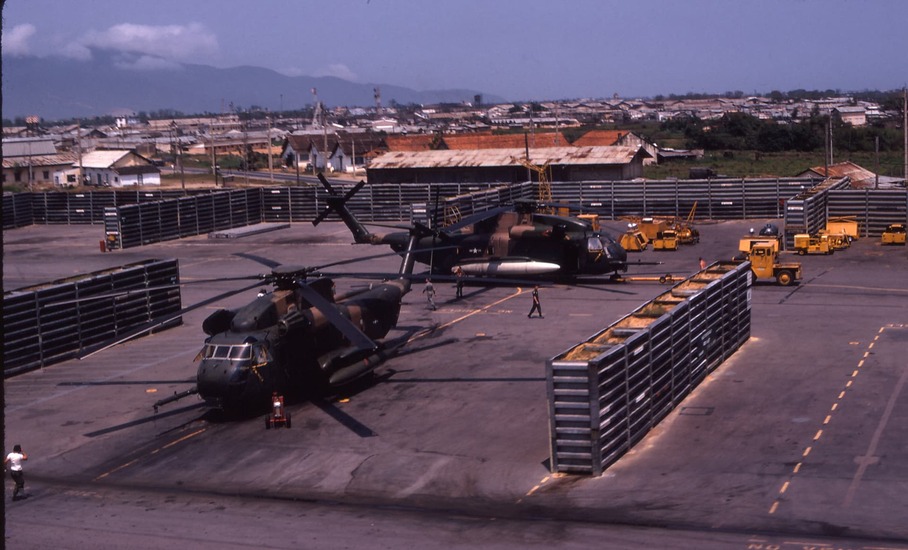
Well, that was a shame since they were already 3D printed (not a big deal) and painted and weathered (OK, that’s a bigger deal).

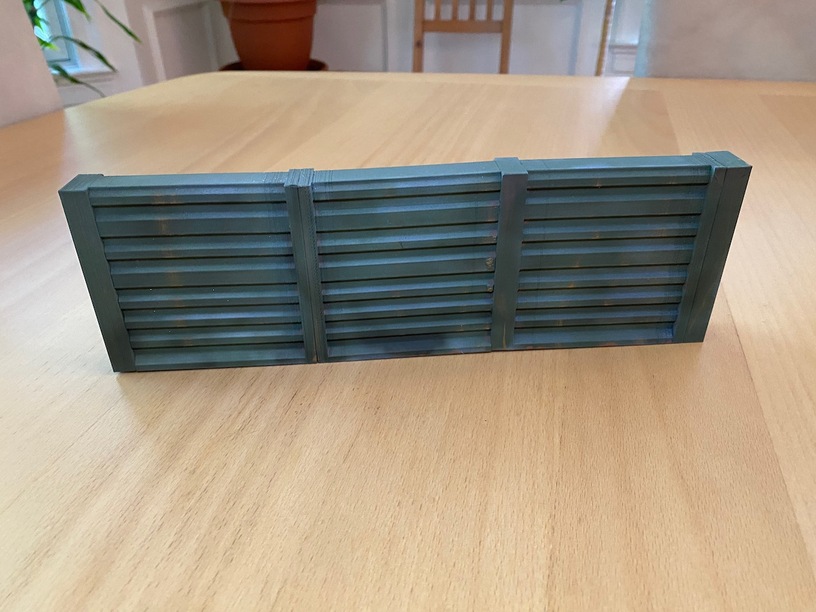
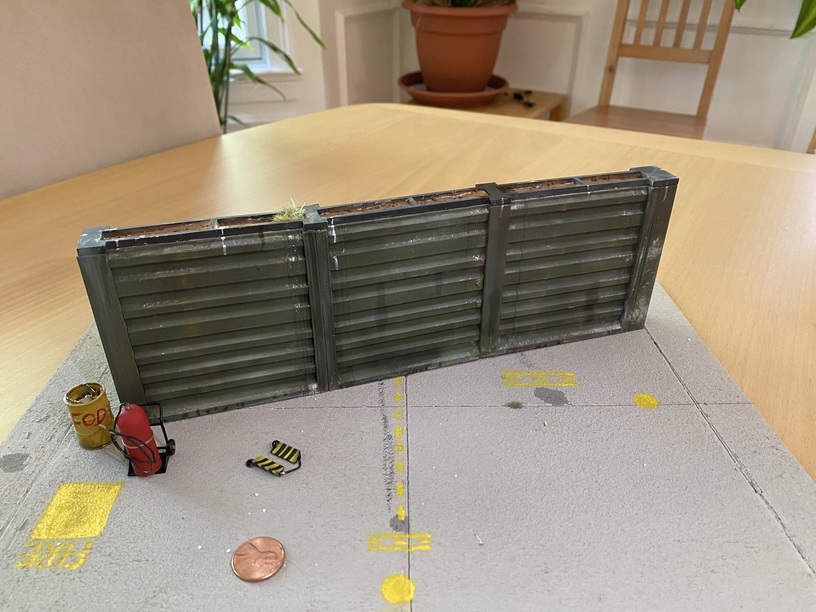
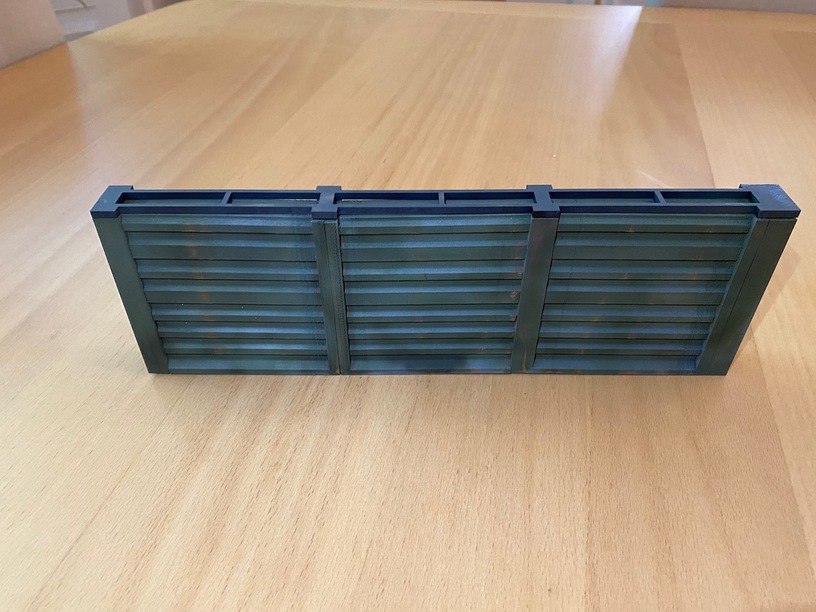
But I realized that nobody else can tell that the dirt is only a few mm thick if I put a cap on top that holds the “dirt”. So off to CAD, and then cut a piece of Draftboard (is there anything draftboard can’t do?)

Next we needed base paint to match the revetment walls. which I mixed up (refractive green, merdec brown and some nato black). Of course like any real world object uniformity is bad, so a little variation in the color is realistic. But the time I’ve added bird droppings, rust and oils stains you won’t notice anything

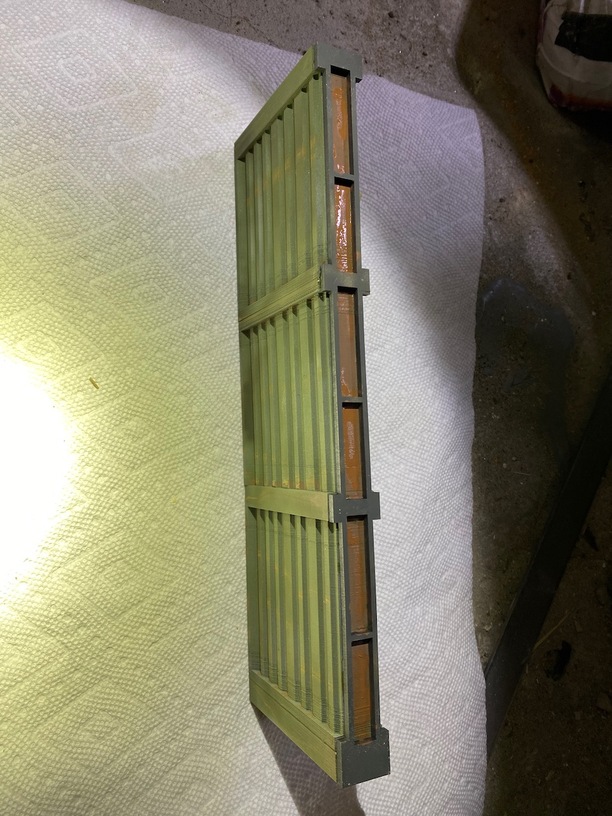
Next we have to put down a base brown coat in case there is a thin spot in the “dirt” we don’t want the plastic showing through, so some Merdec brown works nicely here. Again not perfect on purpose.

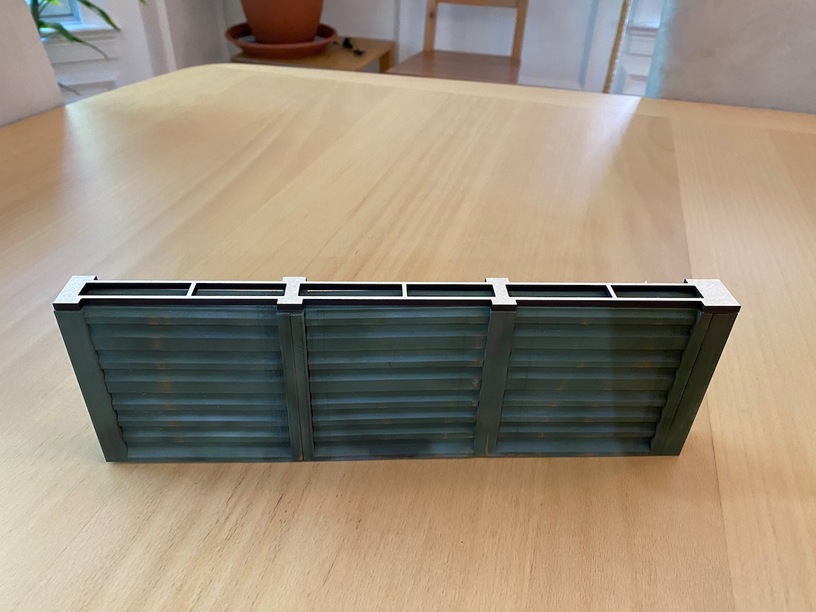
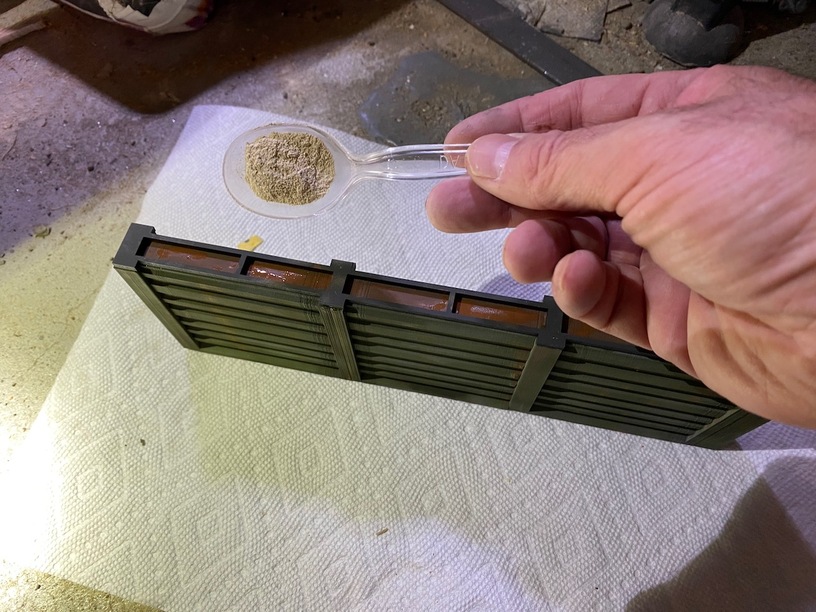
Now for “dirt”, I have found that while there are commercial dirt products that nothing honestly works better than sanded grout. Plus it is adhesive on its own once you wet it, so you fill the area and put some drops of water on it. The key here is unlike in your bathroom tile you don’t want the surface too smooth.

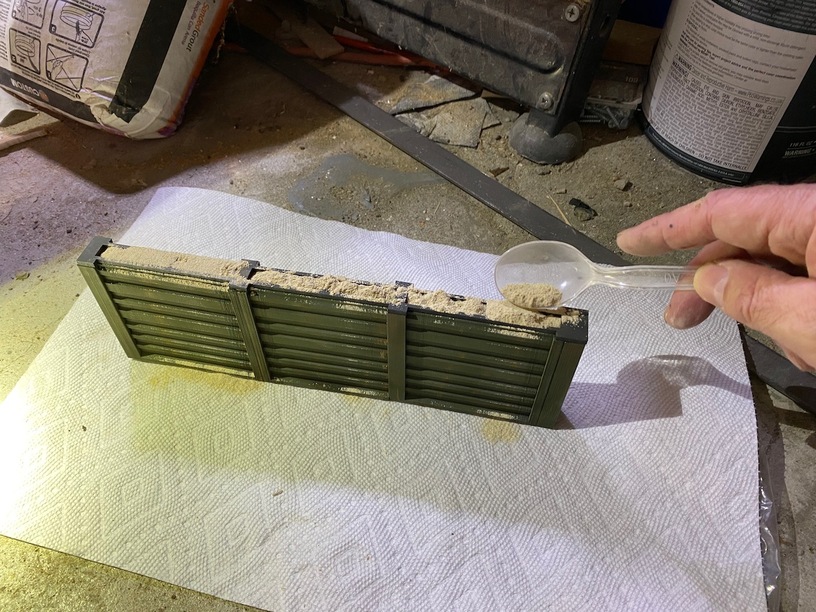
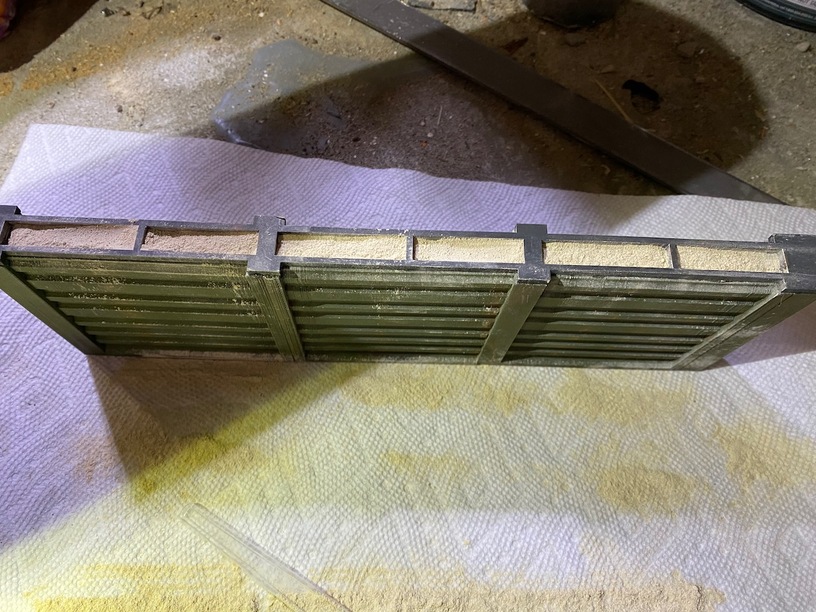
When the grout is dry it will get stained with a wash of earth tones to make it more like dirt dug up on the side of the base and dumped in by a front loader rather than playground sand. I will some tiny gravel (used for model train rail beds) to give it some texture then will finally have the Revetment part done. I also noted in that new photo there were a few weeds in the dirt, so I will get that. I unfortunately have to redo the base because I mis measured and the revetment hangs off the back (and not in an artistic way like the howitzer did, more like oh you can’t measure correctly. So a quick cut of some 1/2" (12mm) MDF with some concrete paint on top and then re-airbrush the ramp markings in Chromic Yellow using the laser cut stencil I made. and that will be finished. Oh and I guess I better finish the plane too (I’ve been busy so hadn’t finished the armament and once that’s all done we can finish this up and move on to the Phantom.

I am very excited that I will be joining my son out at OshKosh (at AirVenture 2023) where I know there are several actual flying Skyraiders so I can get some reference photos myself of where grime and oil stains are (that’s what sells a model).

40 Likes

Amazing attention to detail. Wow.

11 Likes

Thanks for sharing this. I never knew the importance of grime, oil stains and dirt.

11 Likes

Oh yeah there are a huge number of “weathering” tutorials on youtube, particularly for painting Armor models, but airplanes too:

9 Likes

Actually funny story on those, when I was starting to make a diorama for my niece she was still a rocket artillery commander (MLRS - i.e. the big brother of HIMARS) but every publicity photo from the army looked like the stupid things had just come from the showroom floor. And I noted there were no diesel stains near the fuel fill (similar to an 18 wheeler’s fuel tank, which are coated in fuel). So I asked her, if her privates that presumably did the fill when in the field were just that good, or did someone scrub the crap out of these before snapping the pic. She went and looked and there was diesel running down the side of the panel. FInally some artillery unit went on maneuvers in Germany with the German army and they took “action” shots, and the paint was scorched off where the rocket exhaust hit, etc, and I was in heaven to have realistic pics. Oh course the current conflict in Ukraine has given many grungy action shots of all sorts of weapons systems covered in muck, dents and rust.

12 Likes

Maybe 70% of all military action shots taken ever?

5 Likes

Exactly, except the MLRS photos were as clean as when Ford show you the latest Mustang, No piece of armor should be shiny clean. You need mud in the bogies and splatter mud on the side skirts or it doesn’t look real. What was interesting in my research when I was first learning some of the weathering techniques is that in WWII shermans rarely had paint chipping whereas soviet and german tanks did, and that was mostly because GM was building the shermans and they knew how to make a reliable paint, whereas the soviets had no auto-industry to speak of and germany produced tanks almost as bespoke artisanal vehicles (which led the problem of not being field upgradable, where the allies were hyper standardized). So a little research like that sells the weathering, plus the terrain where they were fighting. Tank at Normandy needs to look like a pickup in mississipi doing bog busting, but a tank at El Alemain needs a good dusting. Almost no mud obviously. For dusting I have light sand colored pigment (from MIG) that you can dust on by flicking with a brush above it, and then locking it down with a matte varnish. and for paint chips you now use this very cool chipping effects paint (over the primer) and then apply an acrylic paint above that, then using a wet brush (plain water) you sort of scrub and the paint flakes off realistically. One of my favorites for painting armored vehicles in one from AK where they mix mud paint (burnt umber semi-gloss acrylic with static grass mixed in, so you get that chewed up mud stuck in the tracks look) I used that on the howitzer wheels since the diorama was muddy grass. Airplanes are of course a different beast since people aren’t letting mud be all over a plane, so there it is oil and grease along with sun-fade and soot from exhaust, flak or rockets. There are whole video tutorials on just weathering the steel exhaust panels on the Phantom’s tail (which has that weird rainbow patina of metals that get baked hot and also soot from the Phantom’s famously soot filled exhaust:

7 Likes

I had a friend that was trying to collect all the images of dragons on the internet but complained that his (a lot more than average) hard-drive space kept getting filled up. So I pointed out that the internet would always be bigger than his hard drive even if only a selected tiny percentage.

I suppose that would be true of the best military shots as well even if only selected images and not videos.

6 Likes

Oh, neat! Executed with your usual meticulous attention to detail, of course.

I’m wondering if one could add ground black pepper to the sanded grout to get some color variation. It would probably not be to scale though…

9 Likes


Similar idea here with the granules mixed in (HO scale track bed gravel). And the dirt is now stained the color I see in modern photos from Vietnam which was a redder brown than the sand color of the grout. Got some good bird poop drips, fuel oil spills and some weeds. Also made a FOD bucket which I saw in some of the historic photos. Filled with random crap from the shop floor (fragments of filament, chips from my CNC, etc)

10 Likes

Awesome!

6 Likes

That is fabulous.

4 Likes

Love all your little details on this.

3 Likes

Brought back memories. Remember seeing these barriers when I use to fly into Tan Son Nhut back in late 60’s. Looking forward to seeing your completed diorama.
Thanks for sharing

5 Likes

Good use of your FOD (foreign object debris) bucket! Largest piece of FOD I ever saw at an airport was a piece of wing from an airplane, just lying there between the taxiway and the runway. (This was one of the last flights of my last overseas tour and my last active duty assignment.) It was too big to be flipped around by my rotor wash, but it made me wonder what else was hiding around it.

I didn’t know how much effort it takes to make something look realistically worn.

8 Likes

We’re you in the Air Force?

2 Likes

No, Brown water Navy, PBR’s. Long time ago

2 Likes

Oh so you meant fly in as a passenger not pilot.

2 Likes

Correct, by helicopter and Air command flights to states. We use to steal things from Air Force once in a while. I only remember a case of lobster one time.

2 Likes

Easily justified by the fact that they had a case of lobster, which seems excessive in a combat command

5 Likes