In this thread I am going to recap my grid setup and go over some new uses I have made for it. I’m also including the cut files I’ve designed to hold some other random things including a 4” pestle, pizza cutter, shot glasses, and corkscrews (I’ve previously posted these files as well).

Feel free to take what you want from this post. If the grid is not your thing, then you can just skip to the “design file” drop down and grab the SVGs along with the vendor for the items which they are designed to hold.
Design Files
To download these SVGs, right click on the image of the design and save as SVG.
Grid

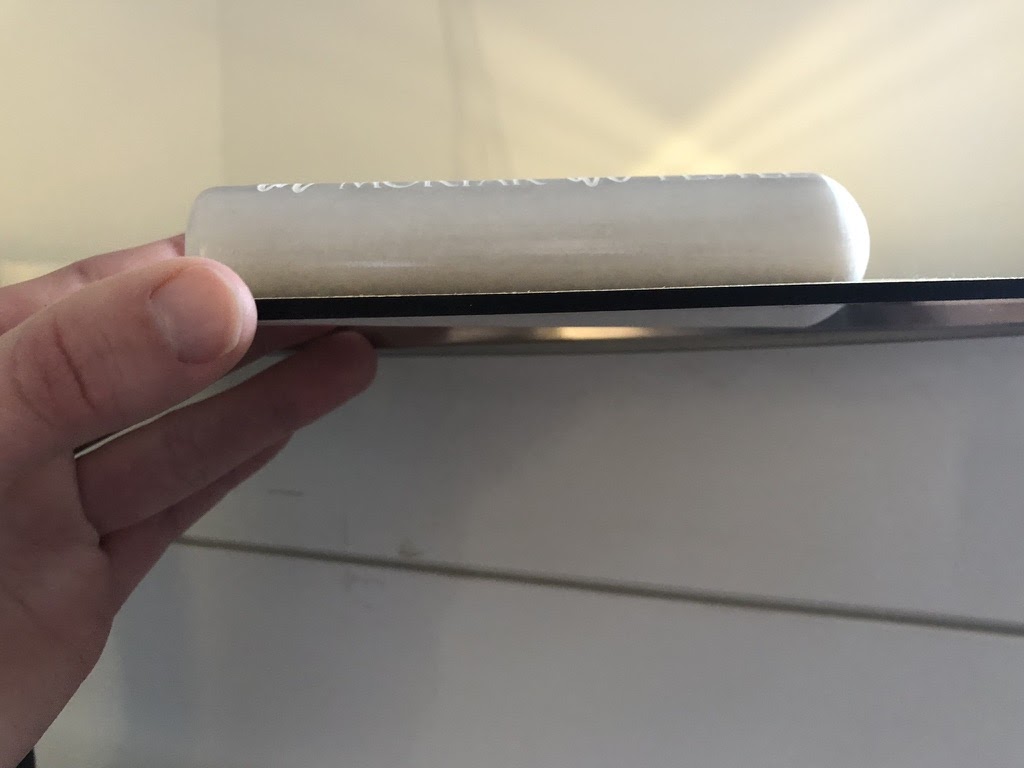
Single pestle holder
This holder is designed for the 4" marble pestle from FoxRun brands and also found on webstaurantstore
Thunder Group 4" White Marble Mortar and Pestle Set

Pizza Cutter
I can’t seem to find a web link for the pizza cutter I use. I buy them for $4 directly from FoxRun but this is what they look like:


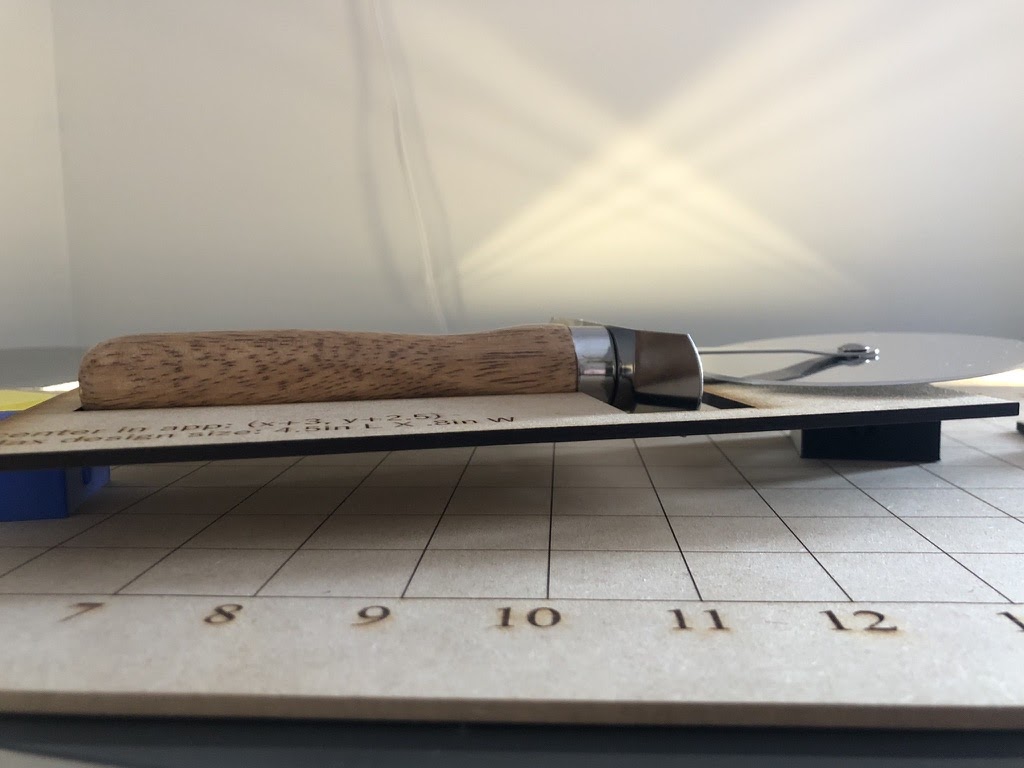
Corkscrew
This is designed to hold this corkscrew:
Acopa T-Style Stainless Steel Corkscrew with Wood Handle

Shot glass
This is designed to hold this shot glass:
2 oz. Shot Glass (12/Case) - WebstaurantStore

Concept of a grid mapping
I have seen a lot of requests about having each Glowforge machine come with a grid. Certainly just having a grid pattern in the bed of the Glowforge is doable, but if you want the grid coordinates to map precisely to the coordinates shown in the app, making the grid is something that you actually have to do yourself. This is because each Glowforge has small and subtle variations in manufacturing (among many other factors) that will make each bed grid unique. I have two Glowforges (one is located in a closet and the other in a bedroom) and so here is a demo of what I mean…
I set up my jig in my closet Glowforge and had it engrave a .2” circle. In the app, I set the center coordinate point to (1,10).
Then I took the board using the exact same jig and put it in my bedroom Glowforge. I then repeated the engrave a .2” square setting the center coordinate point in the app again to (1,10)
Here is a close up of the comparison
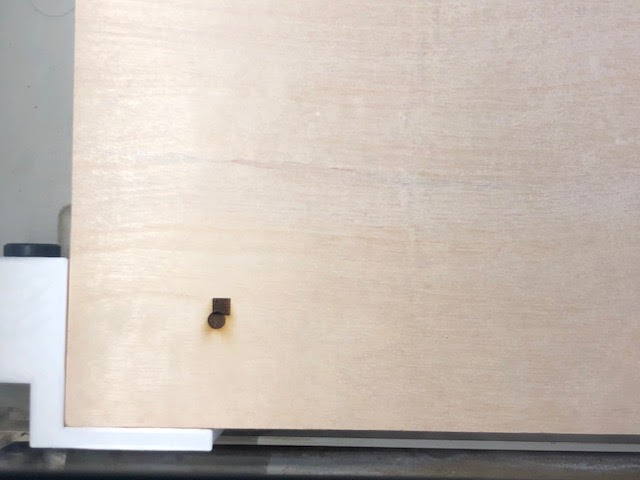
If the Glowforges were EXACTLY the same, the square would be directly over the circle. However, as you can see, even though the app had specified the same center point, (1, 10) is a slightly different location in the bed of my closet Glowforge compared to my bedroom Glowforge, because no two Glowforges are EXACTLY the same.
Conclusion: There is a unique mapping of your specific printhead to your specific Glowforge. This is also alluded to when you read Glowforge instructions like ‘setting up a new printhead’ or if you read your machines logs.
Concept of grid with different material heights
Does the point on the map change based on material height?
No. No matter how high your material is, your printhead will go to the same spot for each point. Here is an example….
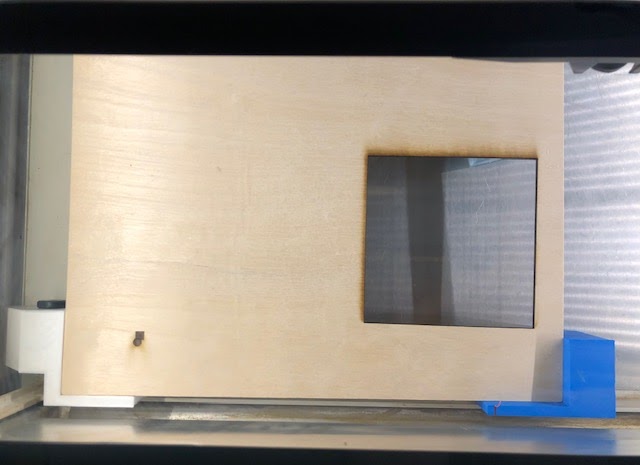
I set up my jig in my bedroom glowforge and have the material raised 1.8” from the bed of my glowforge. I then had my machine engrave a .2” square at app center point (1, 10).
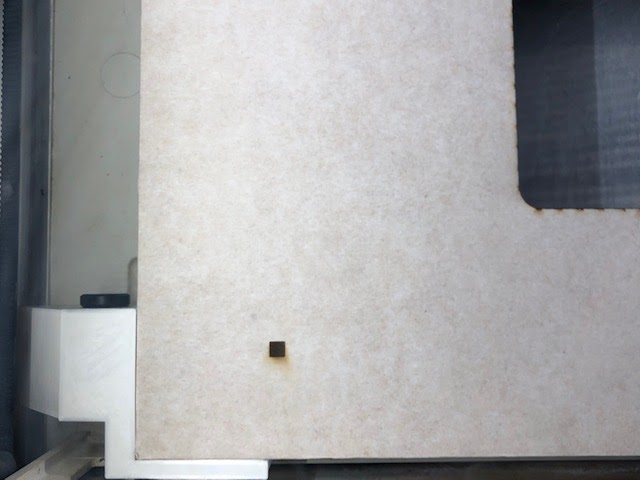
I then removed my material and lowered my risers to 1.4”. I then put the material back in and lined back up with my corner jig. I had the glowforge now engrave a .2” circle at app center point (1, 10).
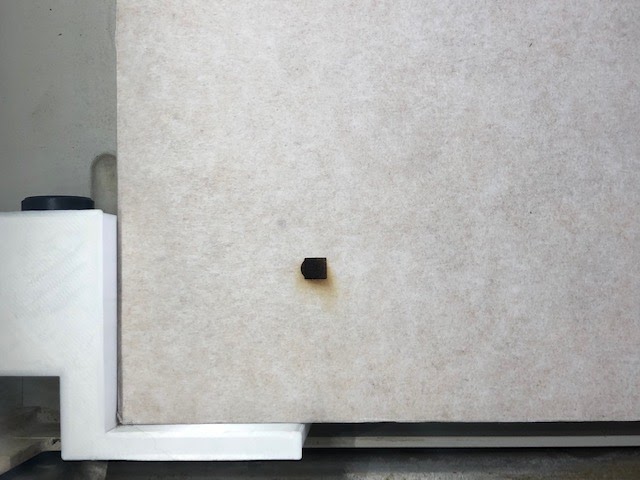
As you can see, it is pretty accurate. I am confident the delta is just from human error because lining back up with just using 3D parts has a lot of potential for human error ![]()
Grid recap
So now onto the grid….
I have written a writeup and posted before on how you can use legos to make a jig as opposed to my 3D printed parts (see link below). That guide also goes over the grid setup in the app with much more detail than I provide here. If you have not read over it before, then I would recommend starting there because I will only lightly touch on some of that information in this post.
Updated grid for engraving without crumb tray
Here is the STL files for the brackets I use:
3D design Main Grid lineup jig | Tinkercad
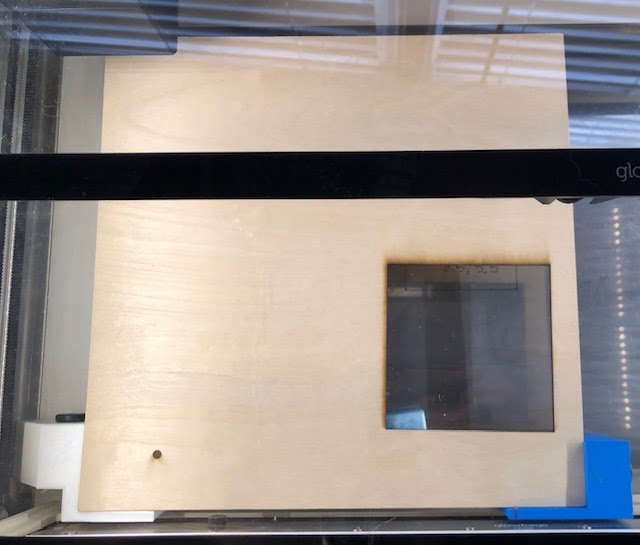
For clarity, I am using two pieces that are different colors. The white piece (which is placed in the front left corner of the bed) is designed to butt against the edge of the left Glowforge rail and the front door. This allows the white piece to return to the same spot in the Glowforge bed every time I place it. The white piece is the critical piece that lines up my grid; it has to be put back in the exact same spot every time for the grid to be accurate. The blue piece is only being used to line up the other corner of my material to the front door. It is just making sure my grid is put in square (not crooked) whenever I use it. Here is a video of how I set them up.

I raise my material height to 1.5” in the bed of my Glowforge (I use 3D printed blocks for that) and line up the material with my lineup jig (the white and blue 3D printed parts in my case). I then have the Glowforge print a grid that starts at point (1, 1) in the app (this is because (0,0) is not a real printable point, the print head can’t reach it when printing). The creation and placement of the grid in the Glowforge has to be done correctly if you are wanting to use the coordinates from the app to align future prints. I go over that in the referenced guide, so make sure and read into that if you are not already familiar with that concept. The grid file posted at the bottom of this post should upload in the correct spot, but it is prudent to just double check.
Once I have printed my grid for the machine, I can use it whenever I need and simply change the height of my risers based on the height of my material I am putting on the grid. I can then line back up the grid with my lineup jig and use the coordinates in the app to place designs exactly where I want.
Using new jigs with grid
I decided to design some new jigs that get used on top of the grid and are useful for doing a print with a variety of materials that each need to be raised a set amount. Some of these jigs are also designed to hold an item in place with using the cut through (i.e. the shot glass and pestle jigs).
I designed these jigs so that you use the point on the grid where you place the top left corner of the jig and put that into a simple equation that will give you the center point of where you want to put your design in the app. For example….
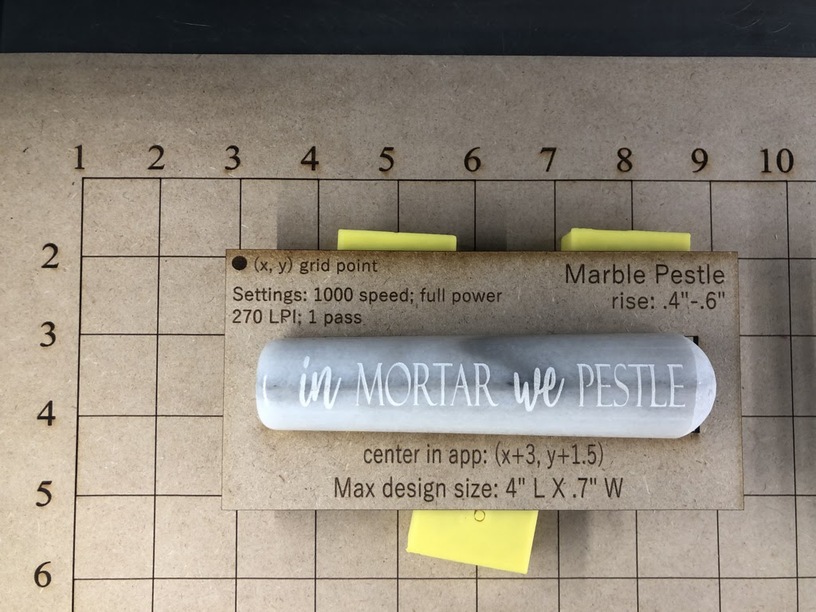
When I set up this pestle on the bed of my Glowforge grid, I put the top left corner at point (3, 2) on the grid.
So now in the app, I bring in my design and I set the designs center coordinates at:
(x+3, y+1.5) => (3+3, 2+1.5) => (6, 3.5)
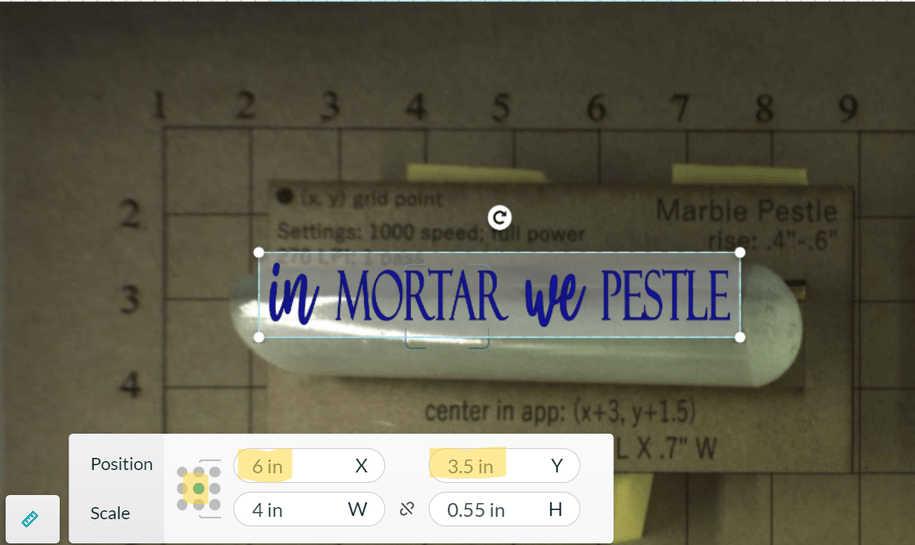
There are some items to keep in mind when setting up the jig and design. To get this pestle at a proper focus height, I need to rise (yes, I technically should use ‘raise’ but I was not focused on matters of verbs with this stuff) it .4”-.6” (I use 3D printed blocks to do that). Then, in order to make sure the design is sized well, I want to make sure the design is no bigger than 4” long and .7” wide.
And as you see in the first photo of the pestle, my machine engraved it perfectly on point.
If you need more examples then I can try and get some posted in the comments.
Hope this all makes sense.