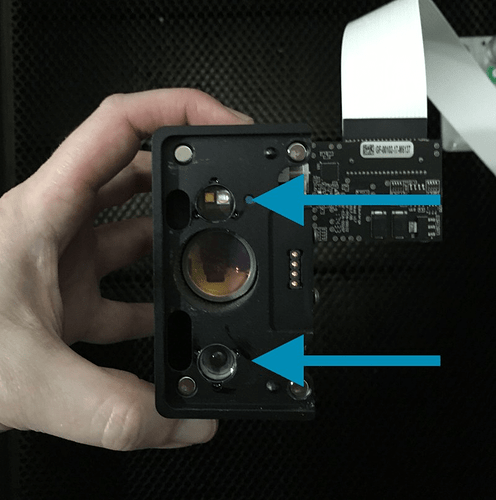
My glowforge is making a grinding noise upon startup and stopping. The focus has been a little off but cutting ok. I have always had to use thick setting to cut 1/8" material. Would be nice to figure this out also. I have a lot of 1/4" material and can’t use it. I have just cleaned my forge and I use the honeycomb pins to hold down plywood but generally my plywood is very nice and not warped.
You’ve opened a support ticket by posting here, so they’ll be along soon to help you. It might be helpful if you could post a video so they can hear what the noise sounds like – it works best to put it on YouTube and then link to it here.
As for using thick settings to cut 1/8", that doesn’t make sense to me, because the laser would be defocused and would be LESS likely to cut through.
If you’re using the thick setting on 1/8" material you are getting less cutting power to the wood because it’s focusing 1/4" above the material instead of at the surface.
On a Basic (there may be slight differences if you have a 45W tube)
The PG settings for medium basswood ply is 150 speed, full power, and a focus height of .13.
The PG settings for thick basswood ply is 166 speed, full power, and a focus height of .206
Literally the thick settings are weaker (because the laser is moving faster)
If your laser isn’t cutting through your plywood it’s likely you bought stuff that either has voids and fills, or the glue isn’t laser cuttable. There are lots of non-PG brands that folks have successfully cut.
Hello @bshoward,
Thank you for reaching out to us. I’m sorry to hear your Glowforge is having some trouble.
To help investigate the cut through trouble you’re having with your material, could you please post a photo of the front and back of a recent failed print. I’d like to review the logs for the print to try and gain some insight as to what might be happening.
Next, I’d like to have you do a quick cleaning of all of your optical components. You can find detailed cleaning instructions on our Things That Need Wiping page. Once all of the optics are clean, please run the below test print for me. This will help us to establish how your Glowforge performs with a known design on Proofgrade material and using default settings. If you have some 1/4" proofgrade material please test with that.
Gift of Good Measure Test Print
- Turn off your Glowforge, then turn it back on
- Place Proofgrade Draftboard in the bed and load the Gift of Good Measure design. If you don’t have Draftboard, Proofgrade Acrylic will work as well.
- Set the score and engrave steps to ‘ignore.’ Print the Gift of Good measure using the default settings. Allow the print to finish.
- When the print finishes, leave the lid closed and wait until the fans stop and the picture of the bed updates.
- Check the completed print:
- If the Gift of Good Measure fails to cut, please let us know the date and time of the print
- If the Gift of Good Measure cuts successfully, please try another print of the design you saw the issue with, and let us know the results.
If the test print fails to cut through properly, please send photos of the front and back of the print, along with photos of all your cleaned optical components, paying special attention to any damage you might find:
- Both windows
- The printer head window, on the left hand side of the printer head
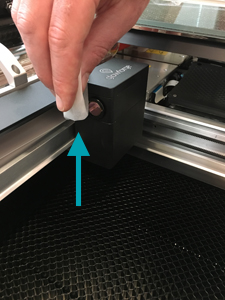
- The laser window on the inside left of the Glowforge
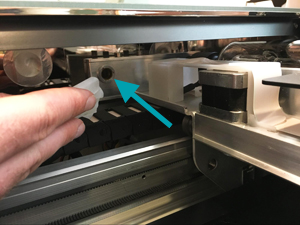
- The printer head window, on the left hand side of the printer head
- The printer head lens
- Both sides of the lens, top and bottom
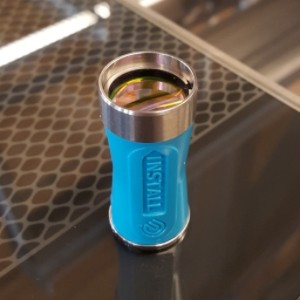
- Both sides of the lens, top and bottom
- The mirror inside the printer head
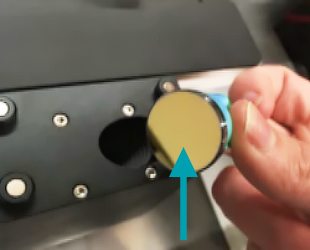
- The bottom of the printer head
Once the test print has been run and I have those pictures, I’ll follow up with next steps.
All the best,
It’s been a little while since I’ve seen any replies on this thread so I’m going to close it. If you still need help with this please either start a new thread or email support@glowforge.com.
