Before we ever got our GF in, I was browsing these forums for ideas and inspiration. As a musician, I loved this guitar pick holder made by garywoffinden.
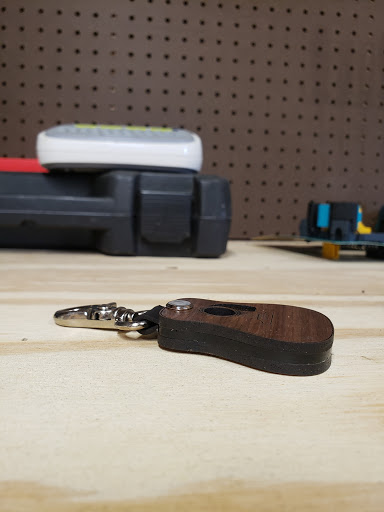
I showed it to my wife (the designer) who saw it as a challenge to recreate. I would say she succeeded! This was pretty much our first build on the GF. We made this one with PG Walnut Hardwood and Black Acrylic.
If someone shares a print that they’ve made, please respect their sharing and do not ask for the source design or artwork. Designs take work and have value, and when you ask someone to give you that value for free, you undermine their work.
This one would be a good one to try your hand at. It looks like a simple 3 layer cut with an engrave on the top piece.
Grab a guitar image of your choice - Google image search can help or check out the Noun Project or any other source of public domain or Creative Commons shared clip art. It’ll help if it’s a vector but lots of options even with bitmaps.
In Inkscape do an image trace to get the outline. Grab a Chicago Screw (you can get them from Home Depot or Lowes) and measure how big a hole you’ll need. Drop a circle that size on your design. Copy it twice.
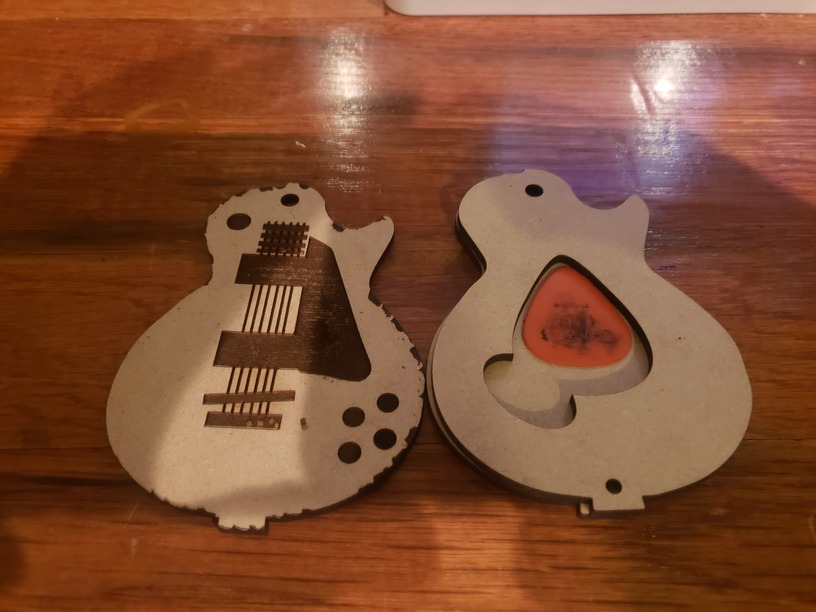
The first copy is the bottom. The second copy can be the middle and the third your top. The middle needs to have an internal outline defined - it’s going to be the other cut you need. Alternatively you can grab a Pick pic and get an outline that you drop into the middle piece that will be pick-shaped. You may want to add a finger notch by merging a D shape or circle with the pick outline. You’ll also want a small hole for the closing magnet. Size it to whatever tiny magnet you might have.
Then for the top layer drop whatever engraving you’d like including personalization or whatever you like.
Take that copy and make another copy that you mirror and give a different color. This will be the underside of the top layer. You’ll need something for the magnet to attach to. Make a deep engrave for either another magnet or a small piece of steel (tiny washer?). You want this in a different color because you’ll do all of the other cuts and engraves on one pass and then this last engrave as a 2nd pass after you flip over the top piece.
A handy thing to do in the first pass would be to score the outline of the mirrored top layer. Then in the 2nd pass, turn off the first 3 sets of cuts and change the mirrored top layer from a score to a cut. The score will be on the material in the bed and give you a place to drop the top piece on so you don’t get any alignment issues on the 2nd pass.
I am going to try and recreate it. I’ve burned my brain on one of my other designs so I’m taking a day off from actually designing anything so I can reset. But thanks for the encouragement
I did not post the files in the free section because we modeled it almost entirely from garywoffinden’s design. Again, it’s HIS design. Imitation is the sincerest form of flattery, but giving away someone else’s work is a different story. Unless your version is noticeable different, please give this some consideration before giving away the files.
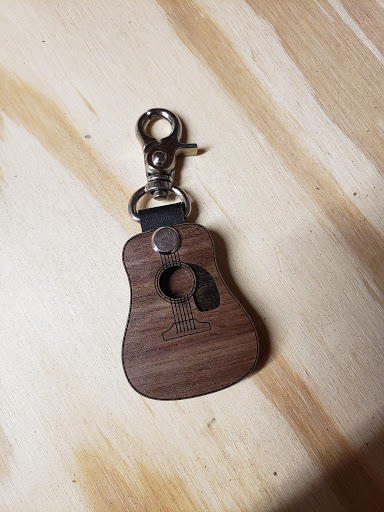
I was able to recreate and style it similar. I used a different guitar body. I had to change a few things to the details of the actual guitar would be seen. In size mine is definitely bigger persay. 20200401_220104|666x500
I have one I am working on that is enough difference that I will share soon in Free Designs. Its acoustic guitar too. Mine will also have the neck portion that you can burn into leather.
Thanks for stimulating me to take this on. I love your design/colors!
It’s a neat approach to stash things besides guitar picks. There are a few grocery stores (I think Aldi’s does it chainwide) where you need a quarter to unlock a shopping cart from a line of them & when you return the cart connecting it to the one in front of it releases your quarter. I never have a quarter when I need it. But a little car shaped keychain like the guitar pick design can hold two - one for me & one for the other guy fumbling through his pockets looking for a quarter

