My Glowforge is receiving a “Head not found” error after centering for a couple of minutes. The printer head is moving freely. I have tried the following troubleshooting steps:
Switched the material I was using.
Changed the image I was originally trying to engrave to a different, smaller image that I previously cut without an issue.
Powered off the Glowforge and cleaned the lid camera, the lenses and the mirror.
Checked the lid cables and ribbon cables. All connections appear secure.
Removed, cleaned and reseated the printer head.
Cleaned the air assist fan.
None of these steps worked. It is still receiving the “Head not found” message.
Please let me know if there is anything else I can do to fix the problem.
My experience with head not found has always been related to the camera not being able to find the ‘print head’. From my understanding the print head moves around until the camera can find the GlowForge logo on the top of the print head.
When I had this happen to me the first time I had cleaned the cameras and still nothing. I am not sure which of the following items fixed it next because I did both at the same time. I cleaned the top of the print head where to logo is and I manually pushed, very slowly, the print head all the way back and to the left. Between those two items, one of those fixed it for me. Also, when performing the last two steps, I had my GlowForge unplugged.
I’m so sorry to hear your Glowforge is saying the head can not be found.
It looks like there may be an issue with how the carriage plate is attached to the laser arm. Can you please try the following:
Turn off your Glowforge
Open the front door and carefully remove the crumb tray
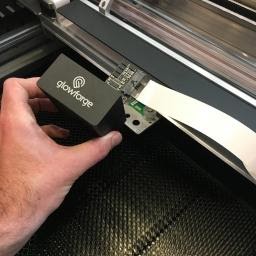
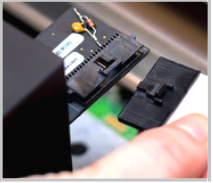
Remove the printer head
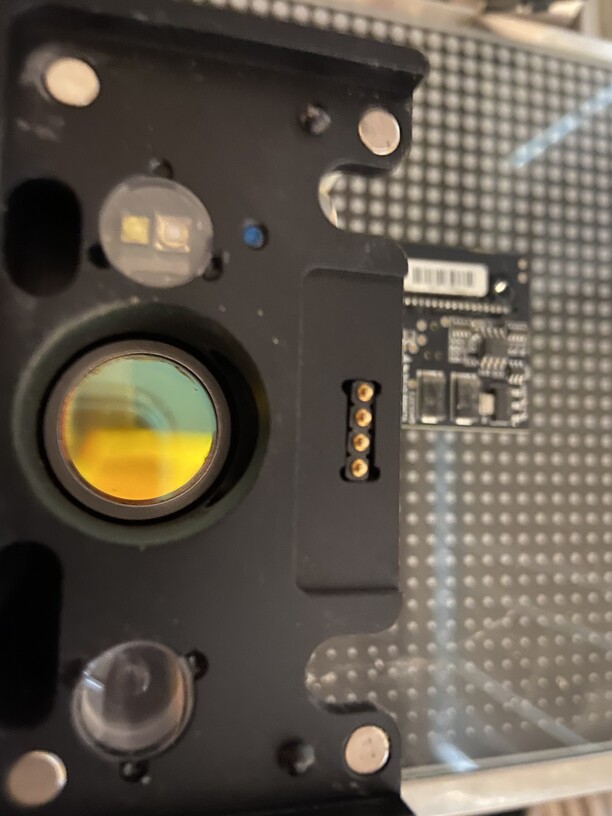
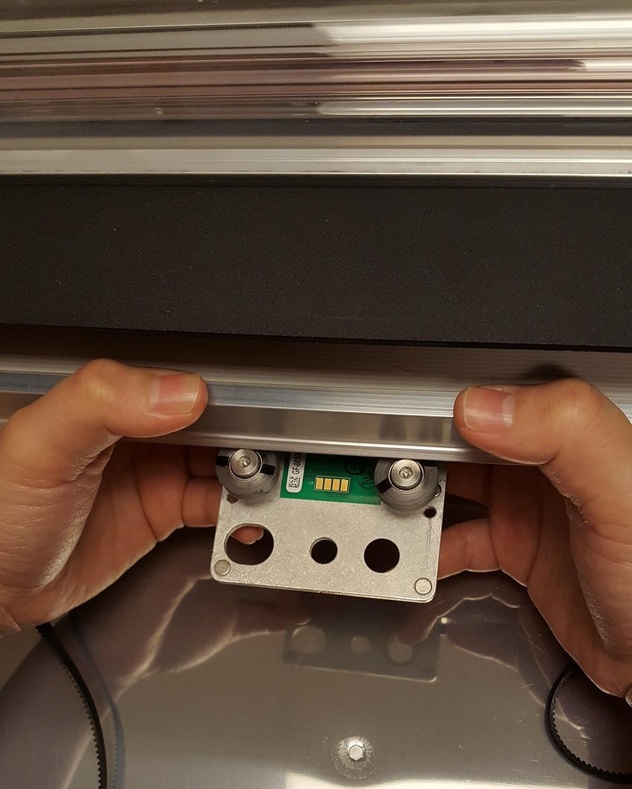
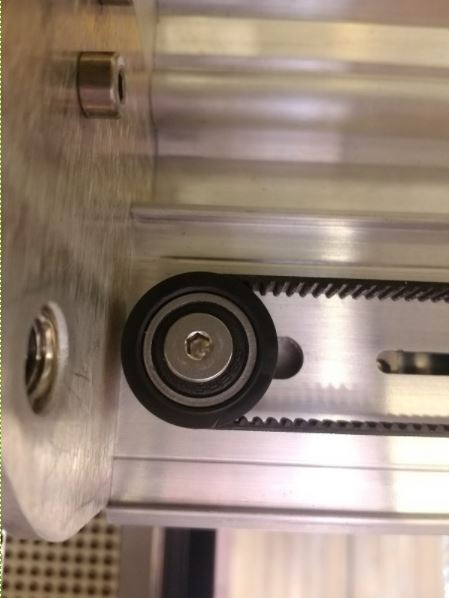
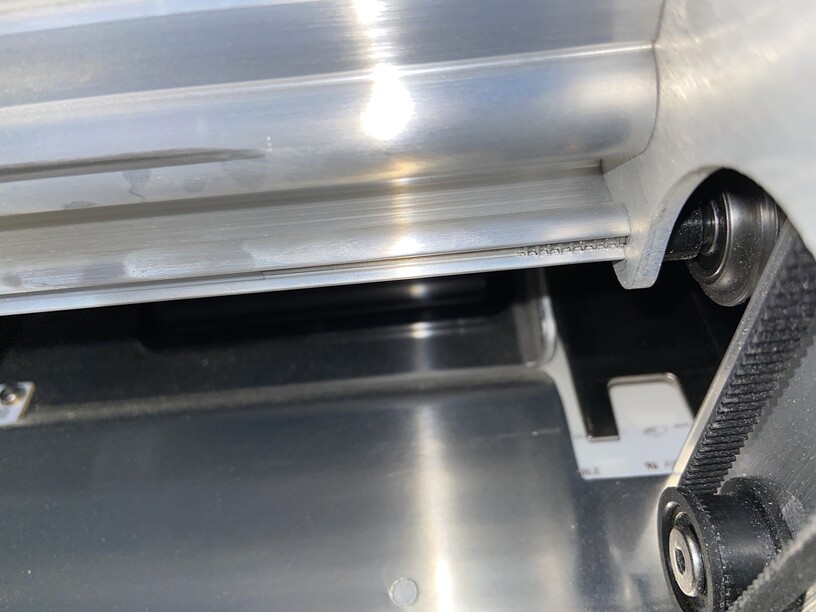
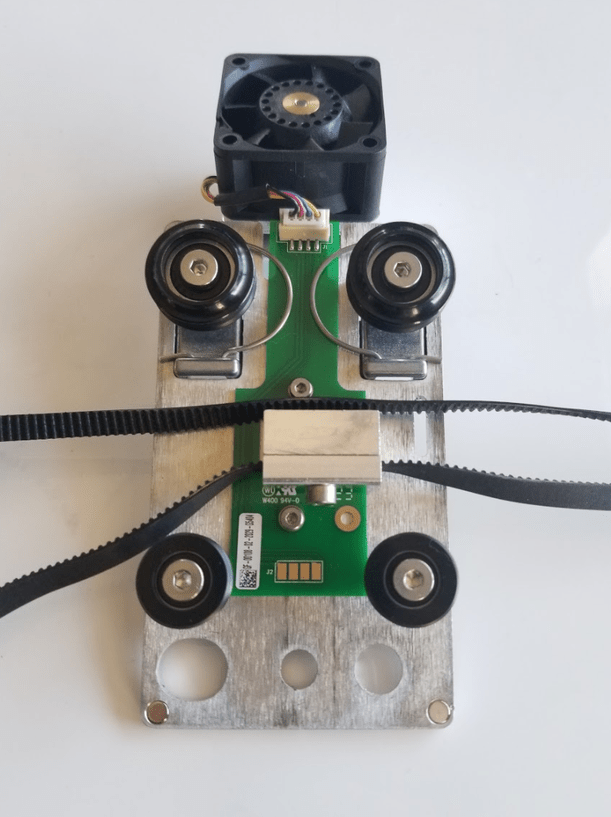
Holding only the finished black surfaces, grasp the printer head as shown. Pull gently up and back to disengage the magnets and remove the head.
Push down fully on the wire ribbon tab to unplug the wire ribbon from the printer head. Pull the wire ribbon gently away and tuck it into the laser arm.
Unhook the belt
Push the carriage plate to the center of the laser arm so it’s out of the way
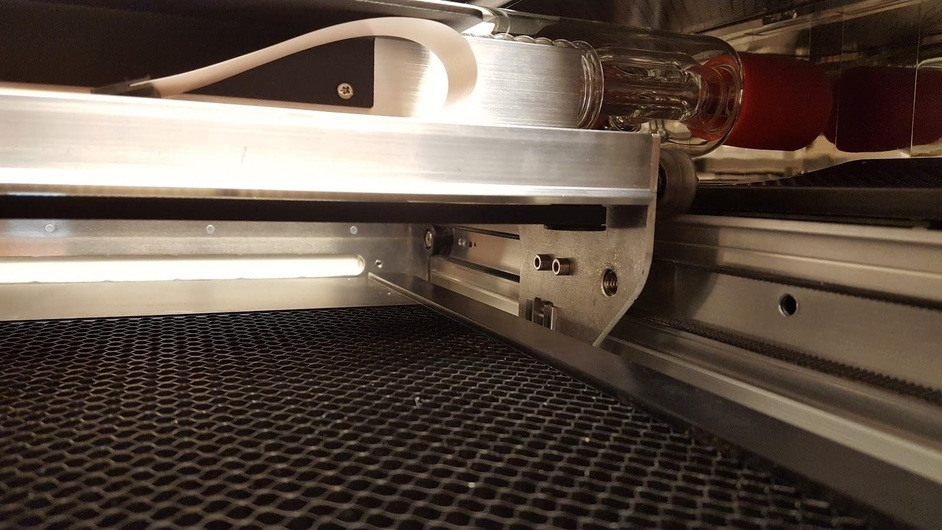
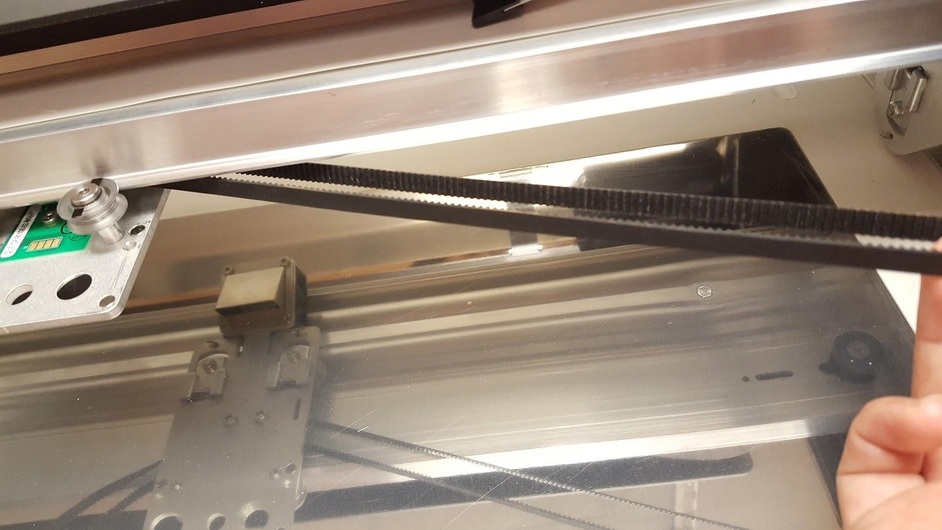
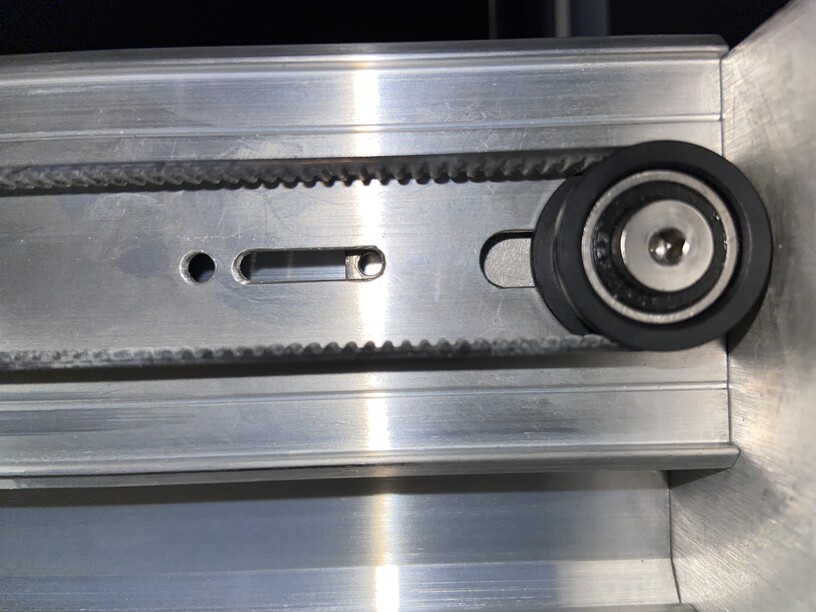
Reach under the laser arm on the right side and feel for a black belt and pulley
Placing your thumb between the belt and the laser arm near the pulley, push down on the belt while sliding the belt to the right towards the pulley. The belt will slide off of the pulley. Don’t be afraid to use pressure.
Unhook the belt from the motor on the left side
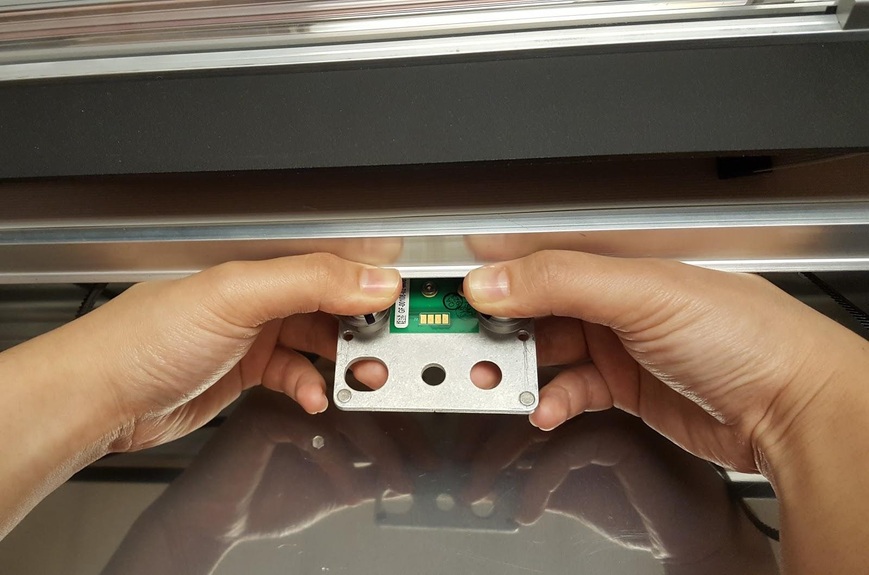
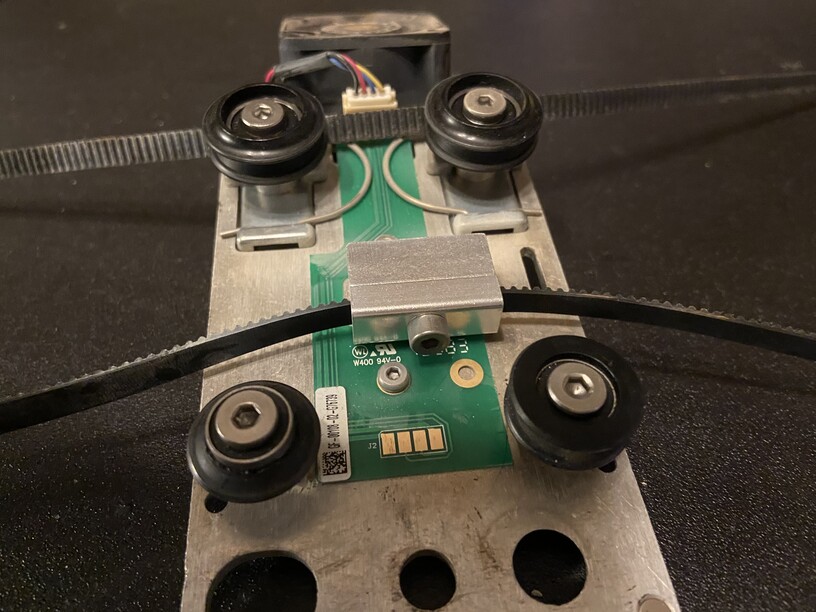
Remove the carriage plate
Place both index fingers on the rear corners of the plate and both thumbs on top of the front wheels. Use your other fingers to support the plate. While keeping the laser arm stable with your thumbs, use your index fingers to pull the plate towards you as far as it will go. Then push down with your thumbs to tip the front of the plate down and towards the back of the Glowforge until the plate pops off of the laser arm.
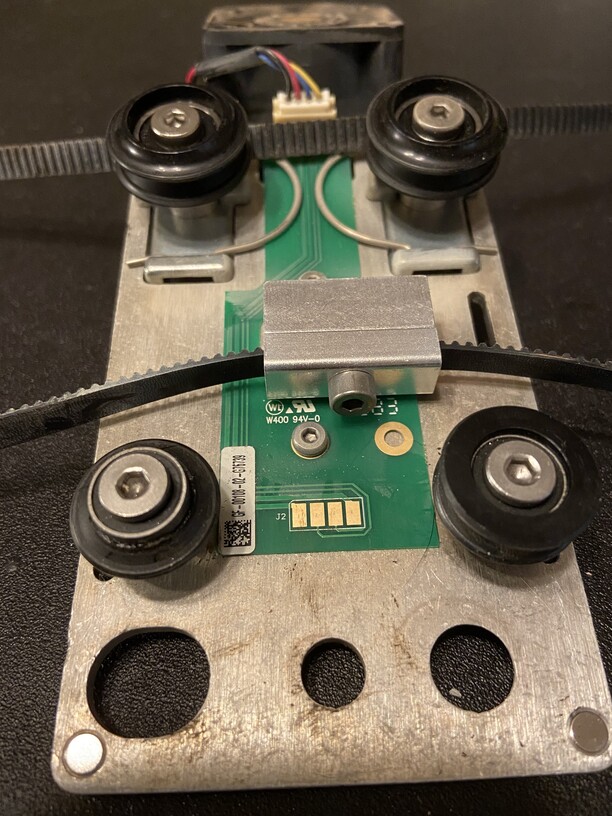
Placing your index fingers on the back corners of the carriage plate and your thumbs on top of the front wheels, hook the rear wheels on the groove under the laser arm. The front wheels should be mostly visible.
Pull the plate forward against the springs until the front wheels clear the laser arm then angle the plate up until the wheels are in line with the rail. Release the plate – it should grasp the rail firmly.
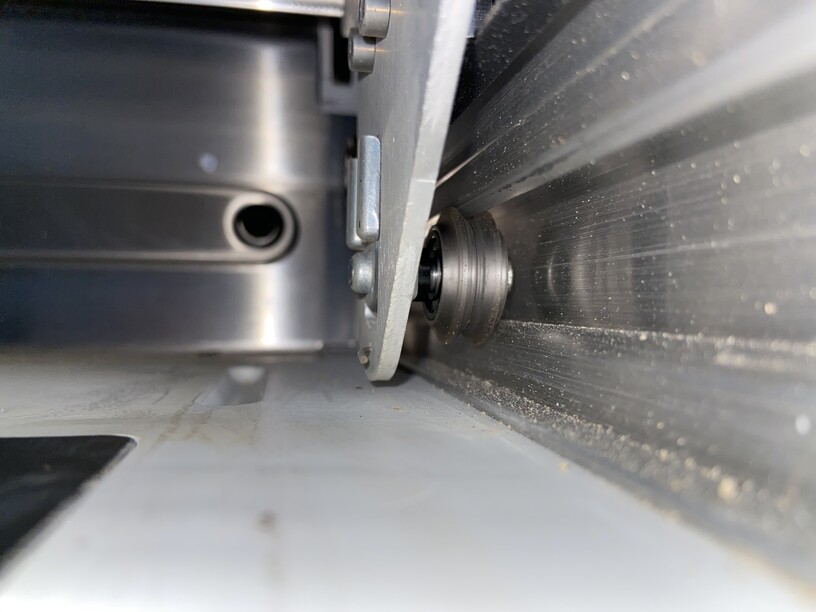
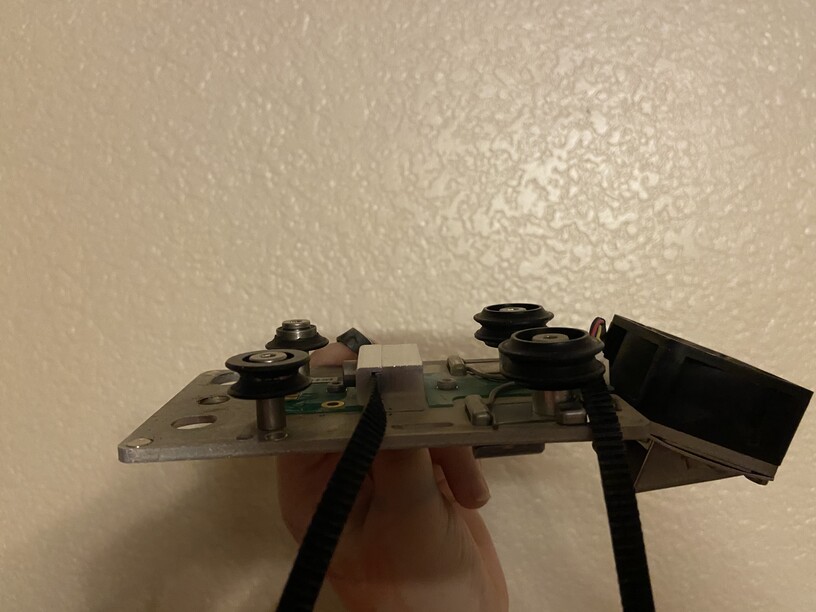
Pick up the right side of the belt and make sure it is not twisted. The outside of the belt should be smooth and the inside should have ridges.
Make sure that the left side of the belt is not twisted and is smooth on the outside and ridged on the inside
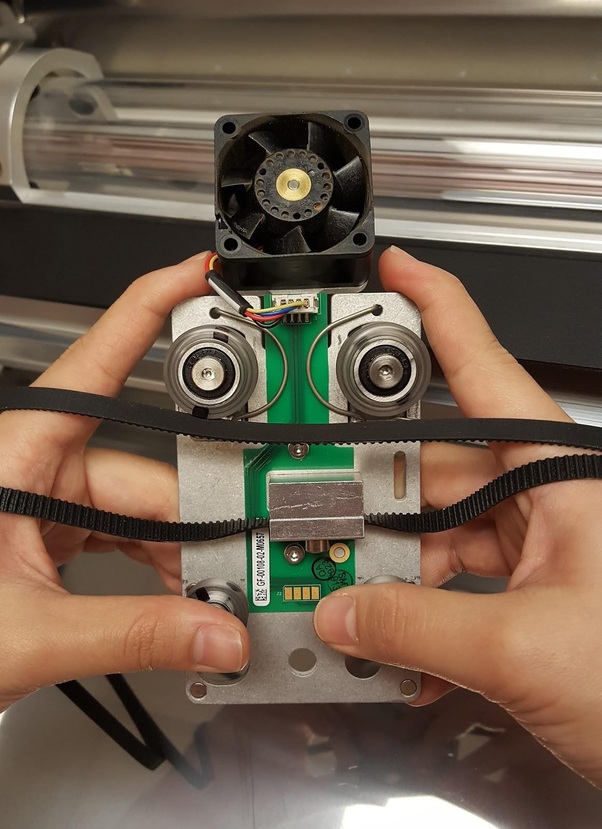
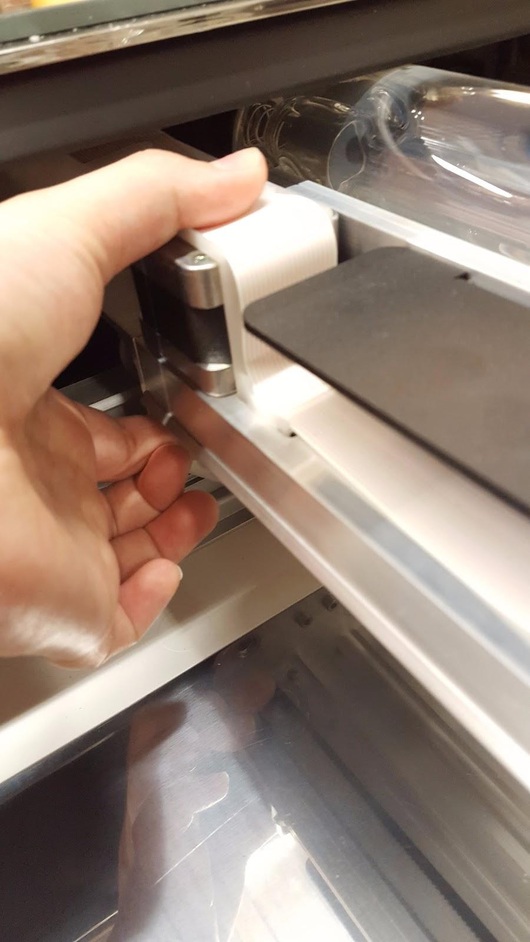
Attach the belt on the left side
Using your left hand, set the belt on the front half of the motor (the silver piece on the left-hand side below the laser arm) and support it with your fingers by placing them under the motor. The belt will not be fully on the motor. Use your left thumb and fingers to clamp the belt firmly in place and apply pressure.
Still holding the belt and motor firmly with your left hand, use the pressure from your left fingers to guide the belt clockwise around the pulley as your right hand slowly pushes the carriage plate to the left. The belt should roll onto the pulley until it is secure.
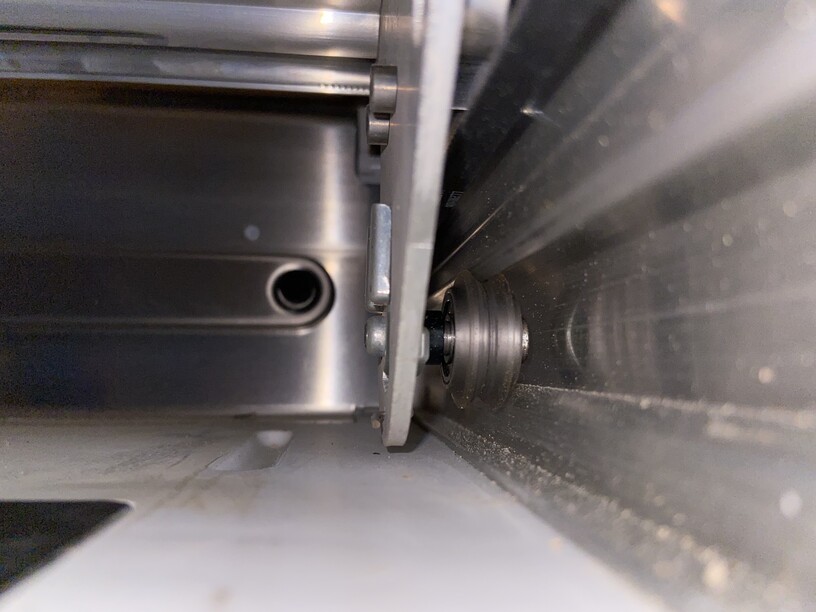
Once the belt is in place, be sure it is taut and does not sag. If it’s quite loose, please take a photo of the belt and send it to support@glowforge.com.
Prepare to Print
Gently slide the carriage plate back and forth on the laser arm to ensure that it travels smoothly. If it doesn’t, remove the plate and try again.
Replace the printer head and crumb tray according to these instructions
My experience with “head not found” usually involves a really late night or a really early morning, and doesn’t really have anything to do with the Glowforge.
Thank you David. I followed the instructions and was able to make a test cut and I was able to engrave a piece. However, when I tried to print something else, the same message appeared again. I checked the carriage again but the error isn’t clearing this time. Also, the cut I made did not cut cleanly through the entire piece and the printer head was making a squeaking noise as it moved across the arm.
Thank you for working through the instructions my colleague David provided. I’ve extracted the log files from your Glowforge to review your most recent print attempts.
Based on the log files, it looks like your lid camera is experiencing trouble locating the printer head, and it may be due to the extra material you have inside of the bed, near the material you were hoping to print on. Would it be possible to remove all of the material from your bed, and reboot your Glowforge to see if the same error occurs? Voids in material can make it difficult for your Printer Head to be found, so I’d like to make sure this helps to resolve the snag.
I removed the piece I was using as a guide and tried to print with just the material but it stuck on centering. I followed the original instructions again to make sure the carriage plate was attached correctly and tried to print. Again, it stuck on centering. I then removed all materials from the machine and turned it on. After doing that, the Head Not Found message appeared again.
Thank you so much for working through the instructions I sent over previously, and for reviewing some of the additional details my colleague inquired about.
I’ve extracted the log files from your Glowforge to review your most recent print attempts, and the error you were experiencing. Based on the log files, it looks like the Printer Head may be sitting lower than it should when the lid camera is attempting to locate it. I’d like to review some additional photos from inside of your Printer.
In order to take a closer look at this for you, would you please send me the following photos?
First, power off your Glowforge and remove the crumb tray.
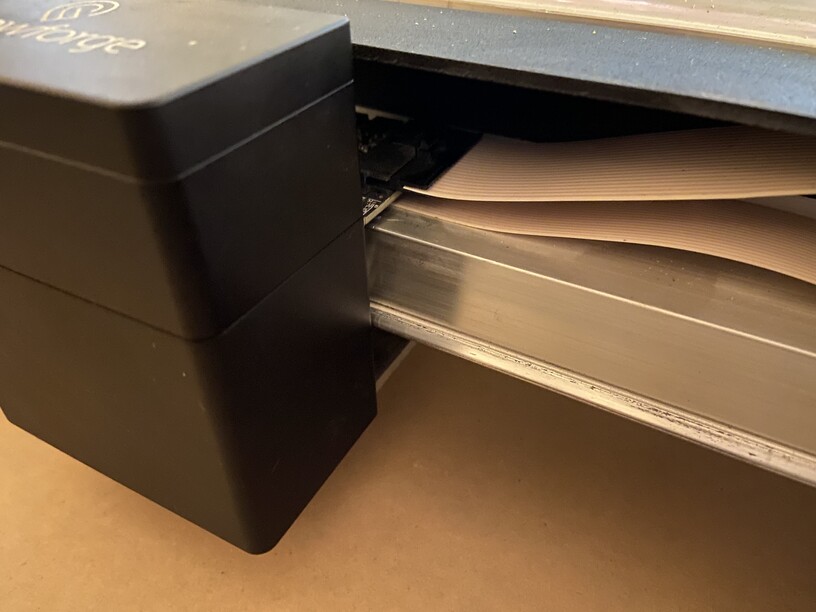
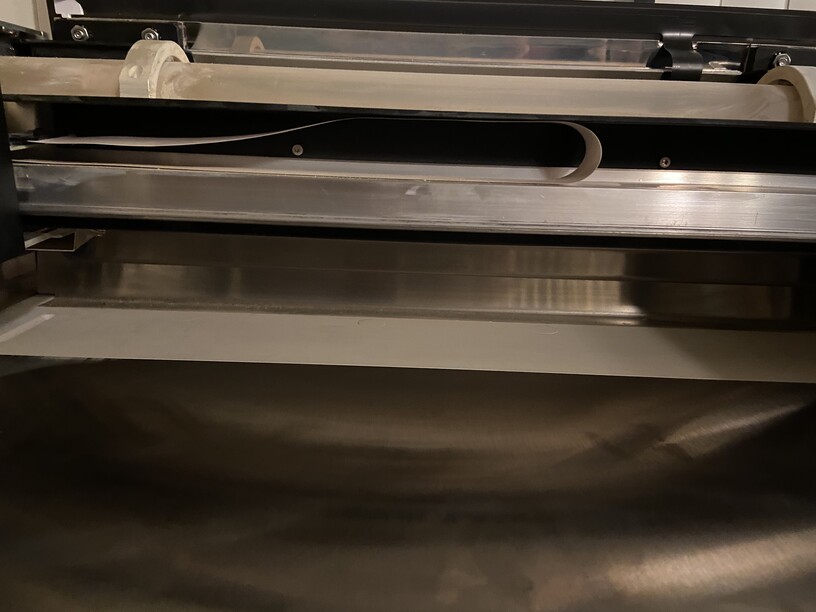
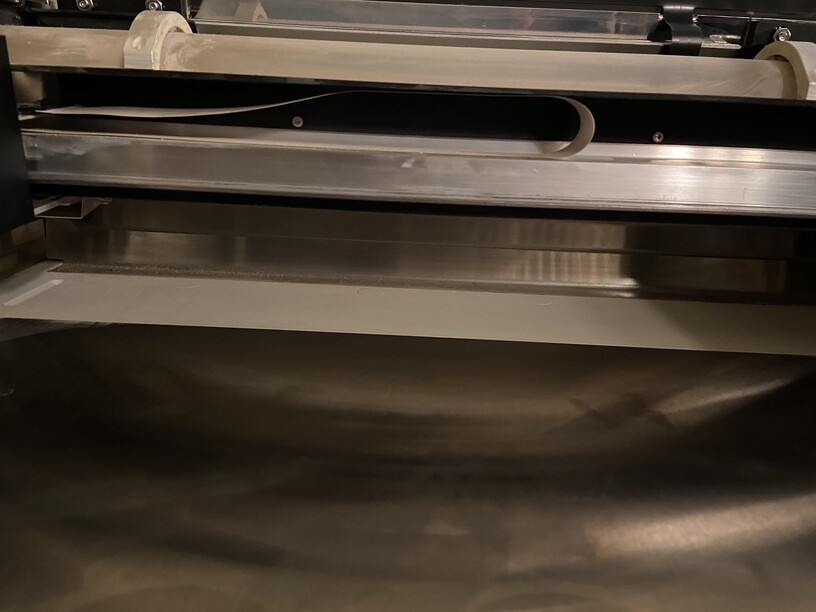
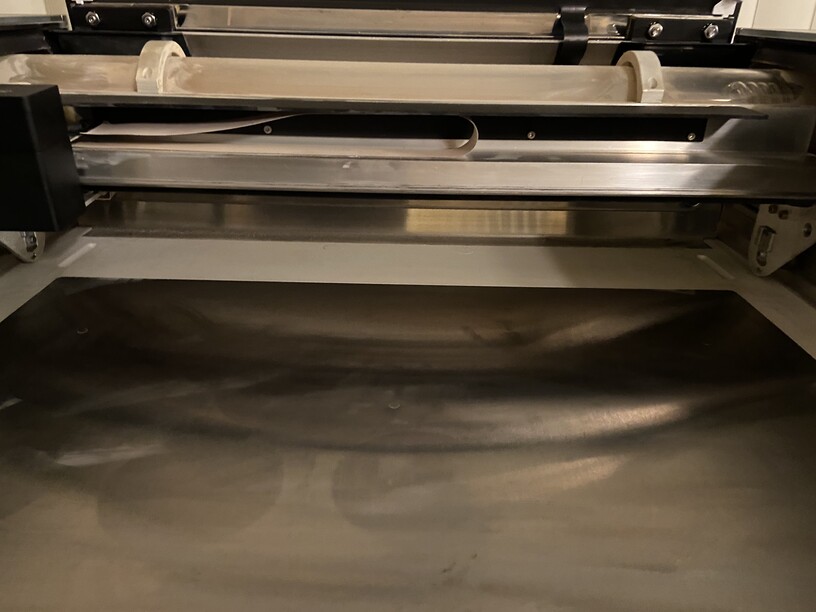
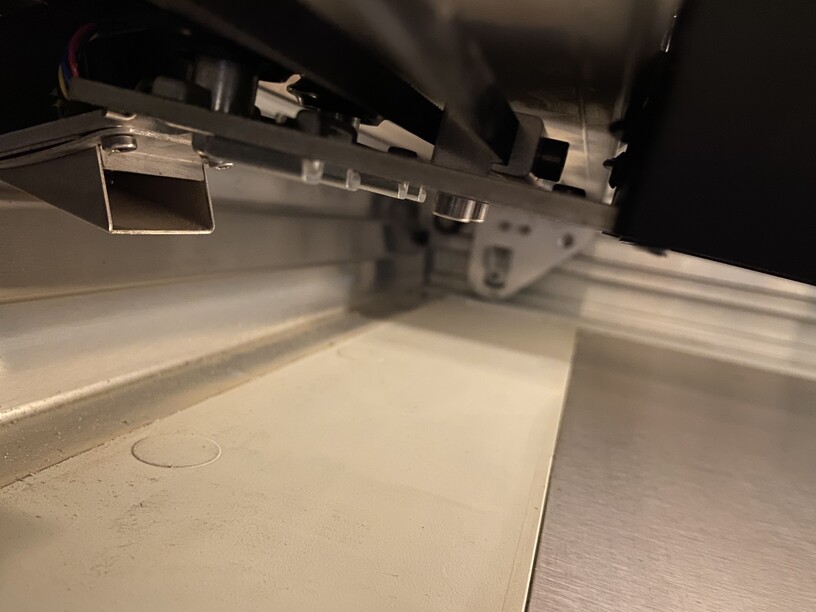
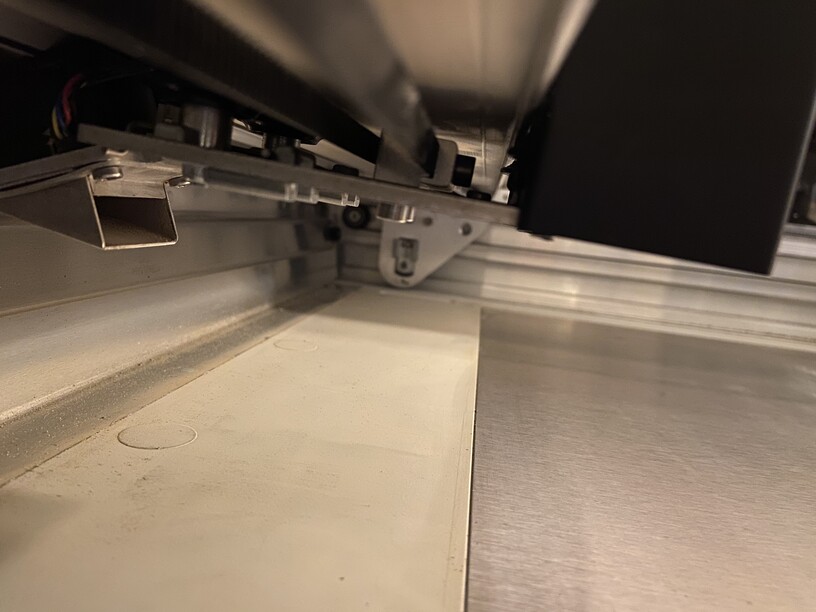
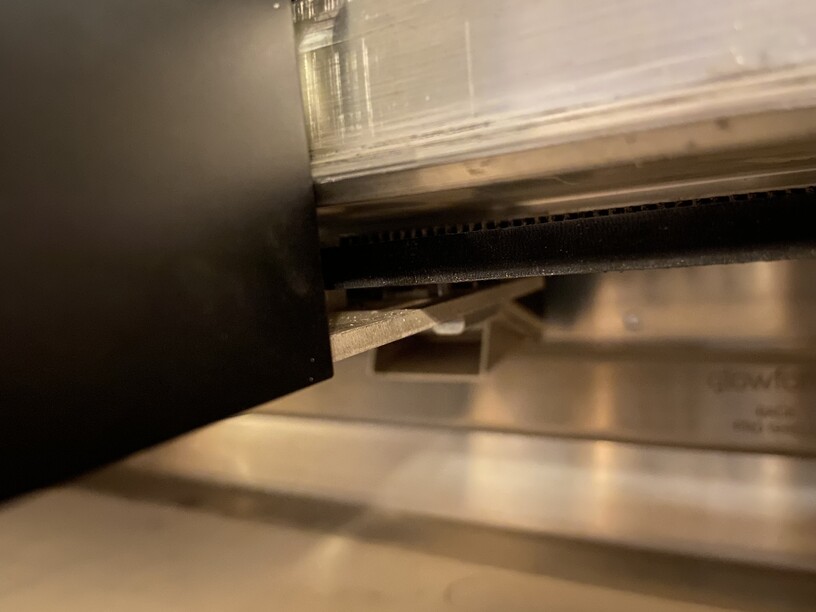
1.The belt under your laser arm with the head pushed to the left:
Hi @JennyM. It’s been a while since we saw any activity in the thread and wanted to check in to see if you were able to take any of the photos @MarcM mentioned in his last response. I’ll go ahead and leave this thread open for another 2 days to make sure you’re not running into any trouble still, and will look forward to hearing any updates. Thank you.
Thank you for double checking these items, and for sending over these additional photos.
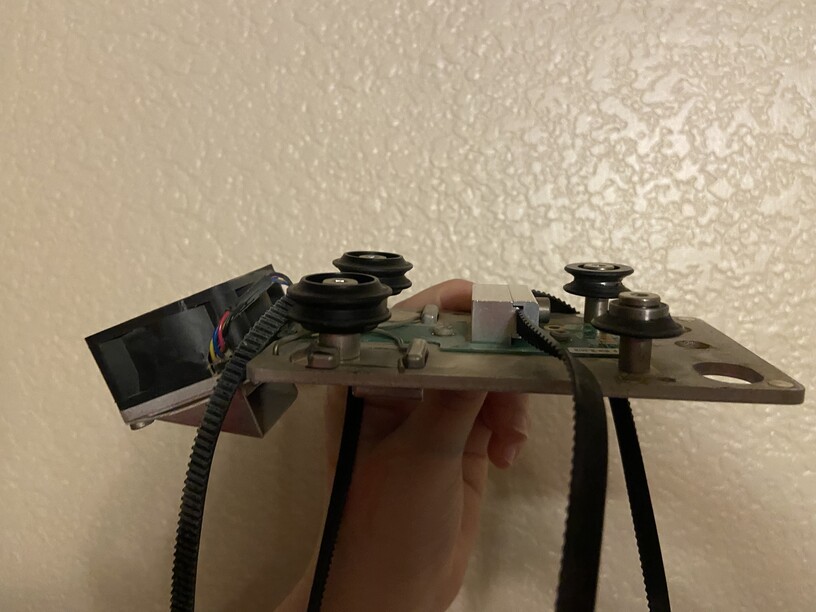
Based on the photos, the belt and pulley appear to be correctly positioned, but the Printer Head when sitting on the Carriage Plate Assembly may not be high enough for the lid camera to notice.
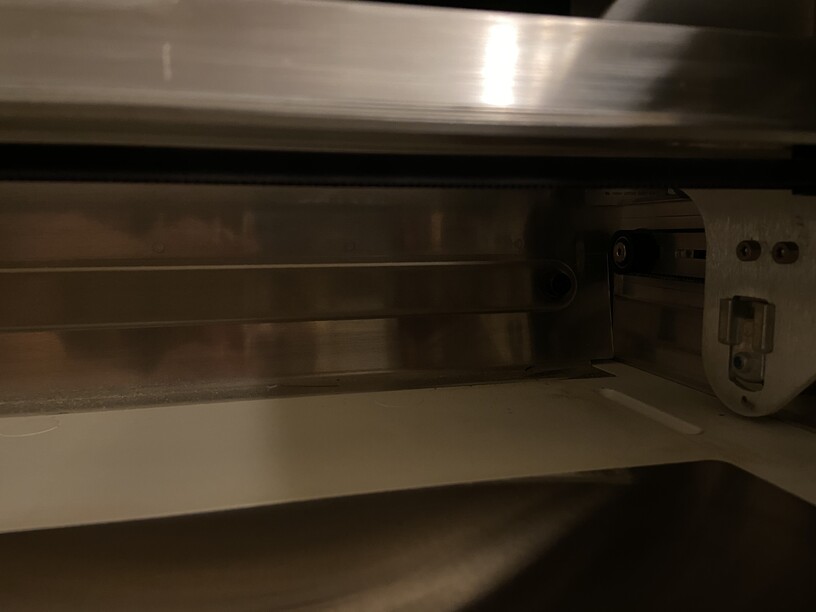
Could you send over a photo of the Carriage Plate Assembly, underneath your laser arm as it is attached? I’d like to make sure that all four wheels are attaching correctly.
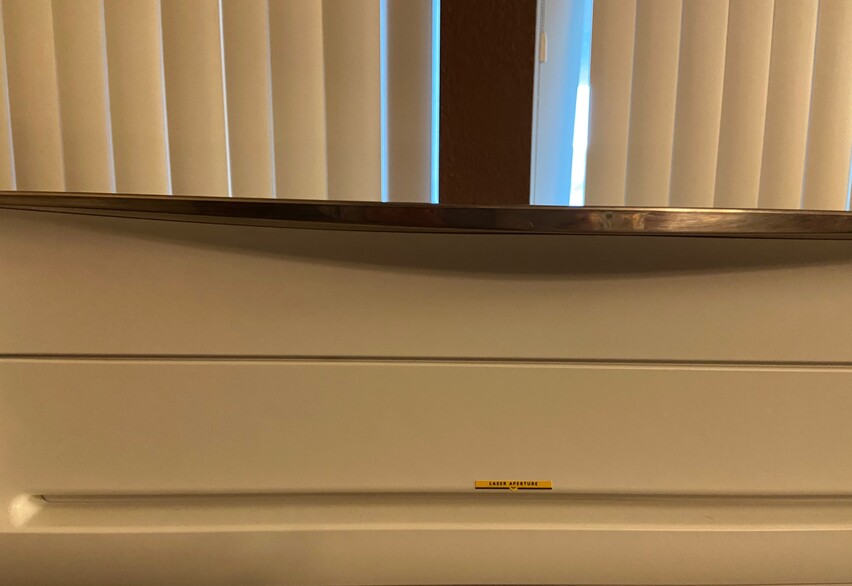
The trouble could also be related to how your lid is positioned when closed. Could you send over a photo of your Glowforge, with the lid closed?
Once we can review these details, we’ll send over any additional steps.
Hi @JennyM. Thank you for getting back with all of those photos to address the continued issues with your Glowforge as the lid camera attempts to locate and calibrate the printer head. I have reviewed the photos and previous troubleshooting attempted for any next best steps.
Based on the photos, it looks like one of the wheels on the carriage plate is not sitting on the rails properly, which can lead to issues as it moves across the laser arm.
To address this, could you please do the following?
Hello @JennyM Thank you so much for providing a picture of your Carriage Plate wheels. I’m so sorry that one of them is damaged.
I am going to send you an email where I’m going to request some information. Because of that I’m going to go ahead and close this thread and we’ll follow up there. Thank you so much.