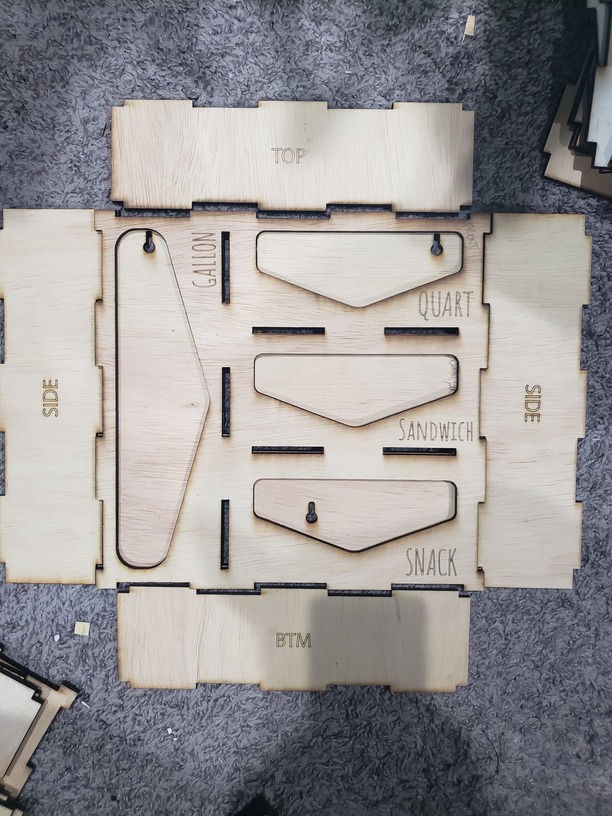
Please tell me I’m not nuts! I’m trying to print a box (ziploc box holder to be exact) and my design is perfect in AI and when I import it into GF. However, when it prints, it is not lining up! It is driving me insane and I’ve probably wasted a whole 4x8 sheet trying to adjust it. The only thing that should be different is 2 sides shorter so the box will fit seamlessly together. but when it prints the tabs are not lining up at all on 2 sides.
I’ve tried everything and looked at my design in Illustrator and GF and each piece is the same size and fits together in the software BUT not when it prints out. Any help appreciated as I’m about to pull my hair out!
sorry pic is not the best. 2 sides are shorter than the other to nest inside so it doesn’t need tabs. The problem is the top/btm tabs aren’t lining up…at all. Each side piece should be interchangeable (top/btm or side/side) but 2 are not lining up. everything in the file is lining but when it prints it is too short!?! as if the GF is shrinking it down when it prints it
yes I’ve tried that several times, checked in AI and GF are the same. even manually entered it. even changed the size and resized everything…its driving me mad! I don’t get it! It makes no sense
I’m sorry for the trouble and that your finished parts aren’t fitting together correctly. There are two things I’d like to look into as a starting point.
First, may I have a copy of your SVG files for this design so I can investigate a few things on my end?
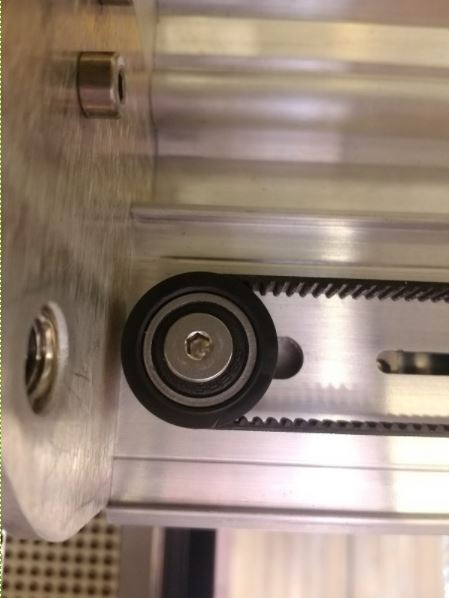
Next, I’d also like to inspect one of the belts and pulleys in your unit to see if there might be a mechanical issue leading to these print results. Would you please share the following photos?
First, power off your Glowforge and remove the crumb tray.
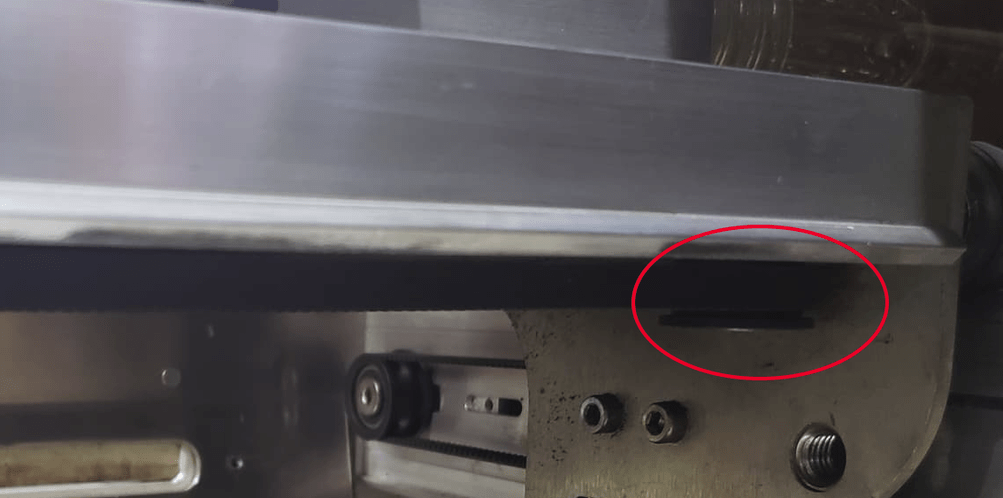
1.The belt under your laser arm with the head pushed to the left:
I’m sorry for the delay as I was out of the office. Aside from sharing them in a forum post, the best way to send us photos or images is to email them to support@glowforge.com. If the person you’re sending them to isn’t in, then one of our colleagues can receive them instead.
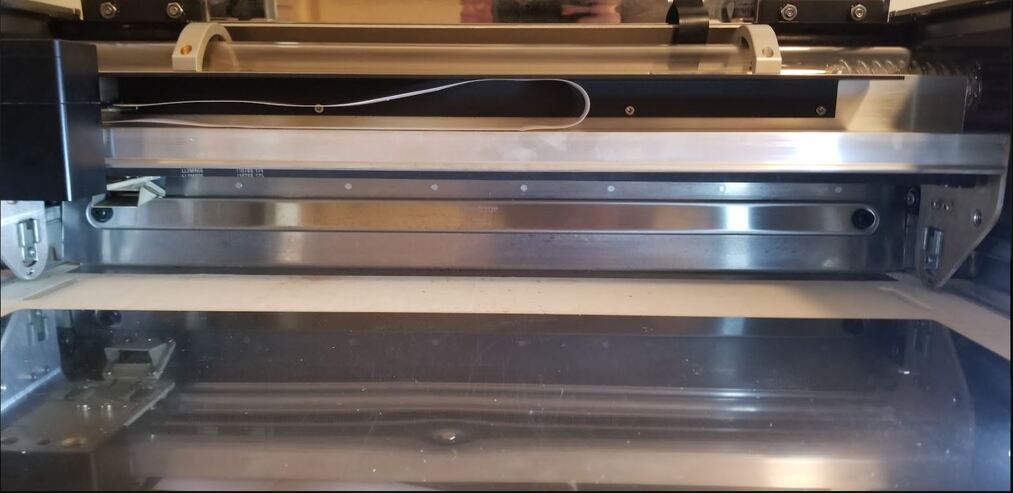
Everything looks normal so far in your photos (thank you for sending them). A good next step may be to double-check the belt tension under the laser arm, and also double-check the pulley on the right side for any damage.
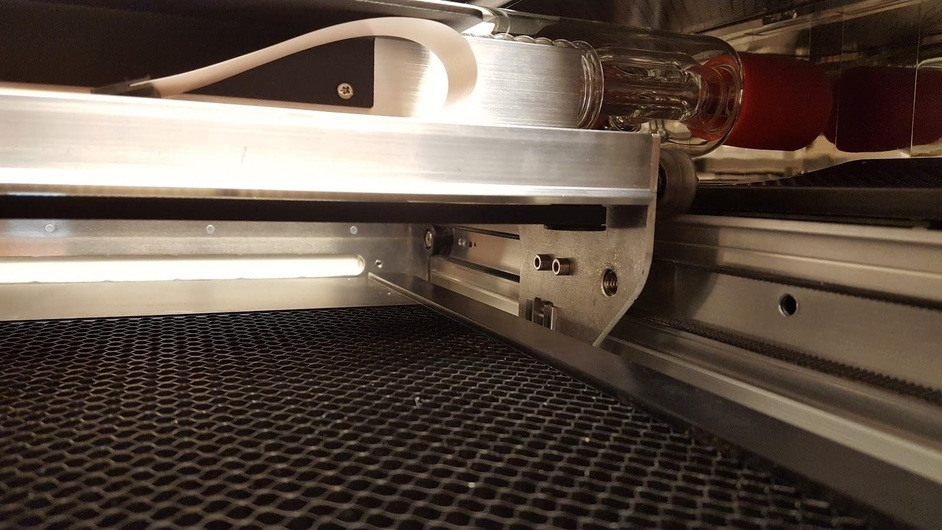
This is the pulley that I would recommend checking for any cracks or other damage:
Hey, I checked that pulley and as far as I can tell it is OK. The tension is tight but not too tight that I can’t move it along the belt. I actually have a new carriage plate and belt on order with you guys and I never received it…long story short…I have a claim in with UPS and email with you guys. I’m worried that my belt is the issue and so everything that I’m trying to print horizontally is not coming out correctly.
Thank you for that information. I looked at your email ticket and I was glad to see that we’re taking care of getting the replacement carriage plate to you. I think the best next step will be for you to try that plate out when it arrives. I’ll leave your thread open for now to allow time for that, and then we can pick up troubleshooting with you right where we left off once the part arrives to you!
I need help with this same type of issue. I tried cleaning my machine, I did all the steps you mentioned above. Nothing. And now when I turn on my machine all it says is “focusing” and just keeps saying the same thing. Honestly, I’m beyond disappointed in this machine and even more so the lack of help when issues arise.

 thanks for the tip!