I dont know how to fix the alignment. I’ve used the set focus, turned machine off and on and cleaned camera. No image that I print aligns correctly, when I set it up on the print screen it indicates that image is located out of material range. The material is placed in the correct position inside the glowforge but after I close the lid and machine focuses it still out of alignment on the app screen
UUUUUUUUUUGH HELP!!! PLEASE HELP!!! ![]()
![]()
![]()
![]()
![]()
![]()
![]()
In order for the set focus to work you first need to have it know what it is looking at. For this, you need to run the calibration. As there are a variety of really minor differences that can throw it off you need to rerun the calibration if it gets off.
They recommend proofgrade material but I had some watercolor paper pasted to scrap and it worked. It just needs to be a full 12x20 white, flat, and substantial. The glowforge will make a series of marks and then spend a considerable measuring and calculating so you need to just let it do its thing.
2 Likes
From your photo it looks like your material is actually not in the correct position. Line up your boards with the bottom of the tray, closest to the front.
1 Like
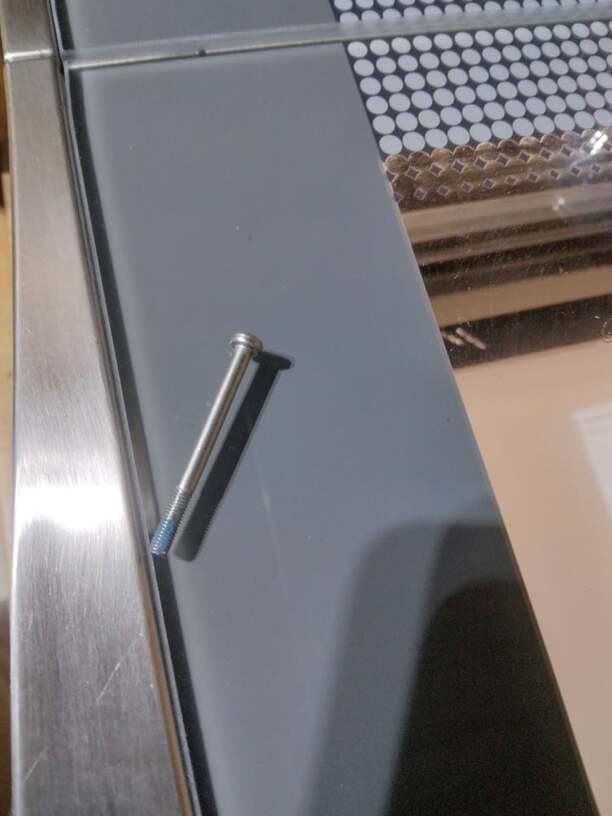
OMG!!! Thank you for your suggestion, I had to step away its been DRIVING ME CRAZY!!! Well when I moved the crumb tray there was a random screw just hanging around, I’m pretty sure it goes to the glowforge maybe just to the crumb tray I really hope it has nothing to do with the operation or moving parts. But i put the material in there in which way, right corner, top, bottom, smaller, bigger, different types of materials and nothing is working. I’ve never done it but I think I’m going to try to run the recalibration step like @rbtdanforth suggested… Ugh!!! I will be back on here if it doesn’t work.
1 Like
Thank You so much im about to do the calibration right now. I was wondering if you changed the settings when you added the paper
So sorry to keep bothering you Im just super frustrated I dont know what to do…
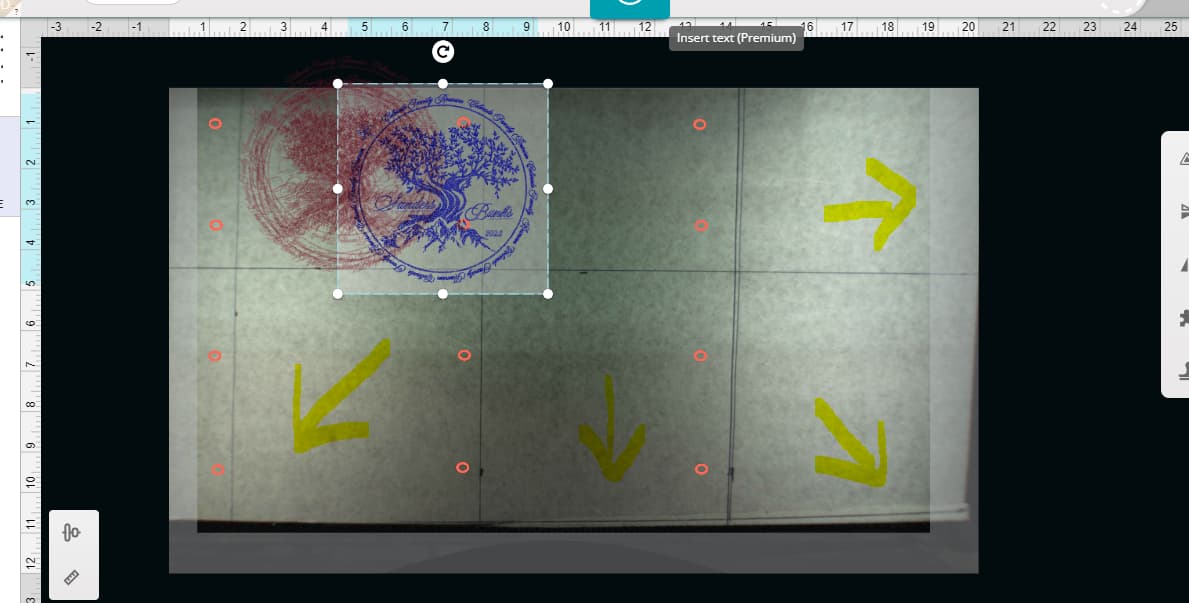
But I did the recalibration and its definitely not crooked anymore I can set up image top to bottom 12 inches now but side to to wont allow me to finish what i need. I dont even know maybe I am placing material wrong. I thought when you position material in the marked parameters( fitted area) it would cut within the 12x19 area but when i set the material all the way to the right near the bottom of tray where its supposed to be there is about an inch blurred area. Then when i move material about an inch to the right then I can use the otherwise it wont print a full sheet. UGH!!! I know it must be me . In the pictures i point out where the material parameters are in yellow on the tray and in the app it shows about an inch blurred out. It will only allow me to print in an 12x17 inch area has it always been like that
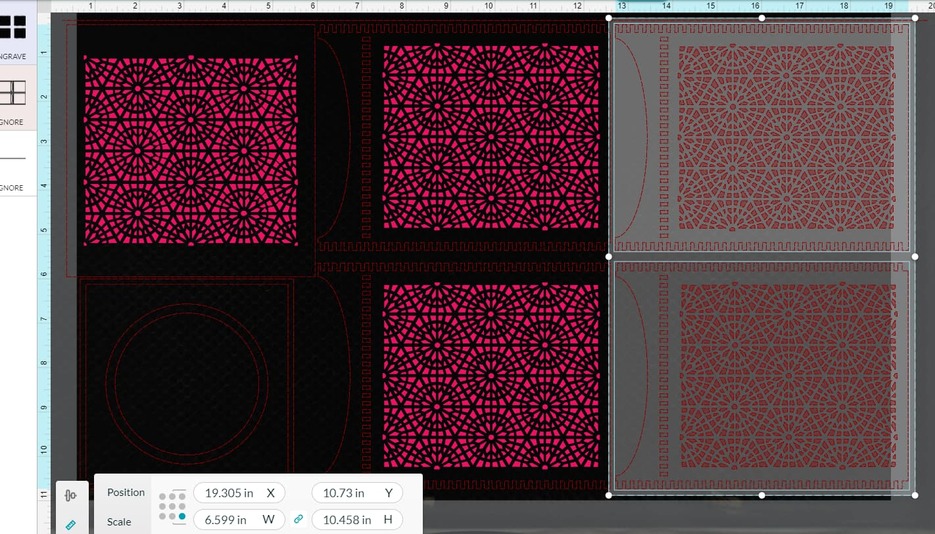
The Glowforge cannot print the total area of the bed. If you look at the empty bed, the head all the way over and you know the laser window is in the middle of the head, if you run your eye down or across from that center point you can see there is about an inch of material above and on the left where the laser cannot go, and that area does not even show up in the window.
To the bottom and right there are areas the laser cannot go that do show up in the window, and that is the blurred area there. When the head is engraving at high speed it has to slow down before it hits the end so the blurred area is bigger and the cuttable area smaller to account for that,
So when your design has even a tiny bit over the line you will see the design suddenly change indicating that the design cannot be cut in total so the machine is telling you it will not cut it at all unless it can cut all of it. The net result is that you have basically ~19 and a bit by almost 11 inches of cuttable space at the maximum. When you think about it, it is better to have more space than you can cut than less or even exactly the same, and that is the case.
![]()
2 Likes
I don’t know what design app you use, but if you always use a 12" x 20" artboard to create your files, it will always fit within the necessary area to print. I created a specific template for Glowforge in my design app.
3 Likes
That is a function of how fast the engrave speed is as the head needs to slow down and stop before it crashes at the end.
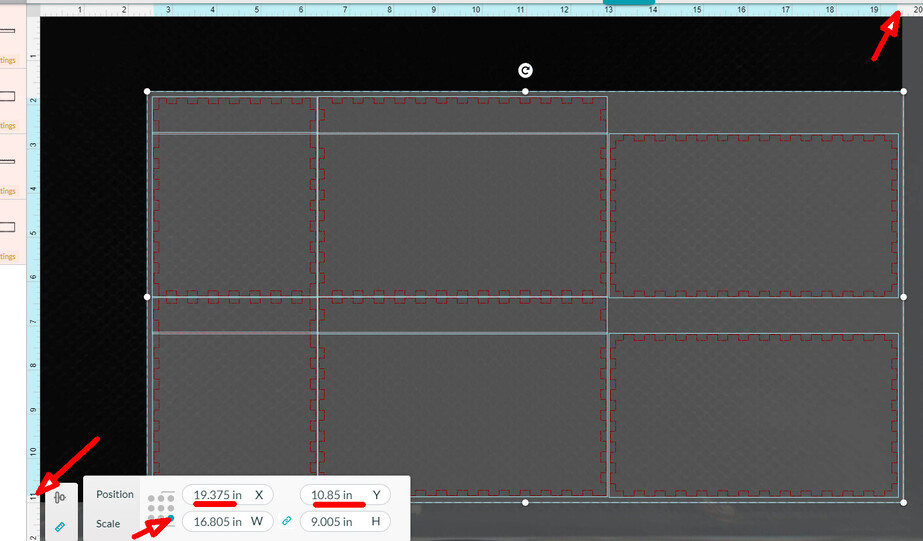
As you can see here…
… all are set to engrave but the two at the end are over the line and will not do so. The faster the engrave the smaller the workable area
2 Likes
The max available working area is about 11x19 and your photos show that’s what you’ve got. So things looks correct. The grayed out edges are there for everybody. Working area will shrink if engrave speed is high.
On a different note - what is your material? Those separate pieces look very much not flat - You’ll want to pin out otherwise hold them down or you’ll have focus problems resulting in blurry engraves or parts that don’t cu through consistently.
1 Like
Thank you for all of your help, yes that is what I’m printing on I just didn’t pin them down because I’m still working on the other stuff. This really is frustrating but I believe I know what is happening although I don’t know why but I started a new design over and realize that the problem might be how I created and uploaded my design. I’ve gone back to previous prints and those prints fit within the space that I’m trying to print, you can visually see the entire aspect of the margins change when I change designs. The screen says that it is a 19 inch space but its actually 17. I’m sorry I don’t know all of the Glowforge terminology to ask questions or explain things the correct way so please bear with me. Does the edge of your design within the app on the screen meet up with the edge of the crumb tray and is it supposed to? My design on the app screen only allows me to print on a 17inch area, the ruler on screen shows 19inches but the green ruler shows that its actually 17 inches, on either side of the boards and my design is just blurred honeycomb
(lol ![]() that’s what its called Honeycomb tray DUH
that’s what its called Honeycomb tray DUH ![]() )
)
The edges of my honeycomb tray are highlighted in yellow Is it supposed to be that way? I may just have to start the whole thing over from scratch in another design program with separate components then upload it into Glowforge
Yes I see two issues that are normal and not a problem with the machine. The first is that the reason for doing a calibration in the first place is that you are trying to get the results of a fish-eye lens to look like the camera was 100 ft overhead. this involves a lot of math but once done works well.
However, it is still a fish-eye lens so the distance from the lens to the work makes a huge difference. This is where Set Focus is used to precisely measure that distance. Only after Set Focus is done do you see on the screen a close approximation to what is actually going on and 17 inches on the bed measure as 17 inches on the screen.
As I noted above the faster the engrave is done the more room it needs to stop and turn and so the less room it has to cut. those grayed out areas on each side are telling you that is the limits of what can be engraved. If the speed is reduced it will need a lower power to get the same effect and this should be considered when you design.
1 Like
To add: and only at that point and a few surrounding inches(cm). The further from the Set Focus point you get(just like from directly under the lid cam without Set Focus) the more wrong the lineup will be.
1 Like
Thank you for your help!!! i figured it out, It was the way I created and uploaded the design. I actually changed the margins everytime i deleted and uploaded it, soooooo I just made a new one and everything lined up, I was trying to cut corners and finish fast so I just slowed down ![]()
![]()
![]() Again Thank you so much for your help
Again Thank you so much for your help
2 Likes
I know I know Its me again so sorry to bother you ![]()
I scrapped the entire design, but this issue has been bugging me and I just want to know and understand. I’m not sure if it was me or the app, and I wish I had an instructor physically here with me.
I’ve already set focus and recalibrated the Glowforge and I know that material is in wrong position but this is just an example.
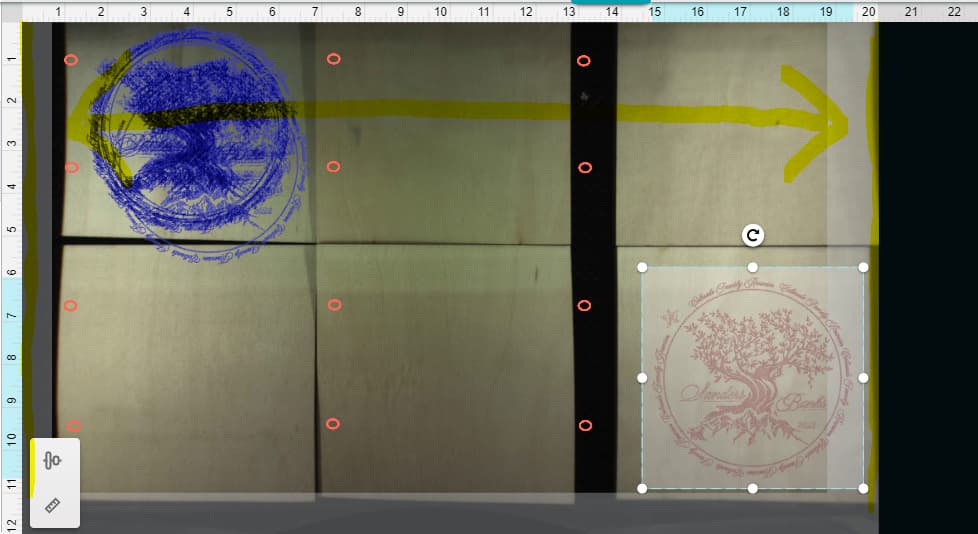
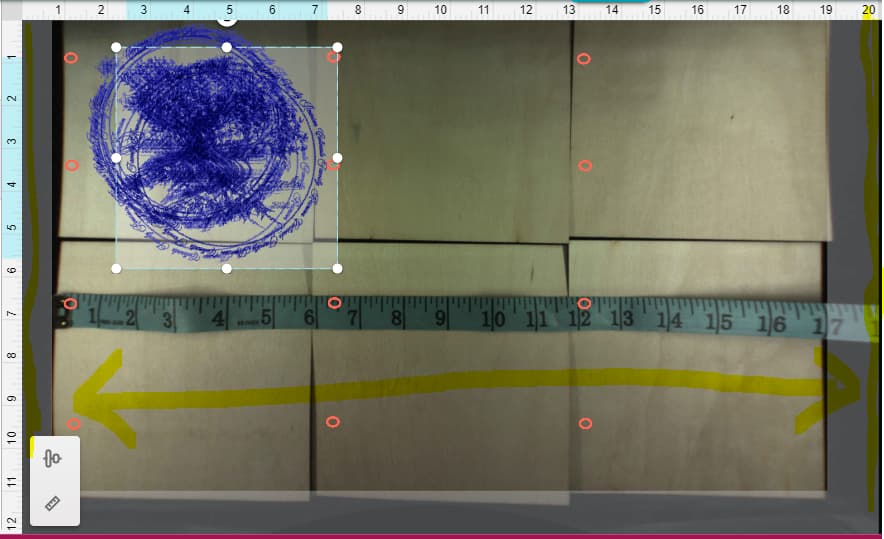
So what I’ve done is moved the wood over so that you can see the honeycomb within the app to the right of the screen also so you can see what I see how the margins change, I never move the images or the material
First screenshot shows a previous print from months ago
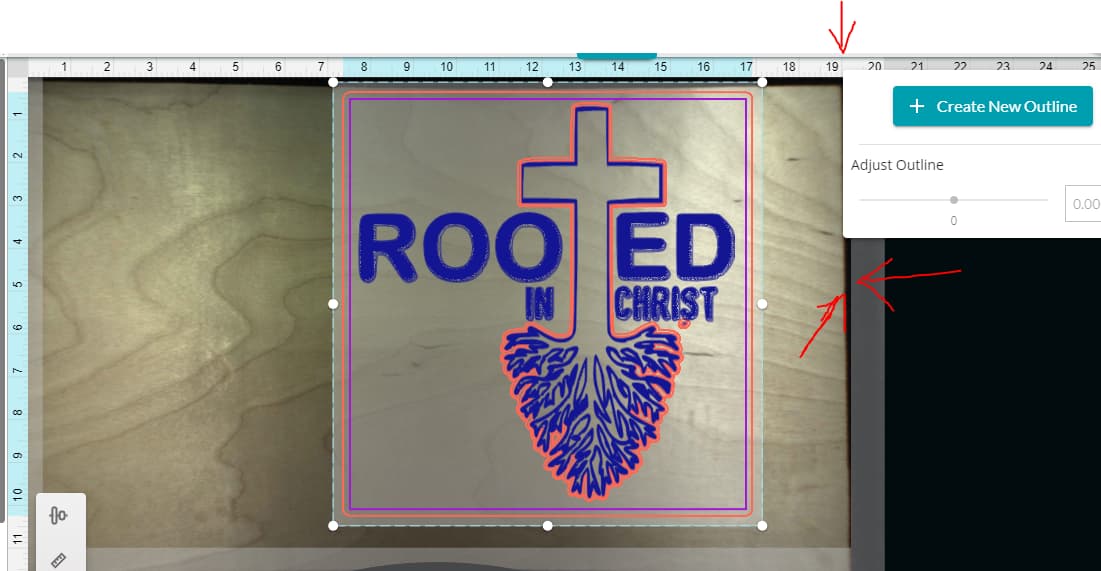
In the second screenshot I clicked on the first image to show where margins line up (sorry idk how the move the create outline popup)
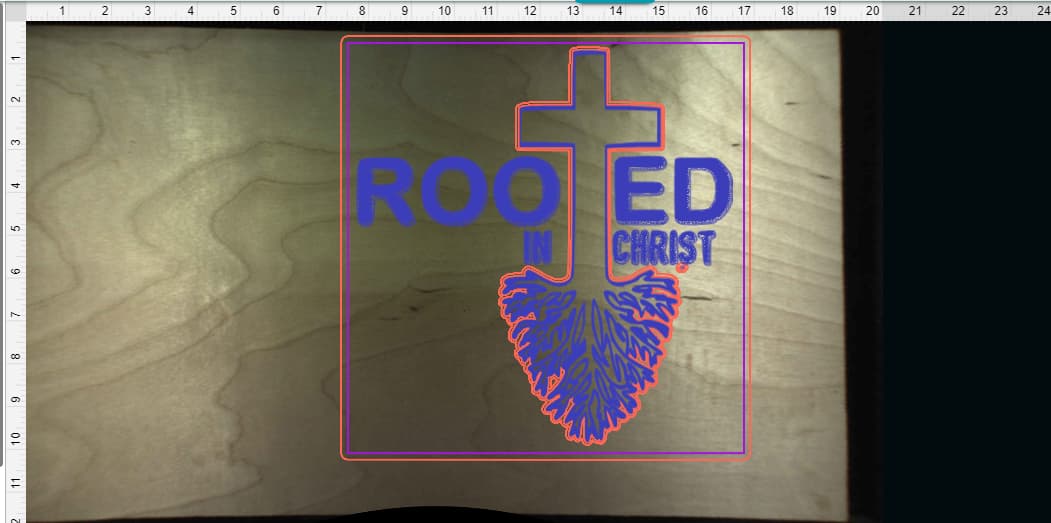
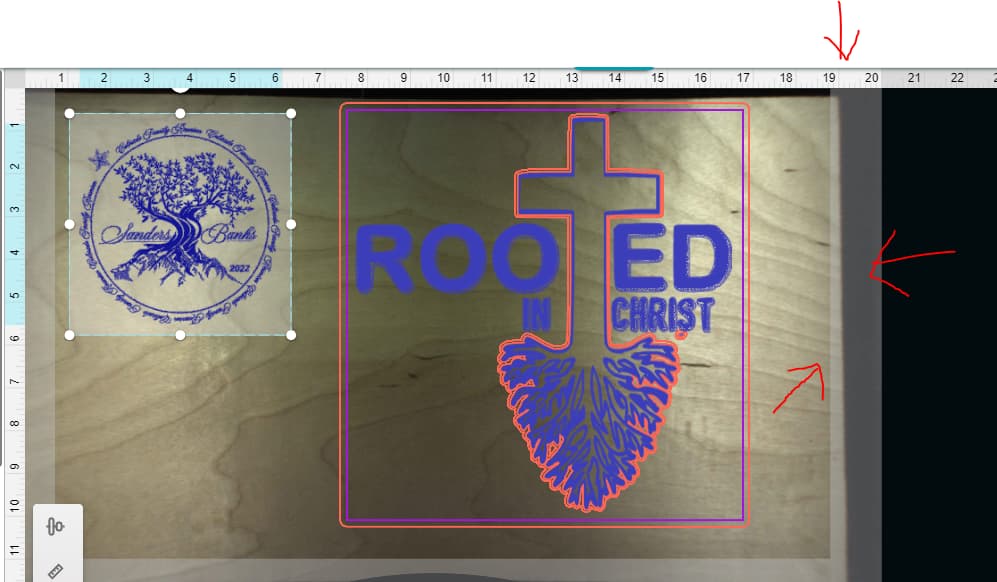
In the third screenshot which is the confusing one. All I did was upload second image, the screenshot clearly shows that the margins move . I just realized it shows that they move on the left side also
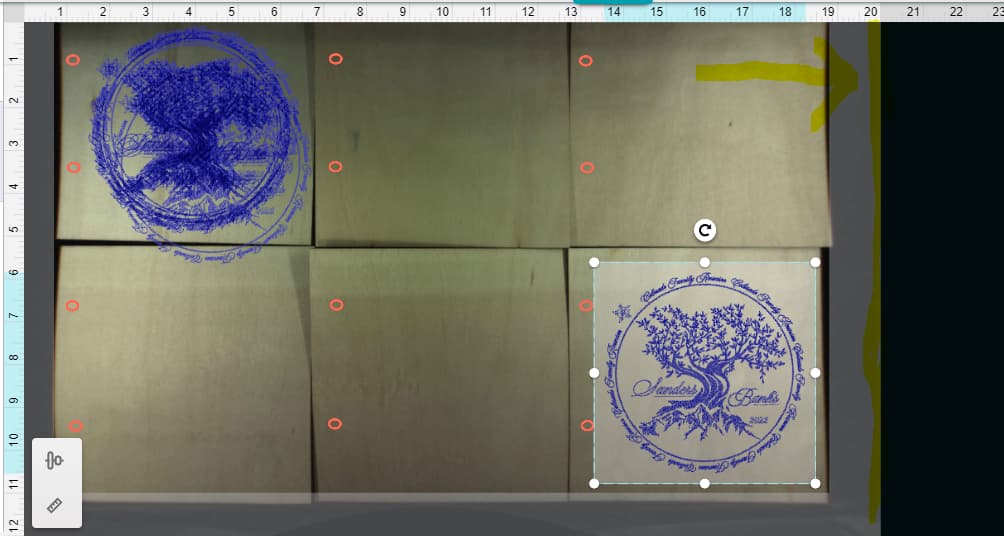
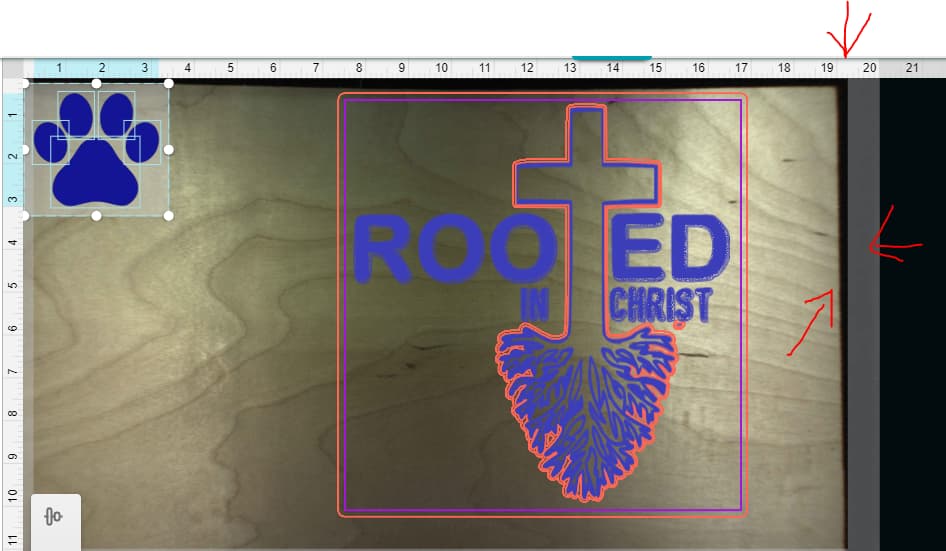
In the forth and final screenshot . I deleted the second image and upload another, you can see that margins go back to how they are supposed to be
The first and third image have separate components and the second, which is just one compressed unit they are also made in different design programs .
I am no longer using this image but part of the problem that I did have with the original design was, on the app itself it showed that I had the same amount of print space but when it was printed it was misaligned, 2in of print space was missing
I know that I clearly need Glowforge classes but I am learning little by little this part of it
Sooooo if you do want to share a little insight I’m all ears or eyes ![]() , what do you think?
, what do you think?
oh yes. this is like the best thing ever. it was so worth figuring out where Inkscape hid the template files for this benefit alone. ![]()
1 Like
The usable space changes with engraved images based on speed. The printhead needs room to accelerate and decelerate on every line and change of direction. To maximize the usable space, you will need to place your image in the center of the interface. As your engrave speed decreases, the margins will increase. If you speed up the engrave, the margins will shrink.
3 Likes
I feel the same way about my 3D Printer. ![]()
Essentially the program decides how much room it needs and adjusts the “blurry lines” to fit. If you do a Set Focus that too will cause a readjustment of those lines. Note also that the Set Focus itself has much more limited space to do its job and the markers will adjust real-time to show you how much.
In general, I find it best to follow those as a guide and after set focus or several of them, then adjust where I expect the design to land and in general it is not off by even a millimeter.
1 Like
This topic was automatically closed 30 days after the last reply. New replies are no longer allowed.