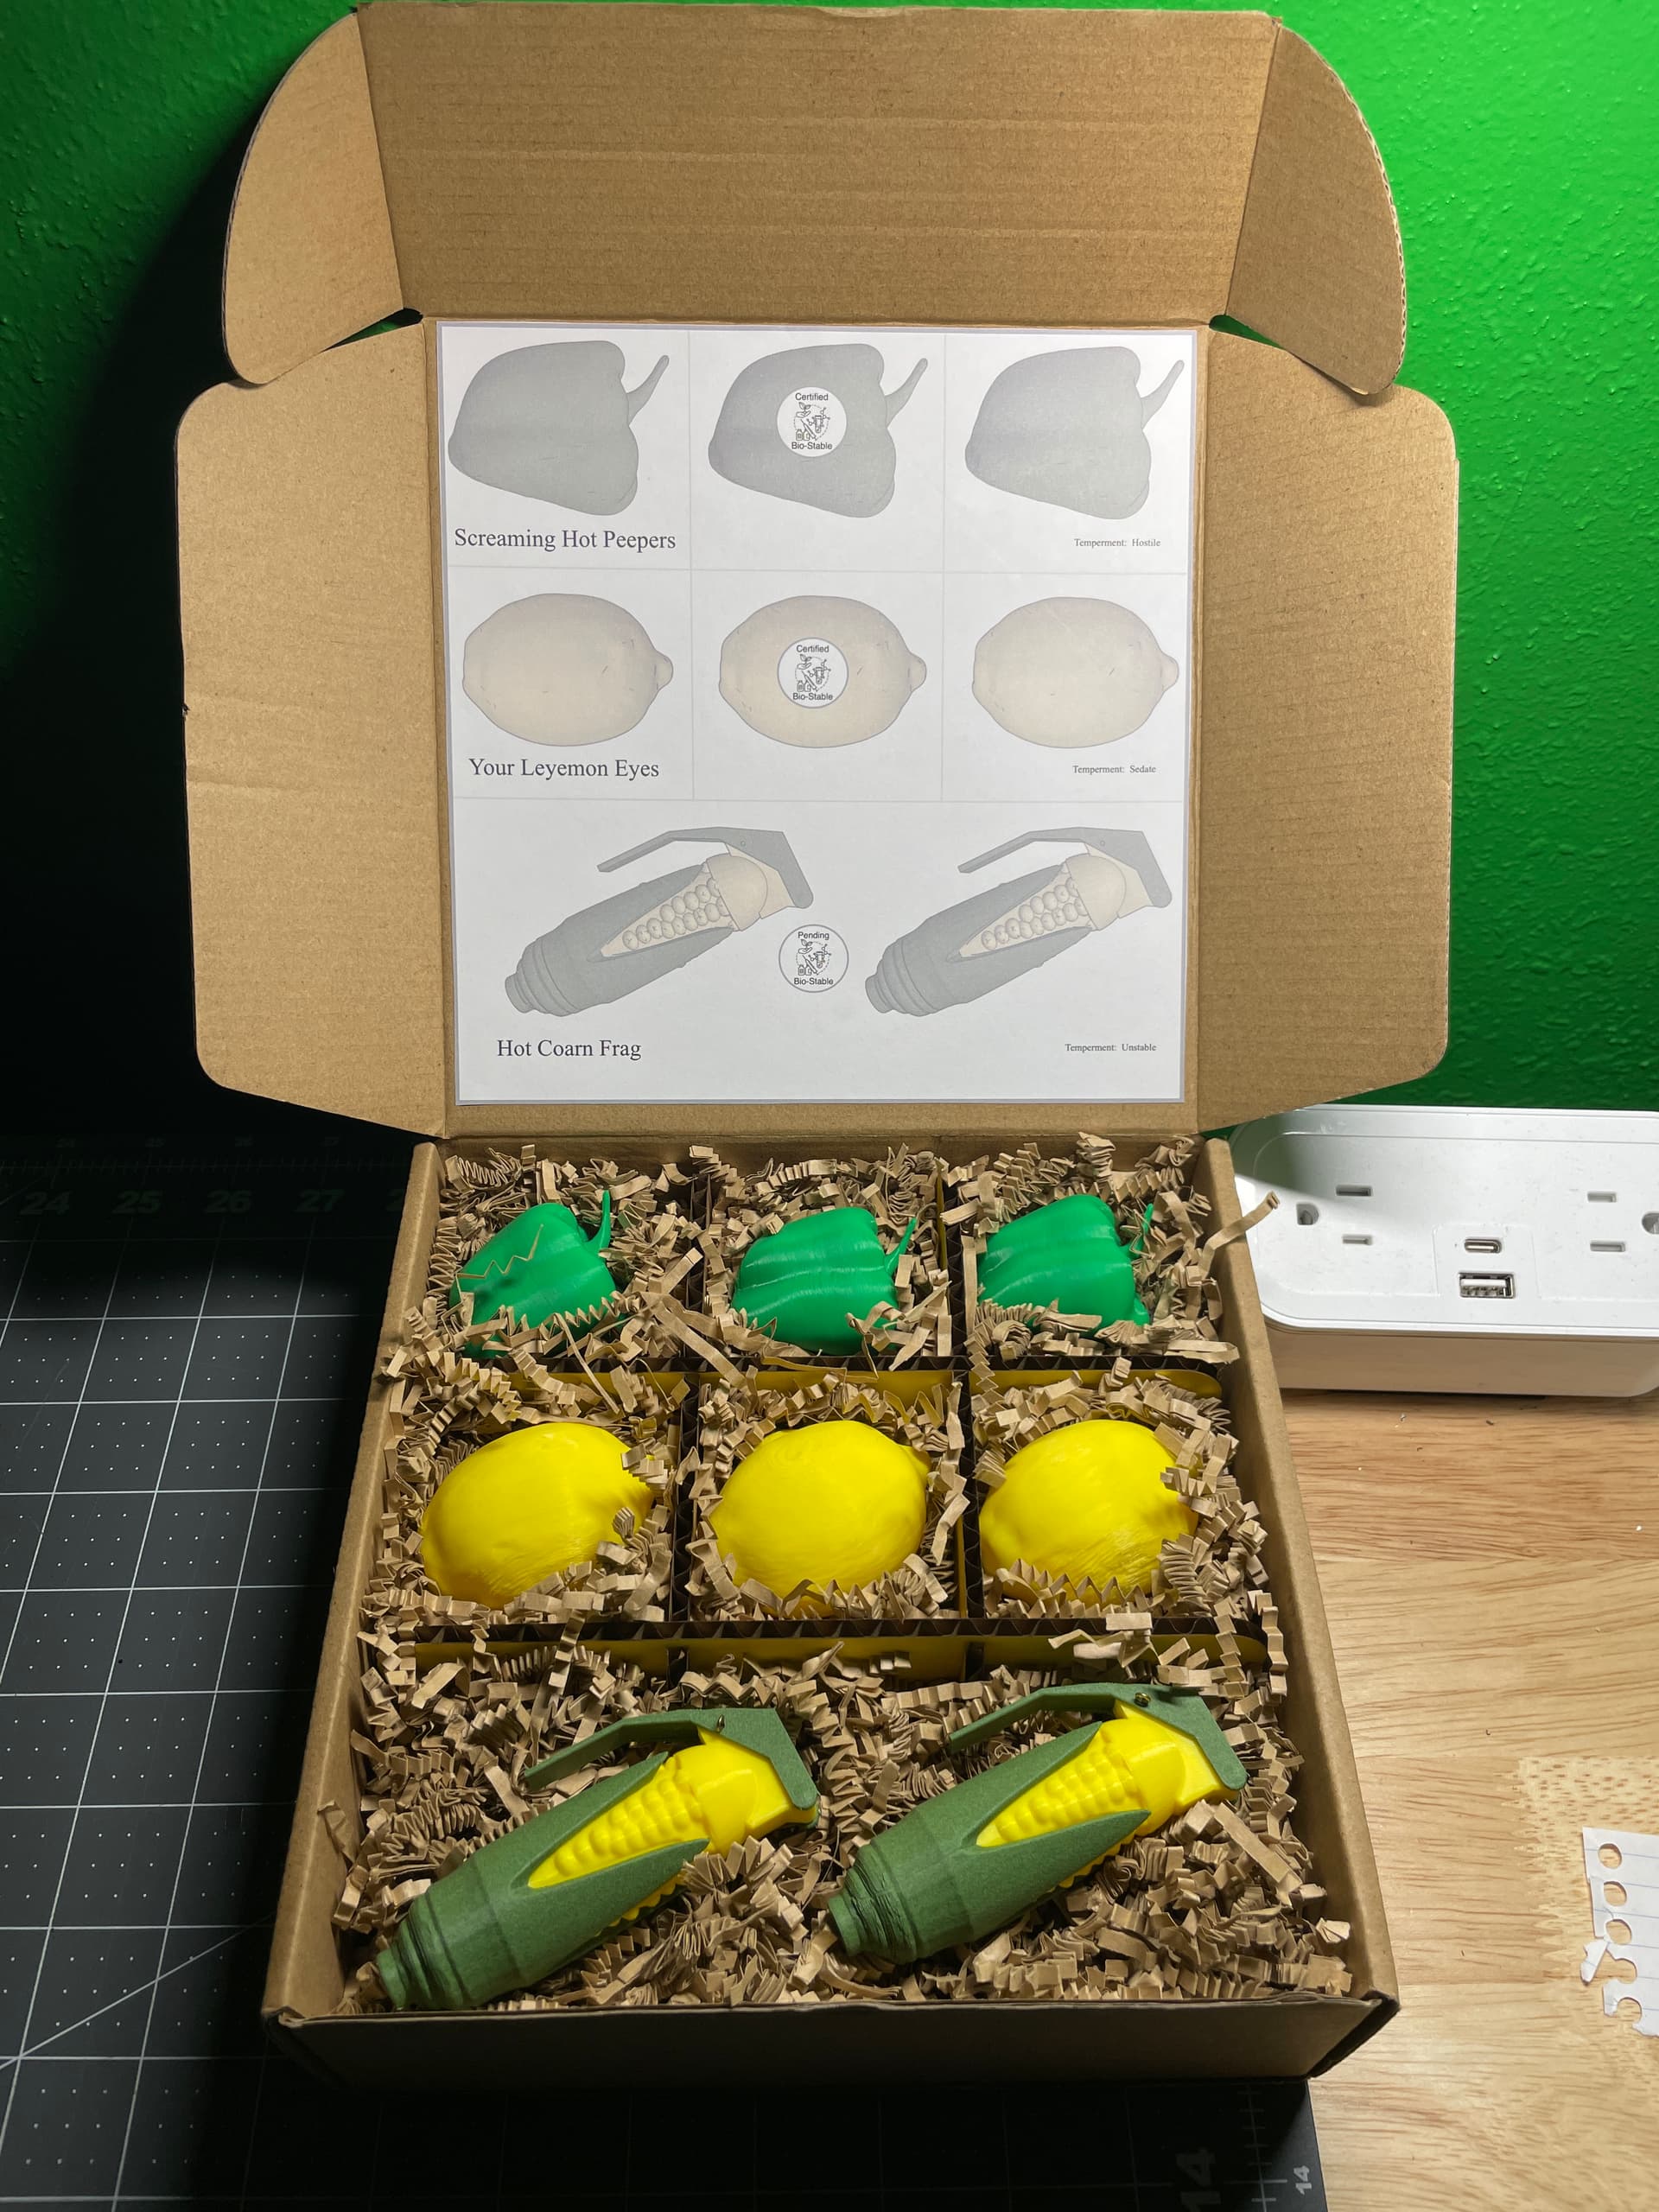
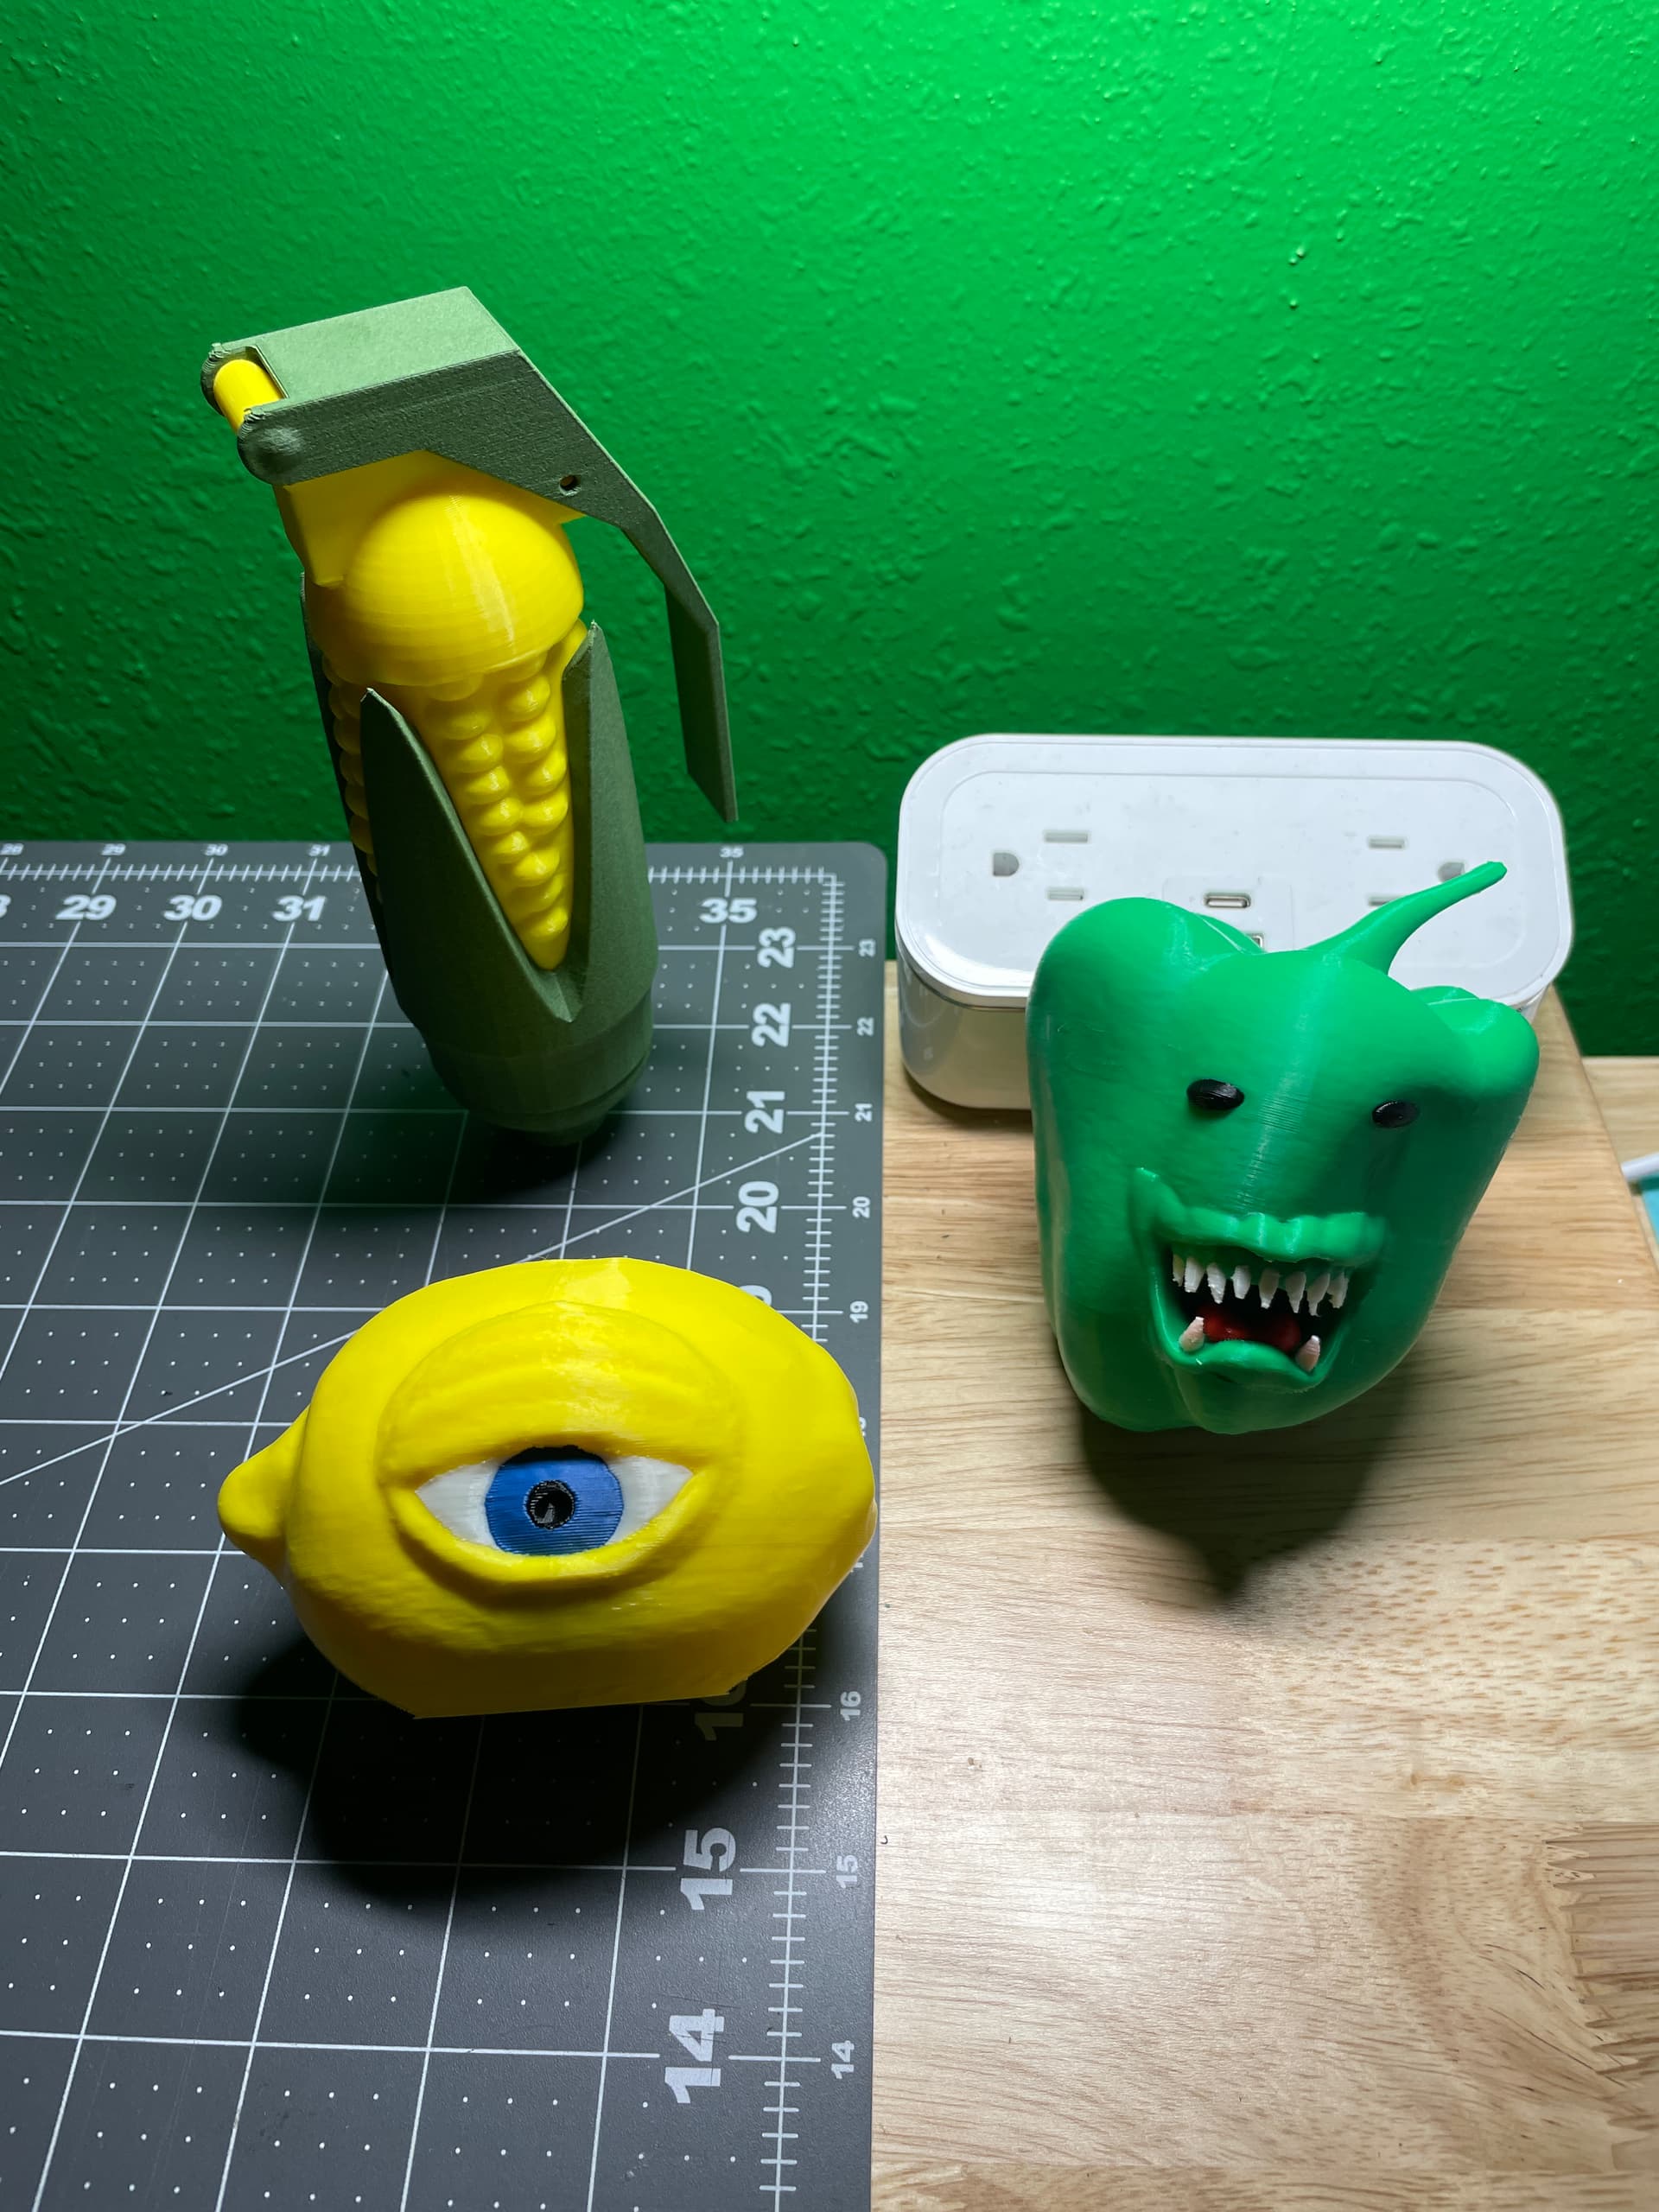
I had these large(r) versions of the fruit and veg that didn’t fit in the ‘sampler’ boxes, so what to do? Make a sign of course. Here we go -
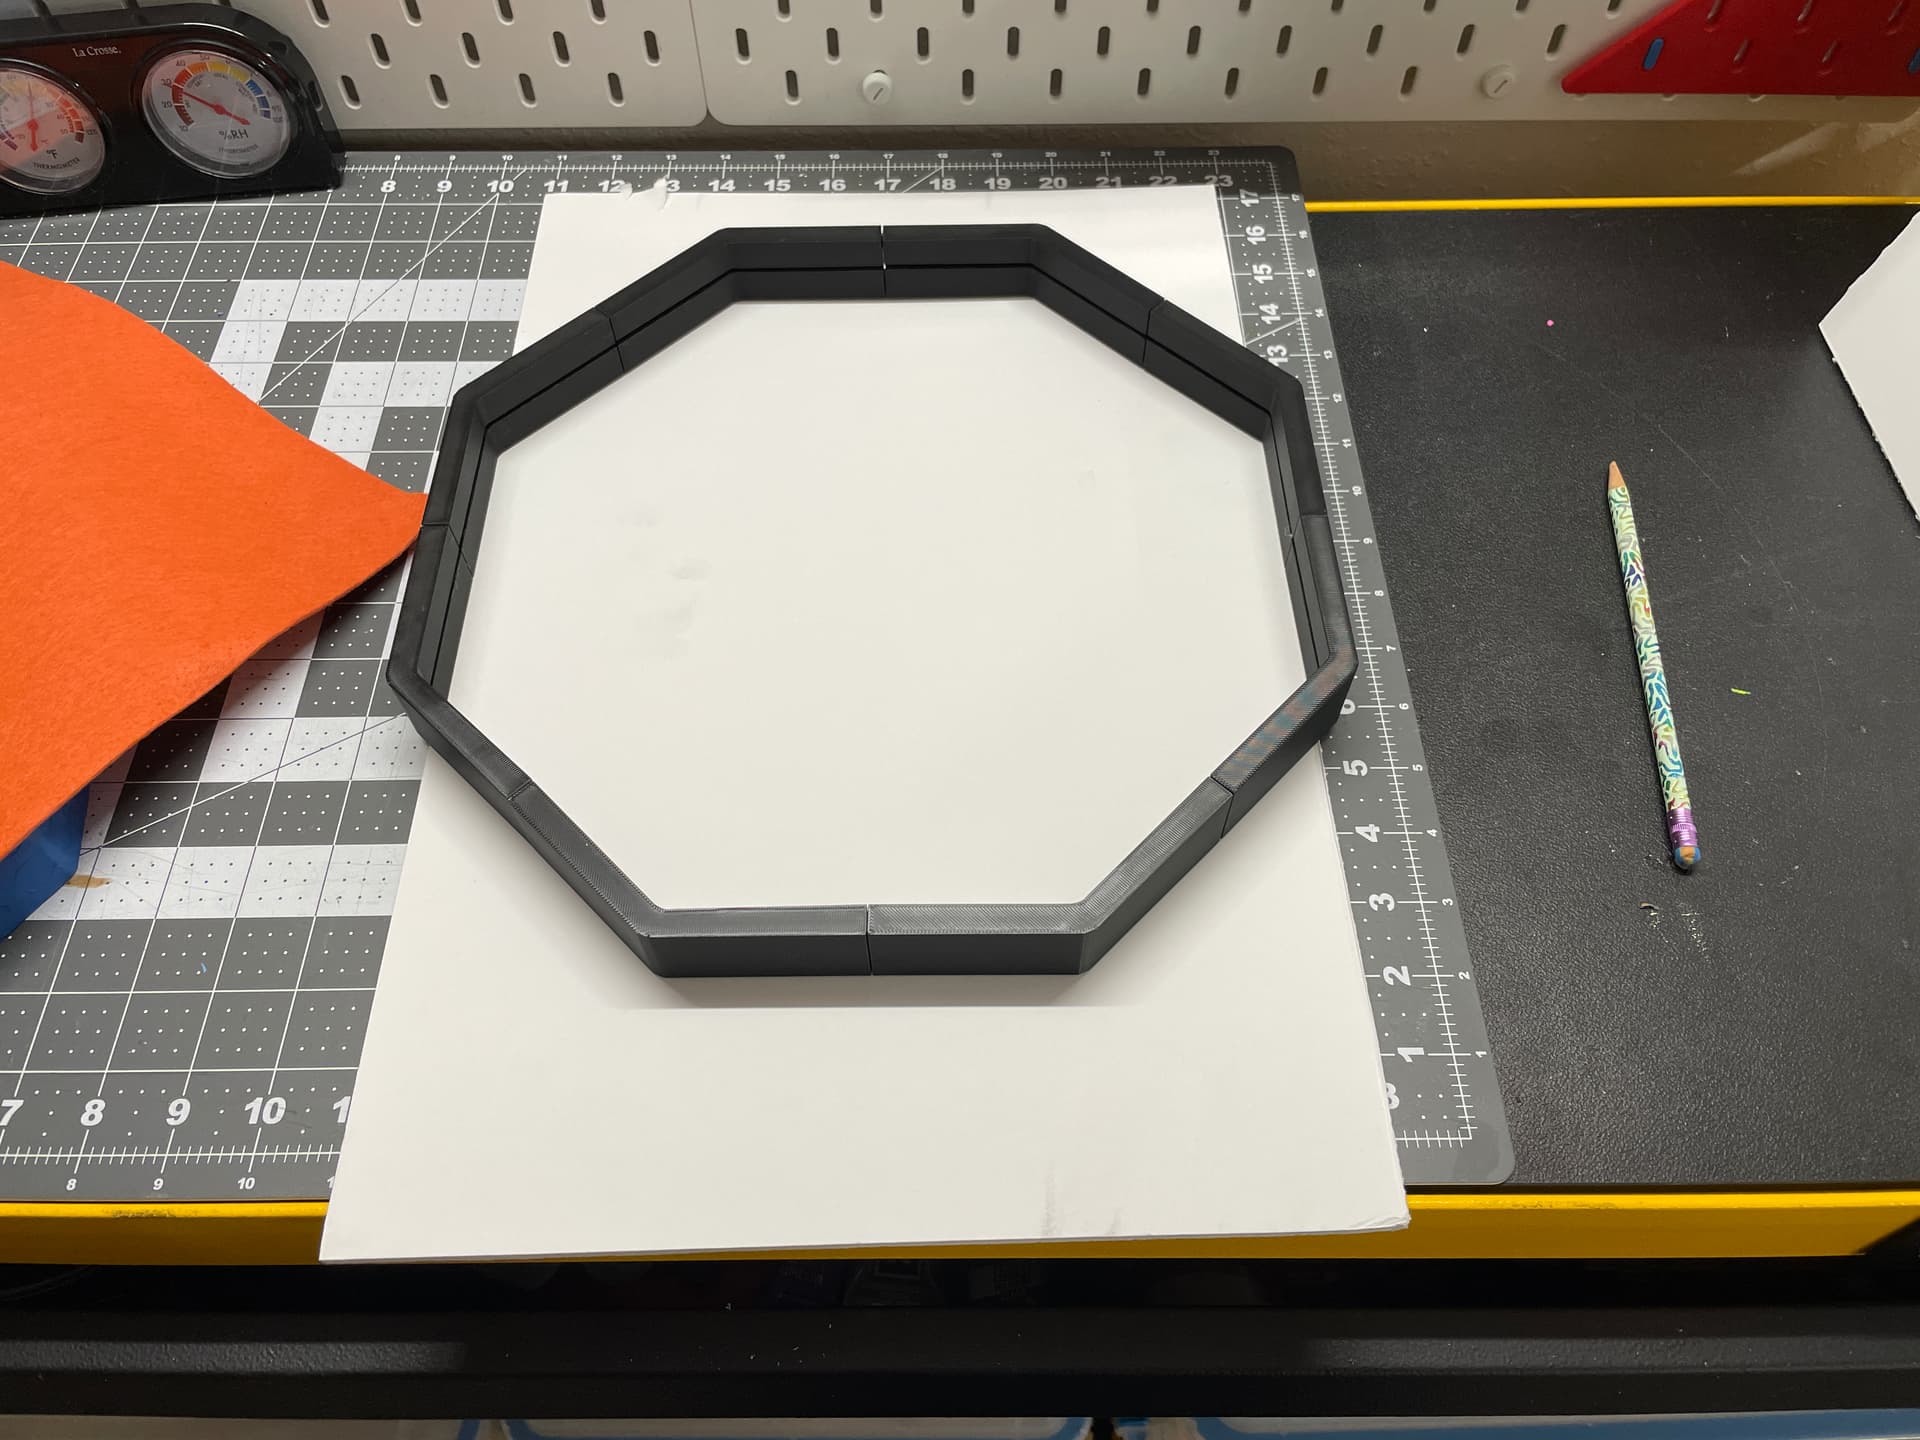
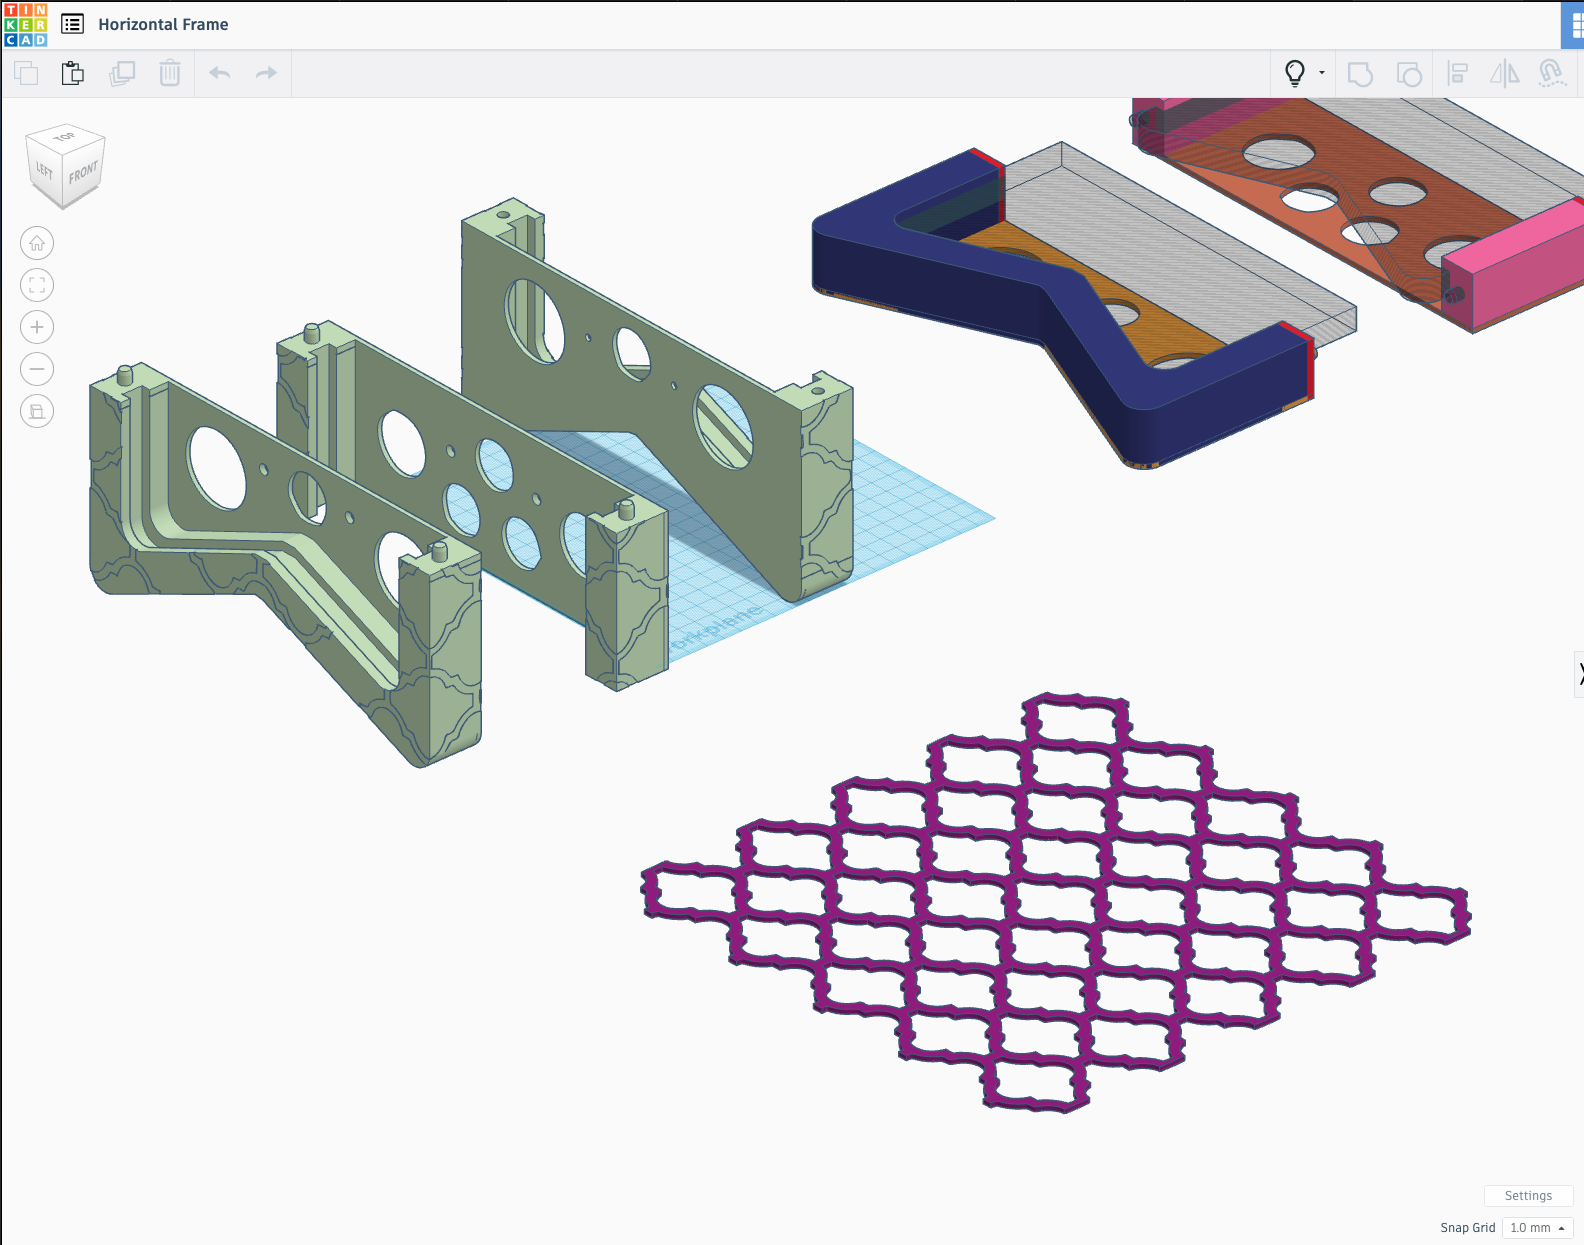
I’ll make a 50% scale version of the outer frame first, to help help visualize the foam core insets and cut felt for the surface.
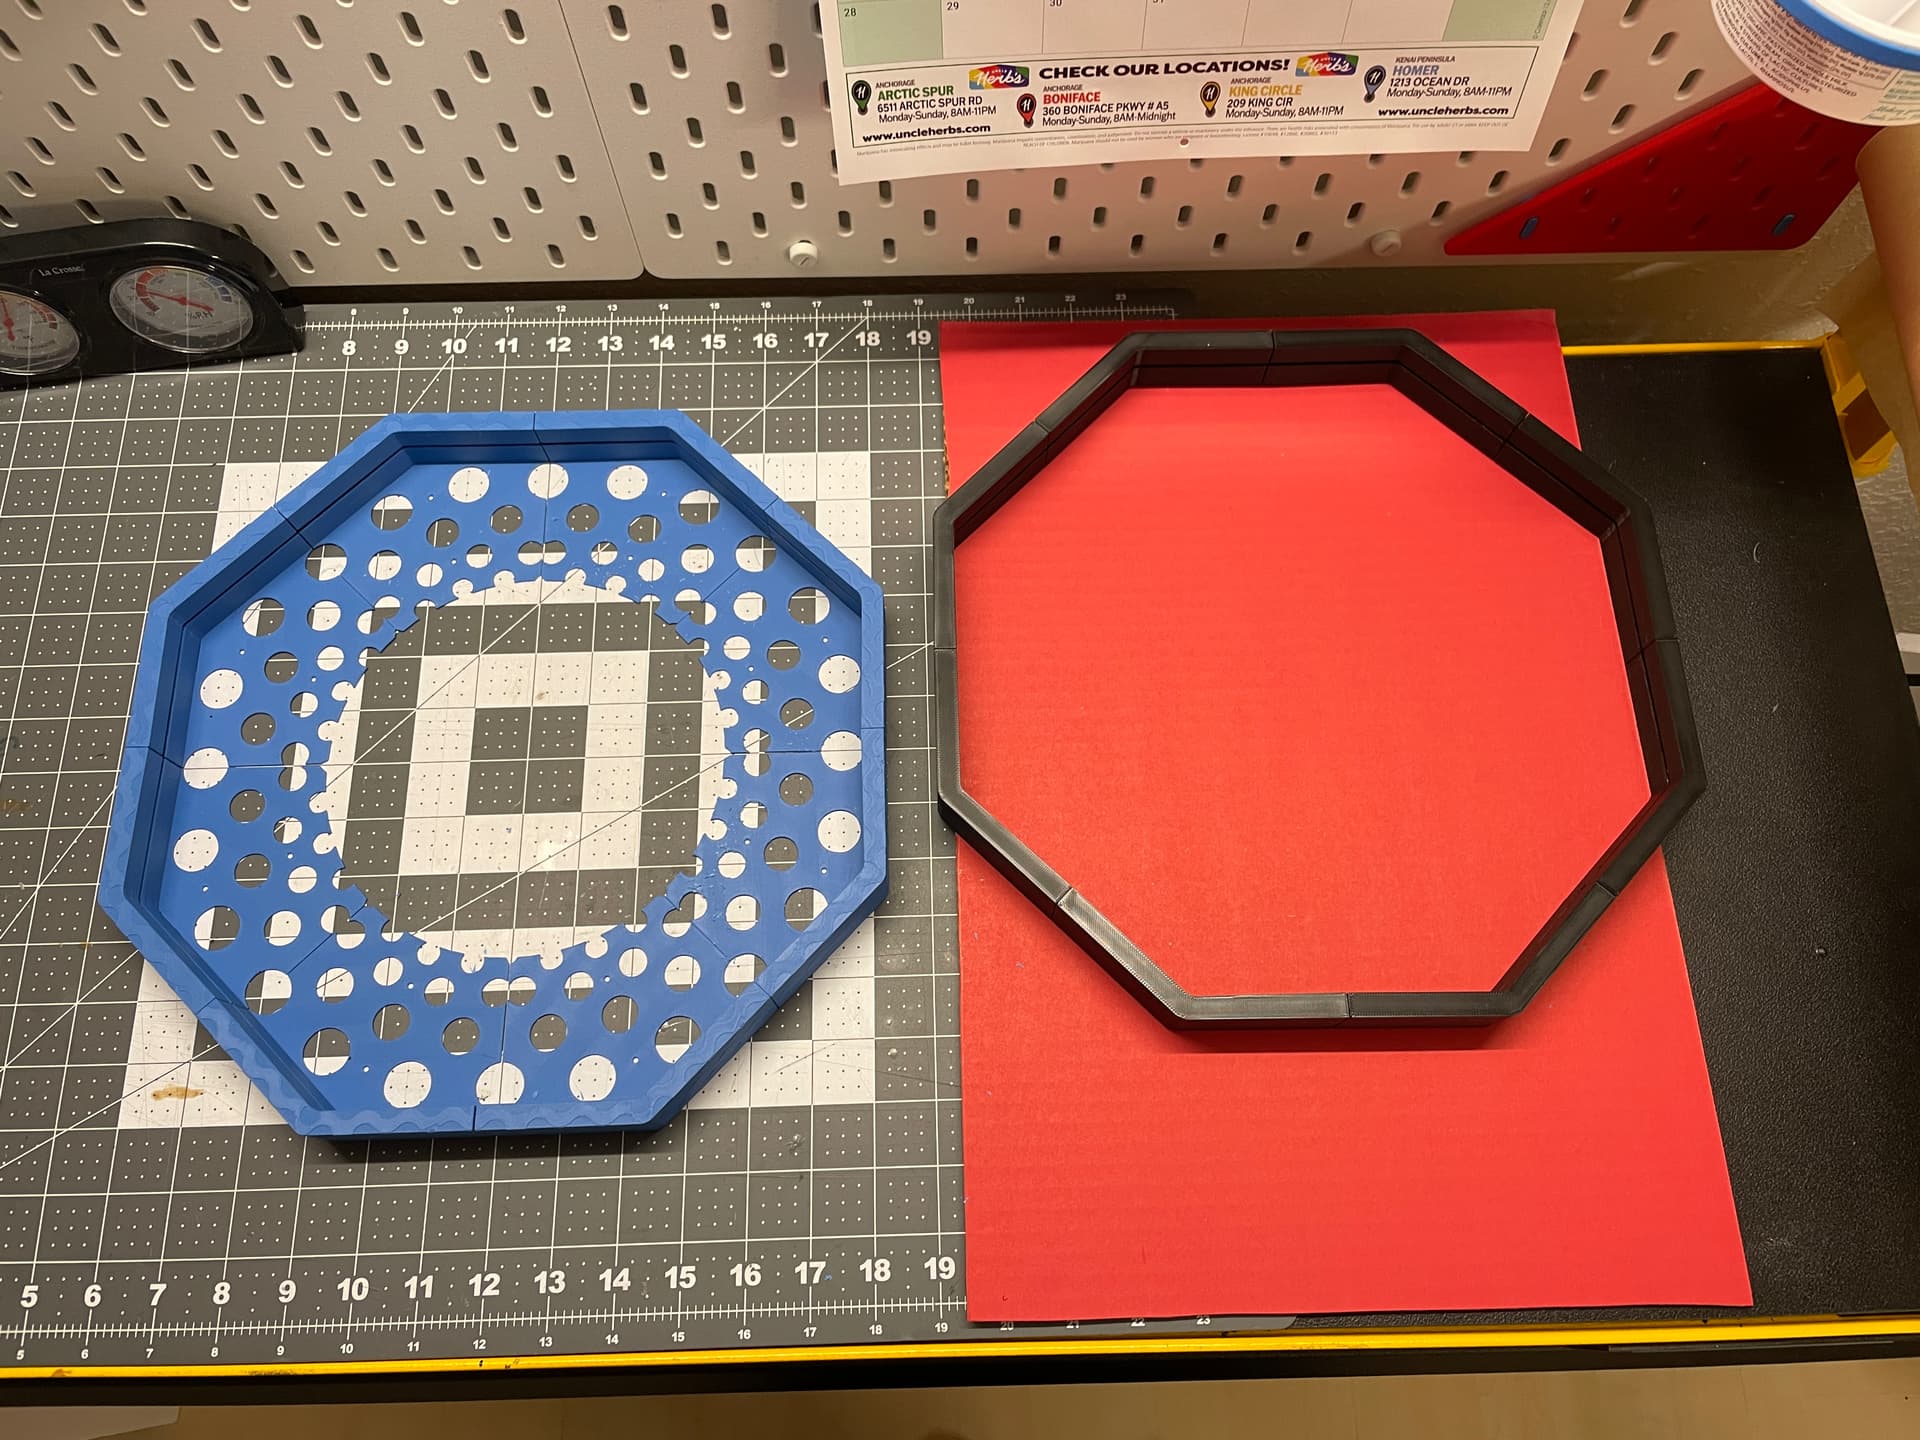
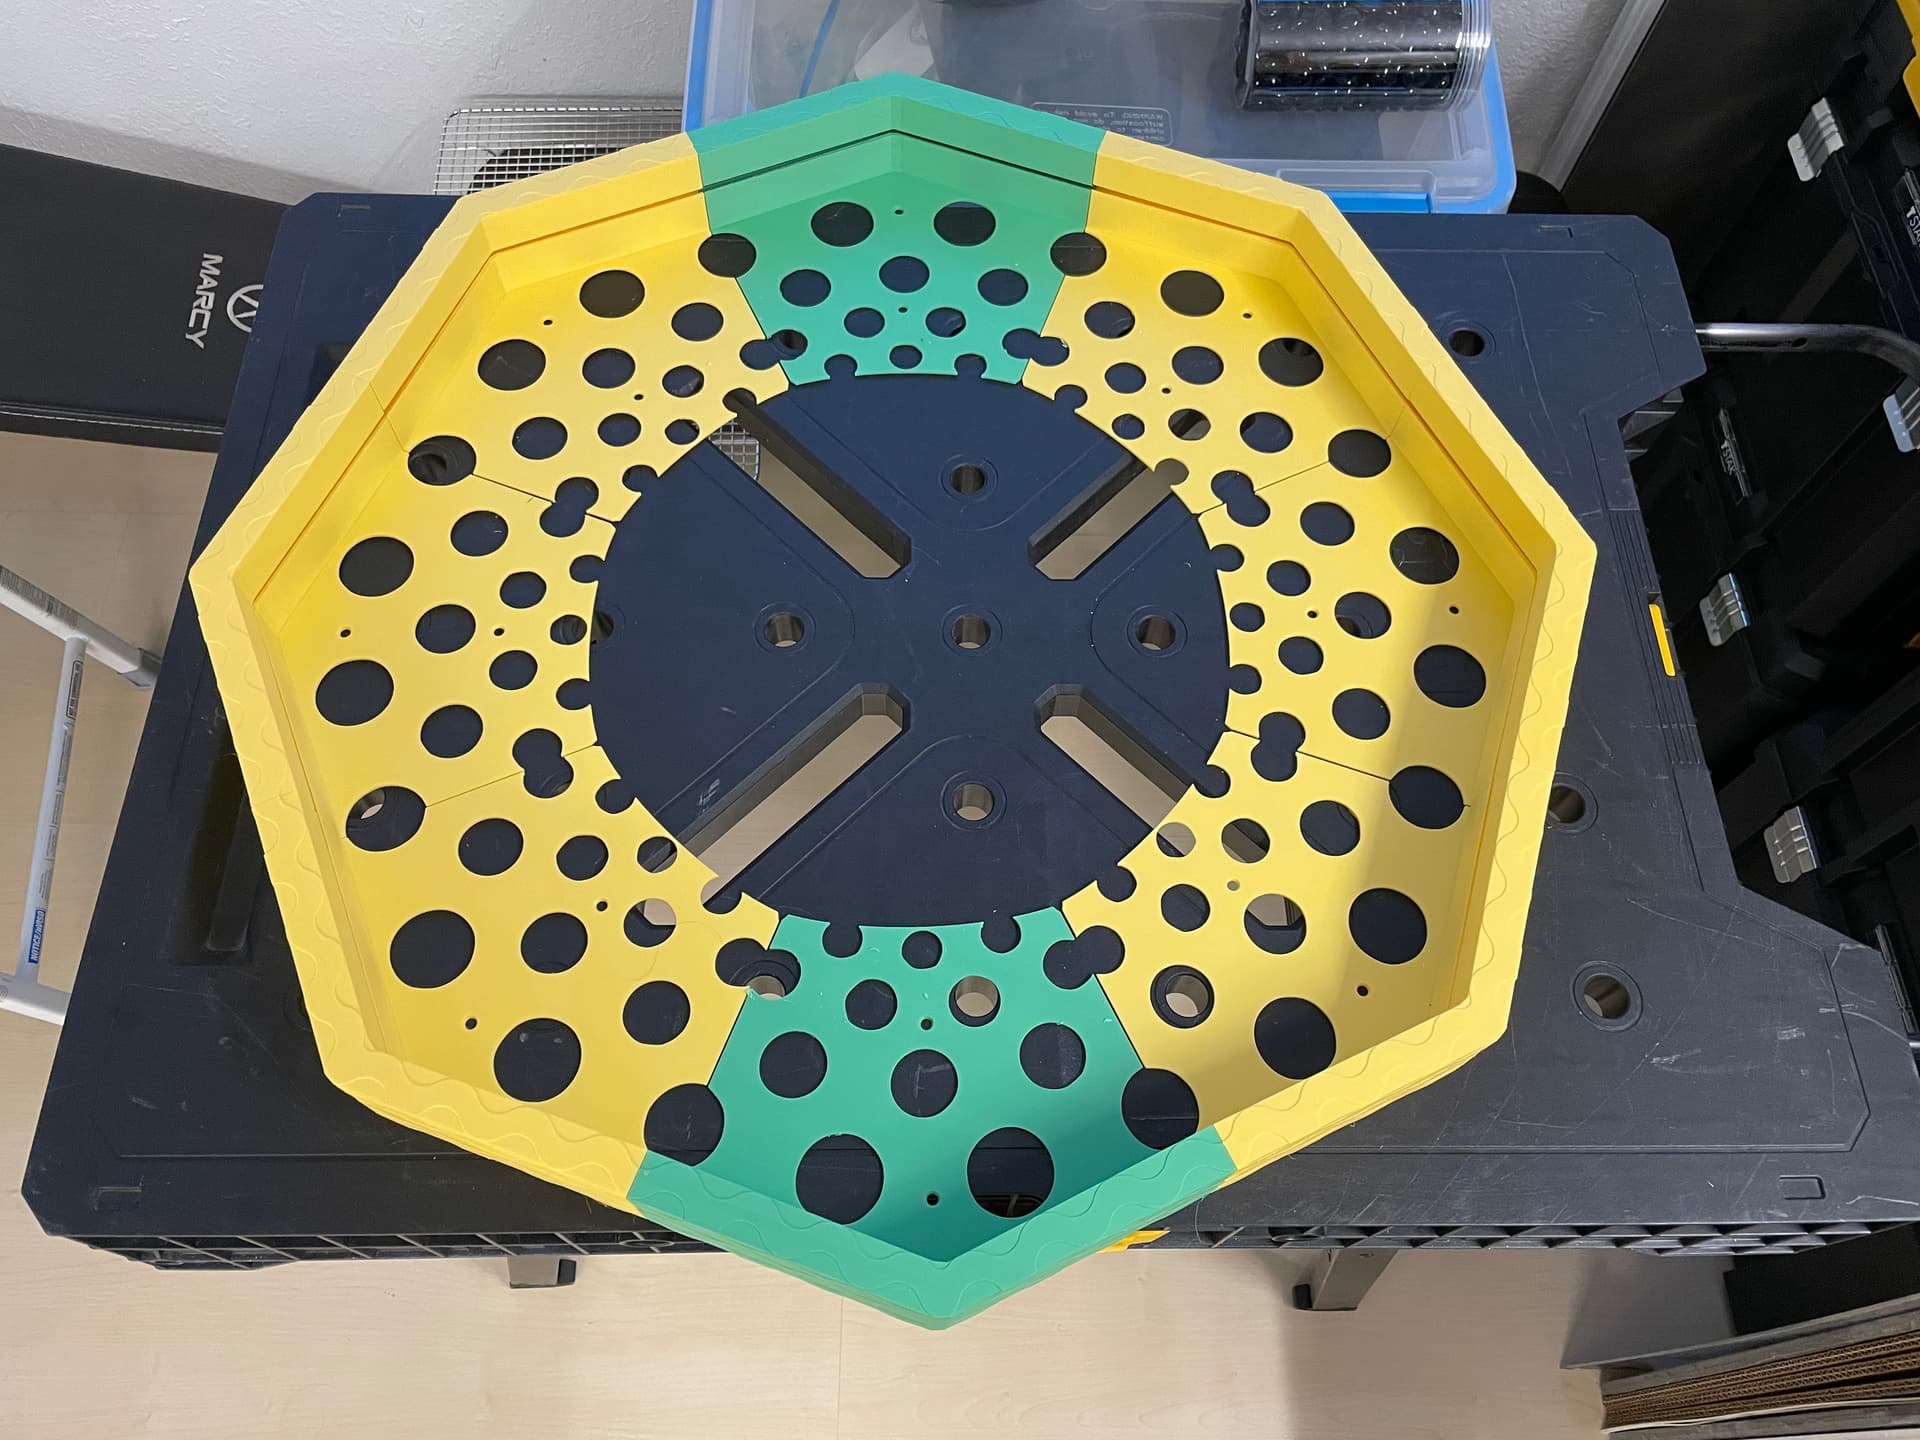
Next, add a web bottom to the corner pieces to hold the surface pieces in place, and give an internal structure to bind the layers together. You’ll see what I mean coming up -
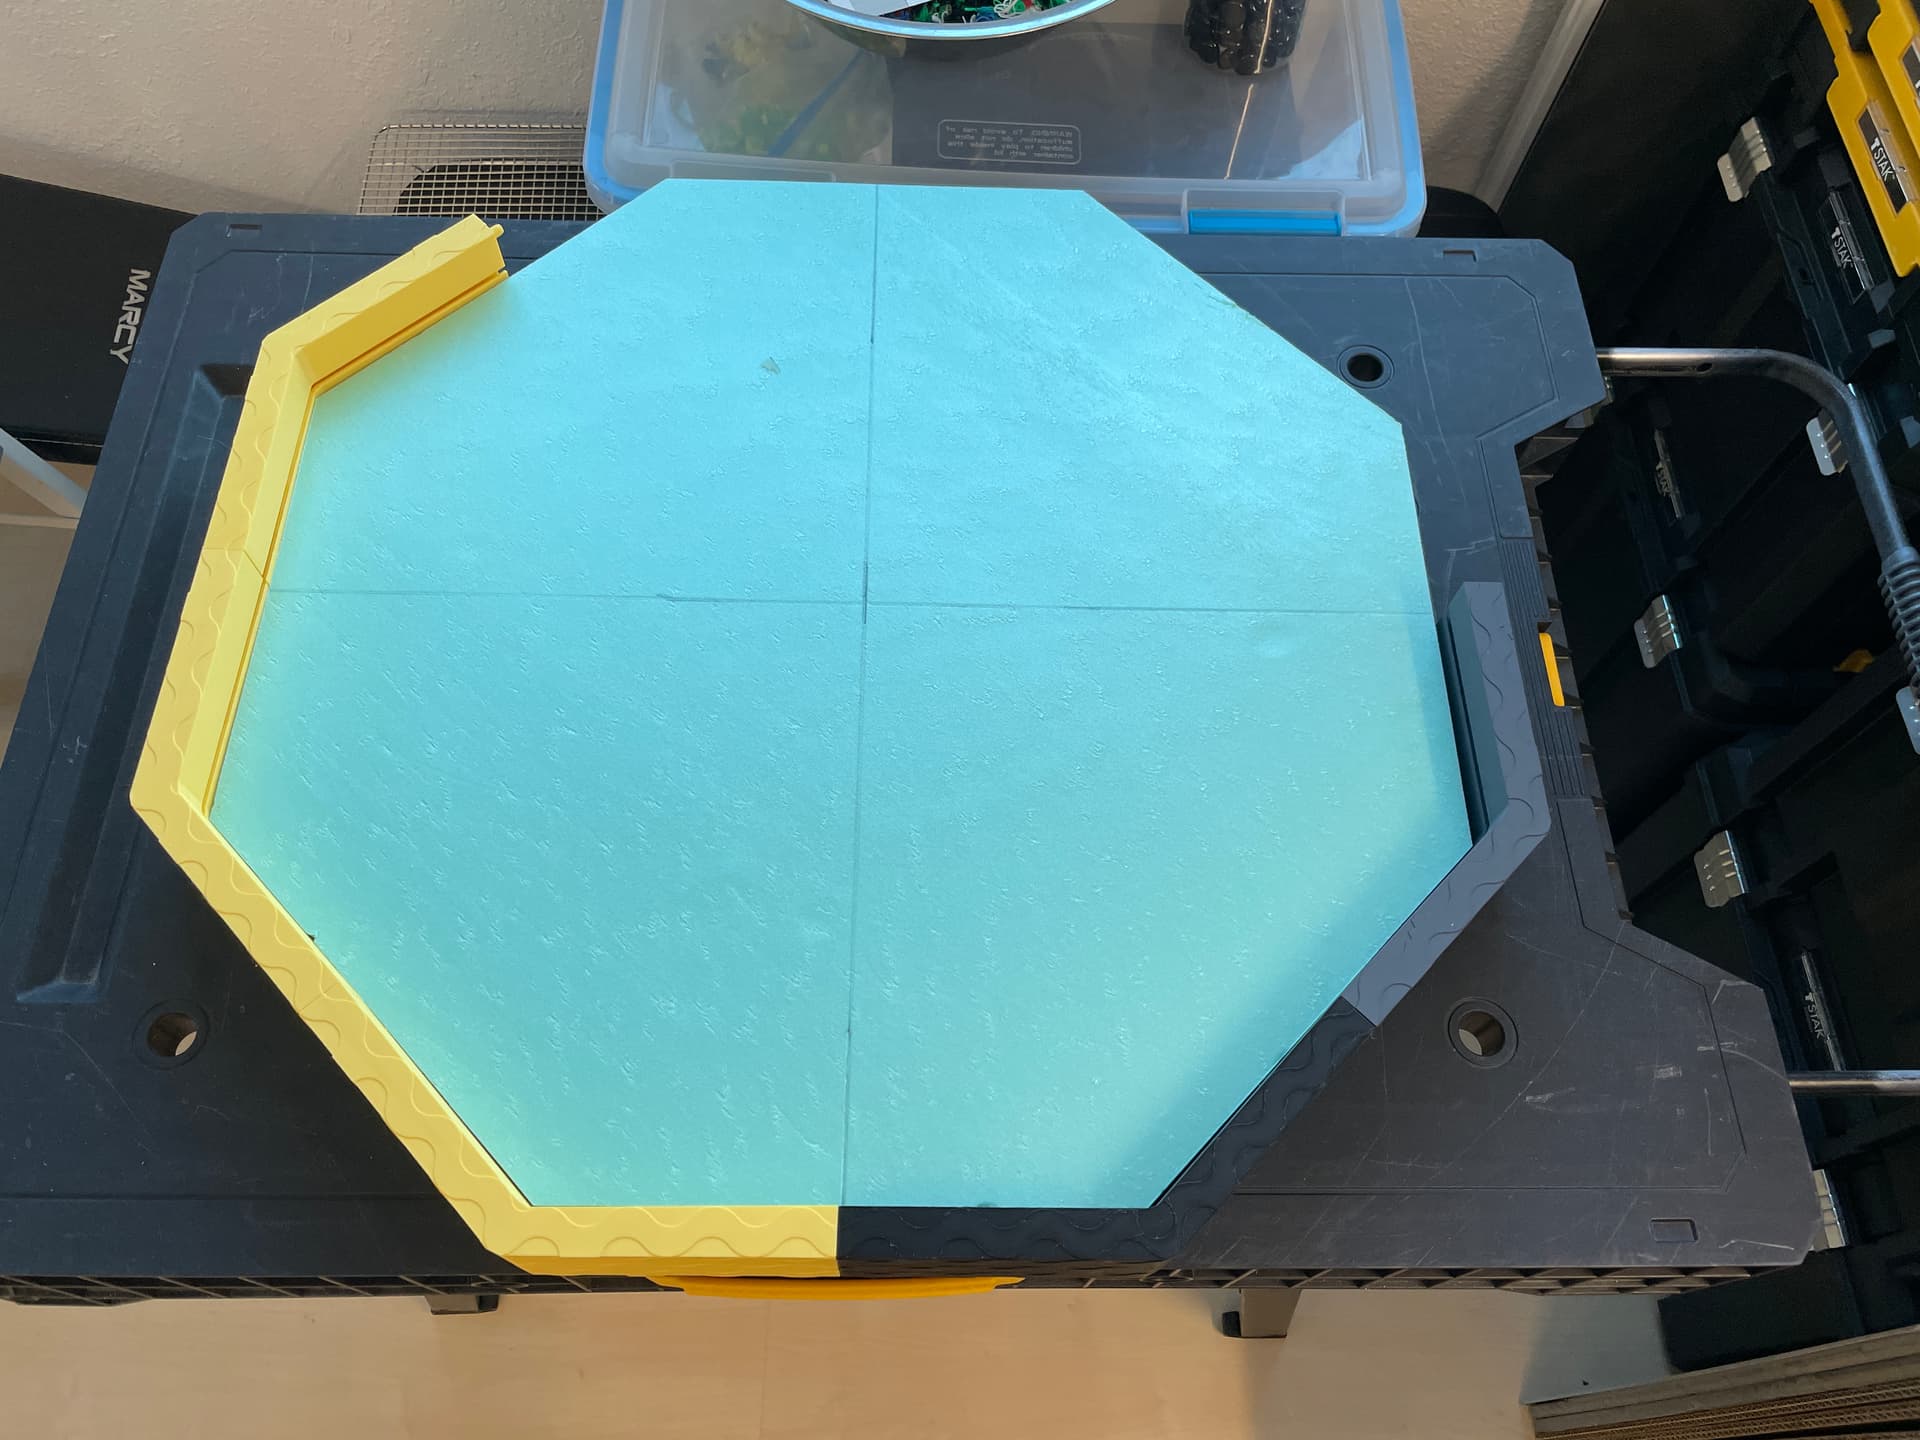
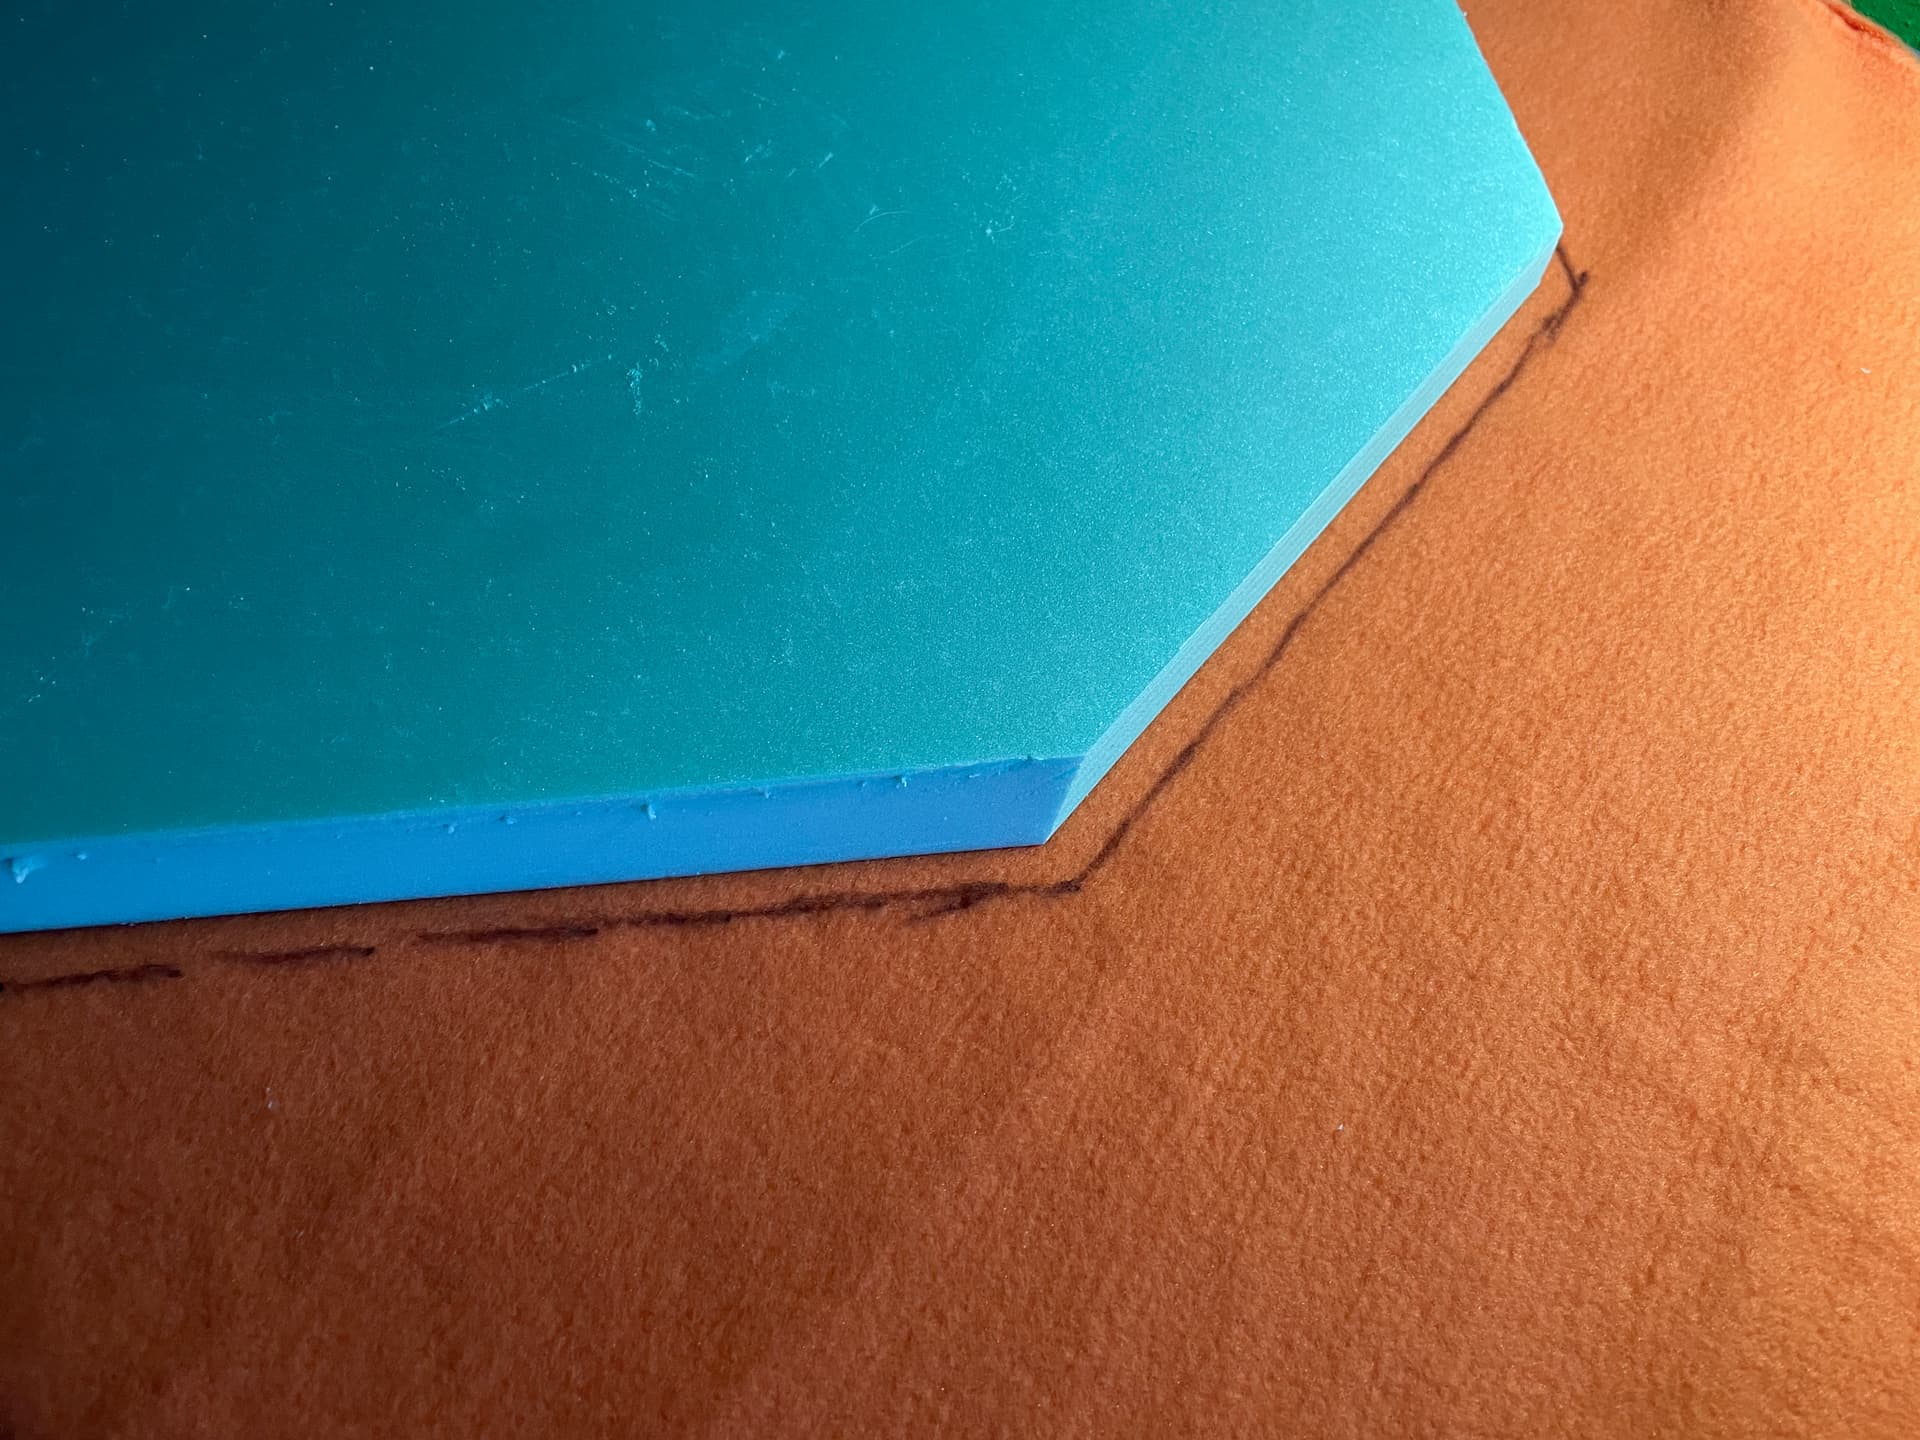
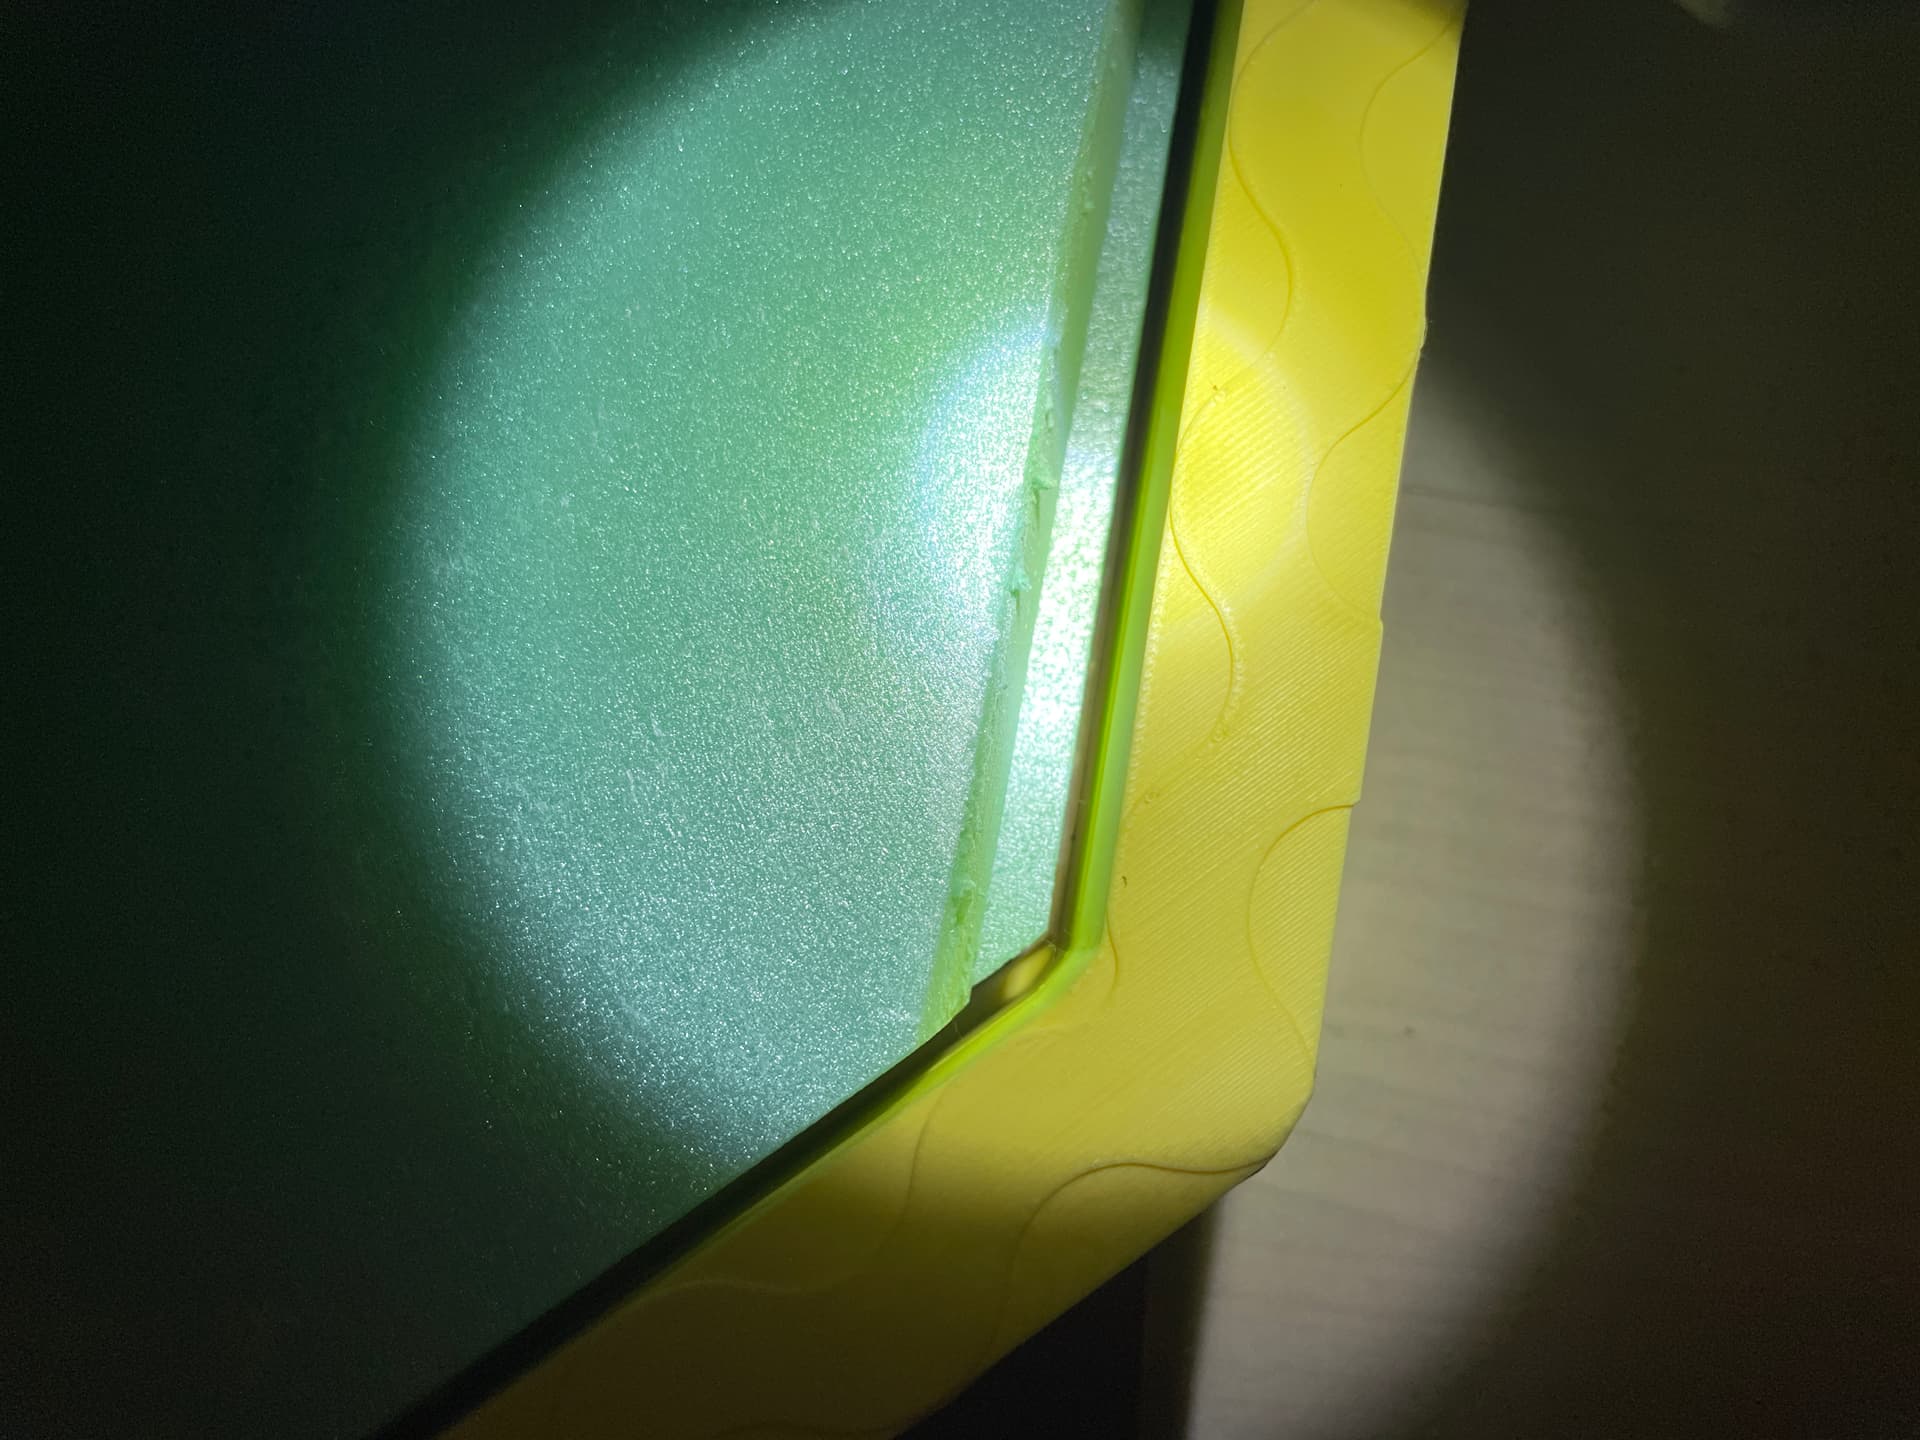
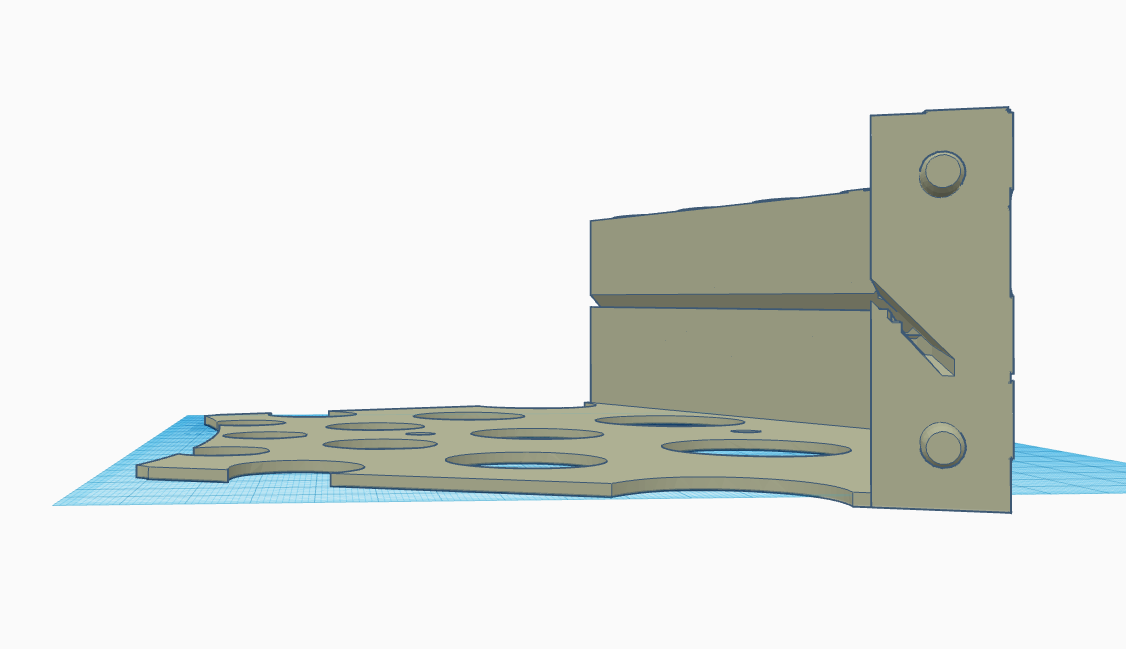
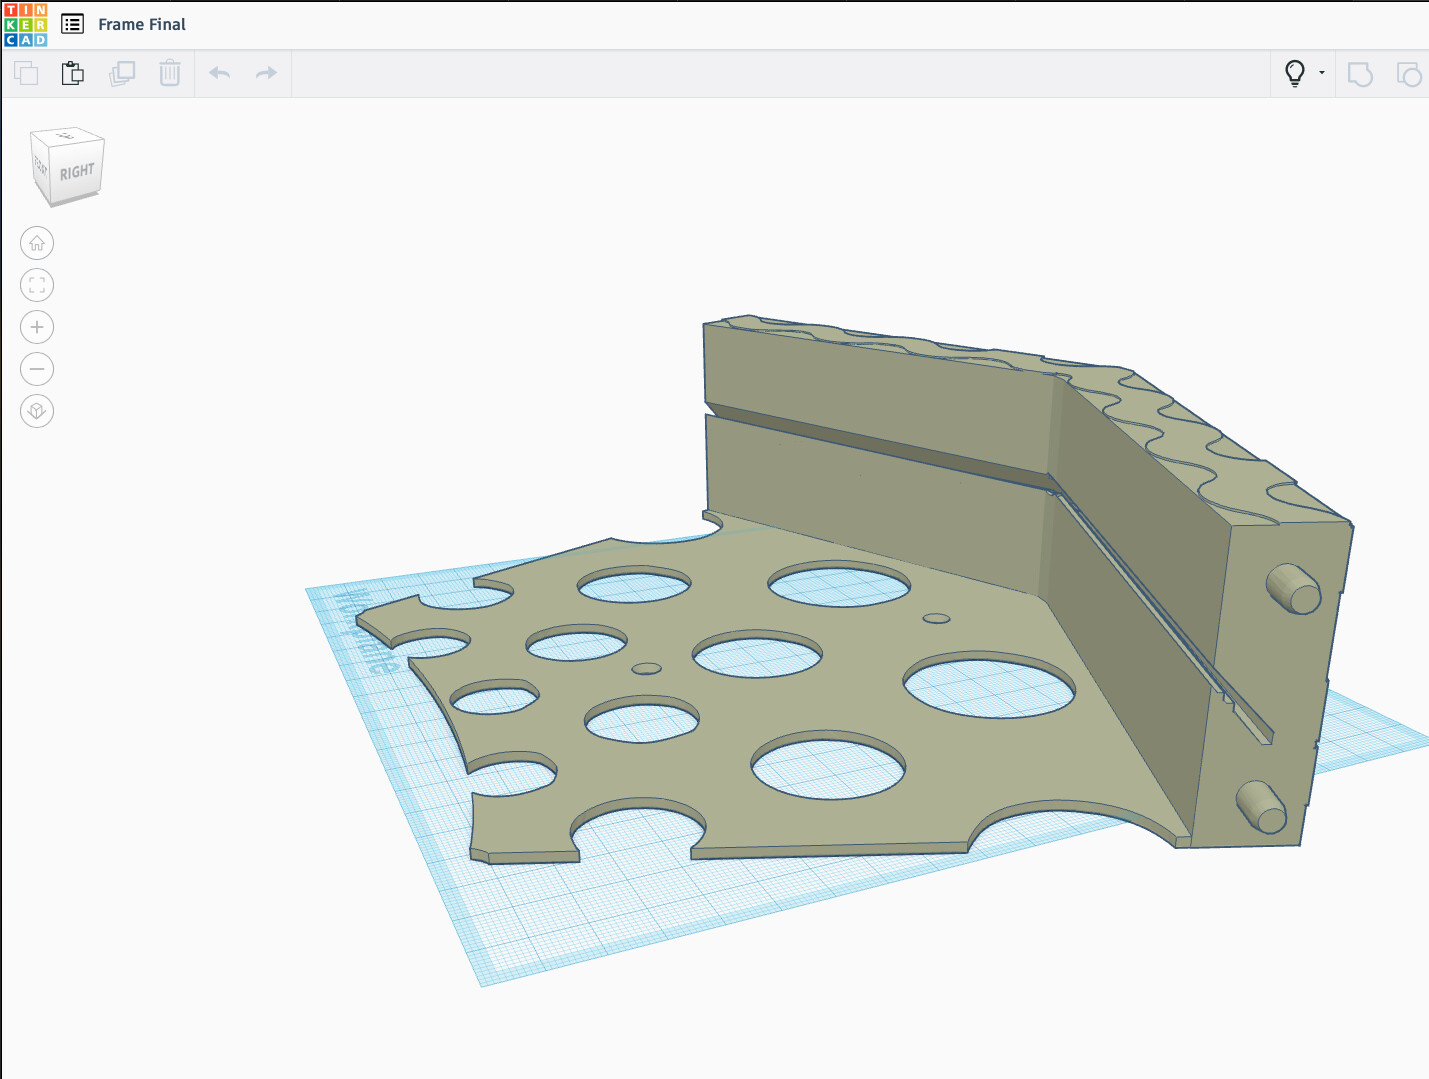
Basically, 2 inset layers of foam core, with a felt display surface. Note, in the frame pieces, there is a channel cut in, which allows the felt (surface) to tuck into the edge, making a super clean surface.
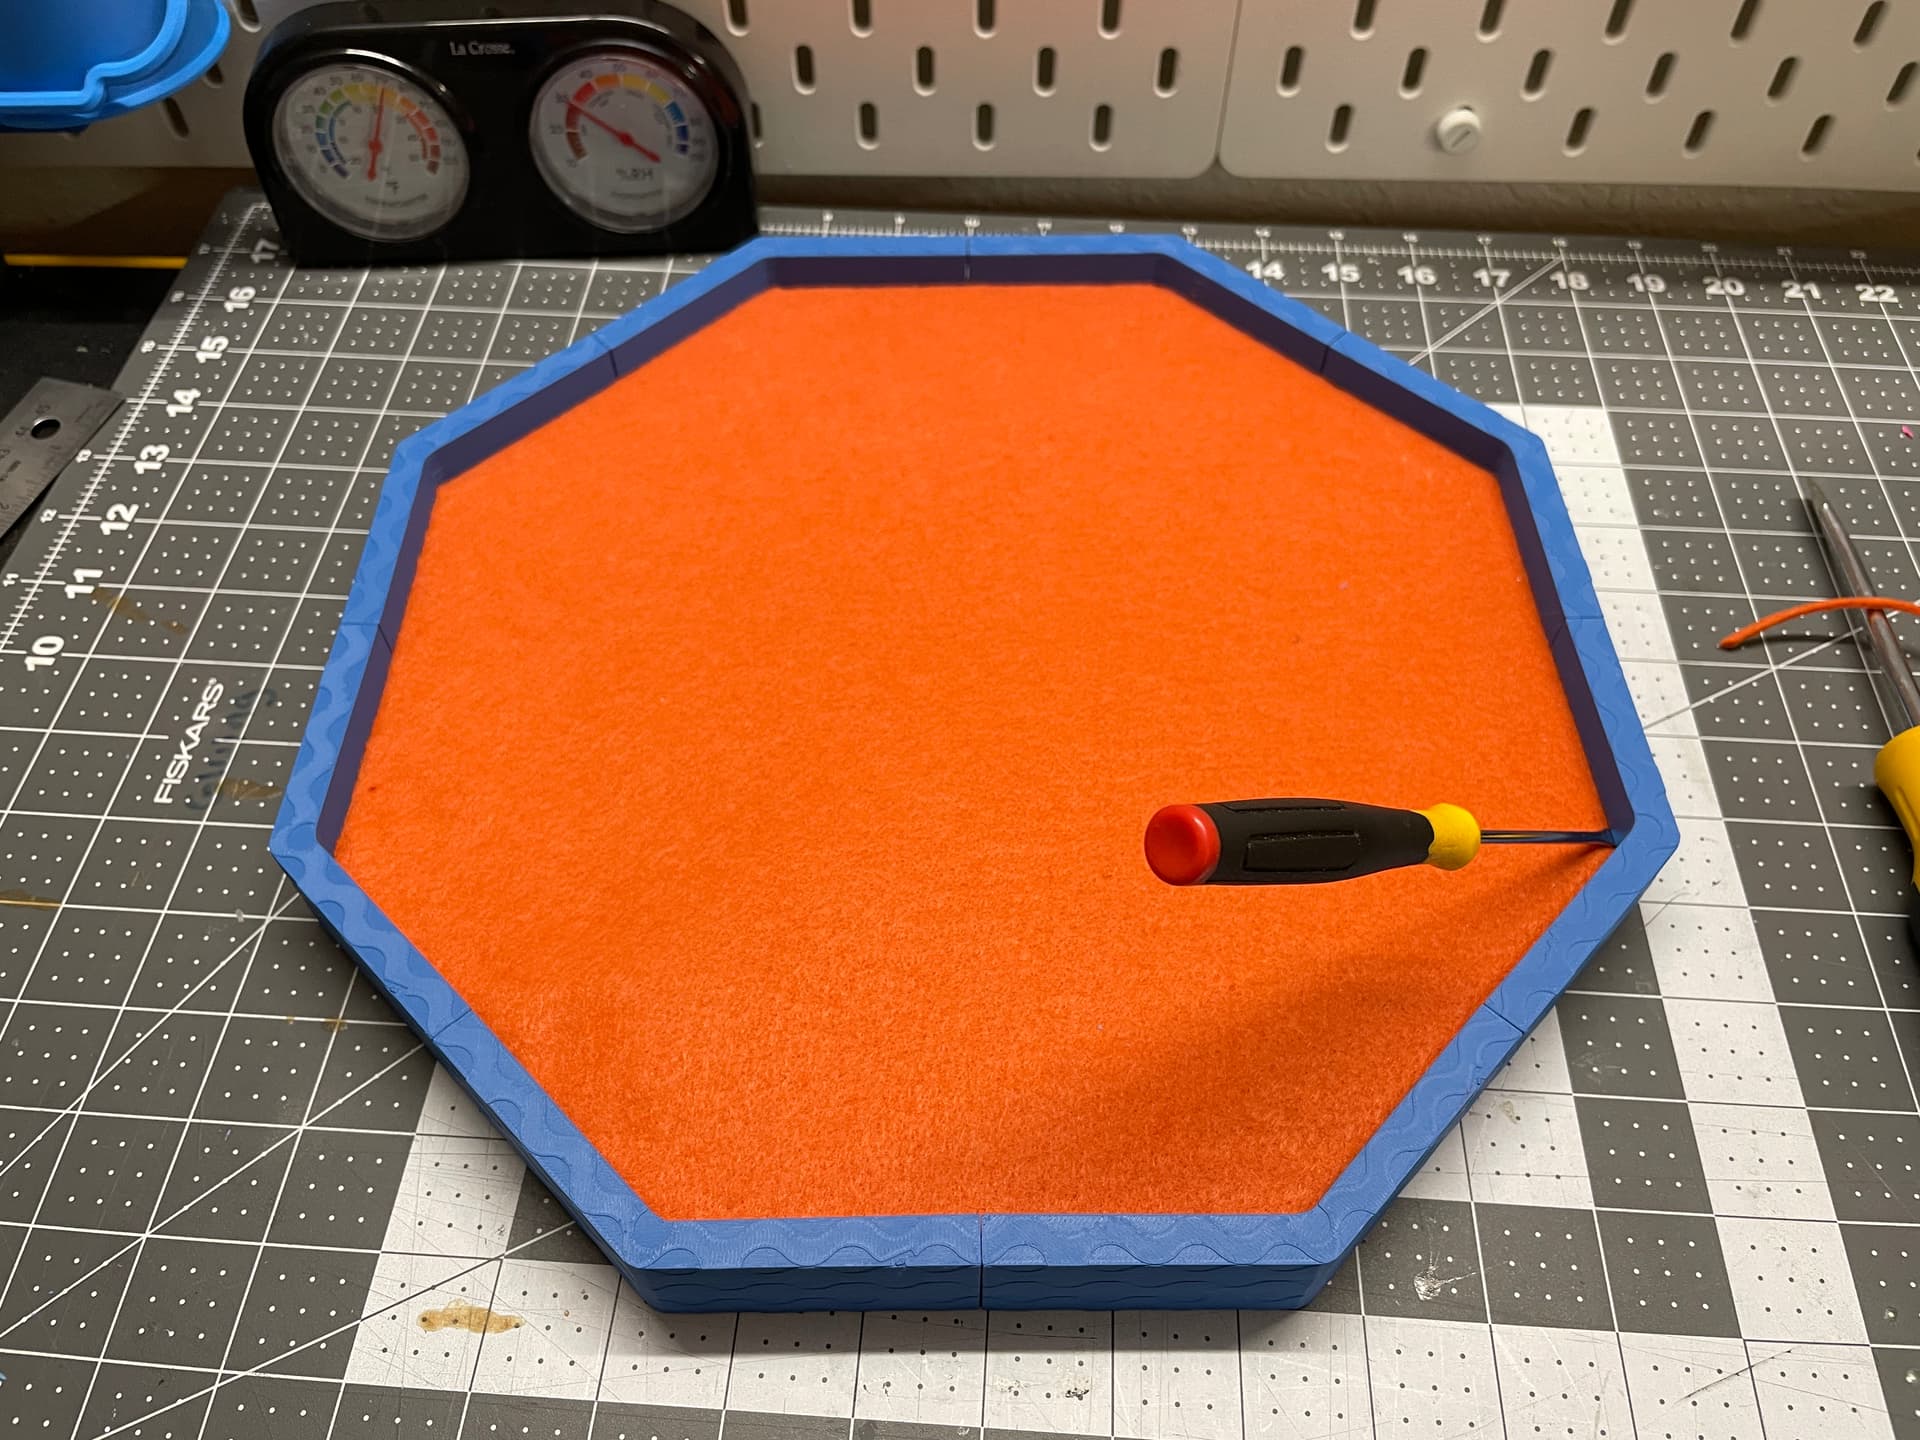
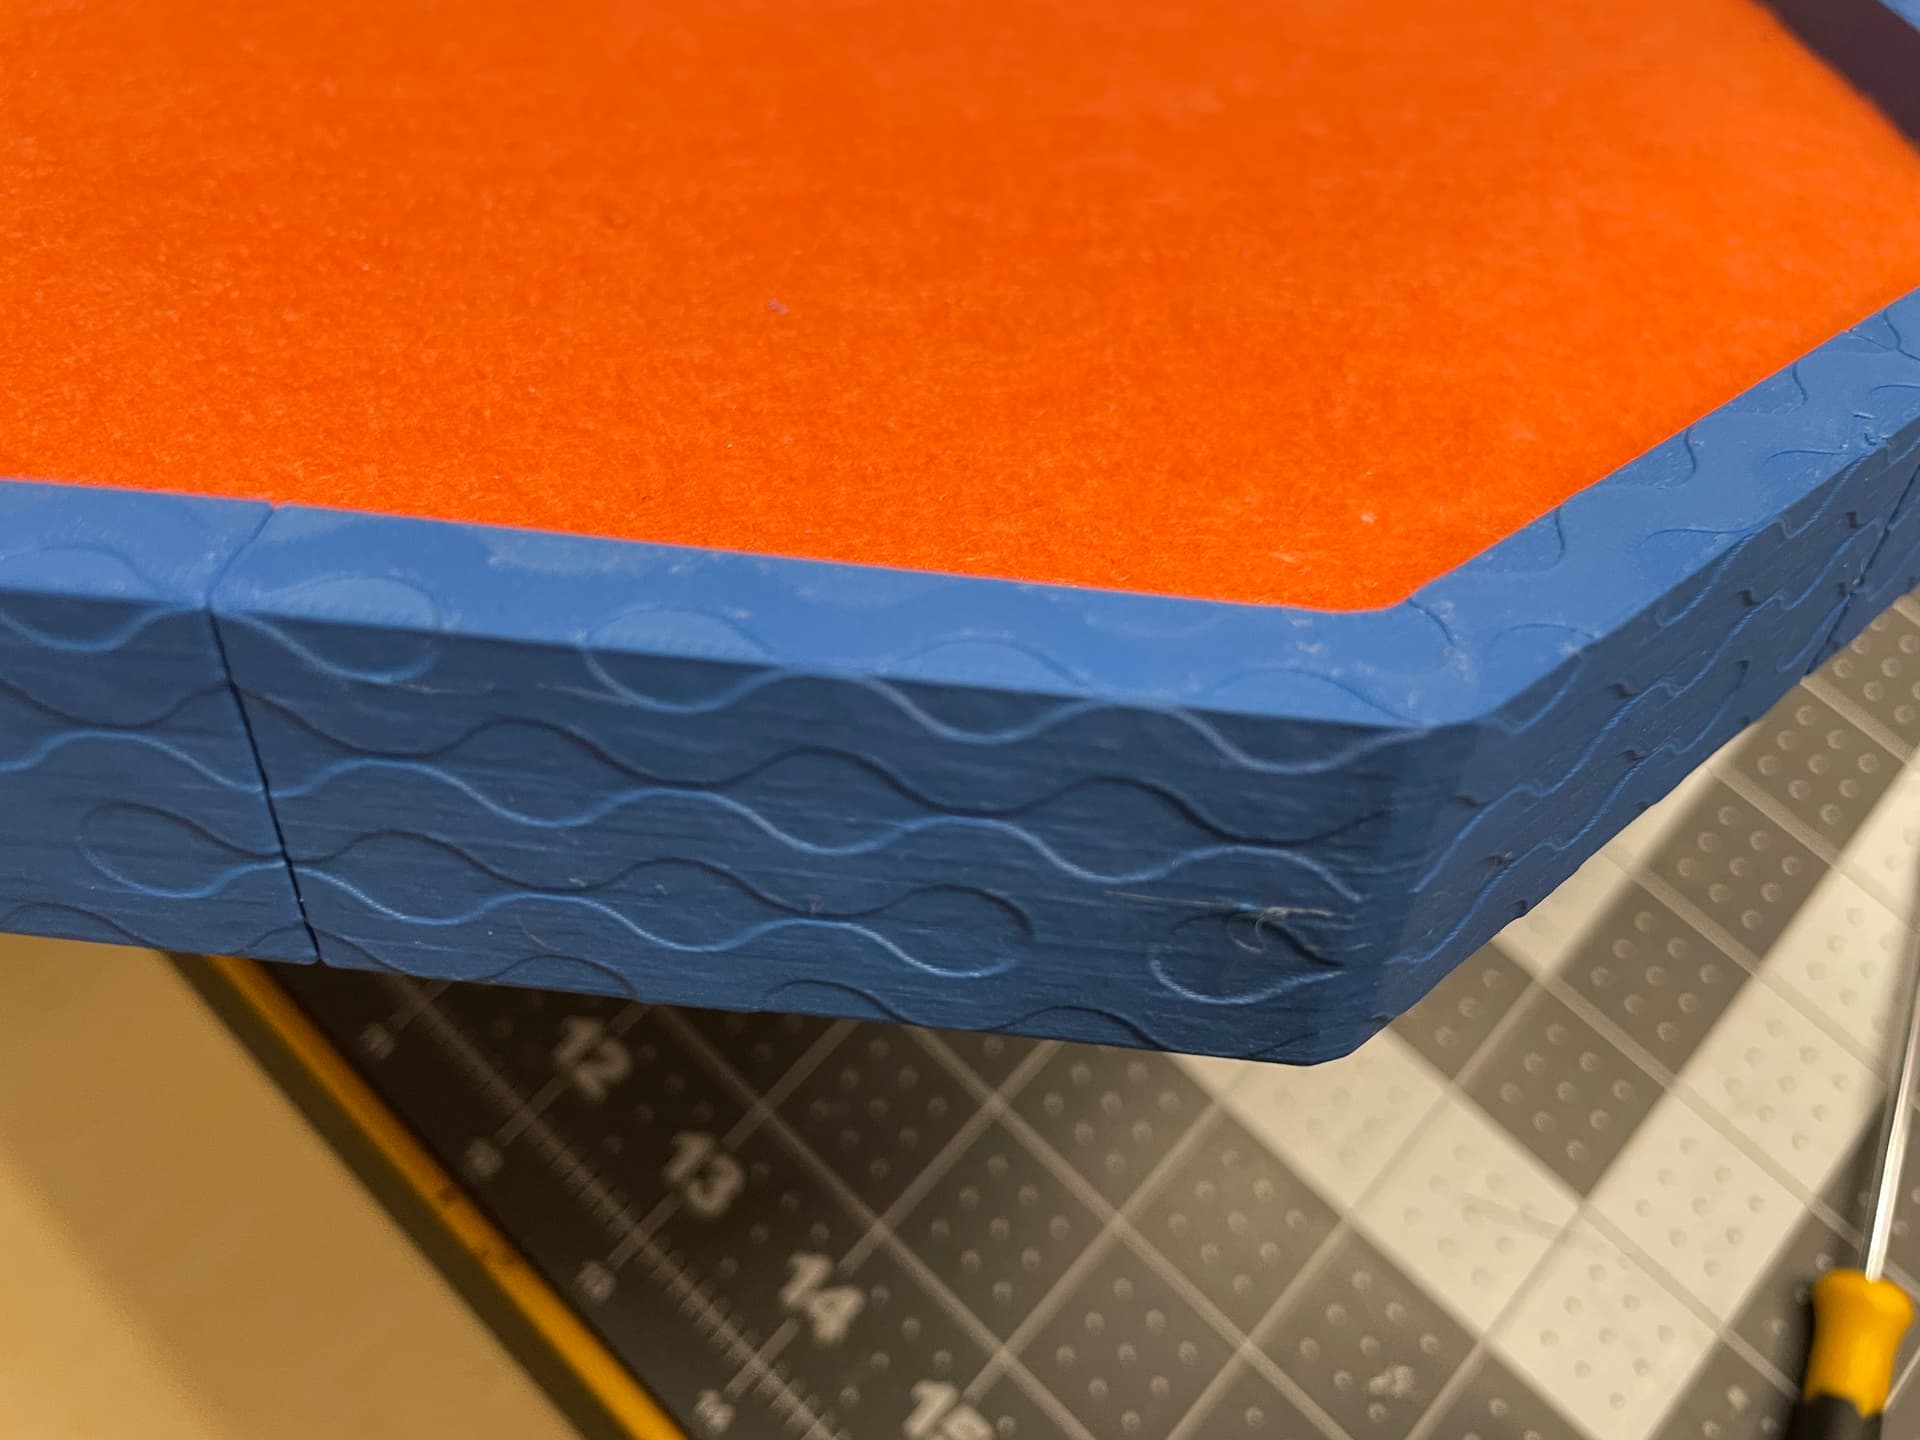
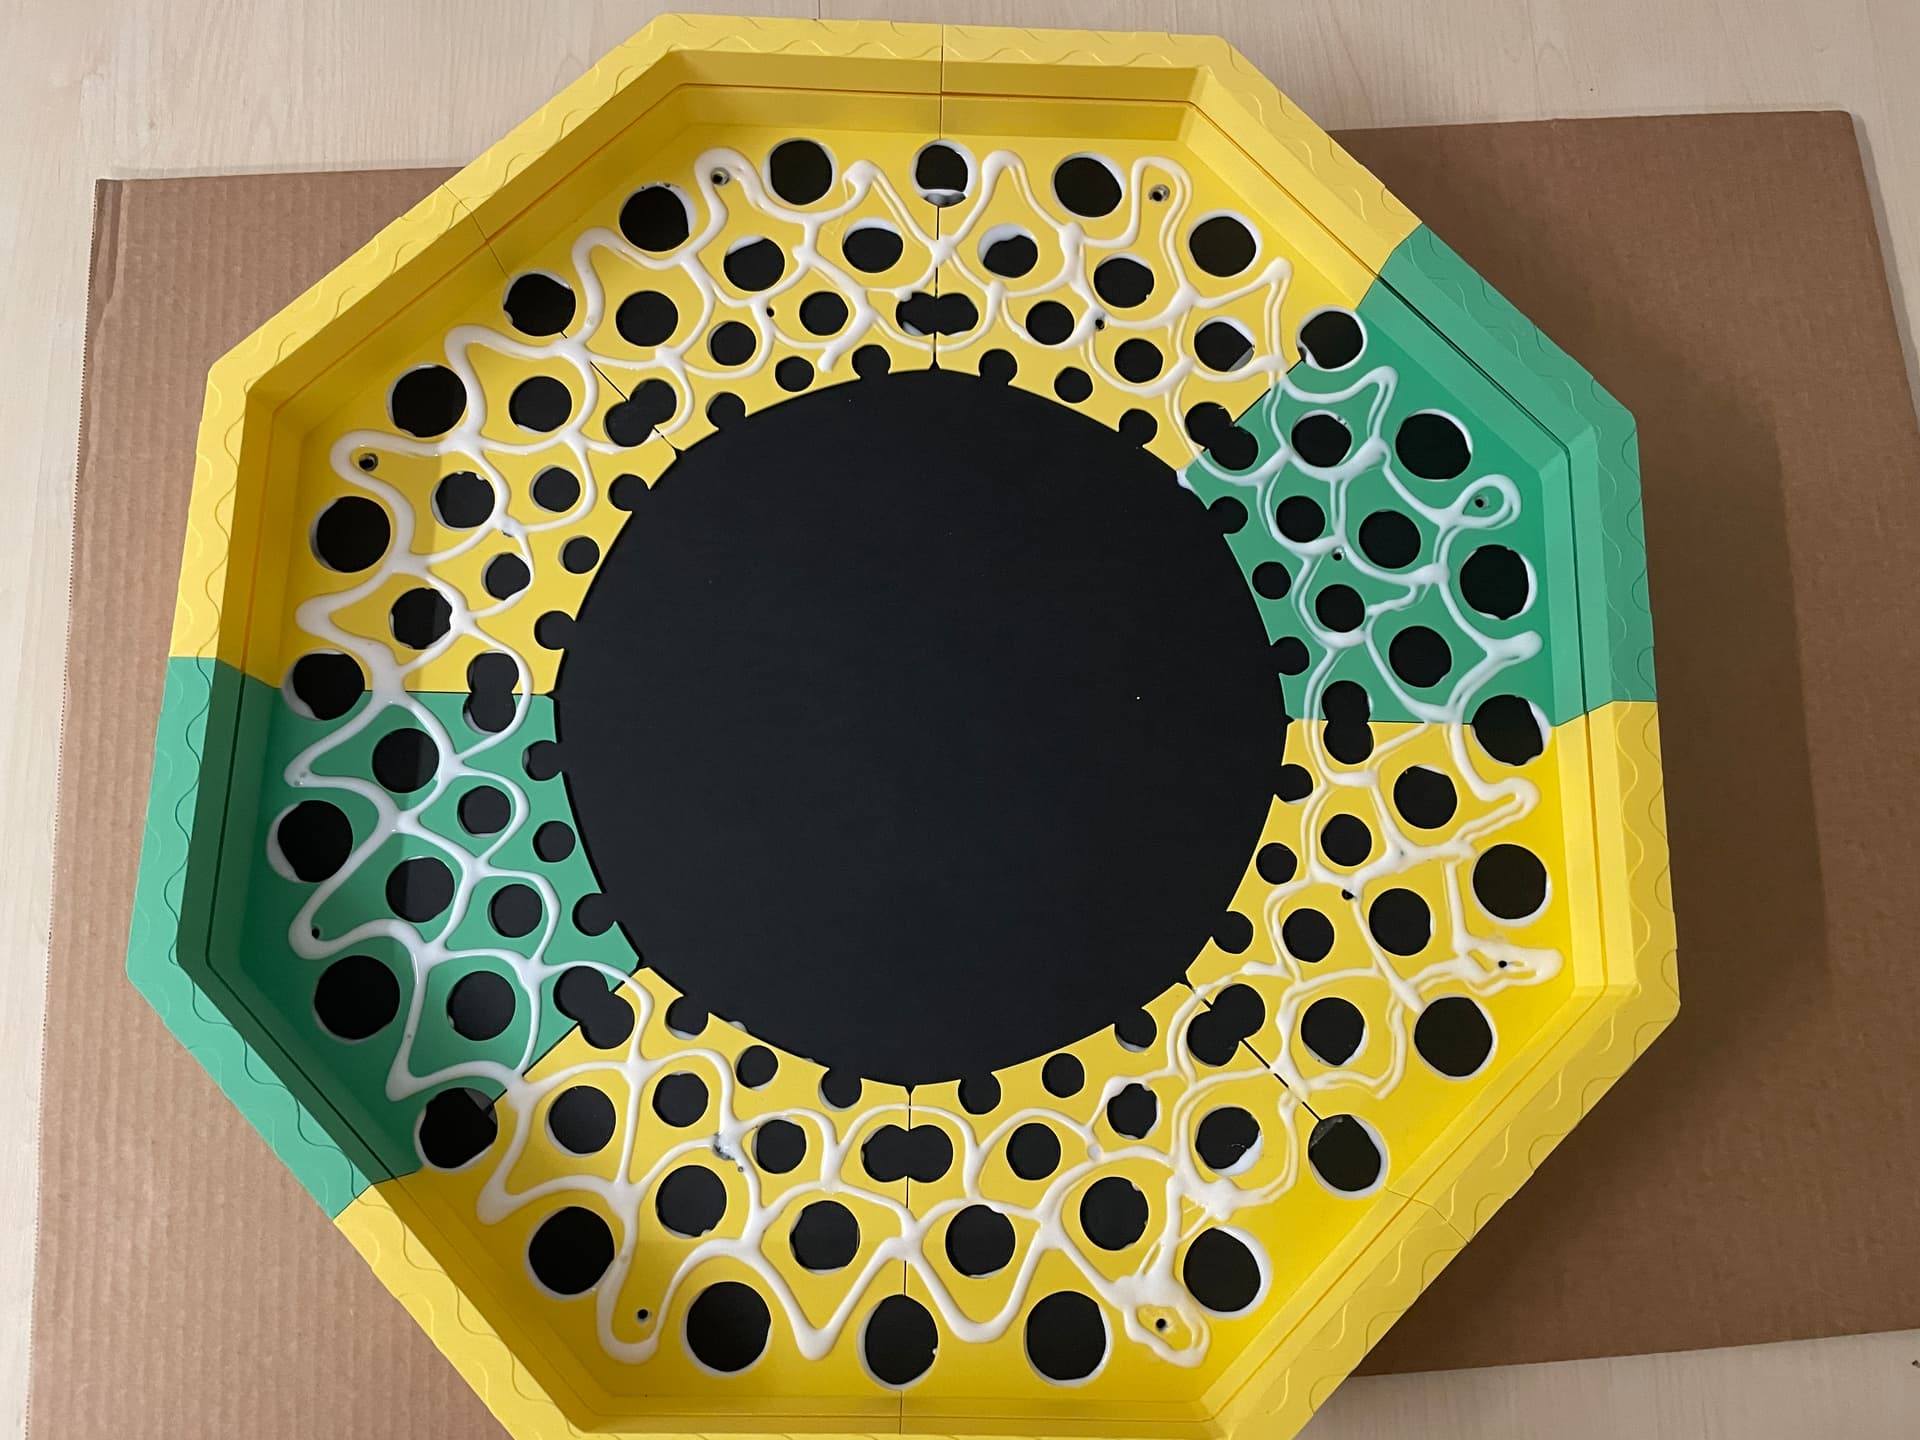
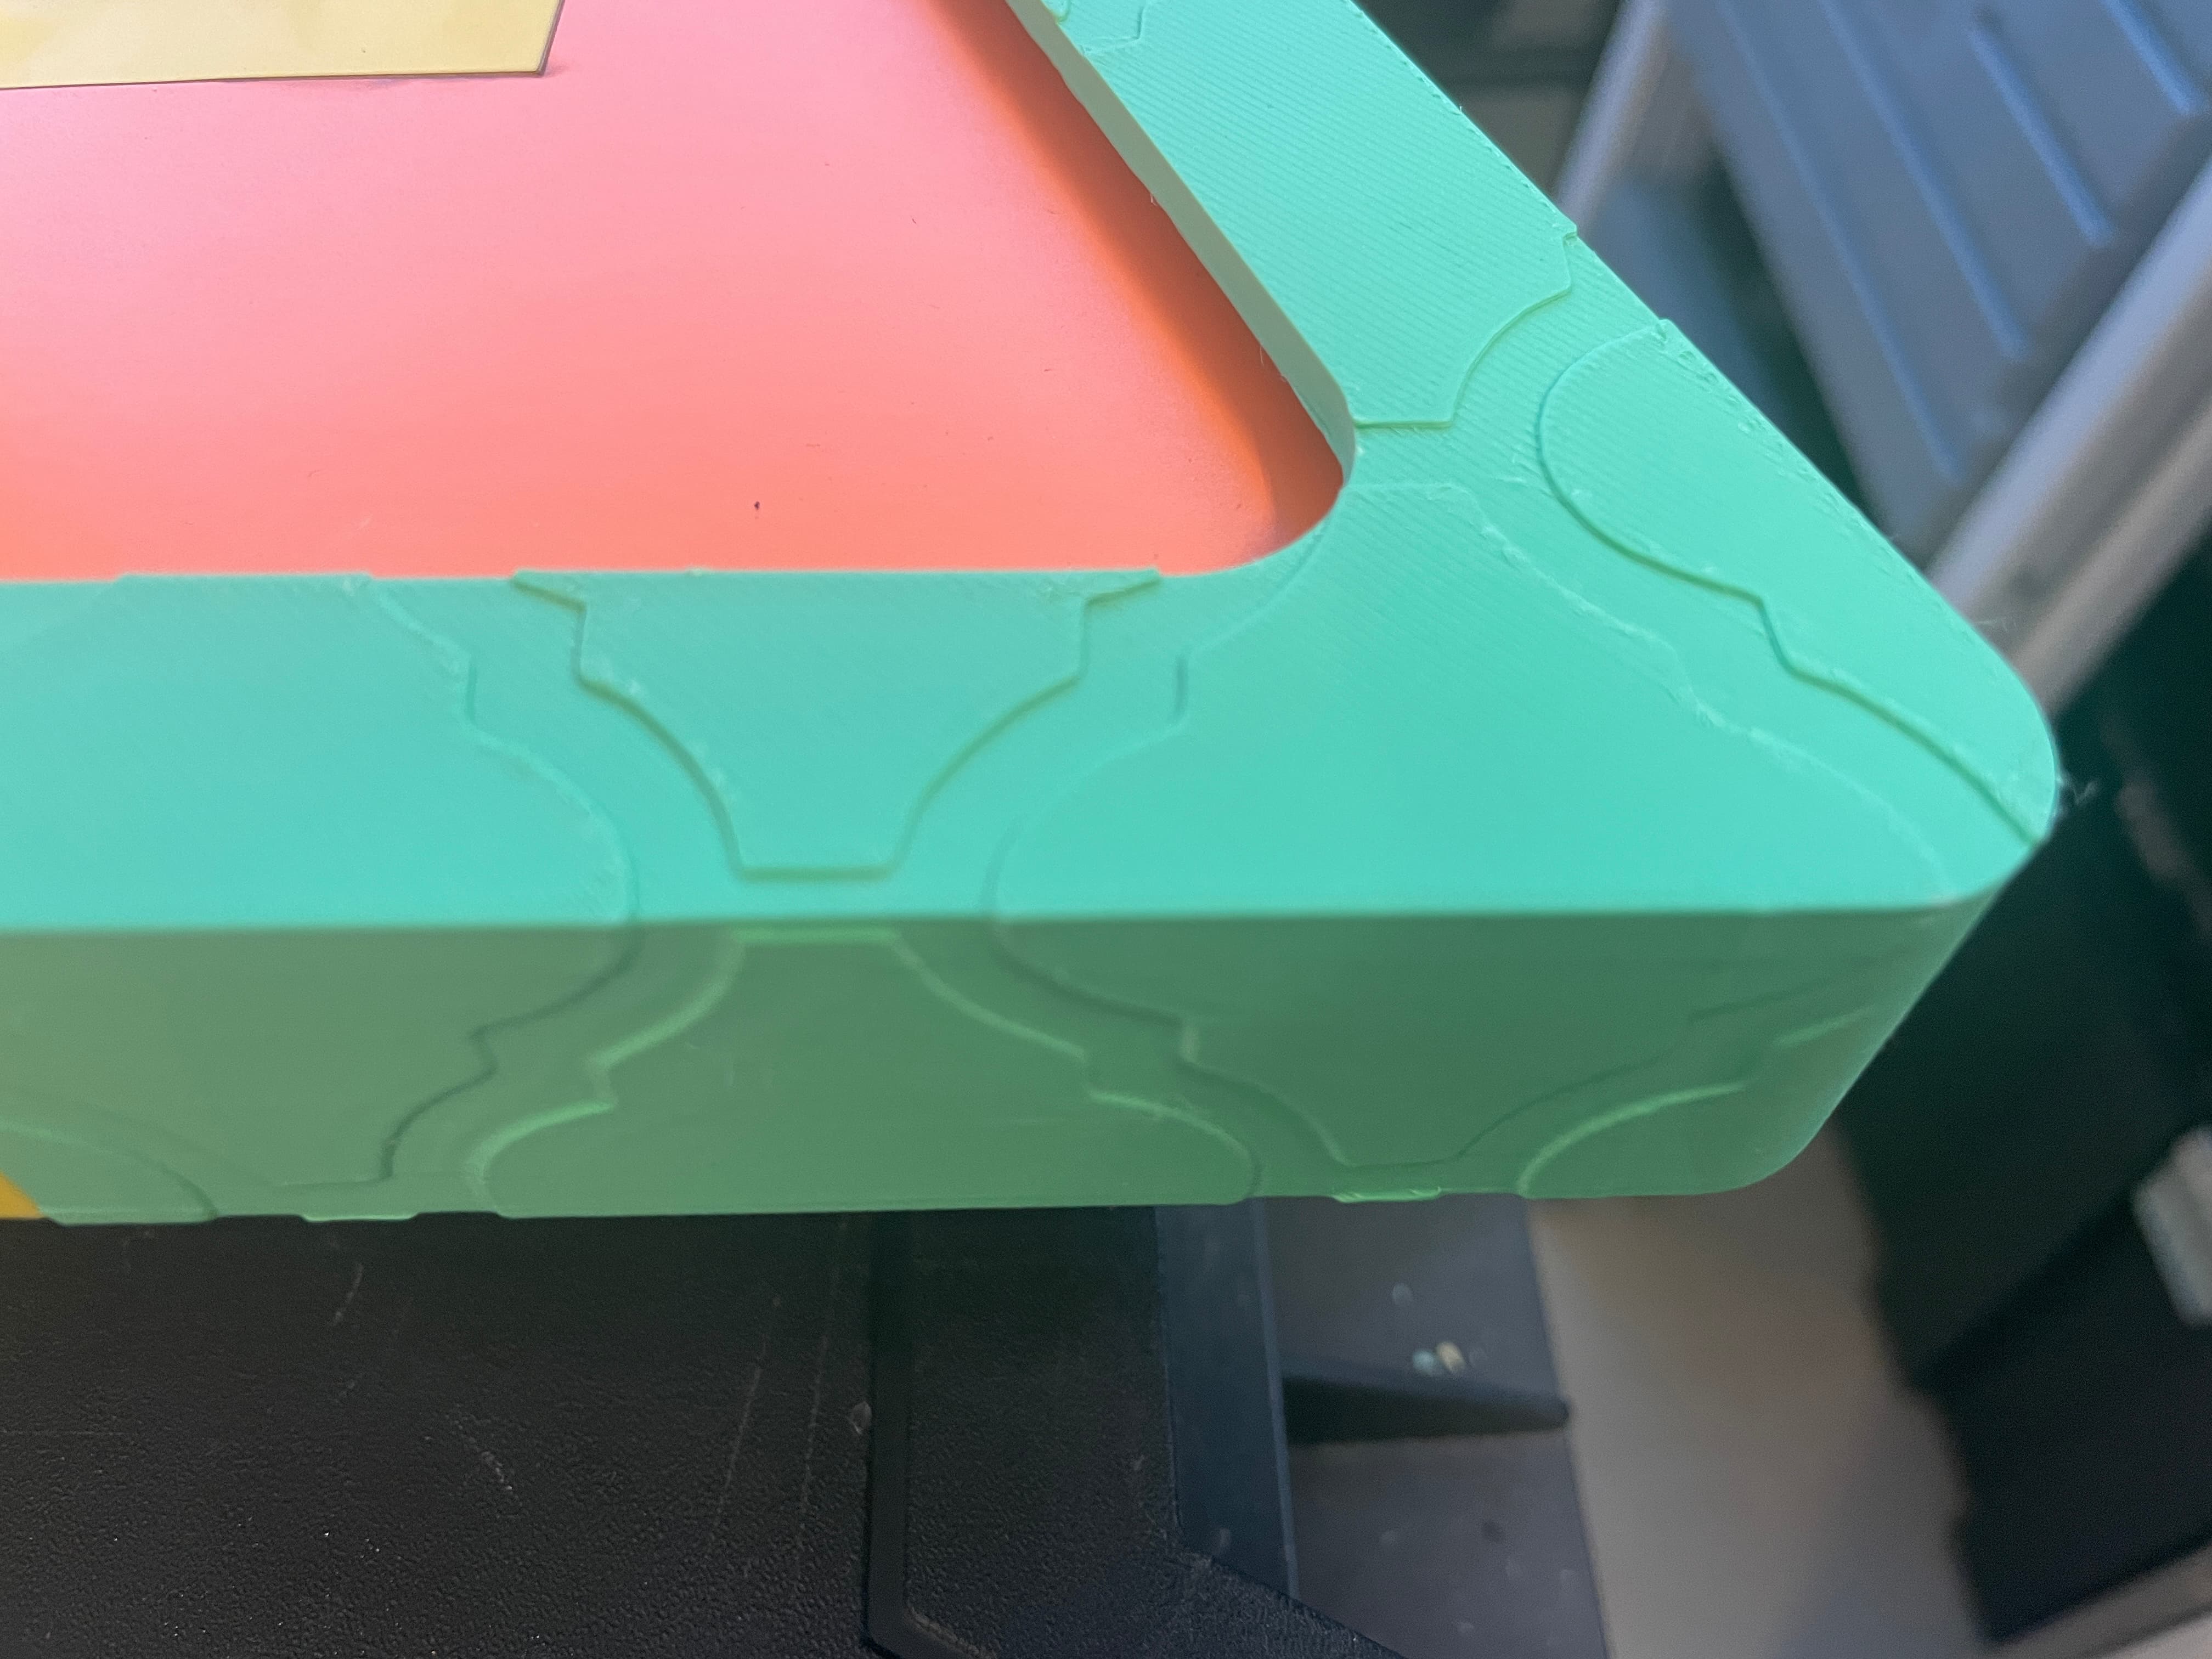
I started with a wavy pattern, inset into the framing, for detail effect. Actually, insetting the non-wavy background. This is the first time I’ve done this technique, but seems to be working fine.
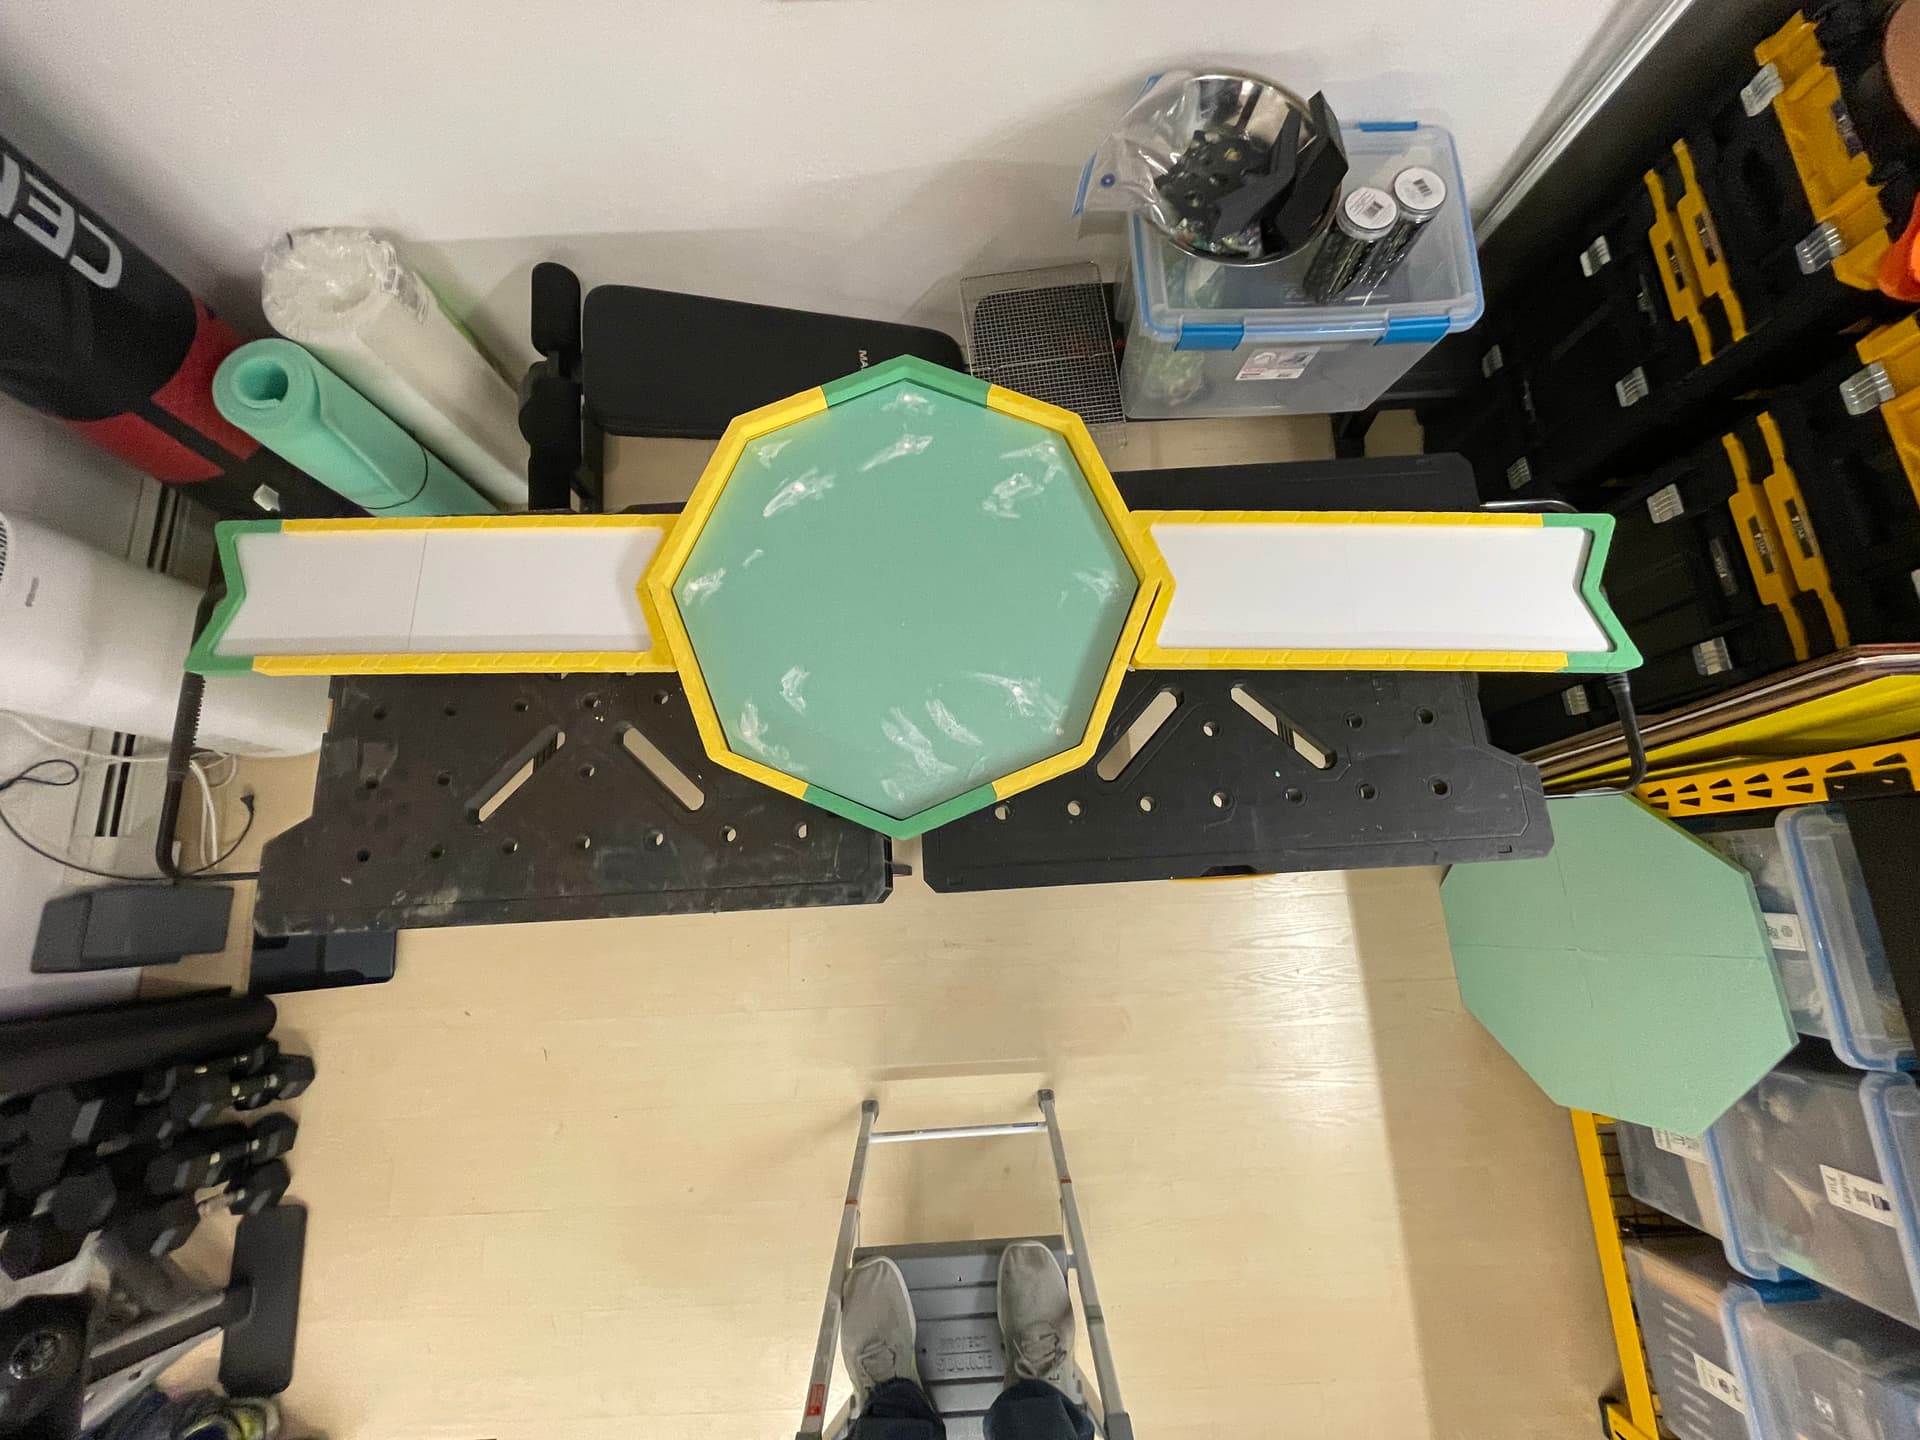
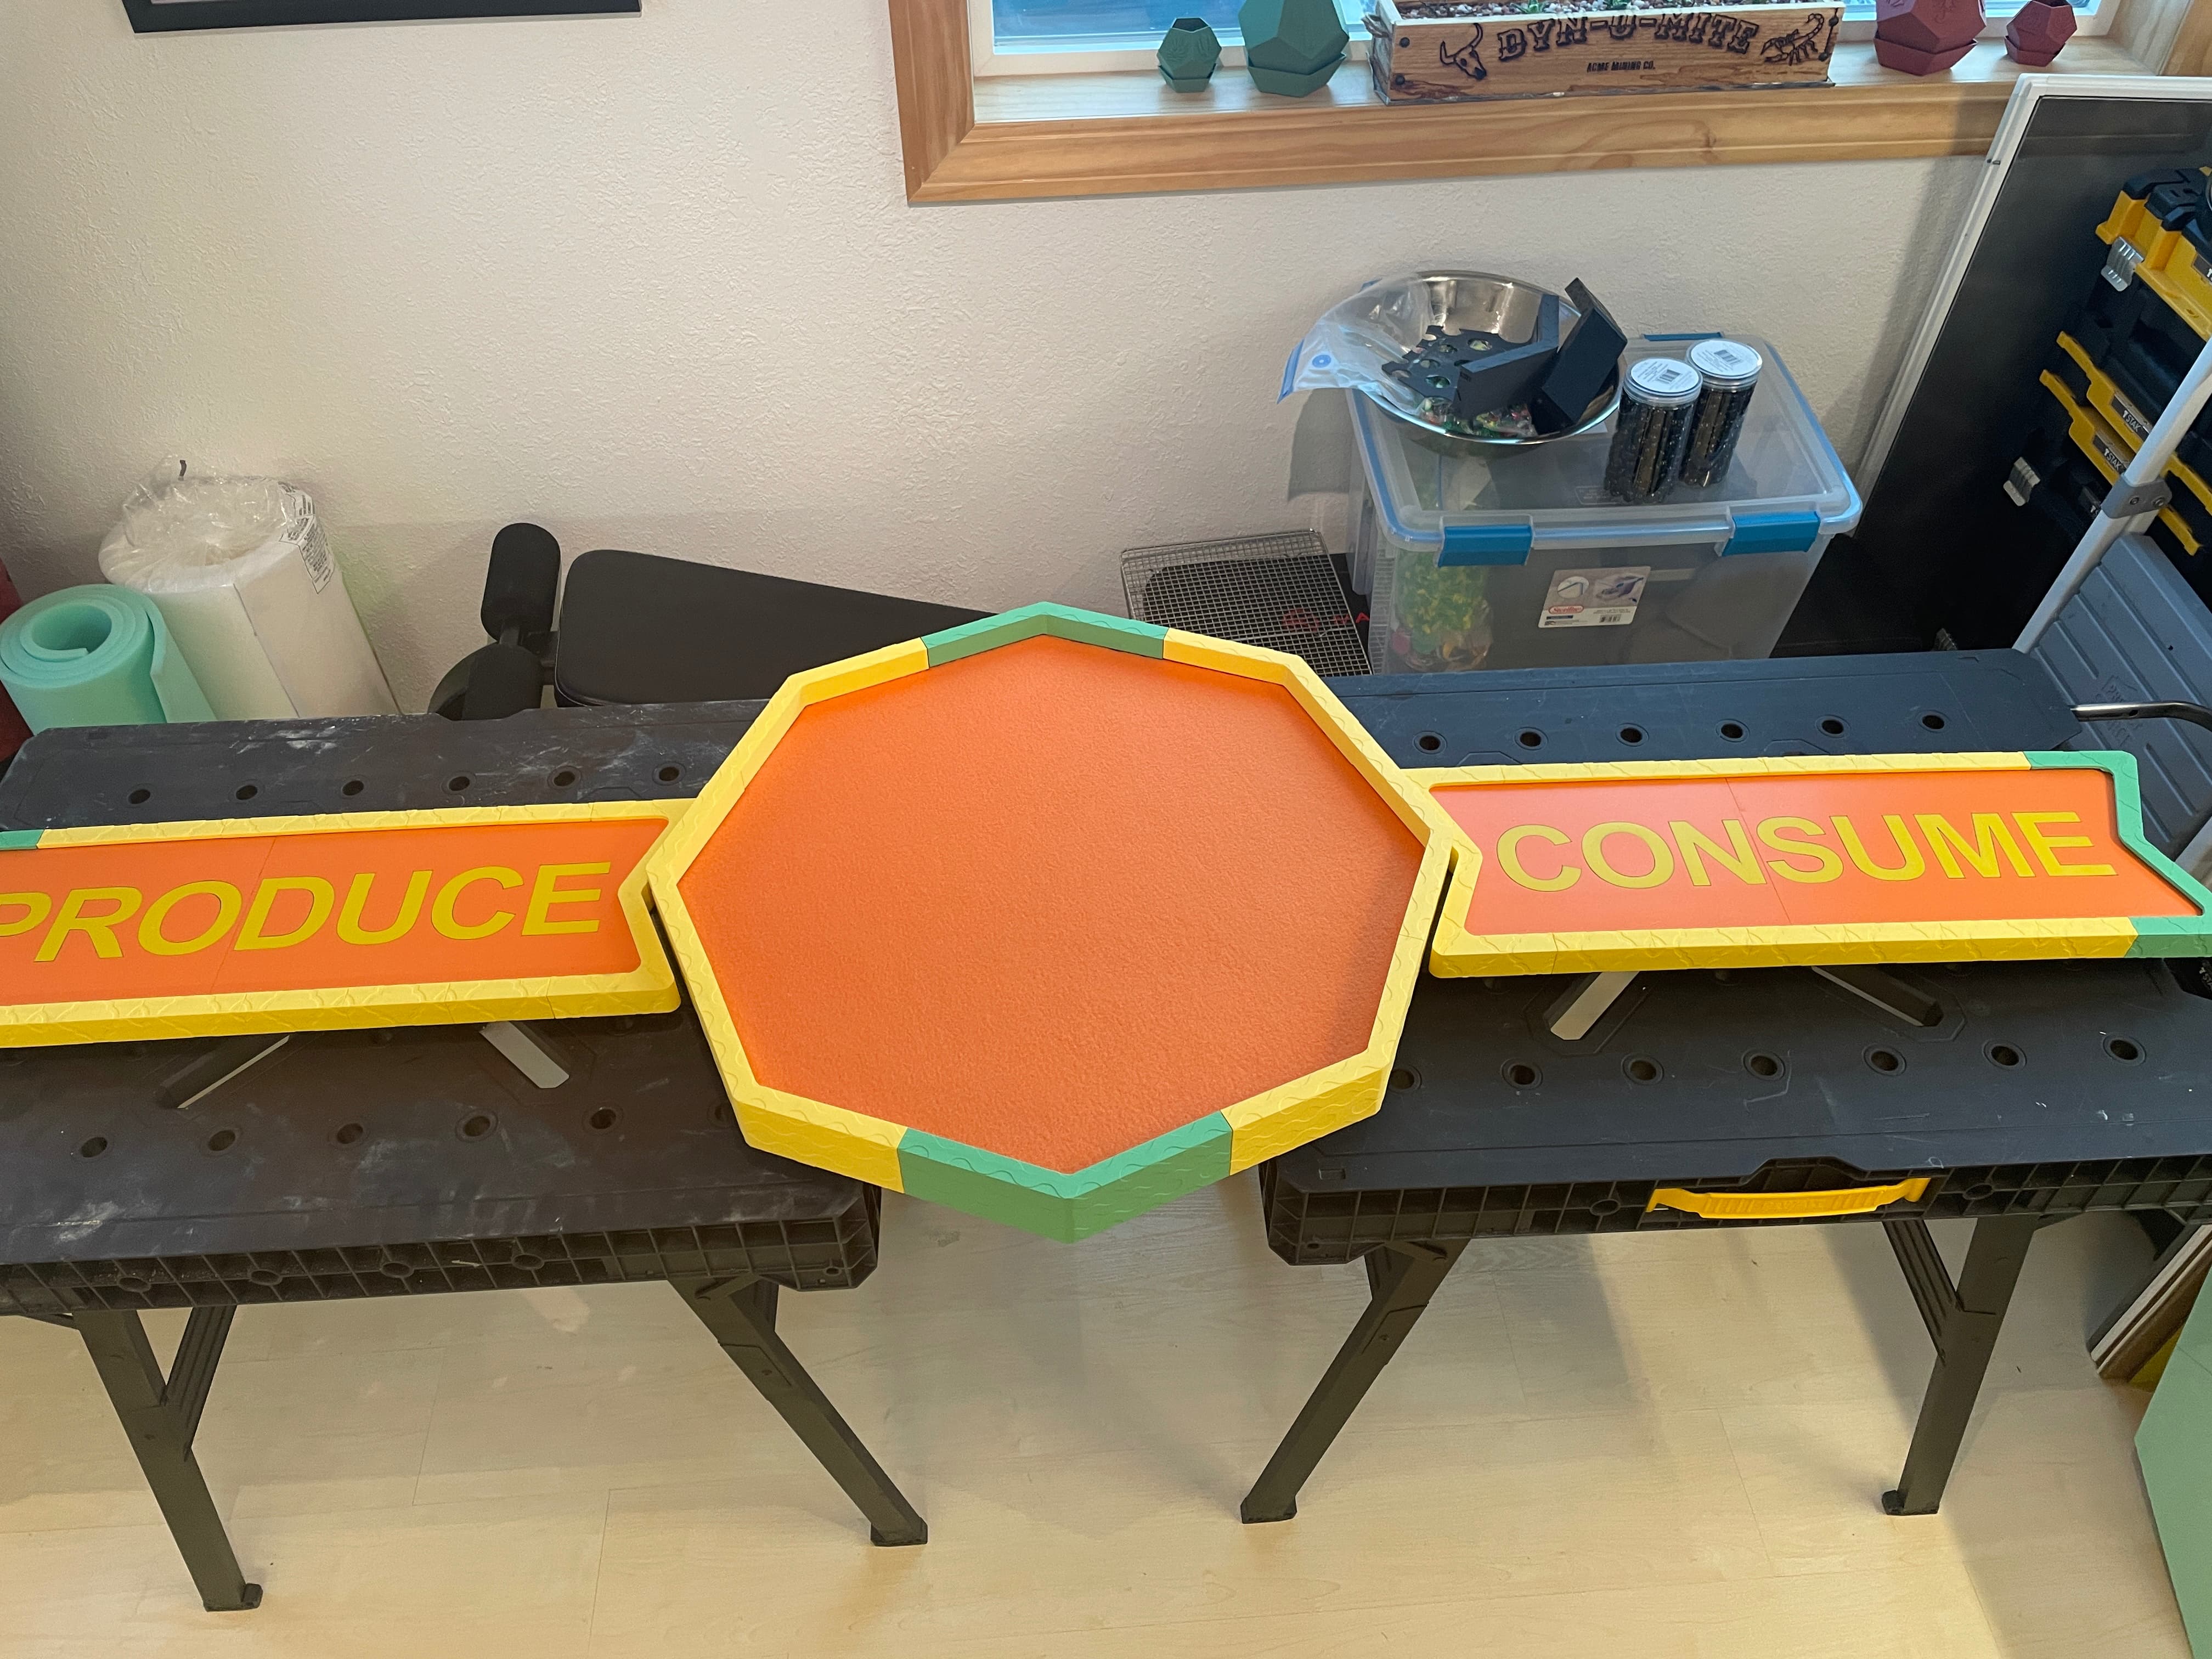
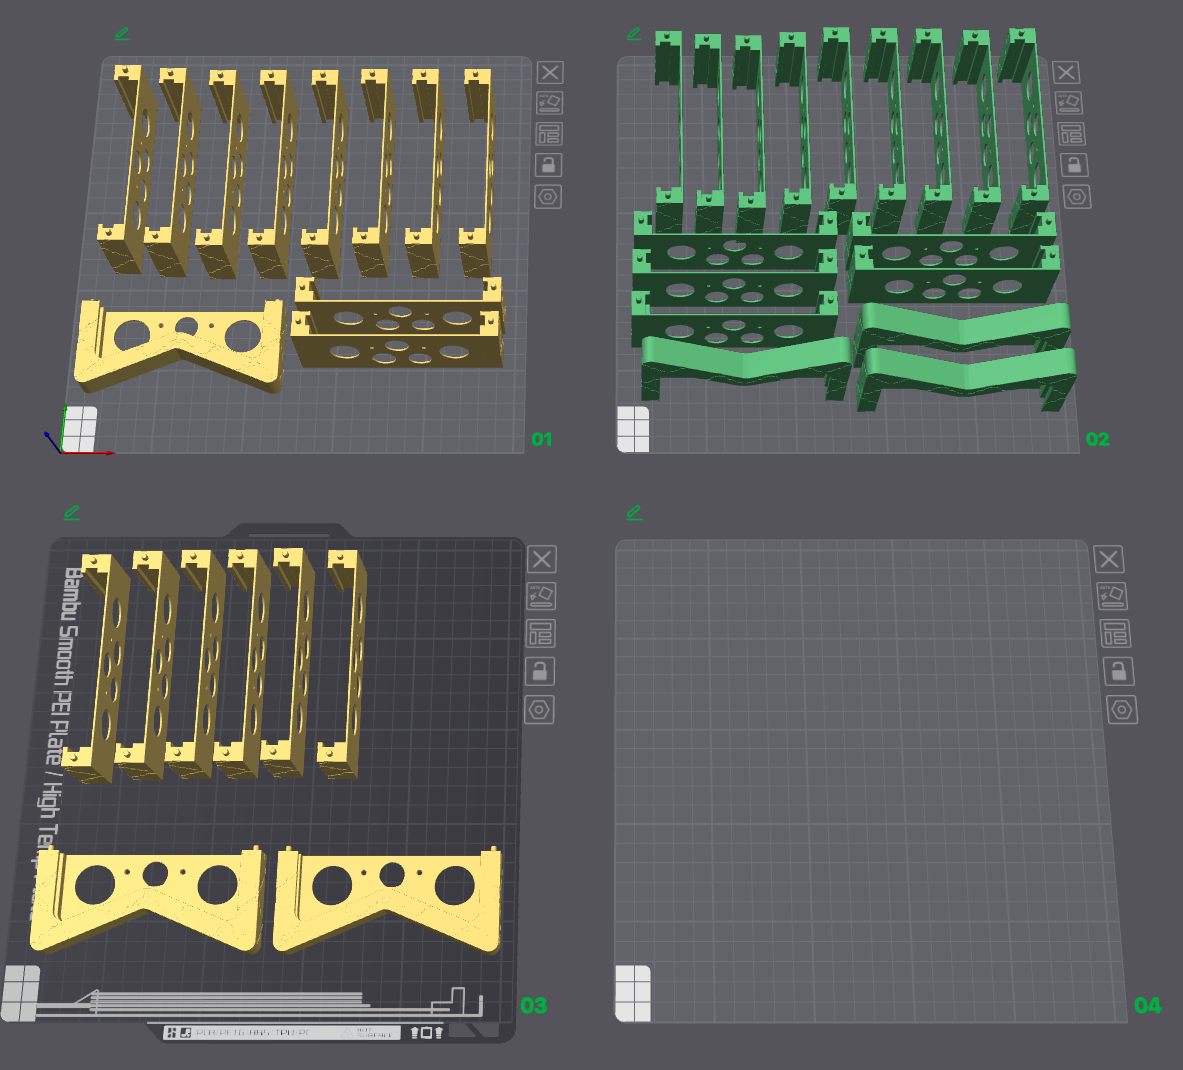
On to the full-scale version. I printed a black and a grey corner piece first to make sure it was all going to fit together, then started on the yellow edge pieces. And cut a rough 1" foam center to fit.
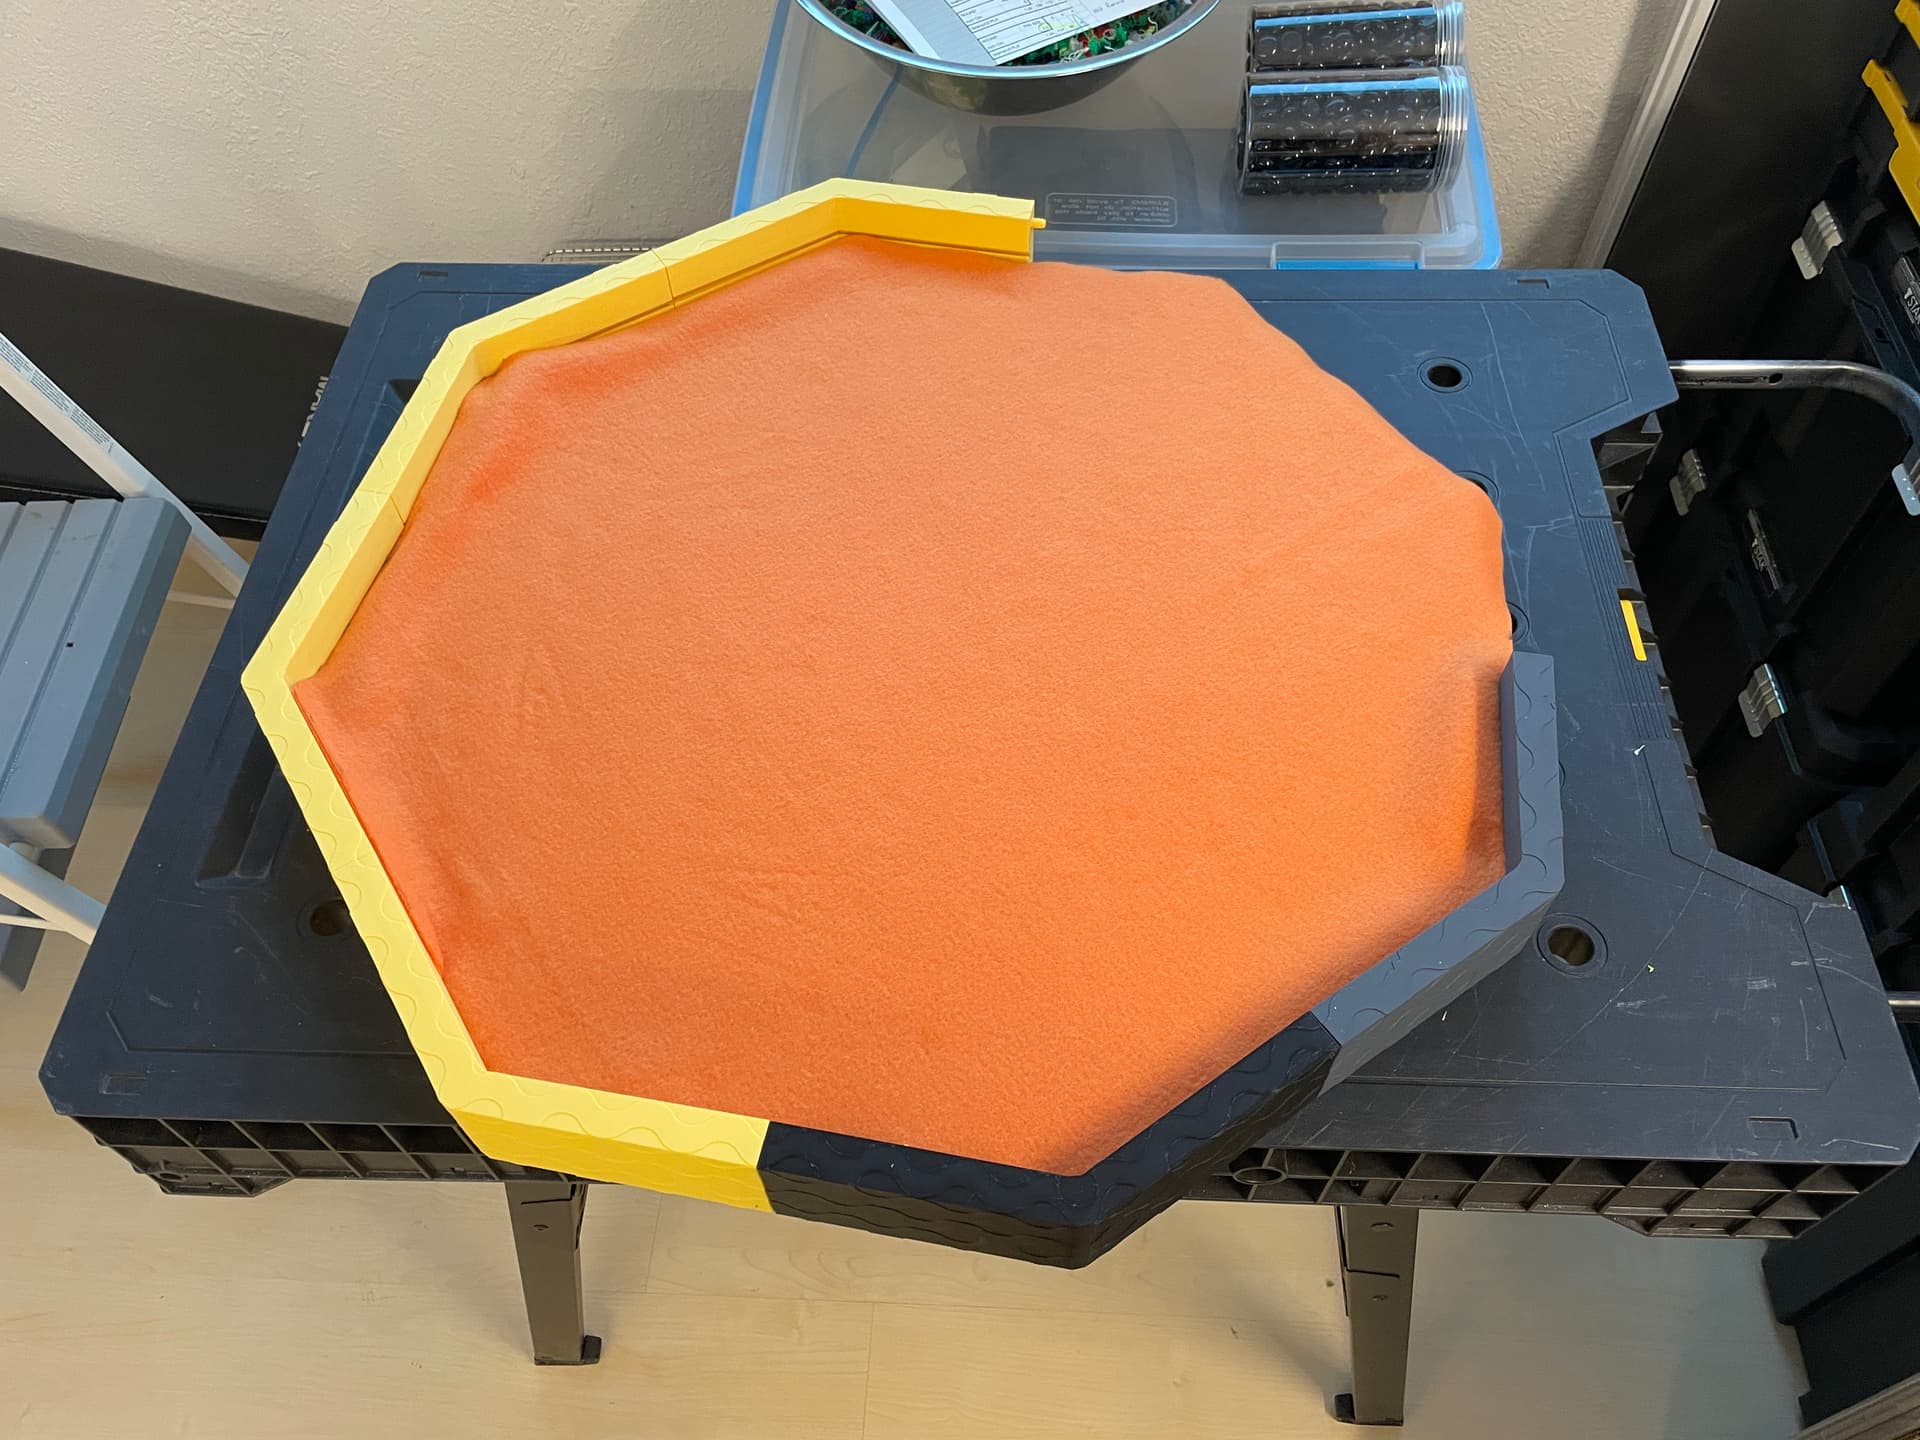
And used that to cut the felt surface layer, slightly oversize, to tuck the edges into the frame once done.
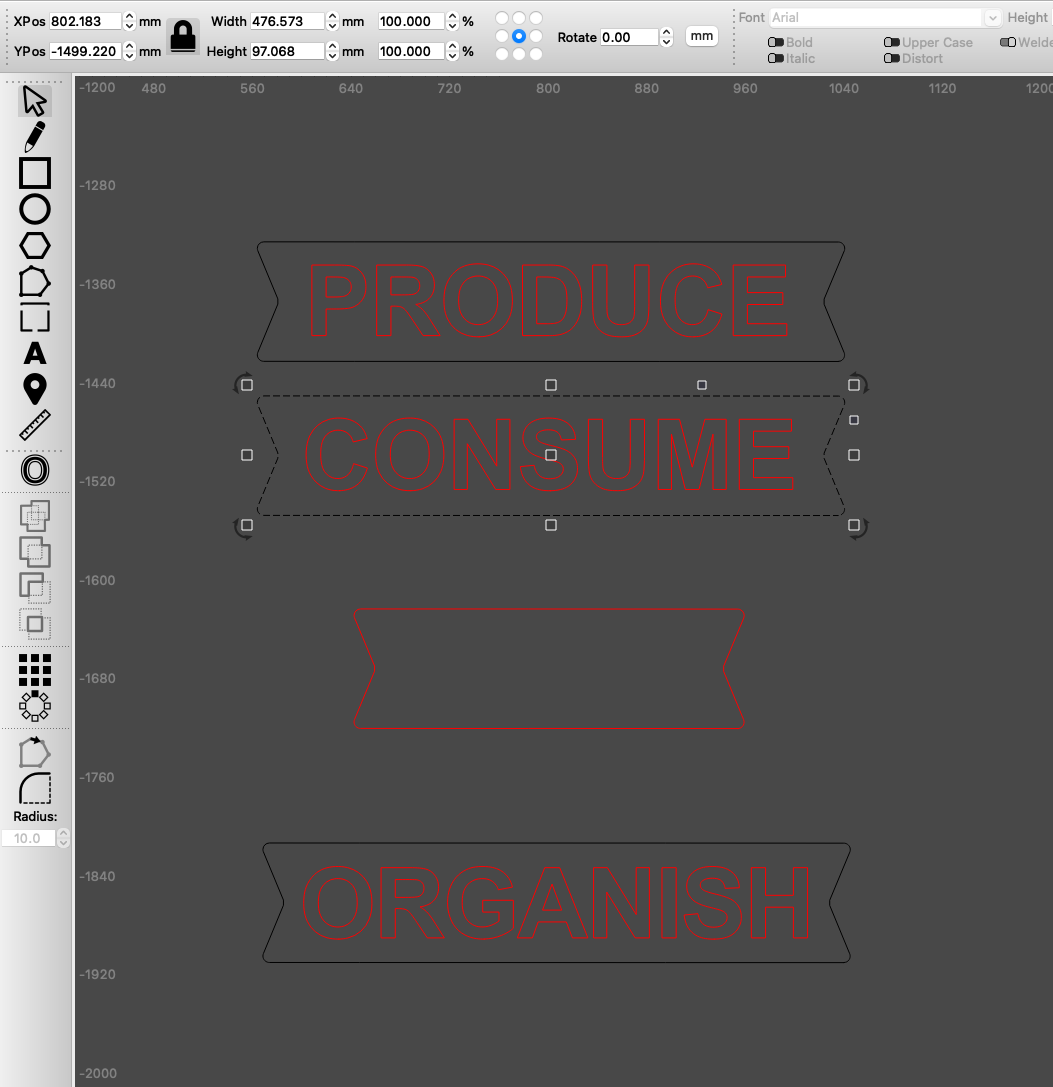
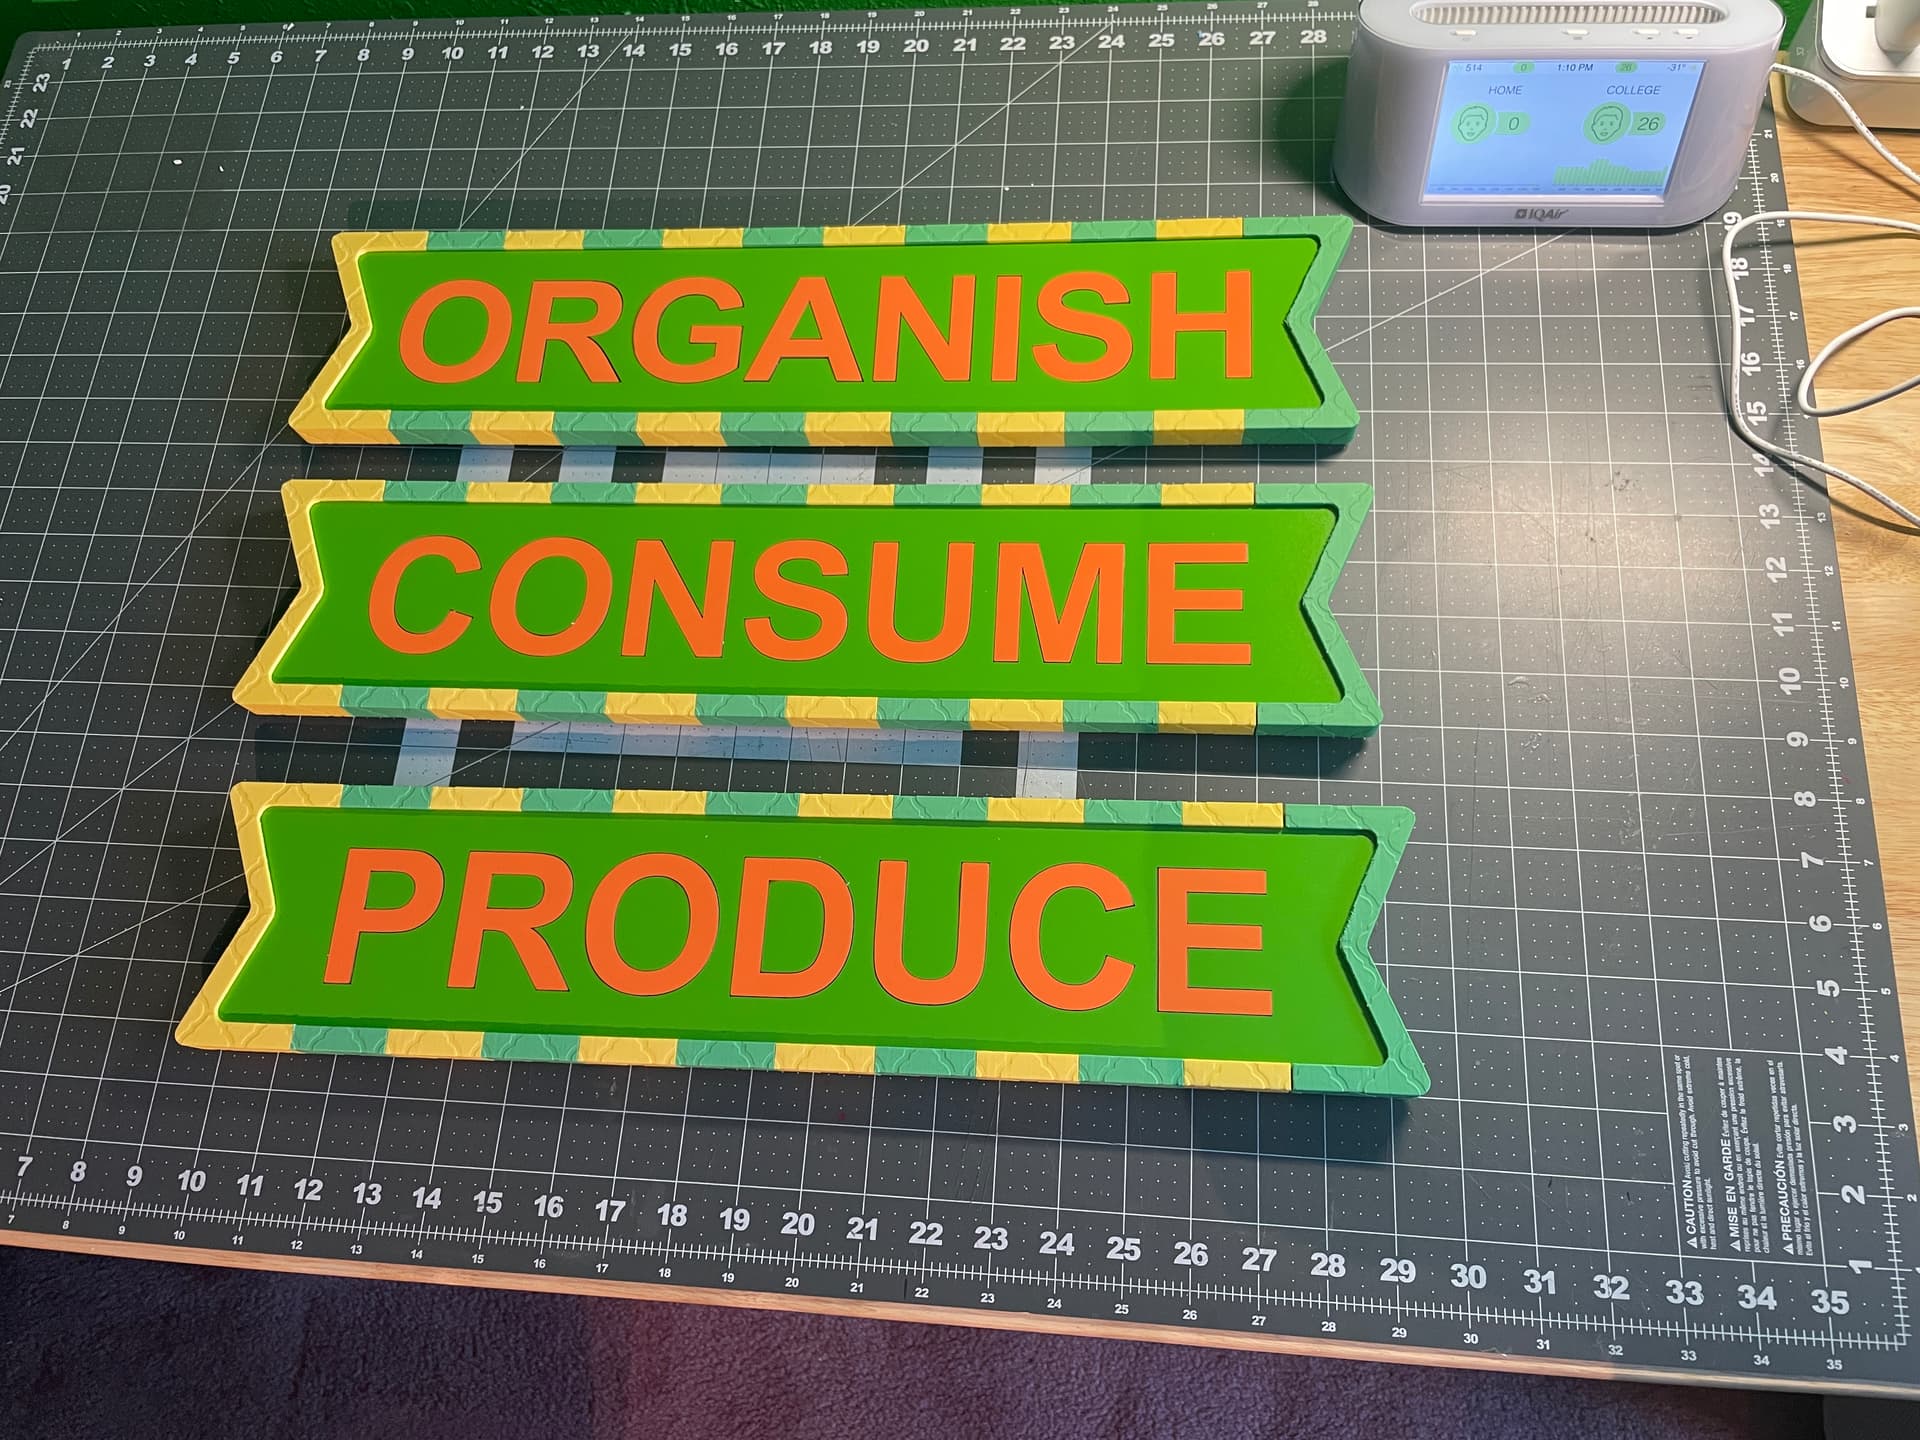
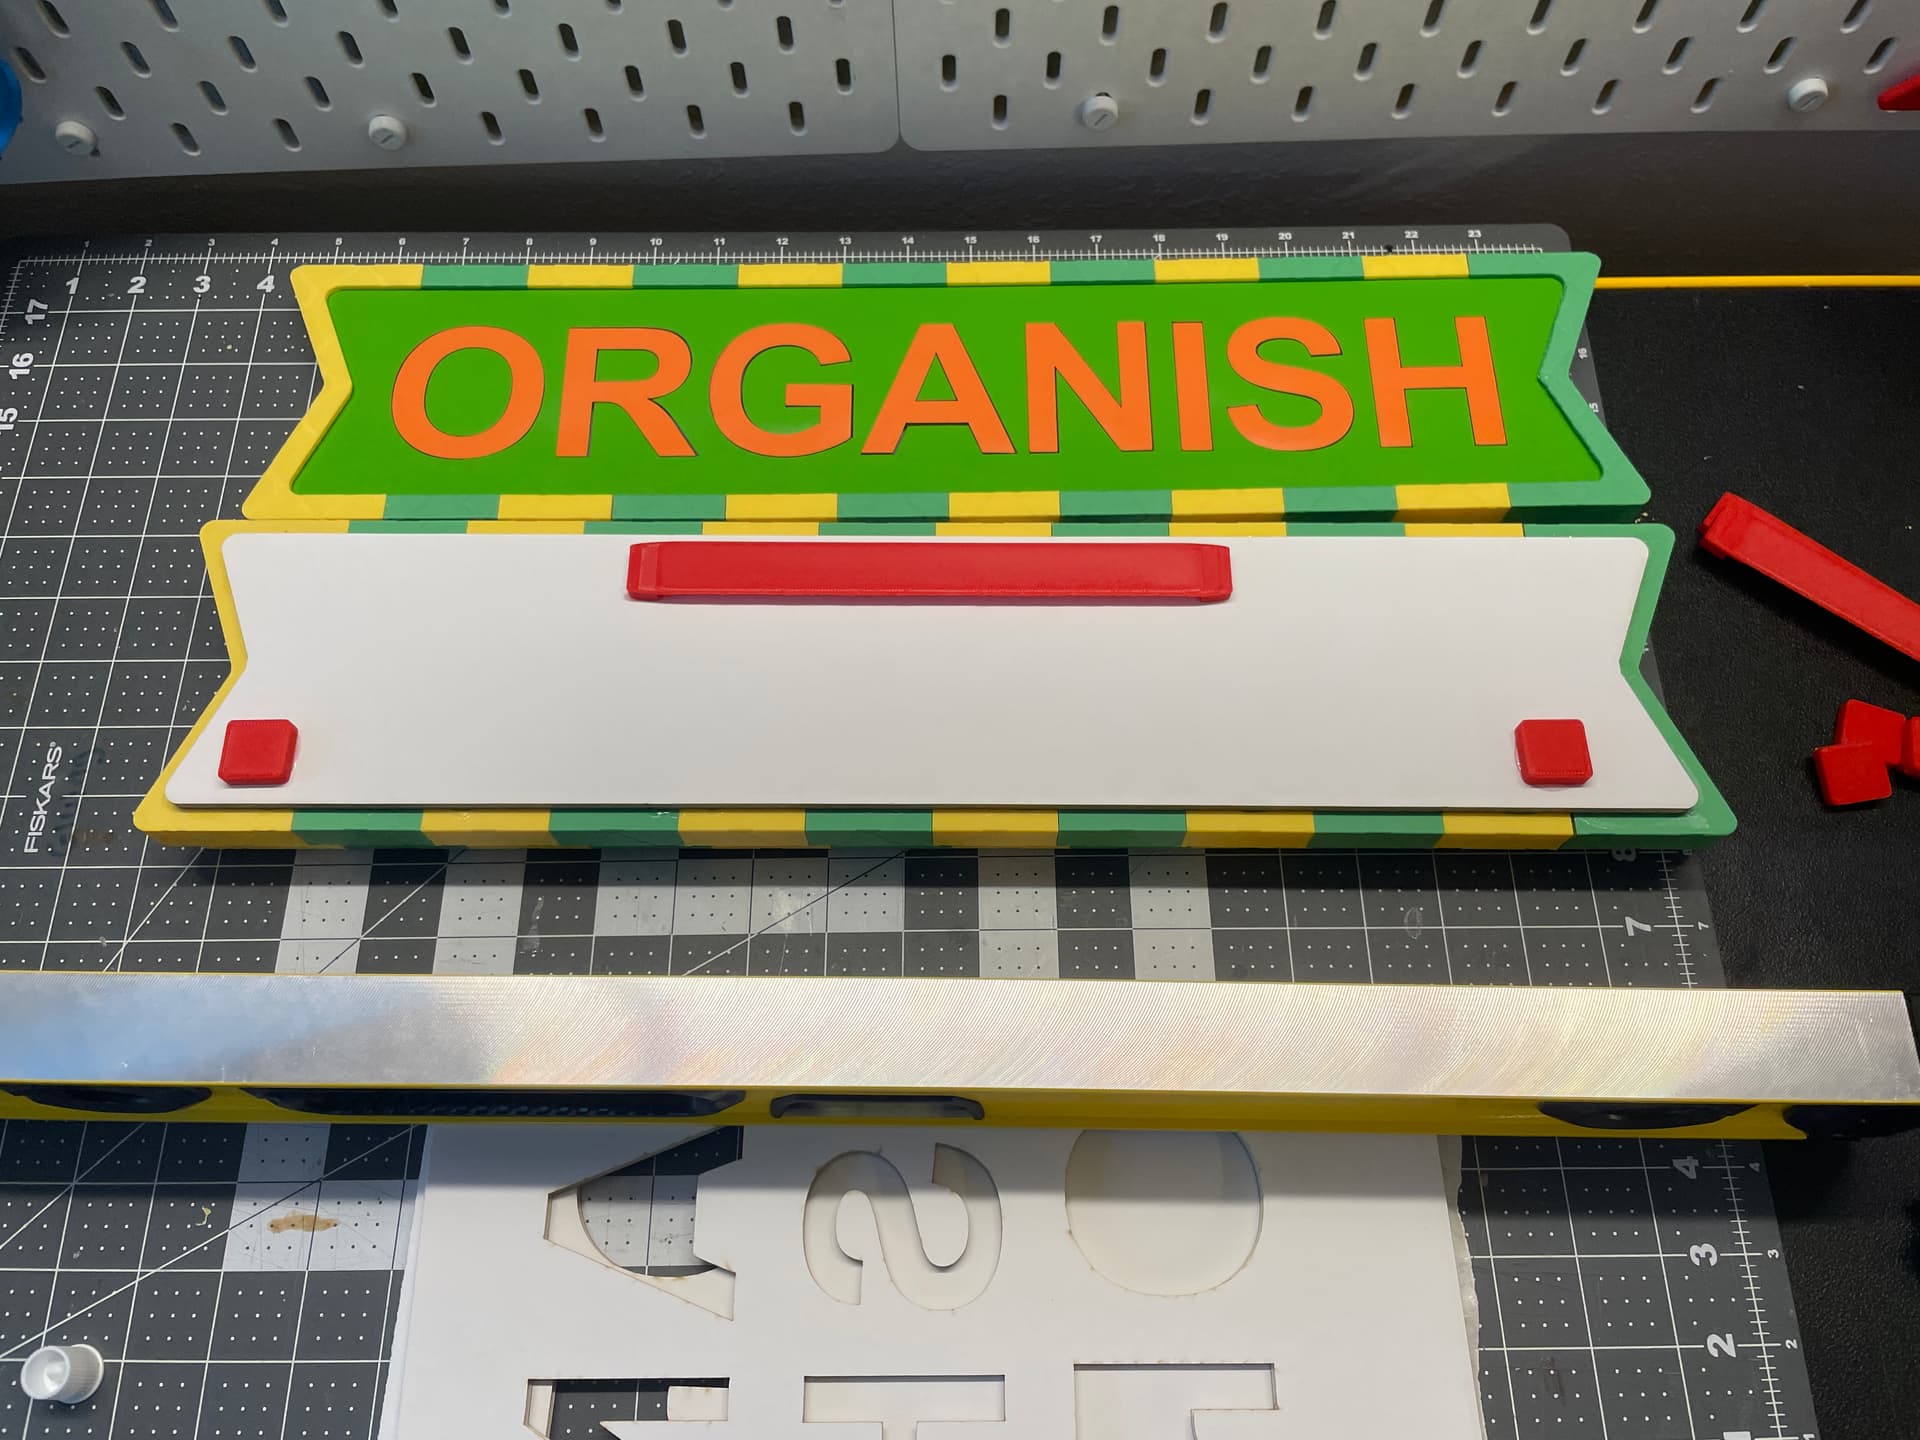
I feel like an all yellow frame would be better with a second color, and, I also want some form of wording frames flanking each side as well. So I can color coordinate those frames as well.
Yes, some green will work -
Time for a mock up, spoiler alert. 
Also making two layers of foam core for the back to glue everything together.
Gluing both rear foam core panels in place.
Now gluing foam inside panel in place, I spaced it ‘deep’ so I’m doing a cardboard spacer on the plastic webbing, then the foam core mounting surface.
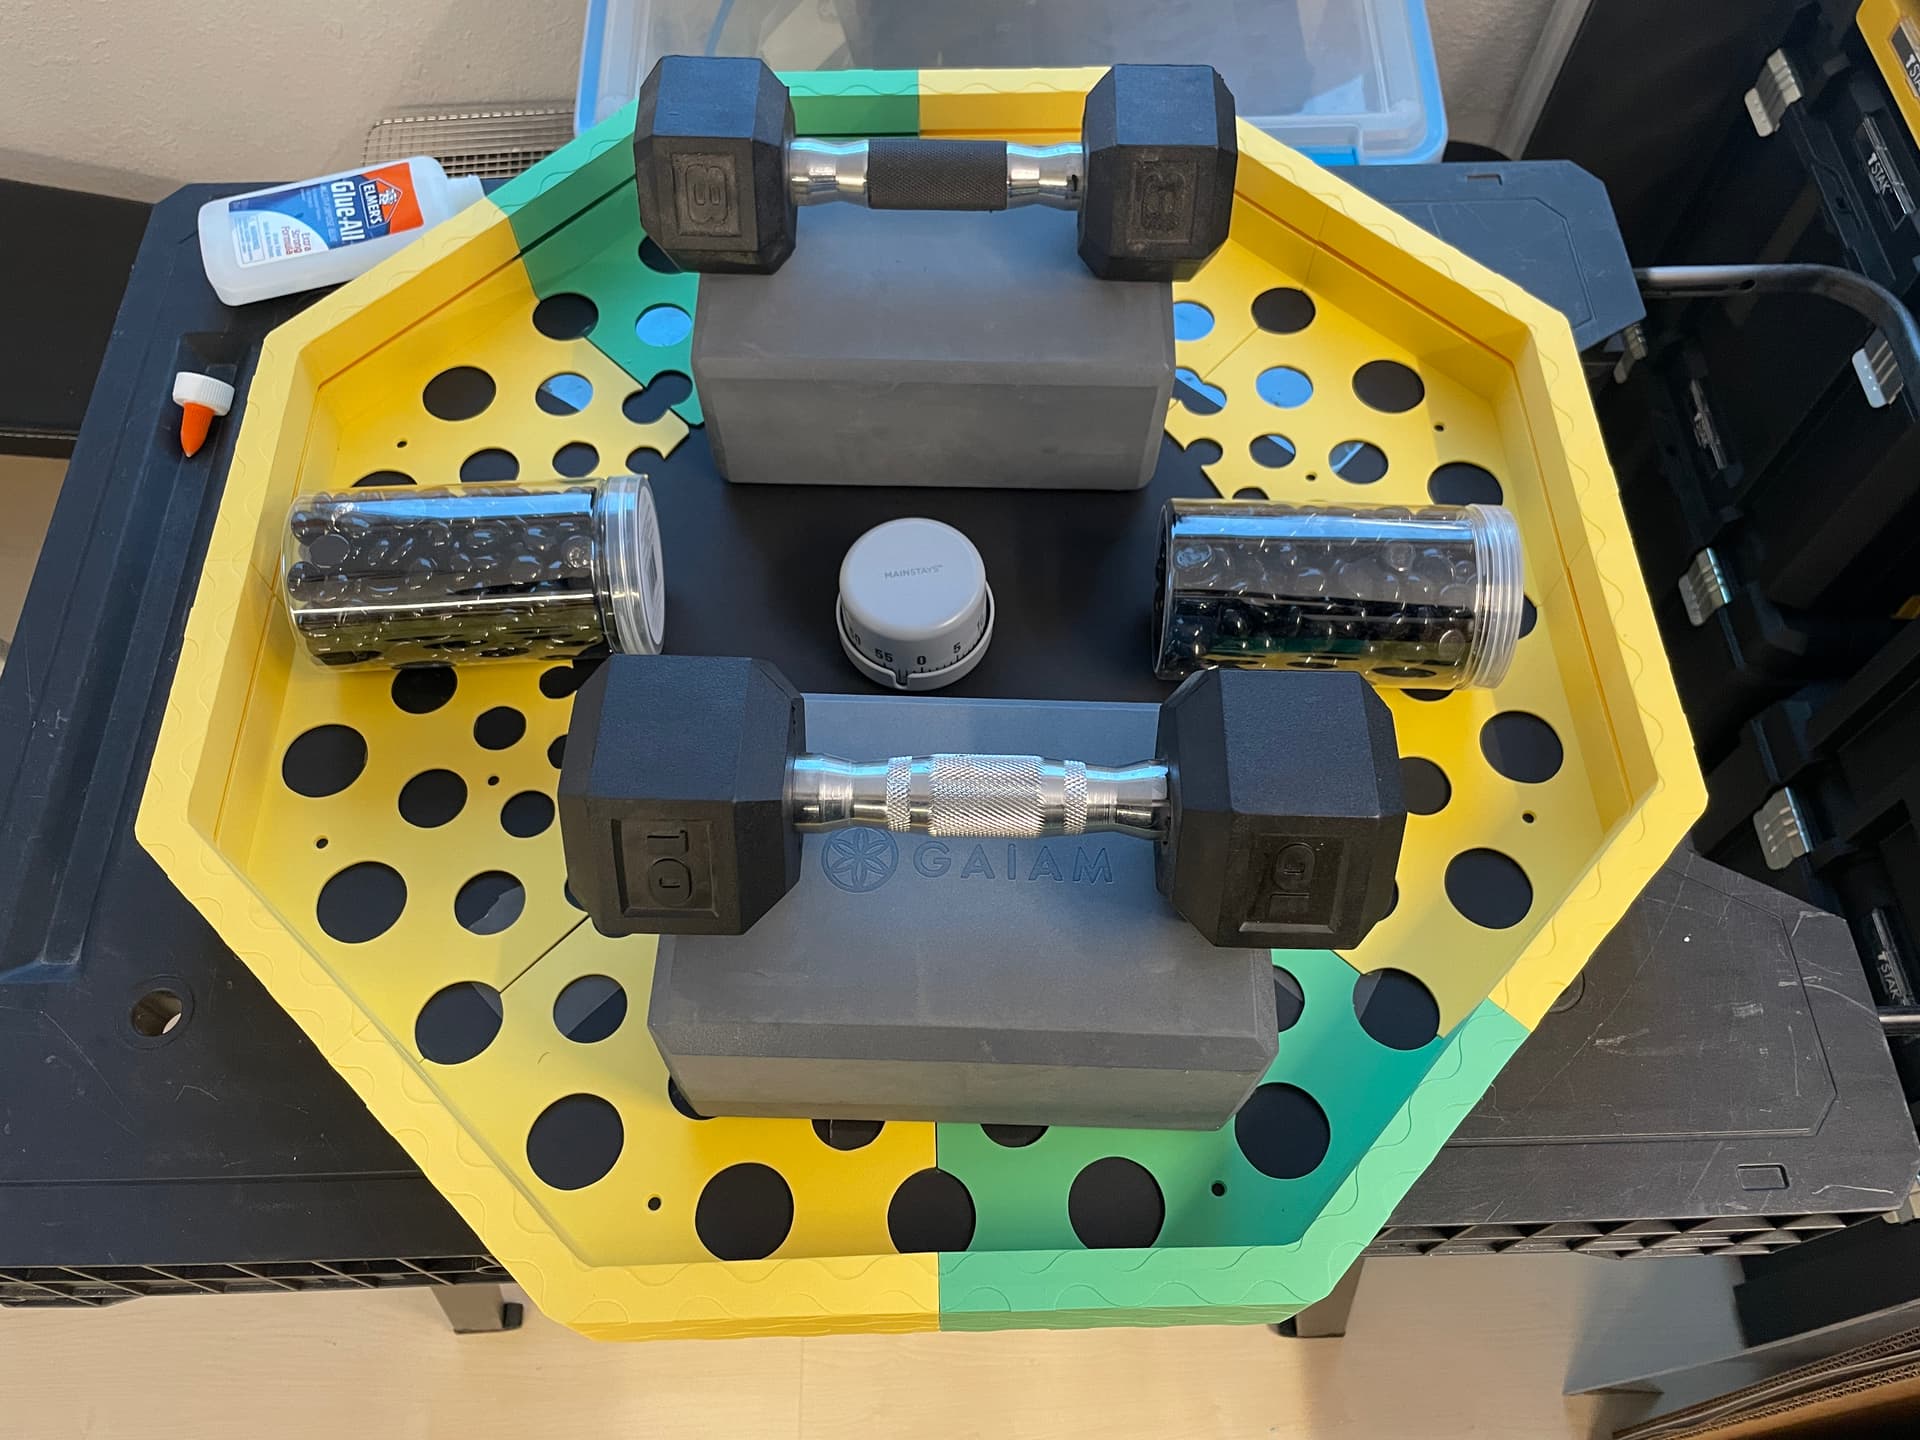
I had cut an extra ‘stop sign’ foam panel to test fit, and turned out to be needed to help flatten everything during gluing.
Making sure to keep the first layer foam with an evenly spaced gap around the edge.
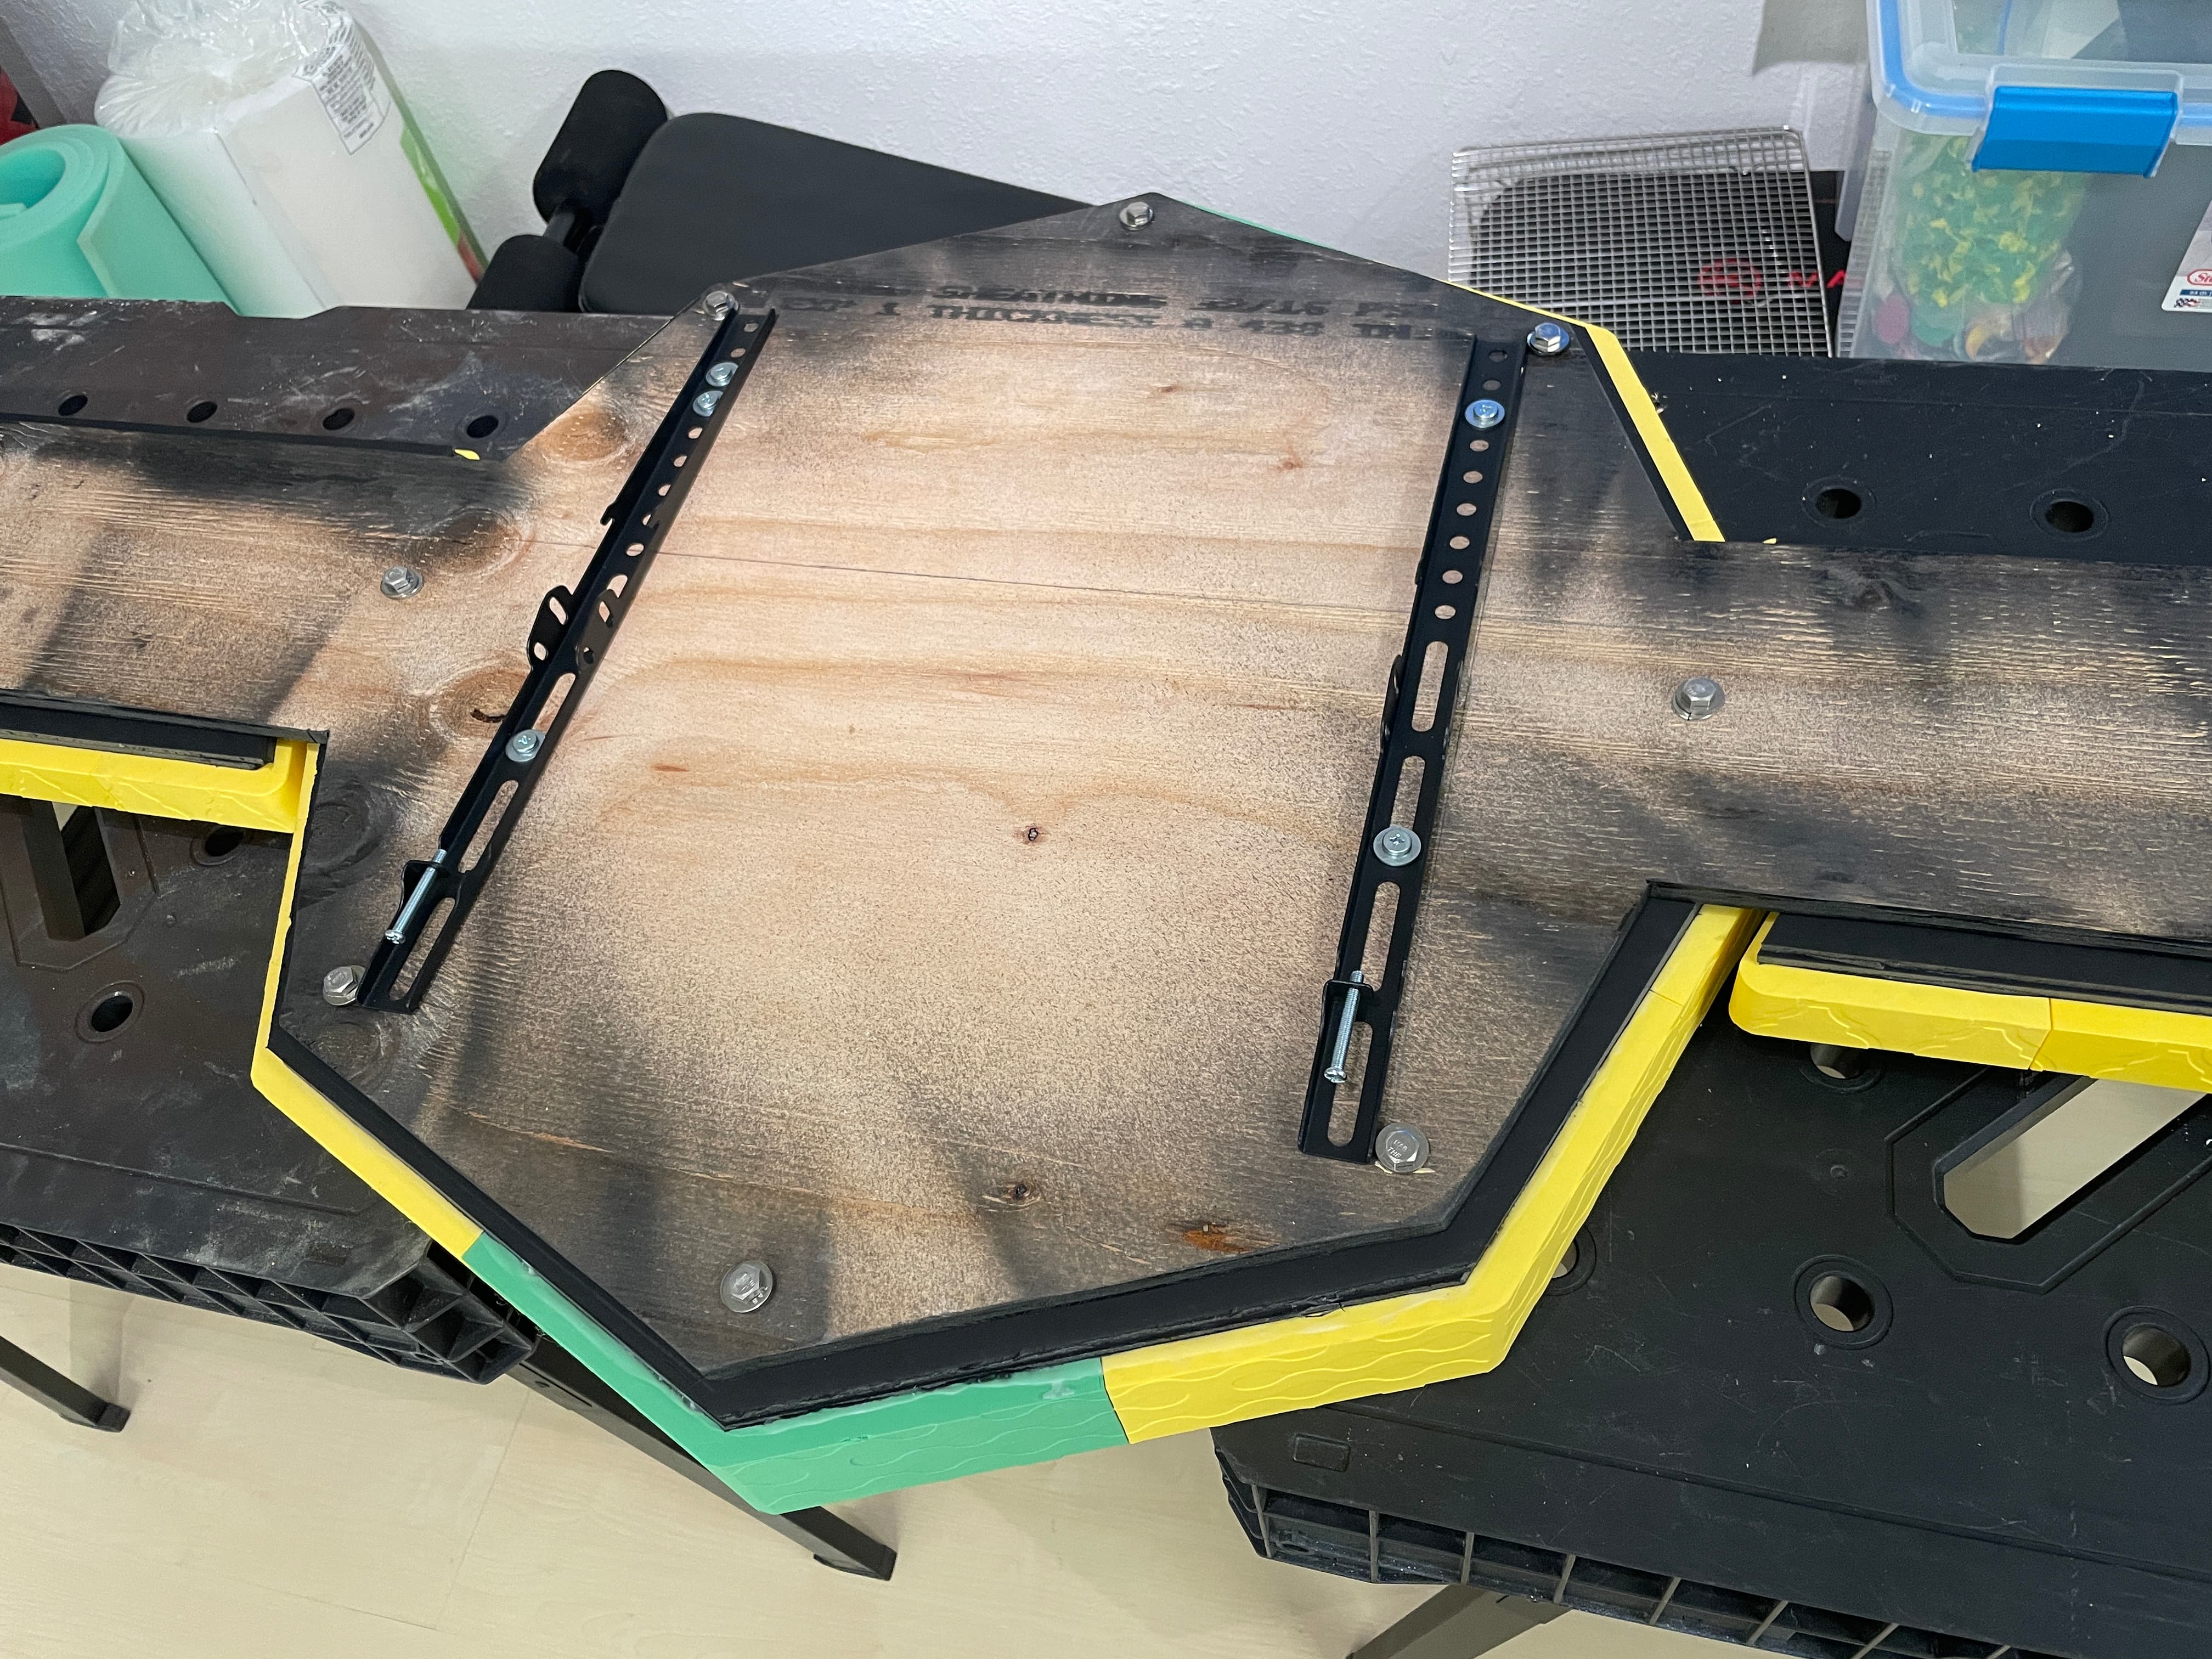
Note - The very back, and two side panels will be all tied together with a single piece of plywood, To stiffen, align, and for the addition of a wall mount. Again, spoiler -
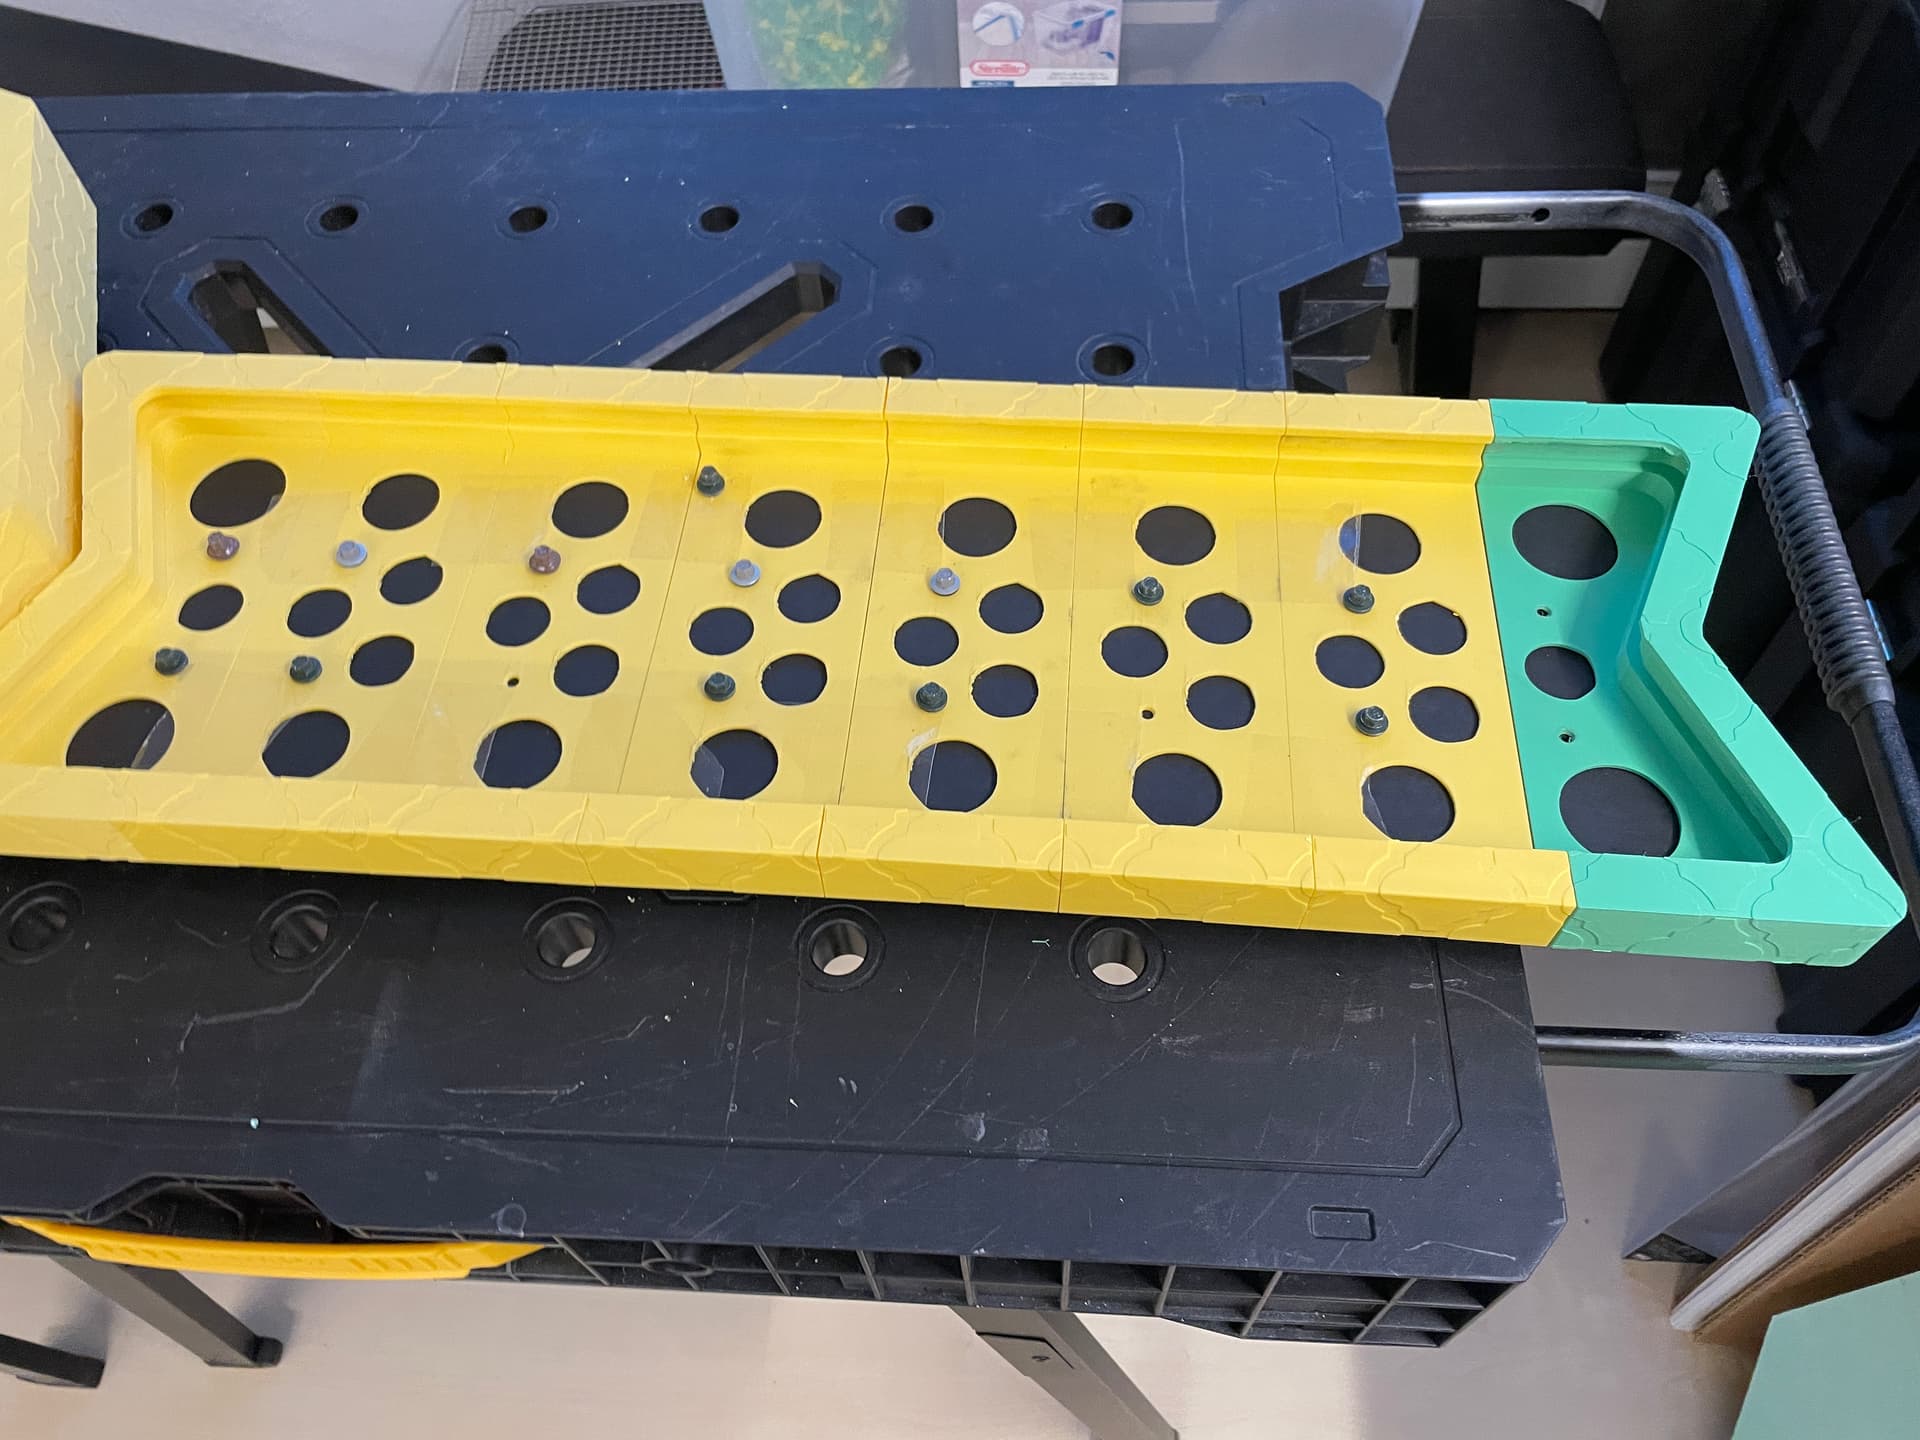
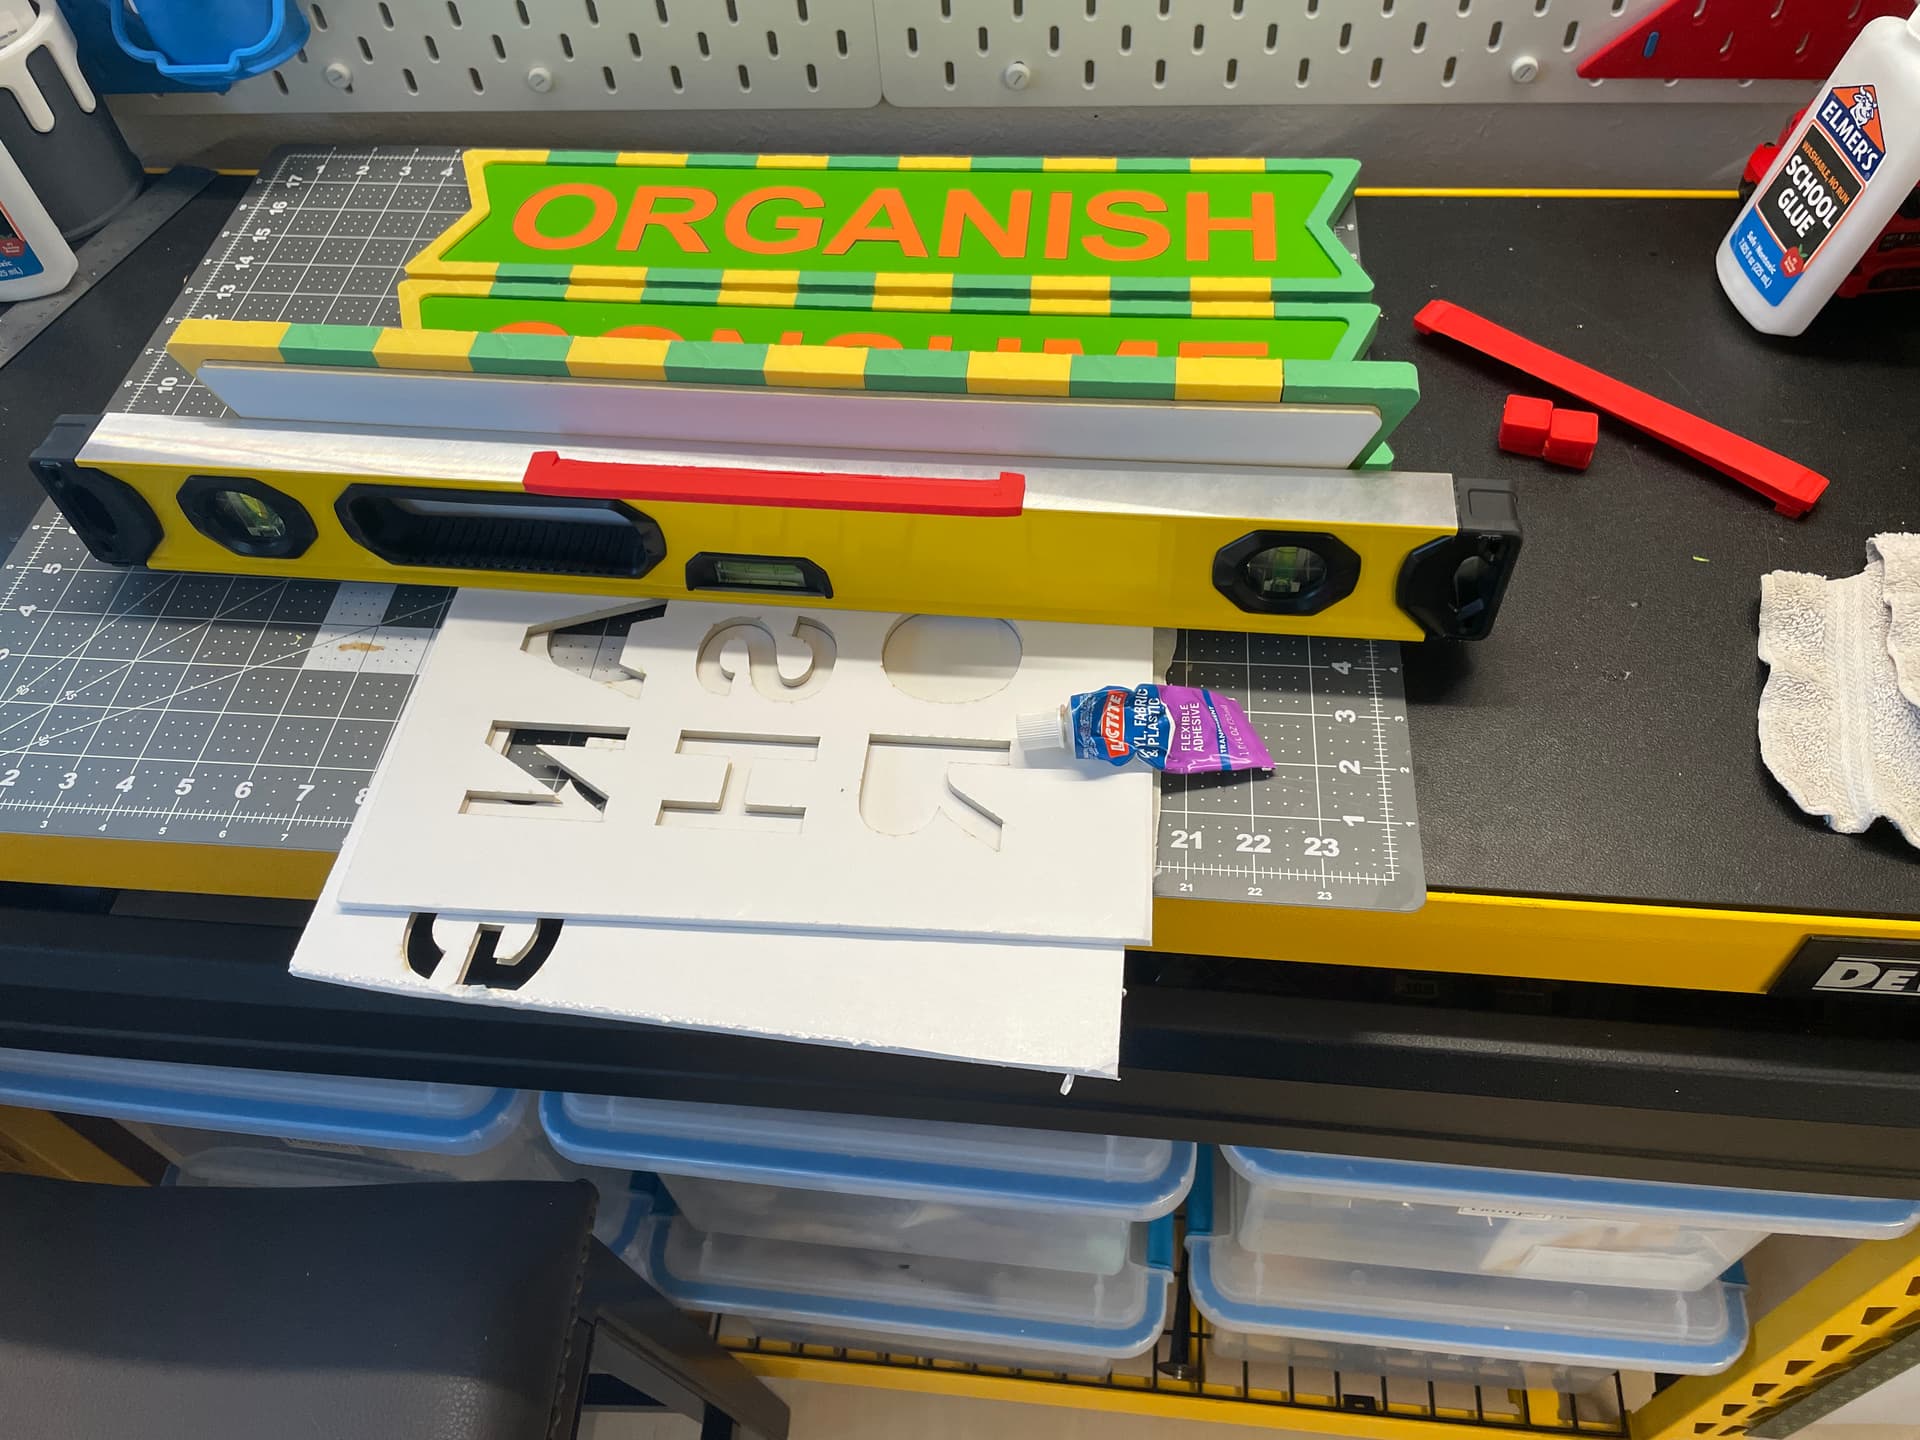
But Let’s get going on the side panels. Something like the yellow green combo will work, and these test pieces work great. The ‘panel’ sections will be longer than 19.5" unfortunately, so I’ll have to make each two section to laser cut them, but that’s the scale that I like, so be it.
I’m screwing ‘through’ the web on the side panels into the plywood backing to keep them in place. Except the end (green) pieces will be screwed ‘up’ from below, so the side panel inserts can be slid in, then secured in place.
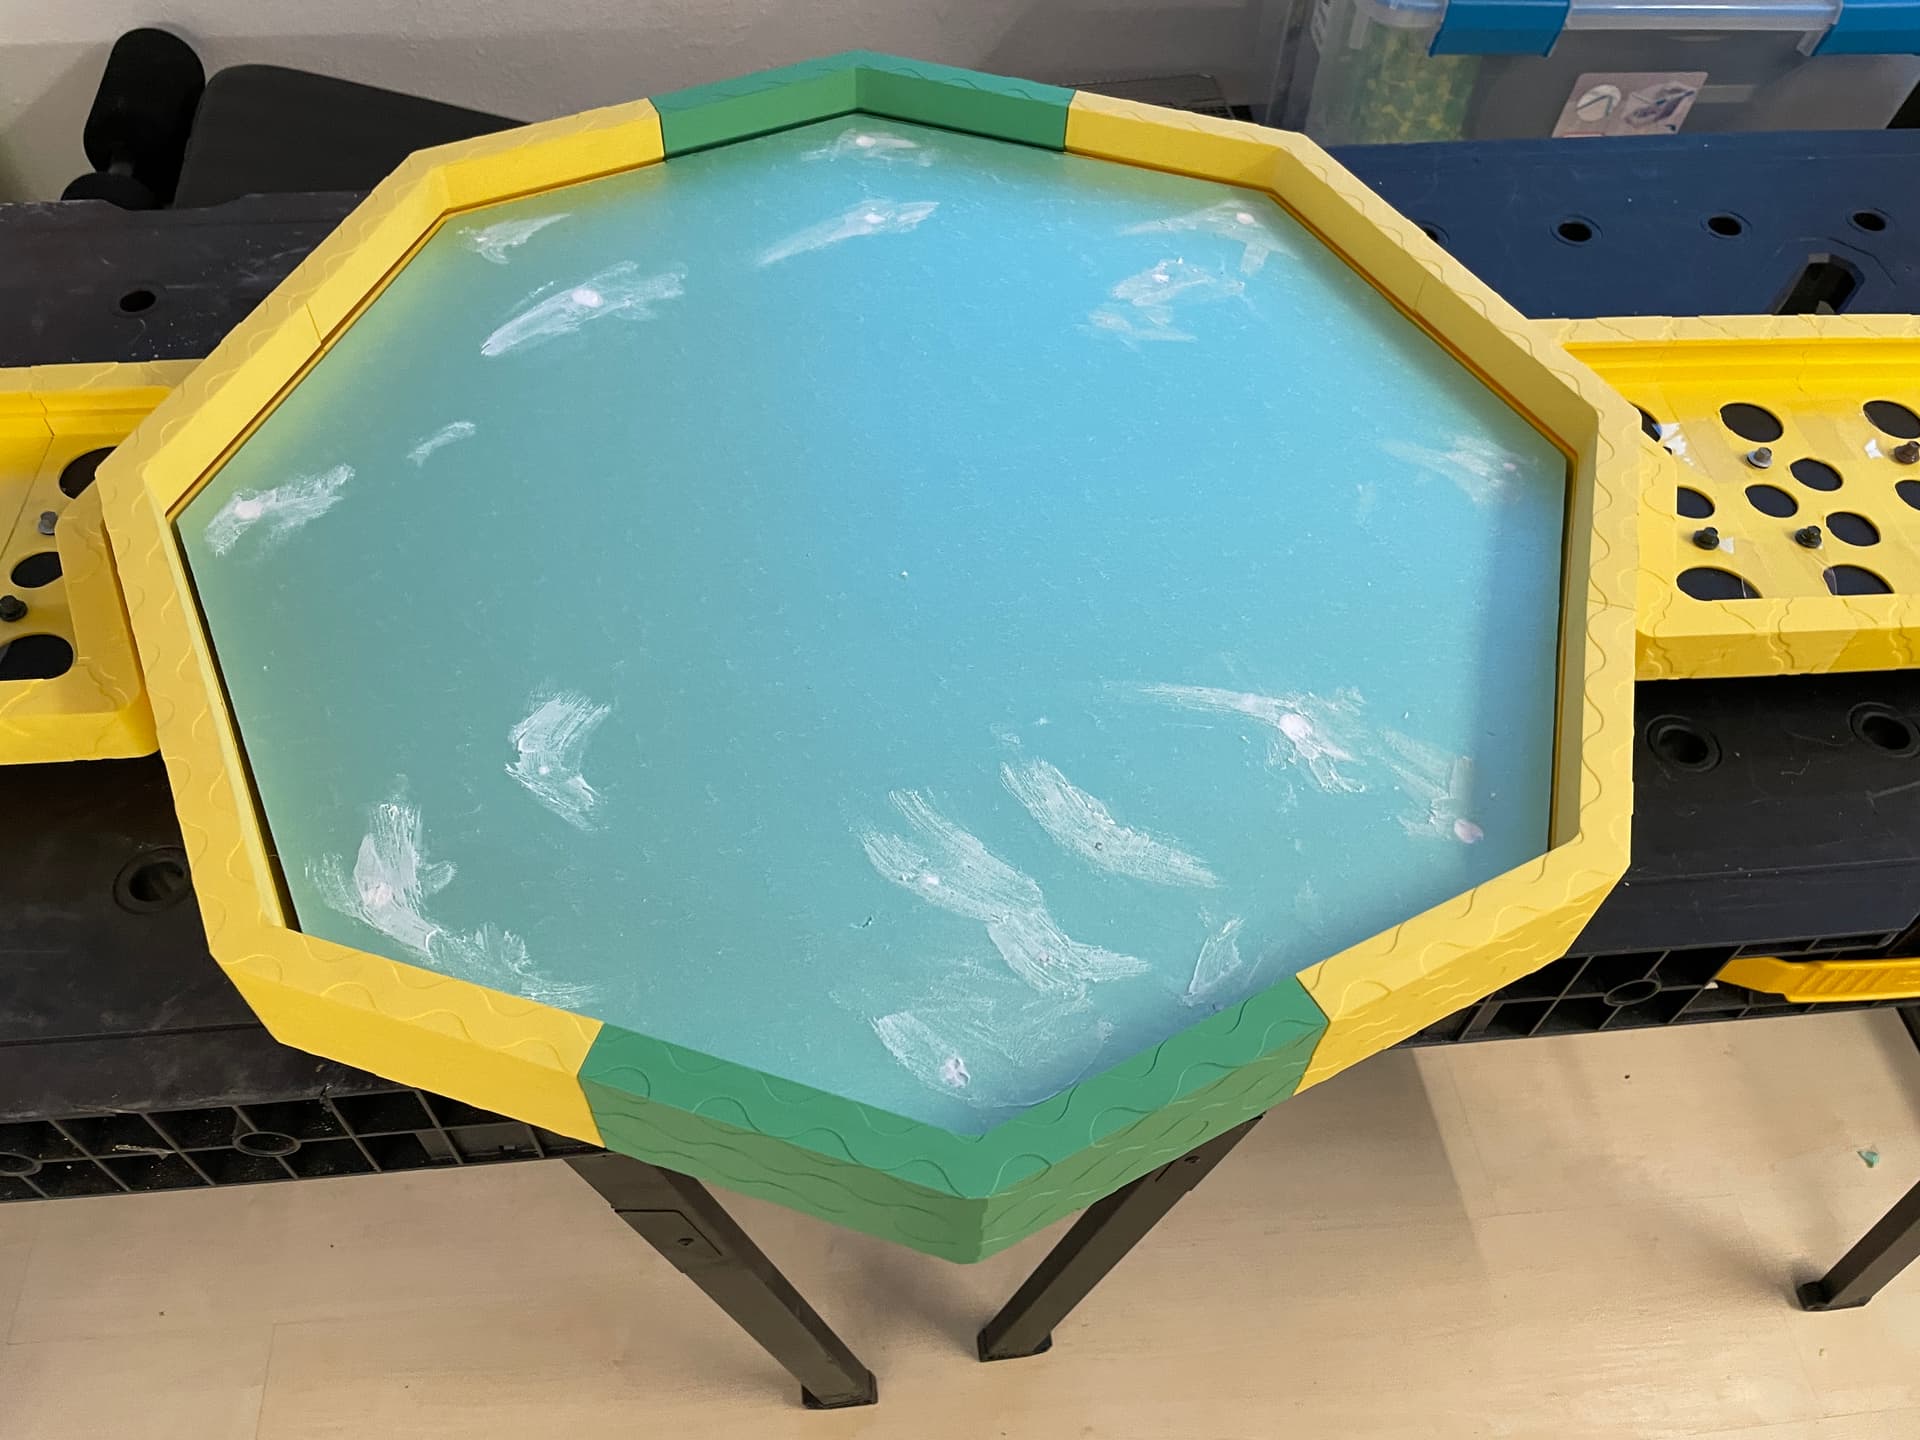
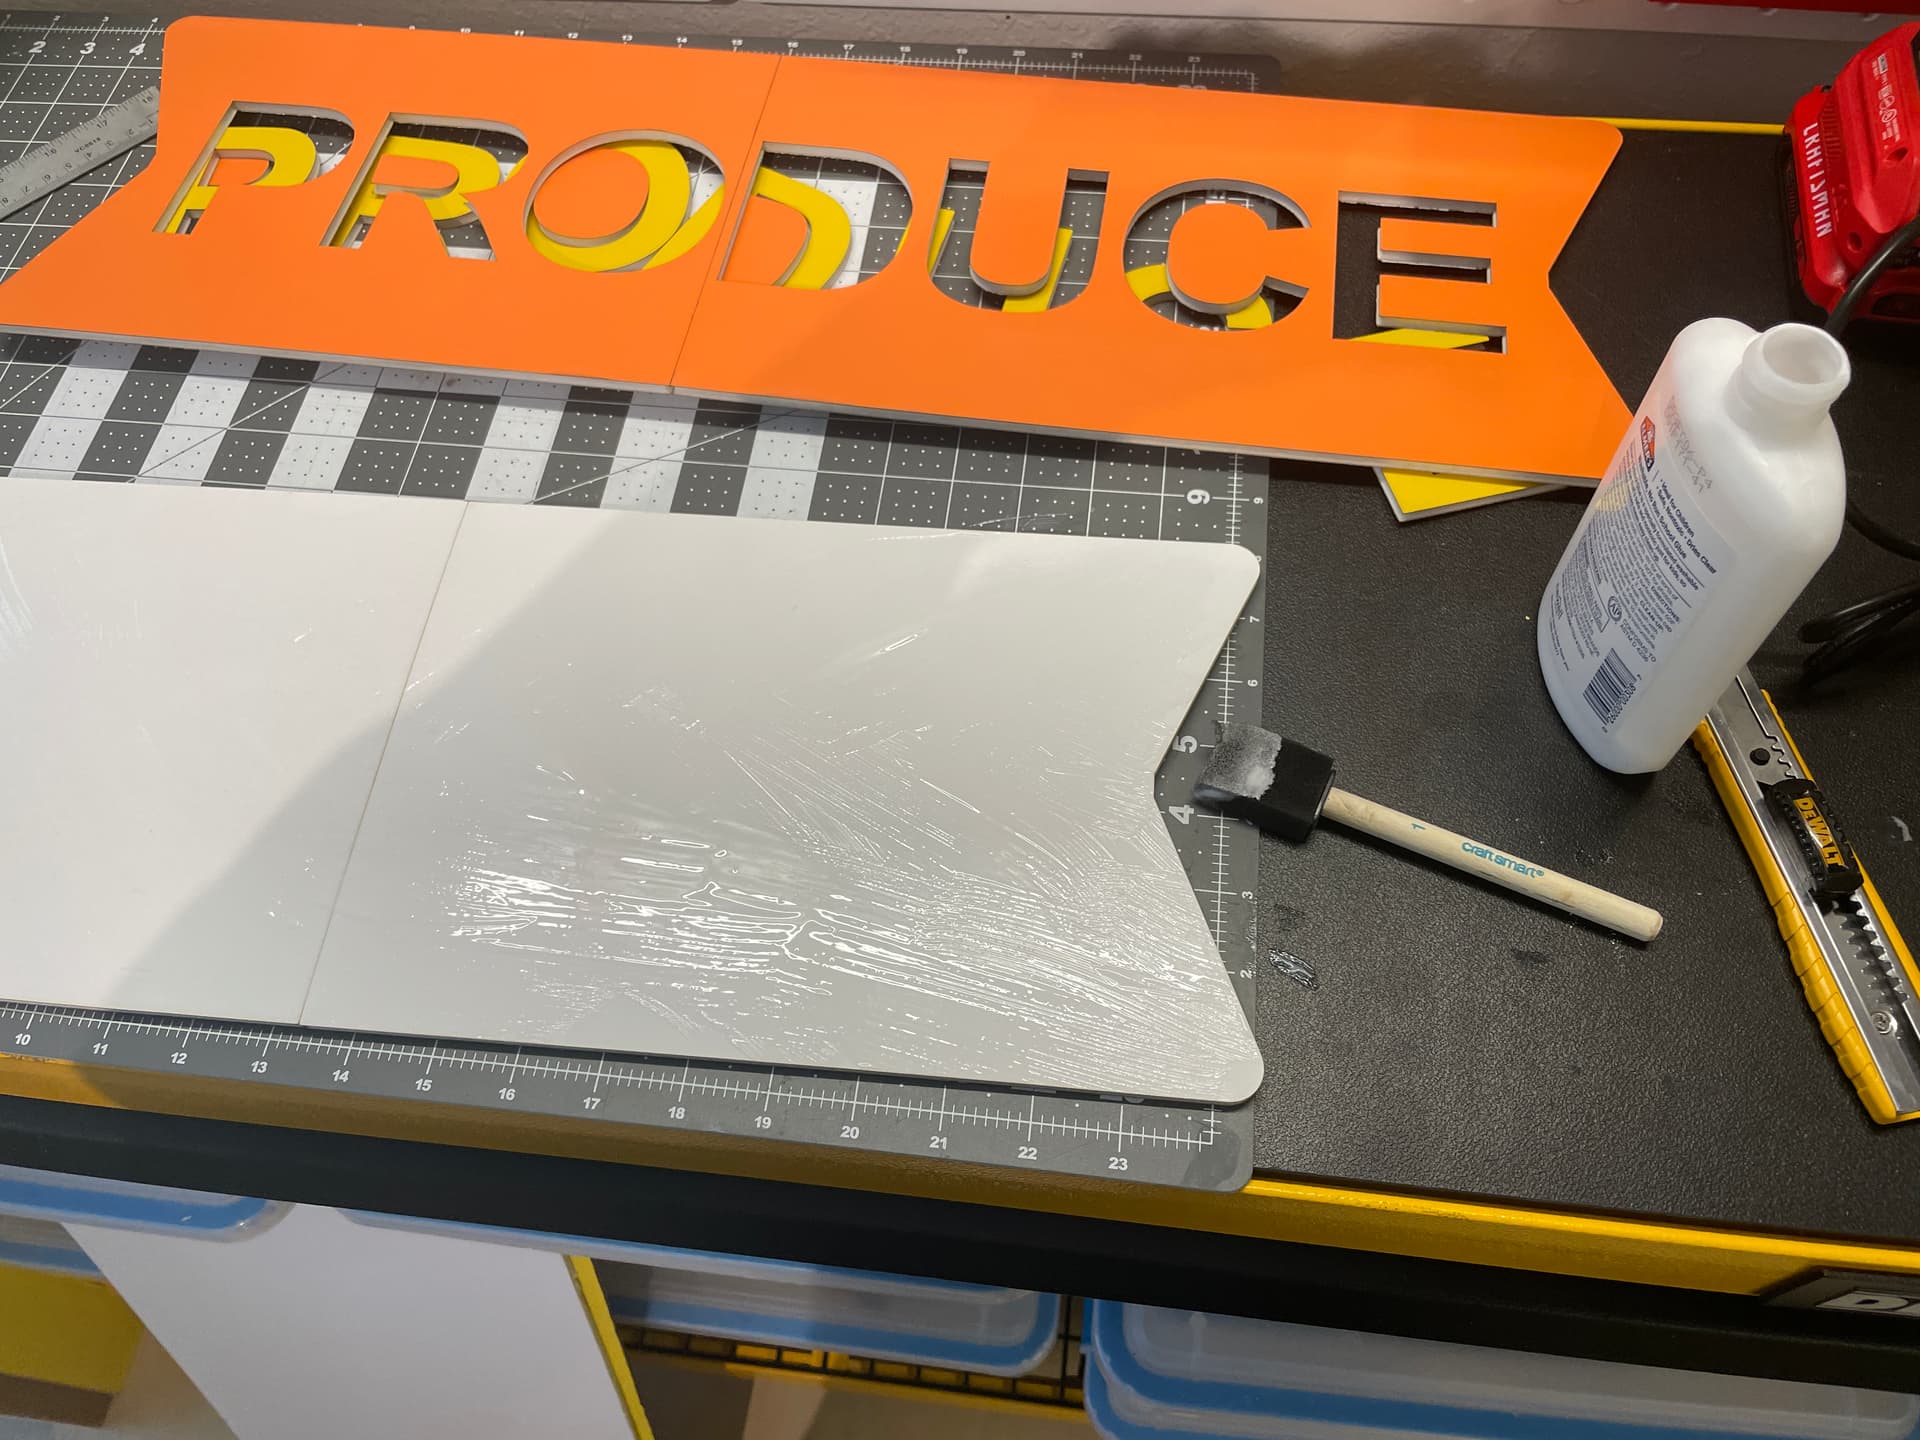
Since the surface foam will be skinned with fleece, which may show through any surface holes or defects in the foam, a little spackle will do.
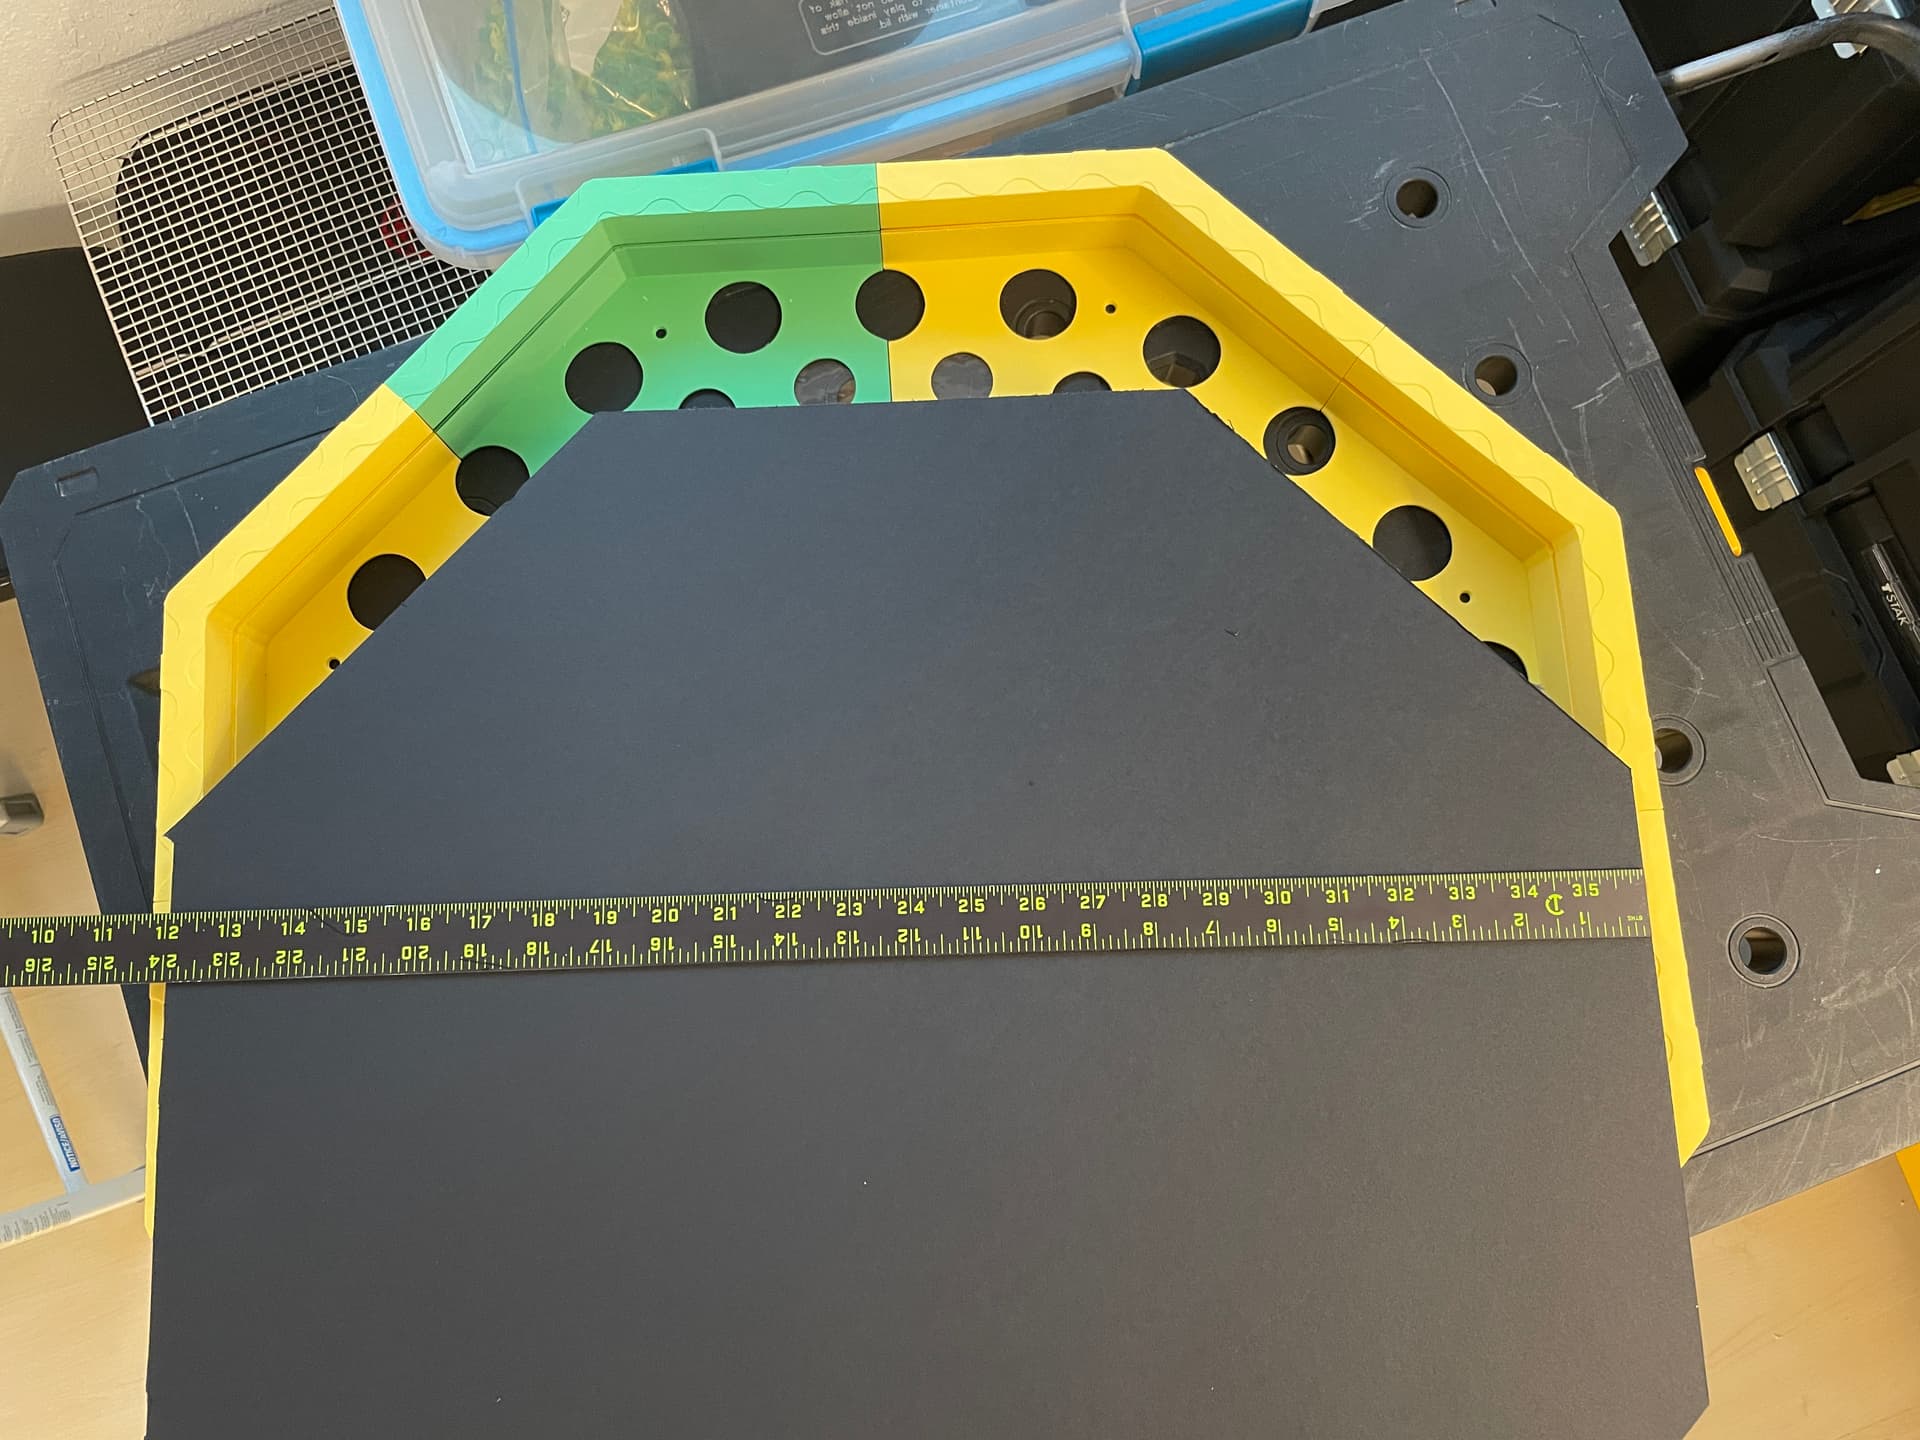
Got the side panels sizing all done so it slides into the frame piece channels.
I made the side panel (channel) gap 11mm to fit two layers of foam core and the laser vinyl. Time to cut and glue the panels together -
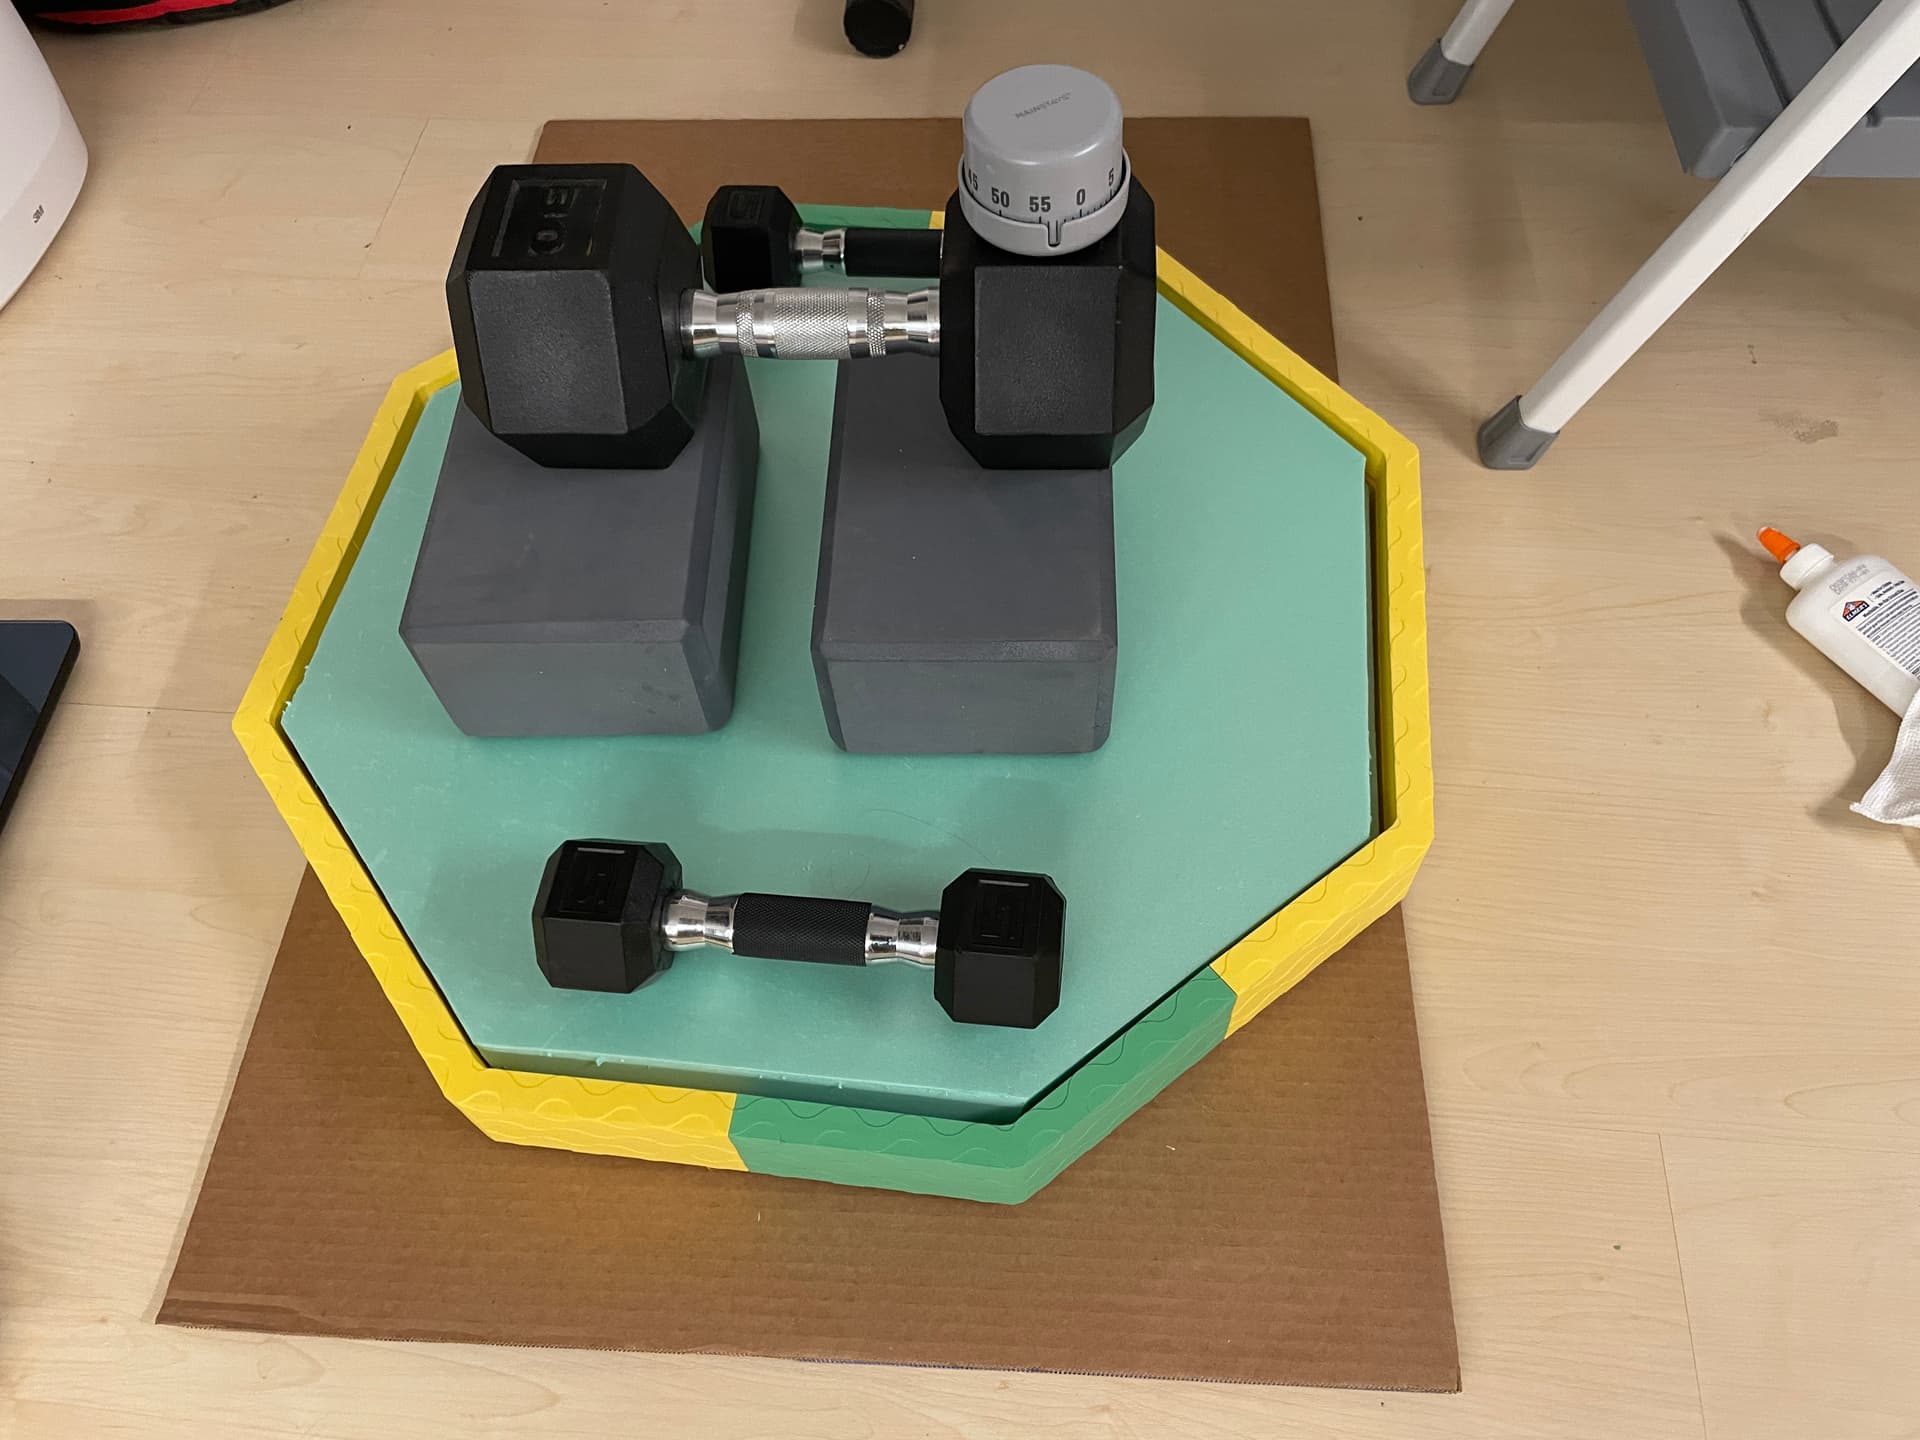
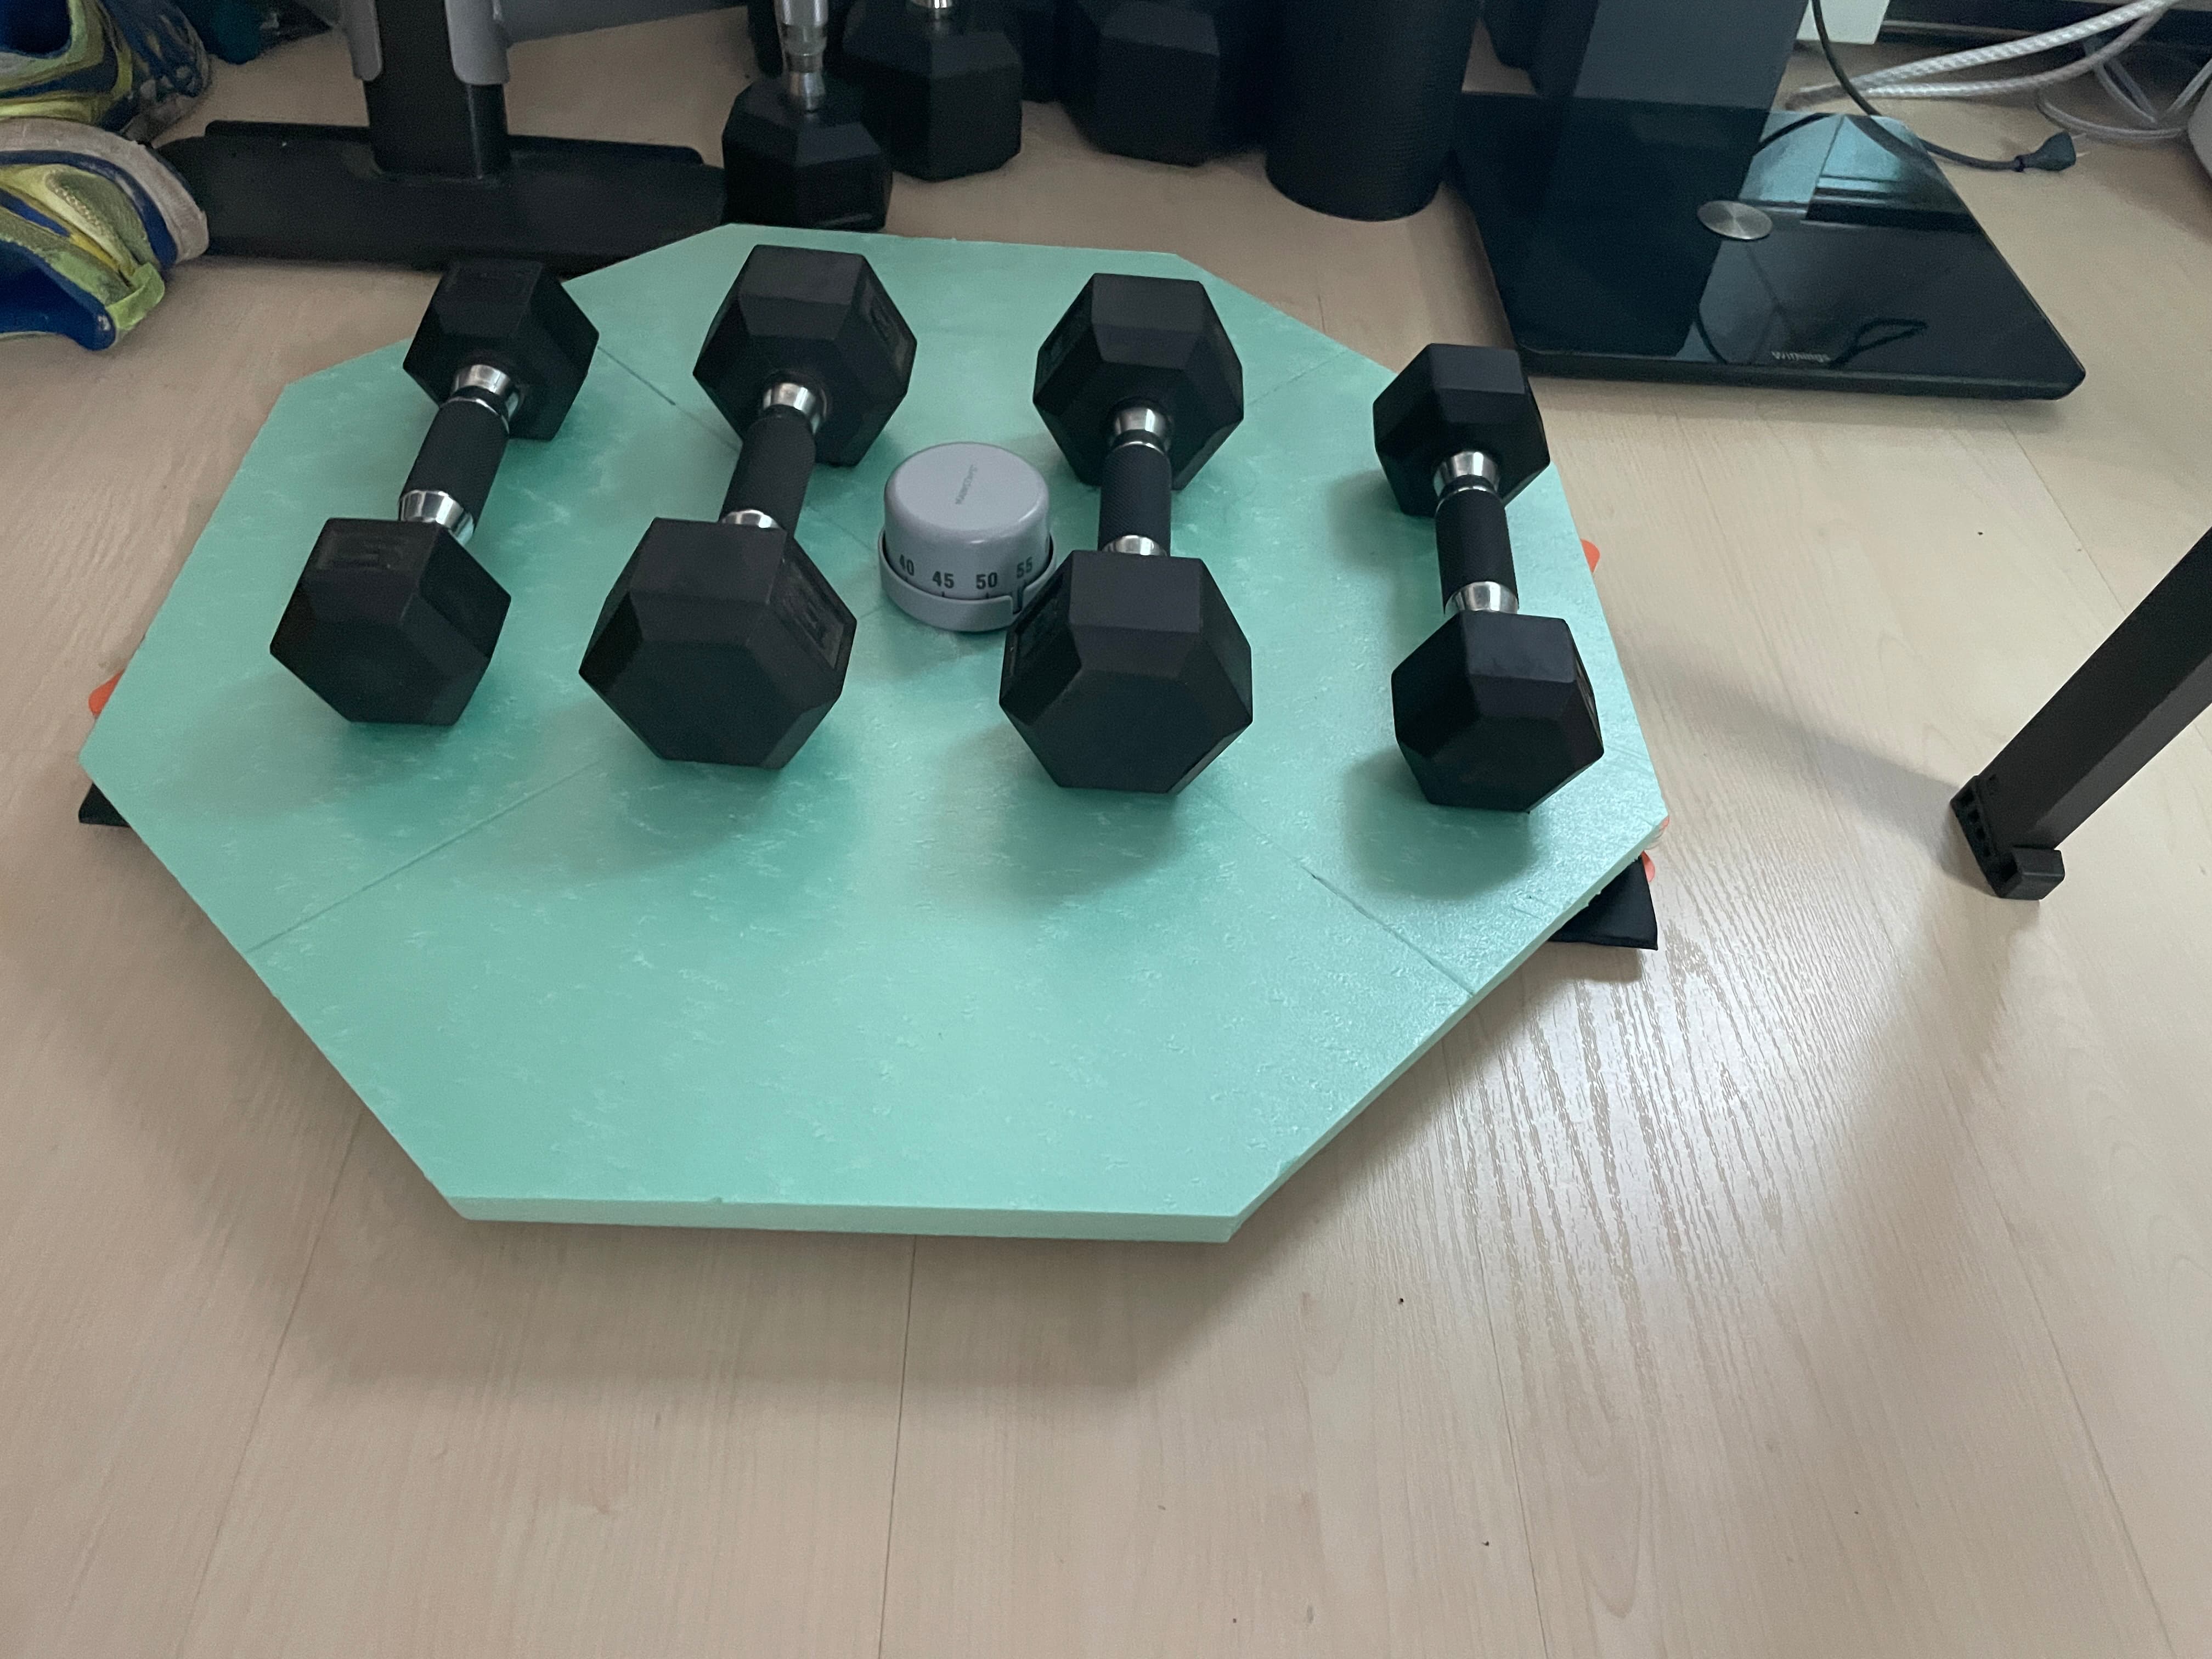
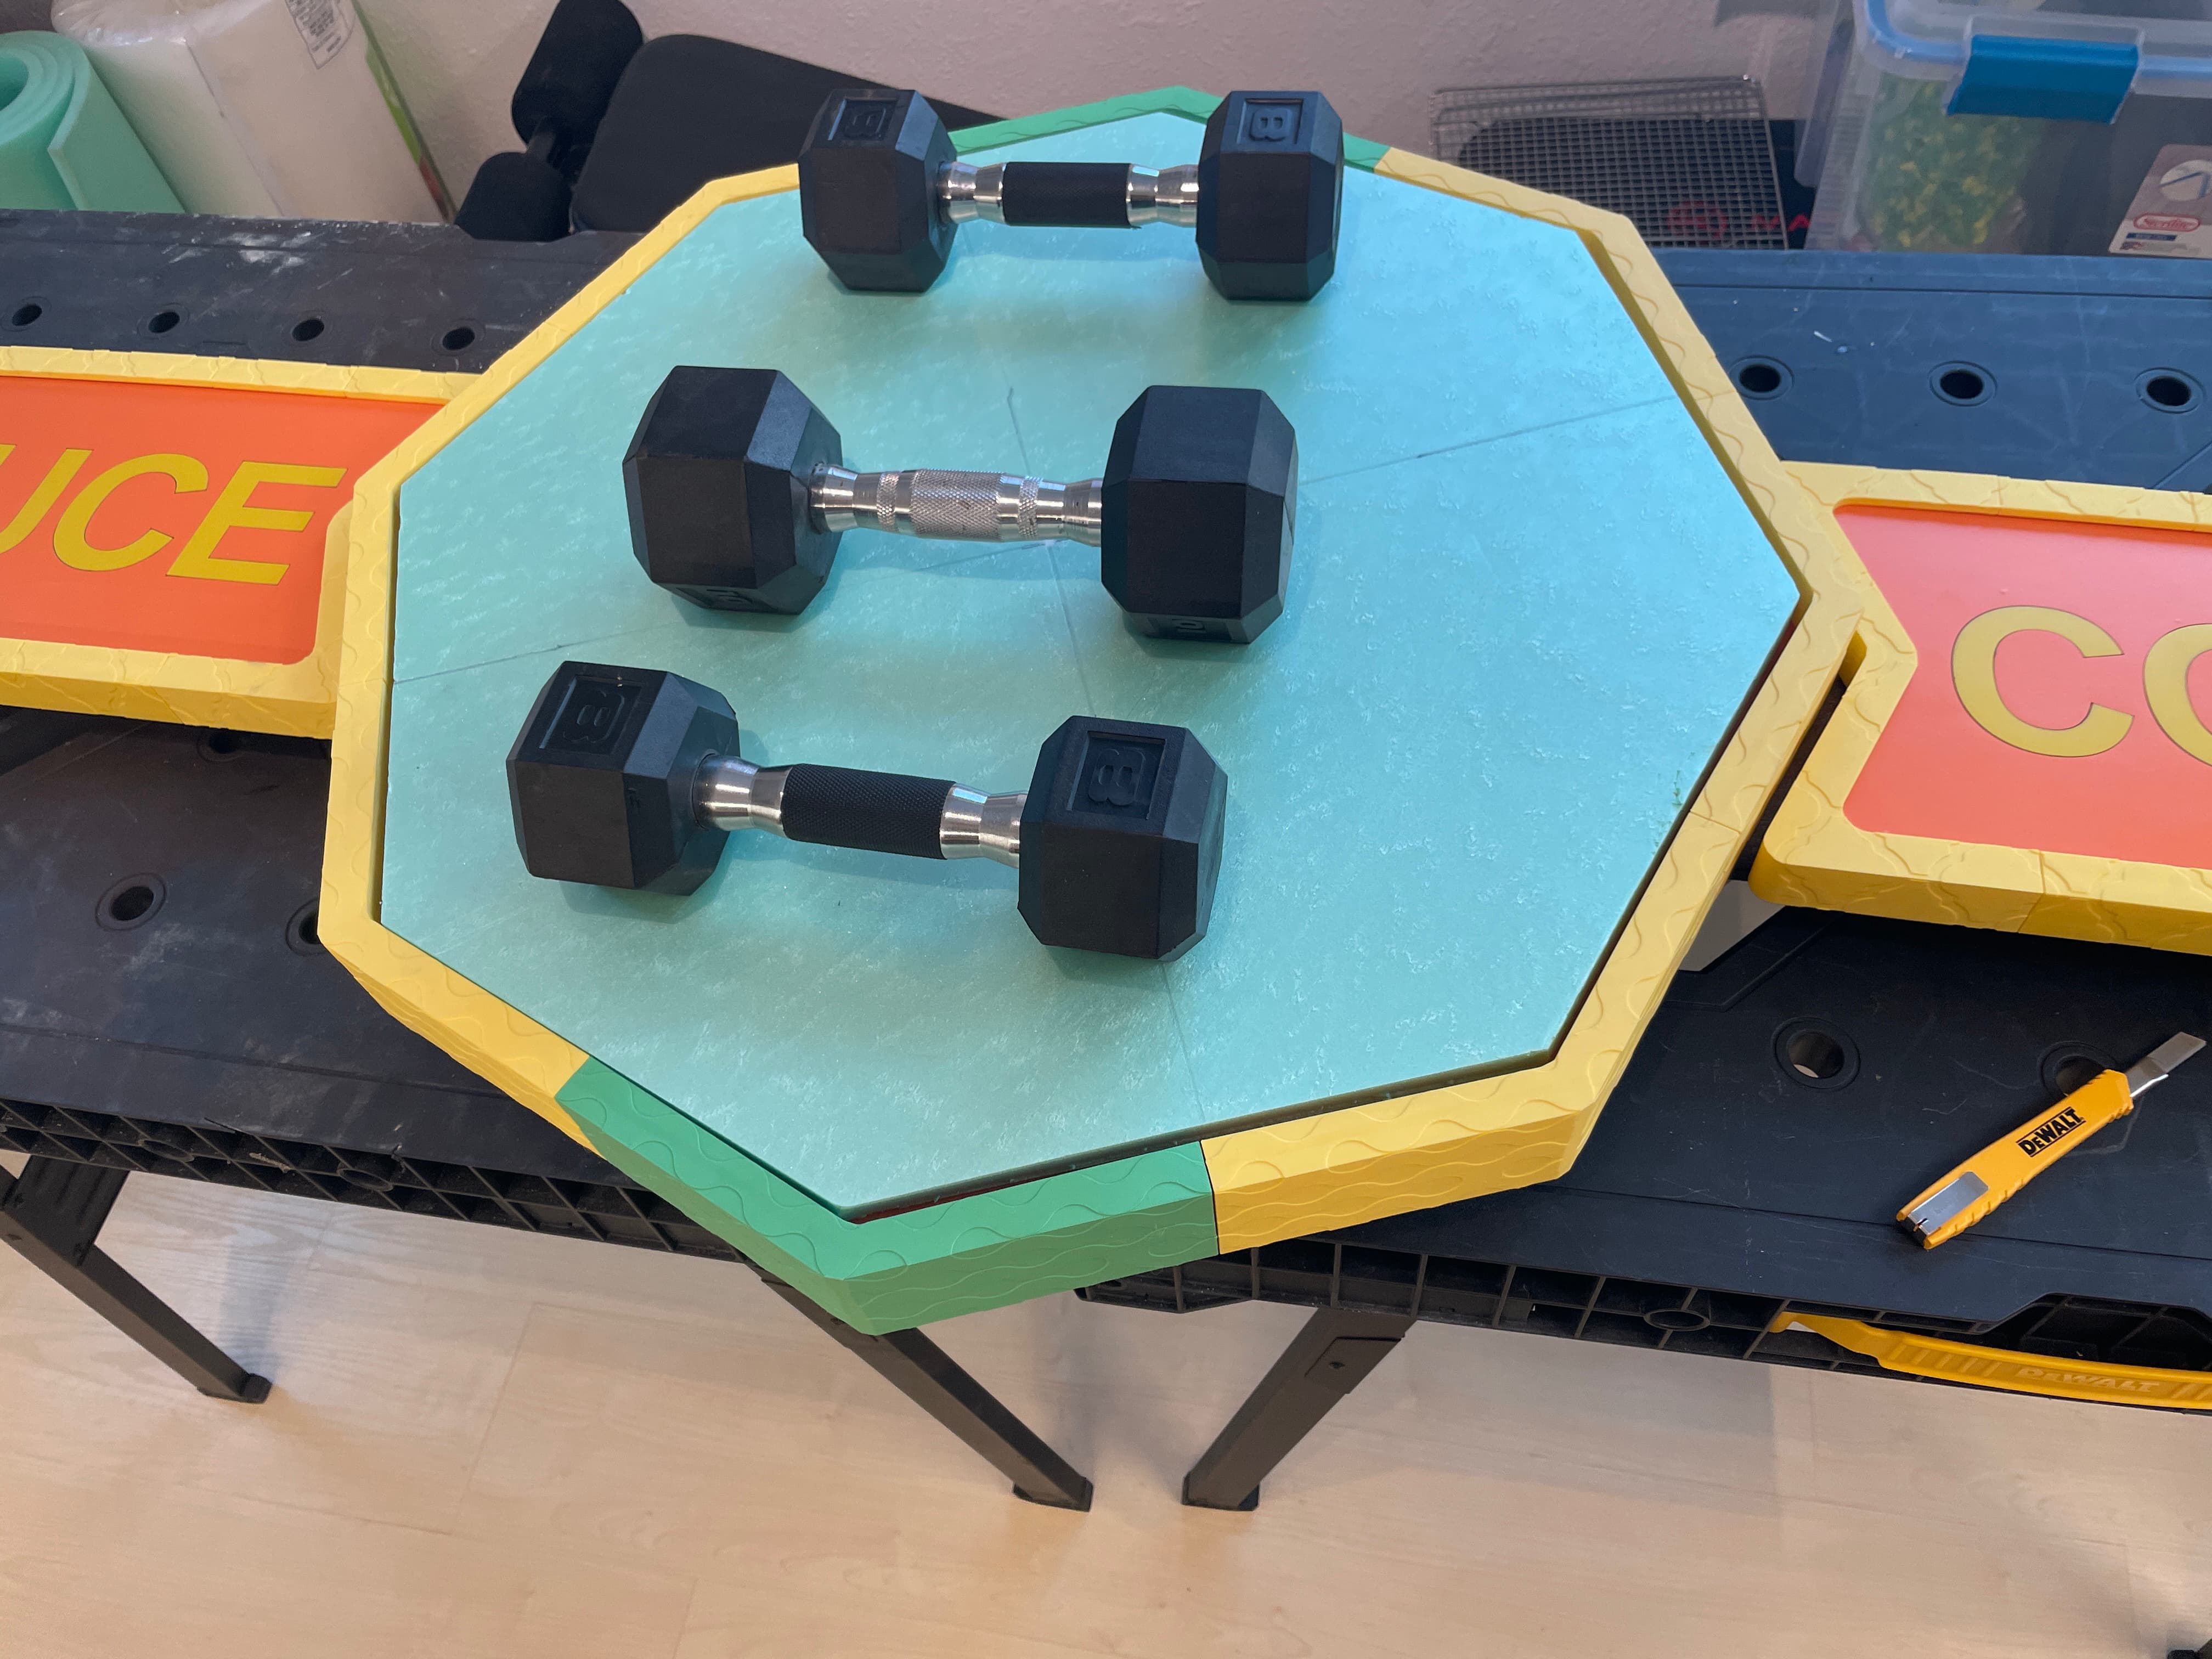
And squash them flat for an hour to dry. As I mentioned, that extra 24" octagon of 1" rigid foam came in handy numerous times during gluing up of various sections.
I’ll also glue on the final fleece face. I didn’t get a pic of this as it’s a one-shot deal and I was nervous about messing it up. But I got it aligned well enough laying it down to glue in place, and tuck all the edges.
Bam -
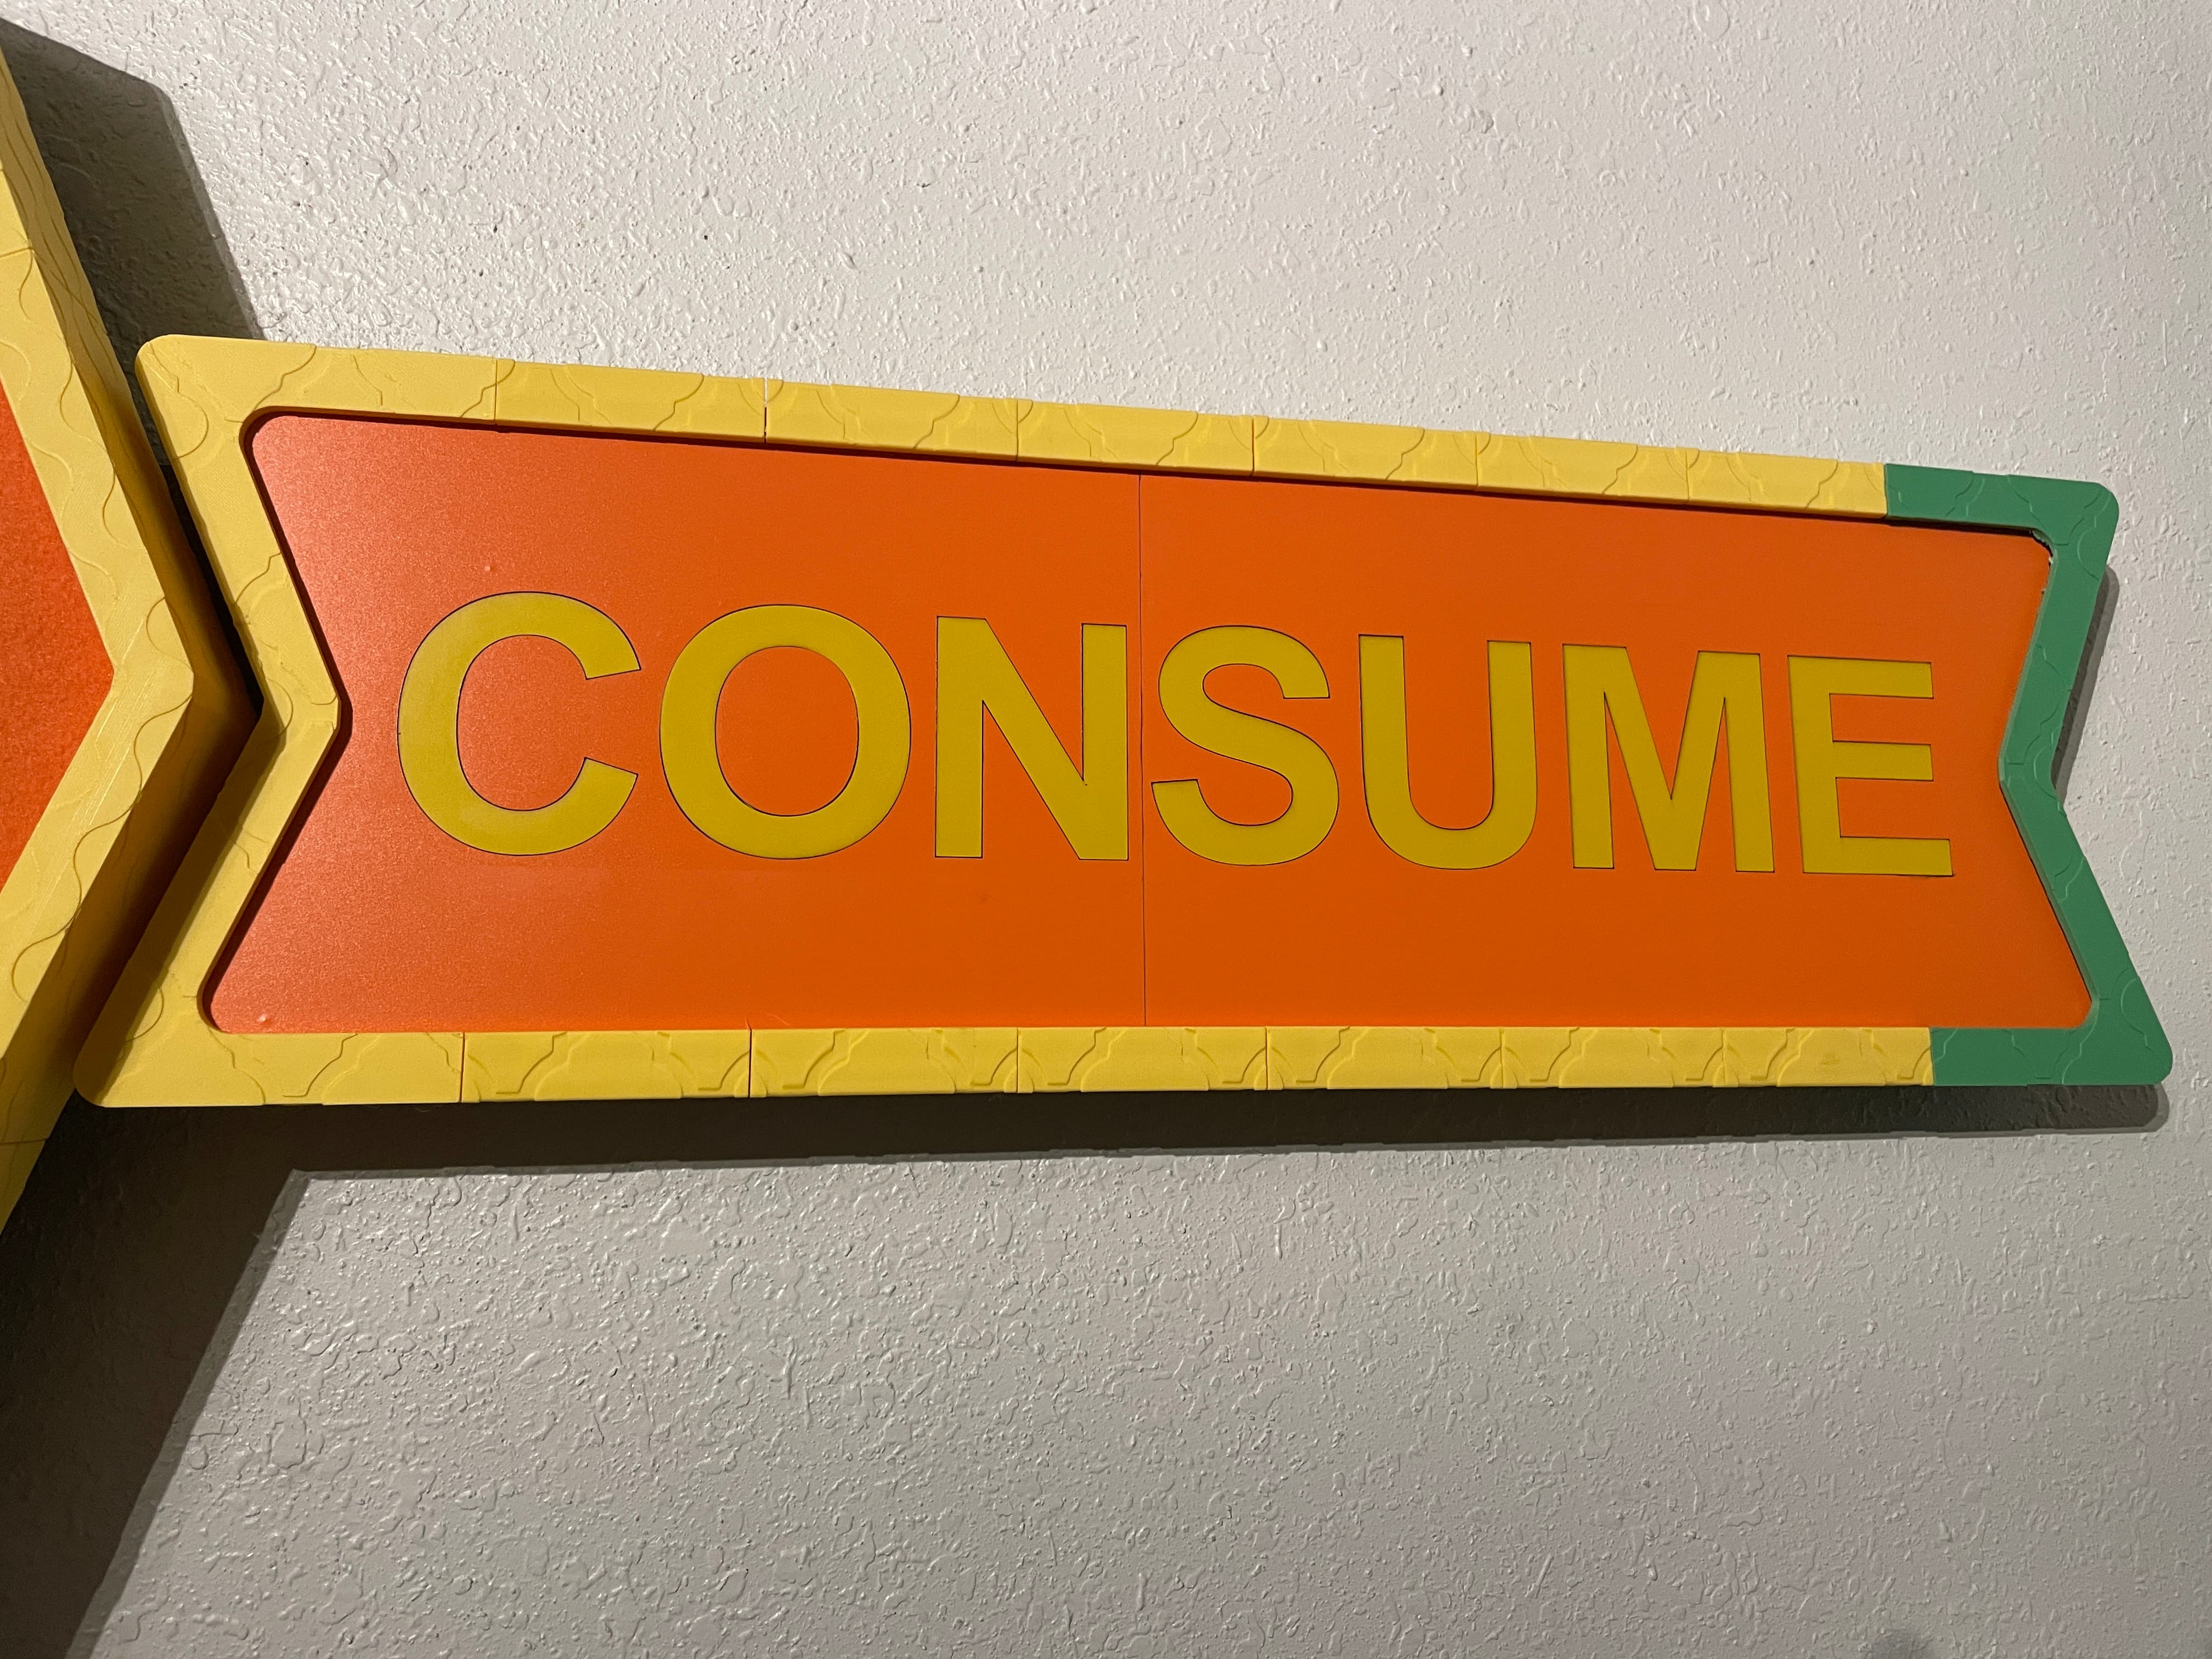
FYI - On the side panels I tried a different ‘inset’ design and it came out super good -
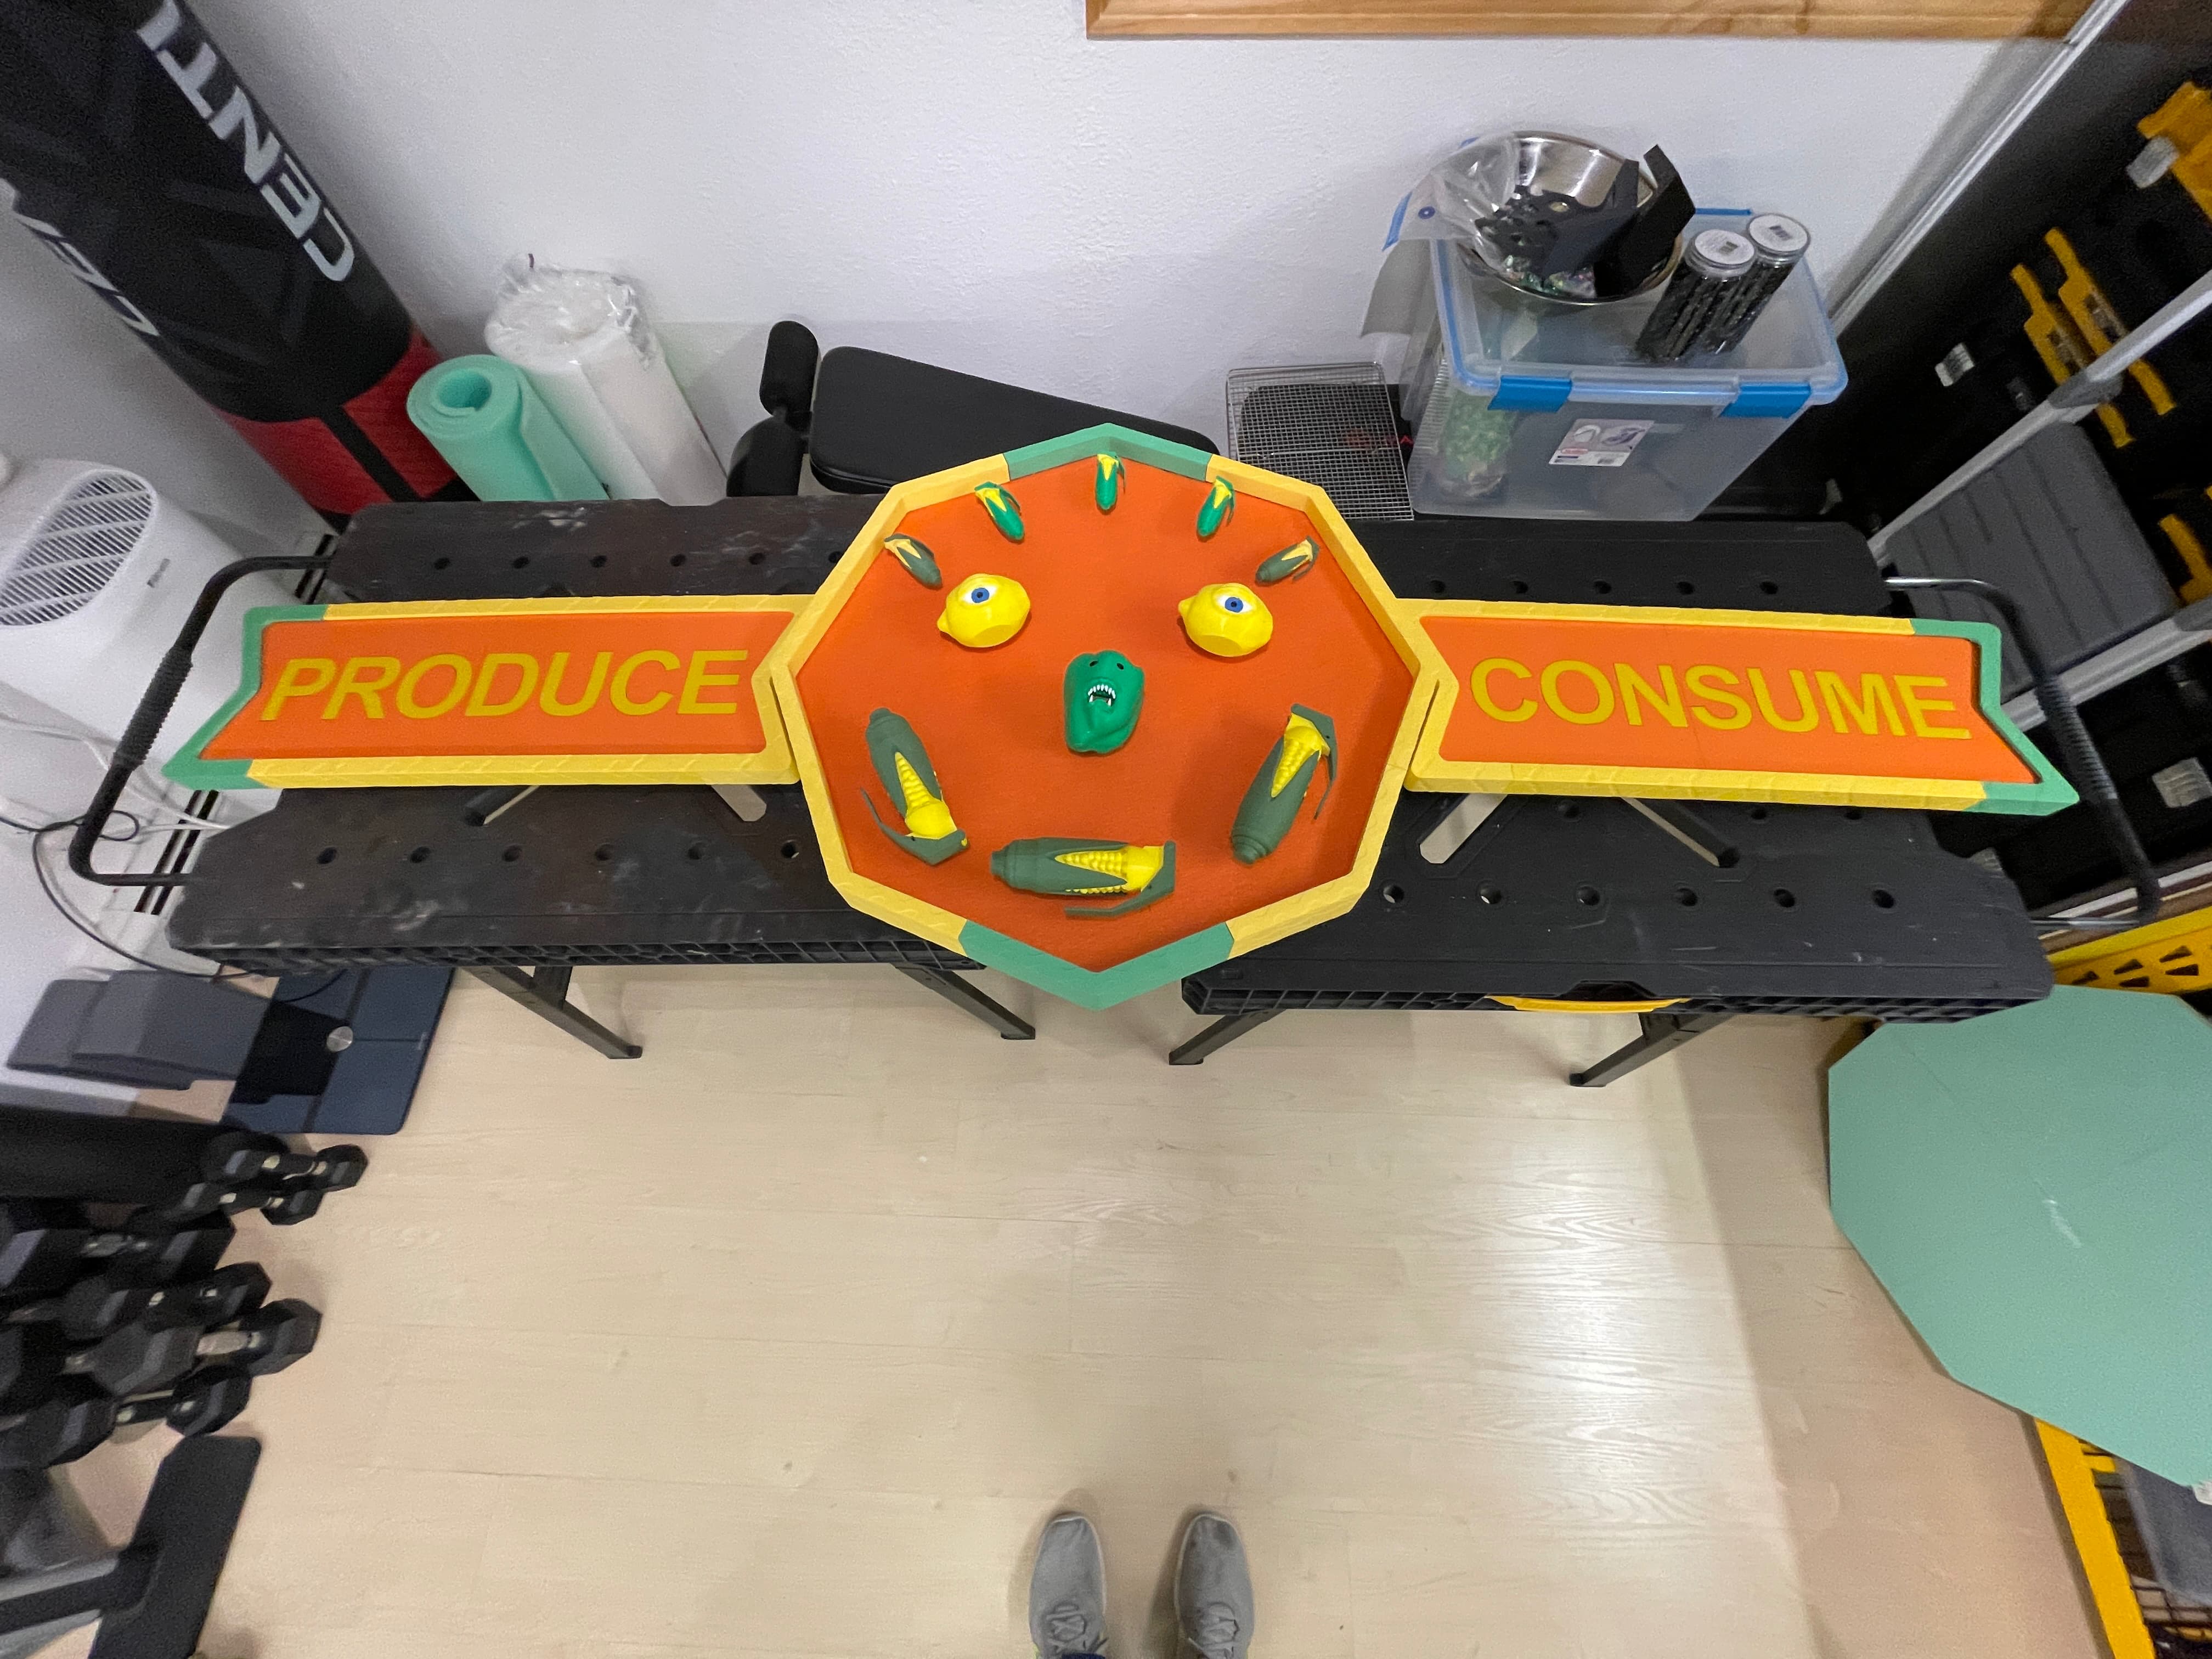
On the main octagon, I had predrilled (from the surface) through the back plywood panel before setting in the cardboard and surface foam, so I knew where the holes through the plastic webbing were inside, and then screwed the plywood in place from the back. There whole thing can’t weight 20 pounds, but the TV mount seemed best for easy wall mounting.
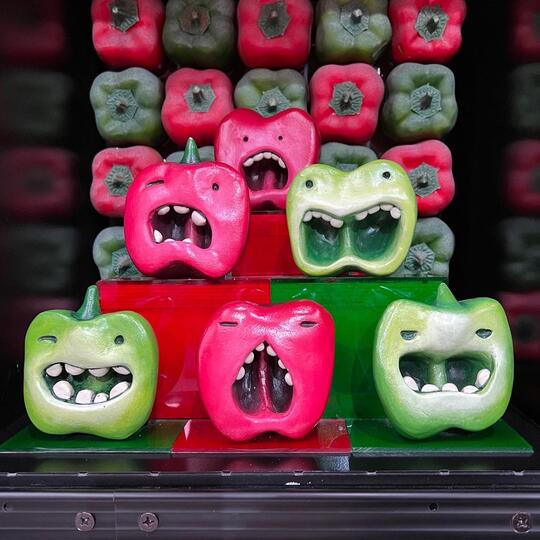
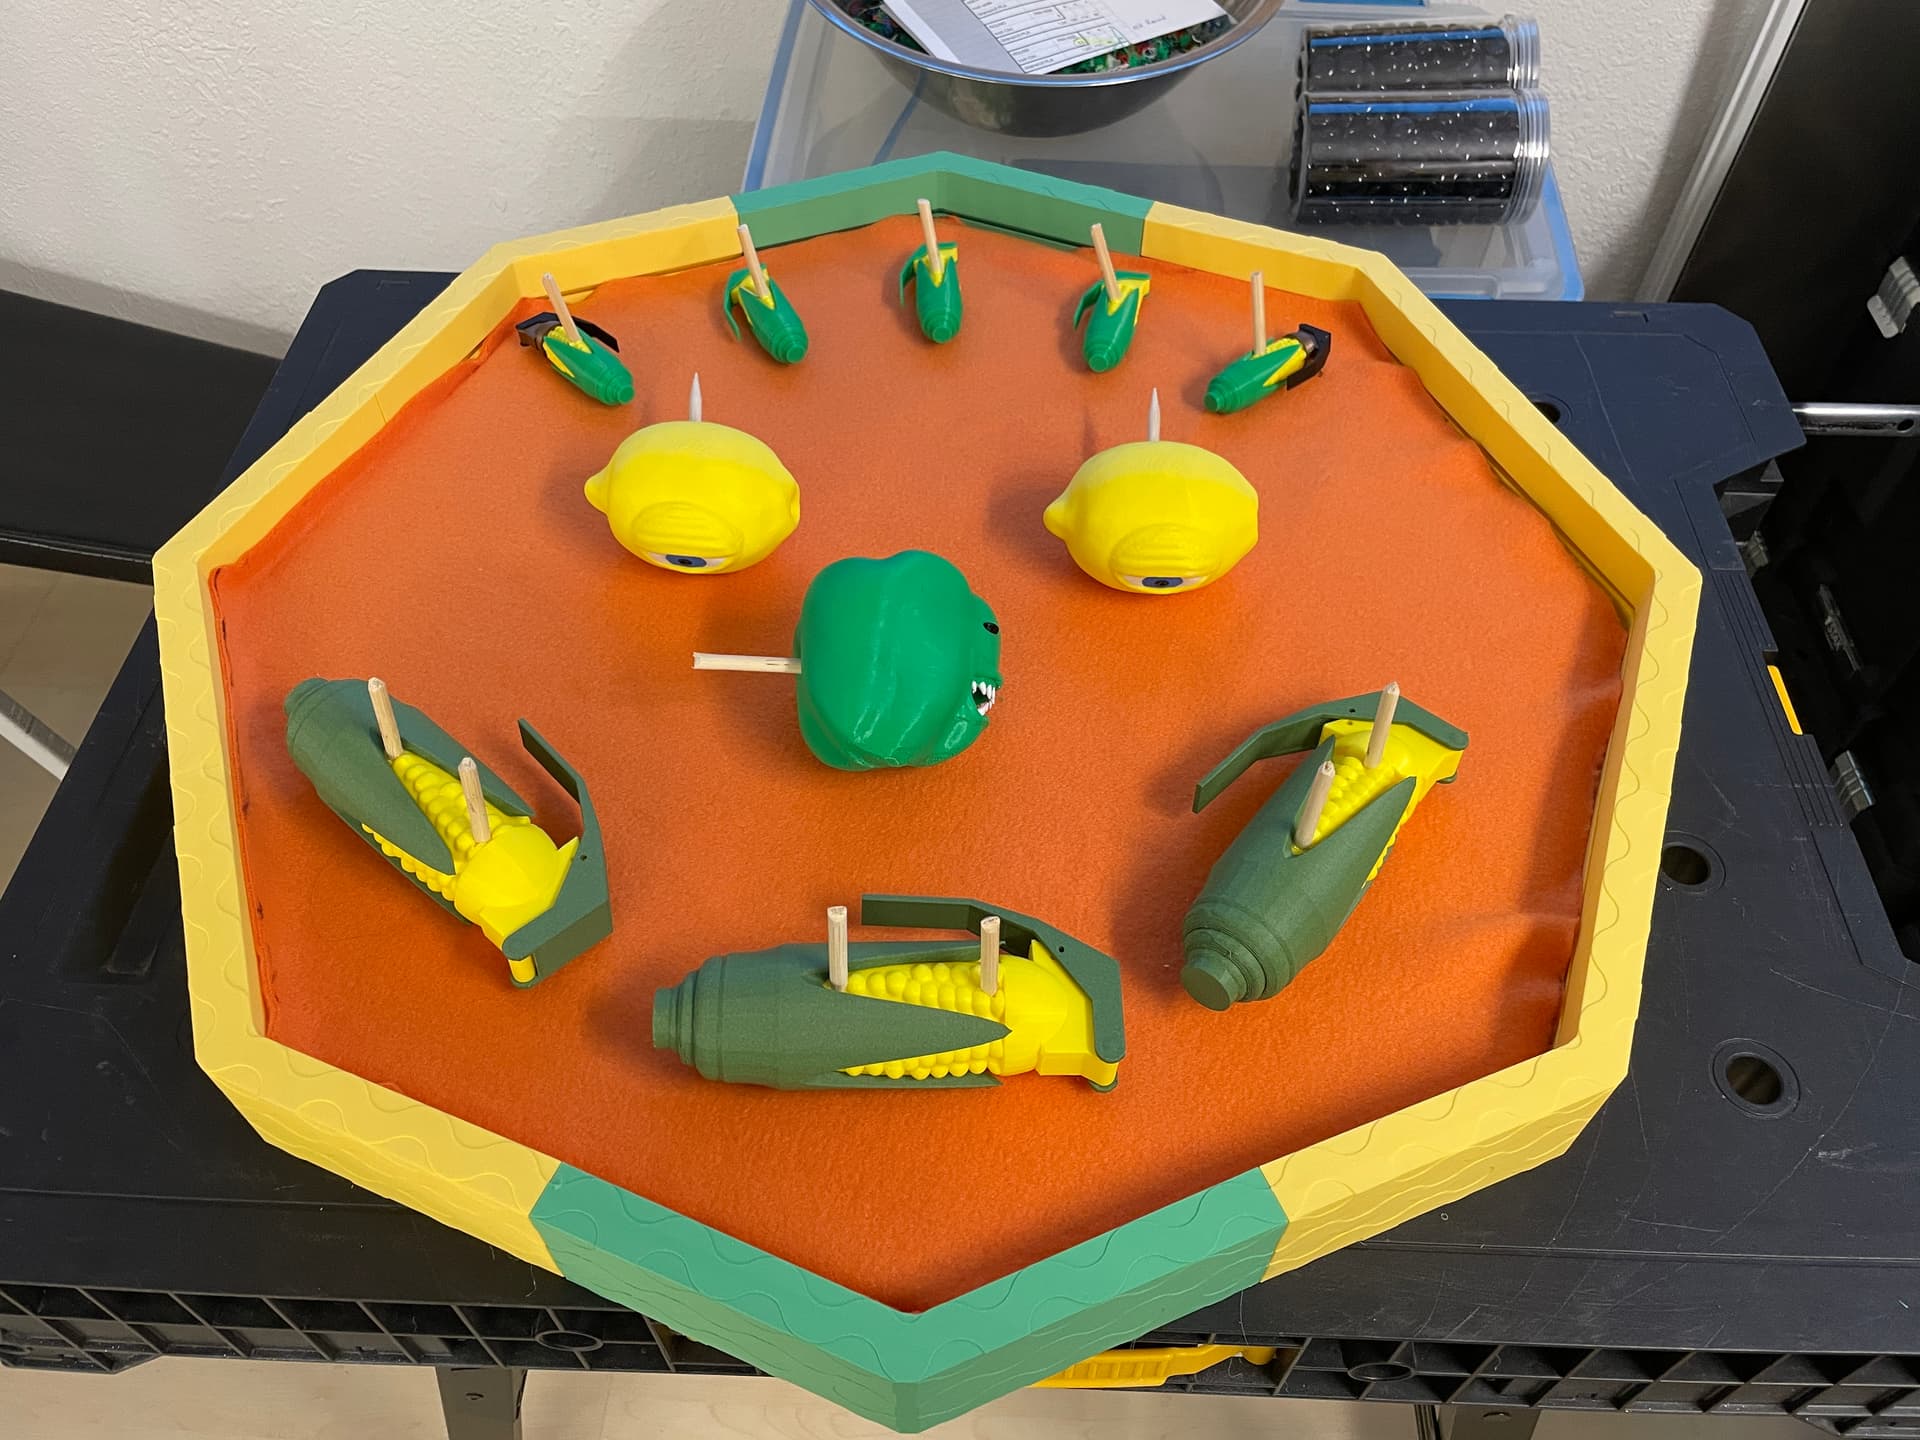
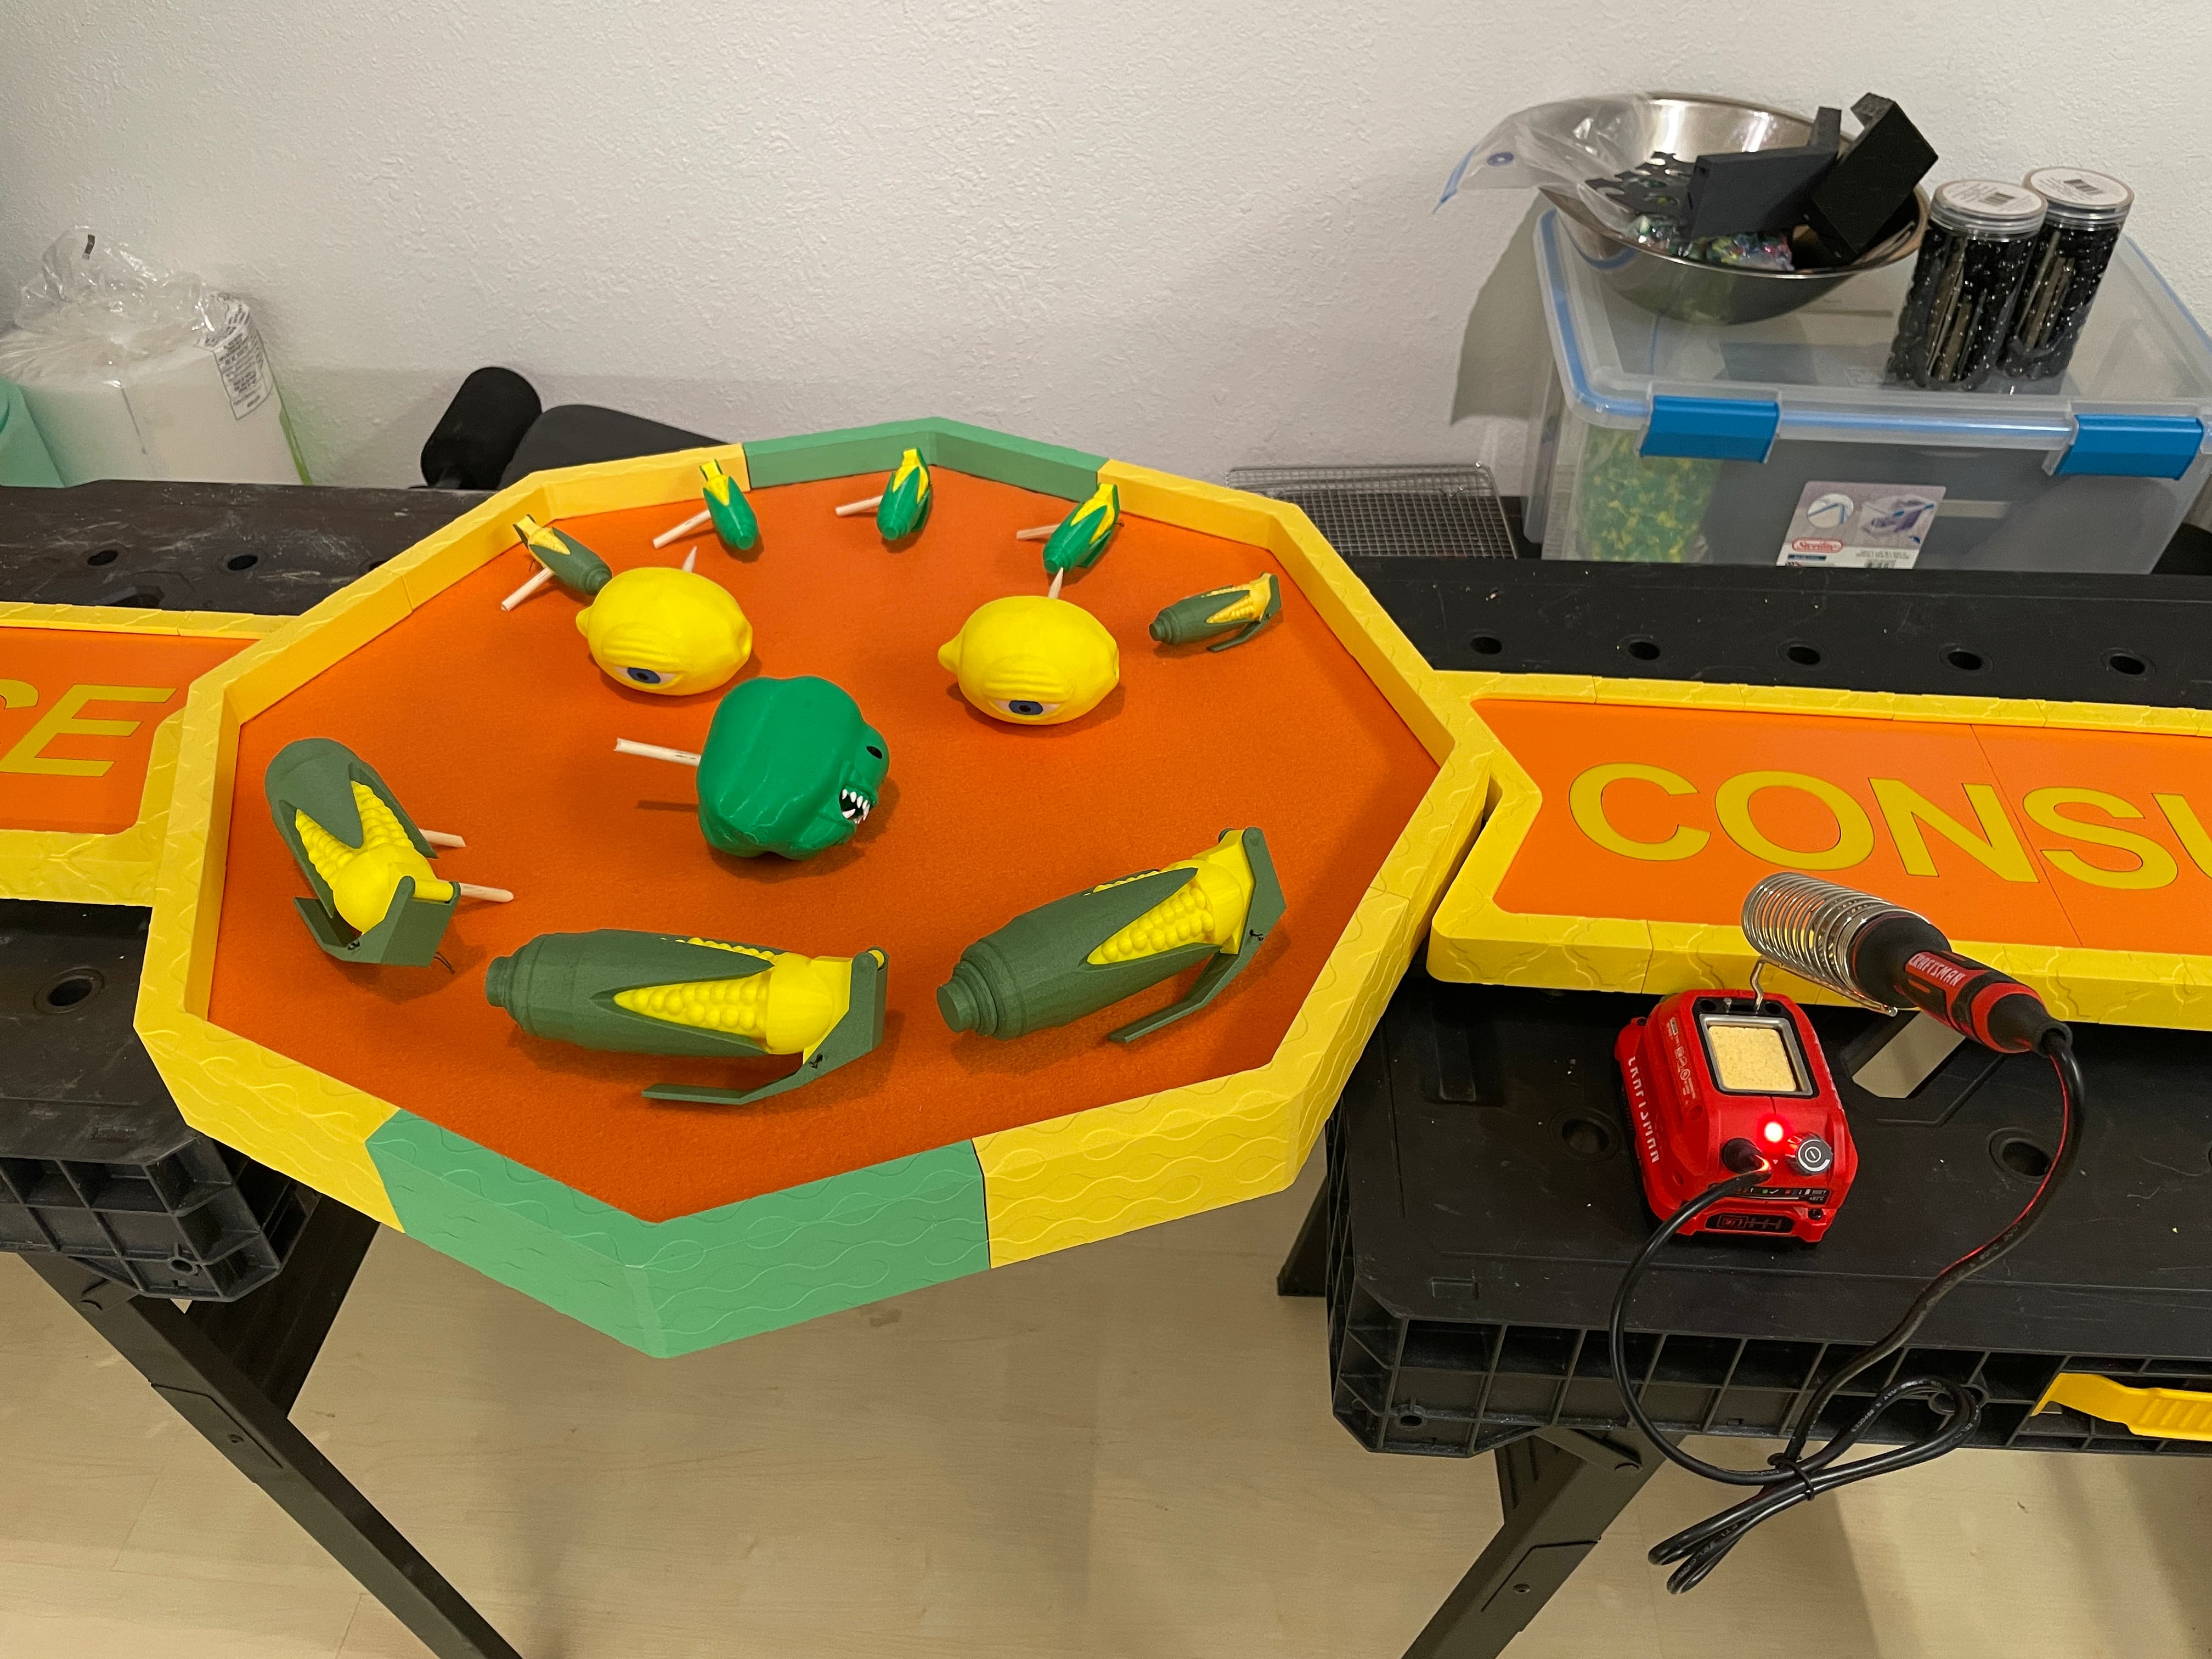
Final placement and layout of the surface veggies before mounting. I just predrilled a hole in the back of each 3d printed fruit & veggie piece and inserted a short dowel.
I’ll melt a small hole through the fleece face and foam in a slightly smaller diameter to jam the dowels in. They’re so light, and the rigid foam so dense, no need to glue them in. Moment of truth -
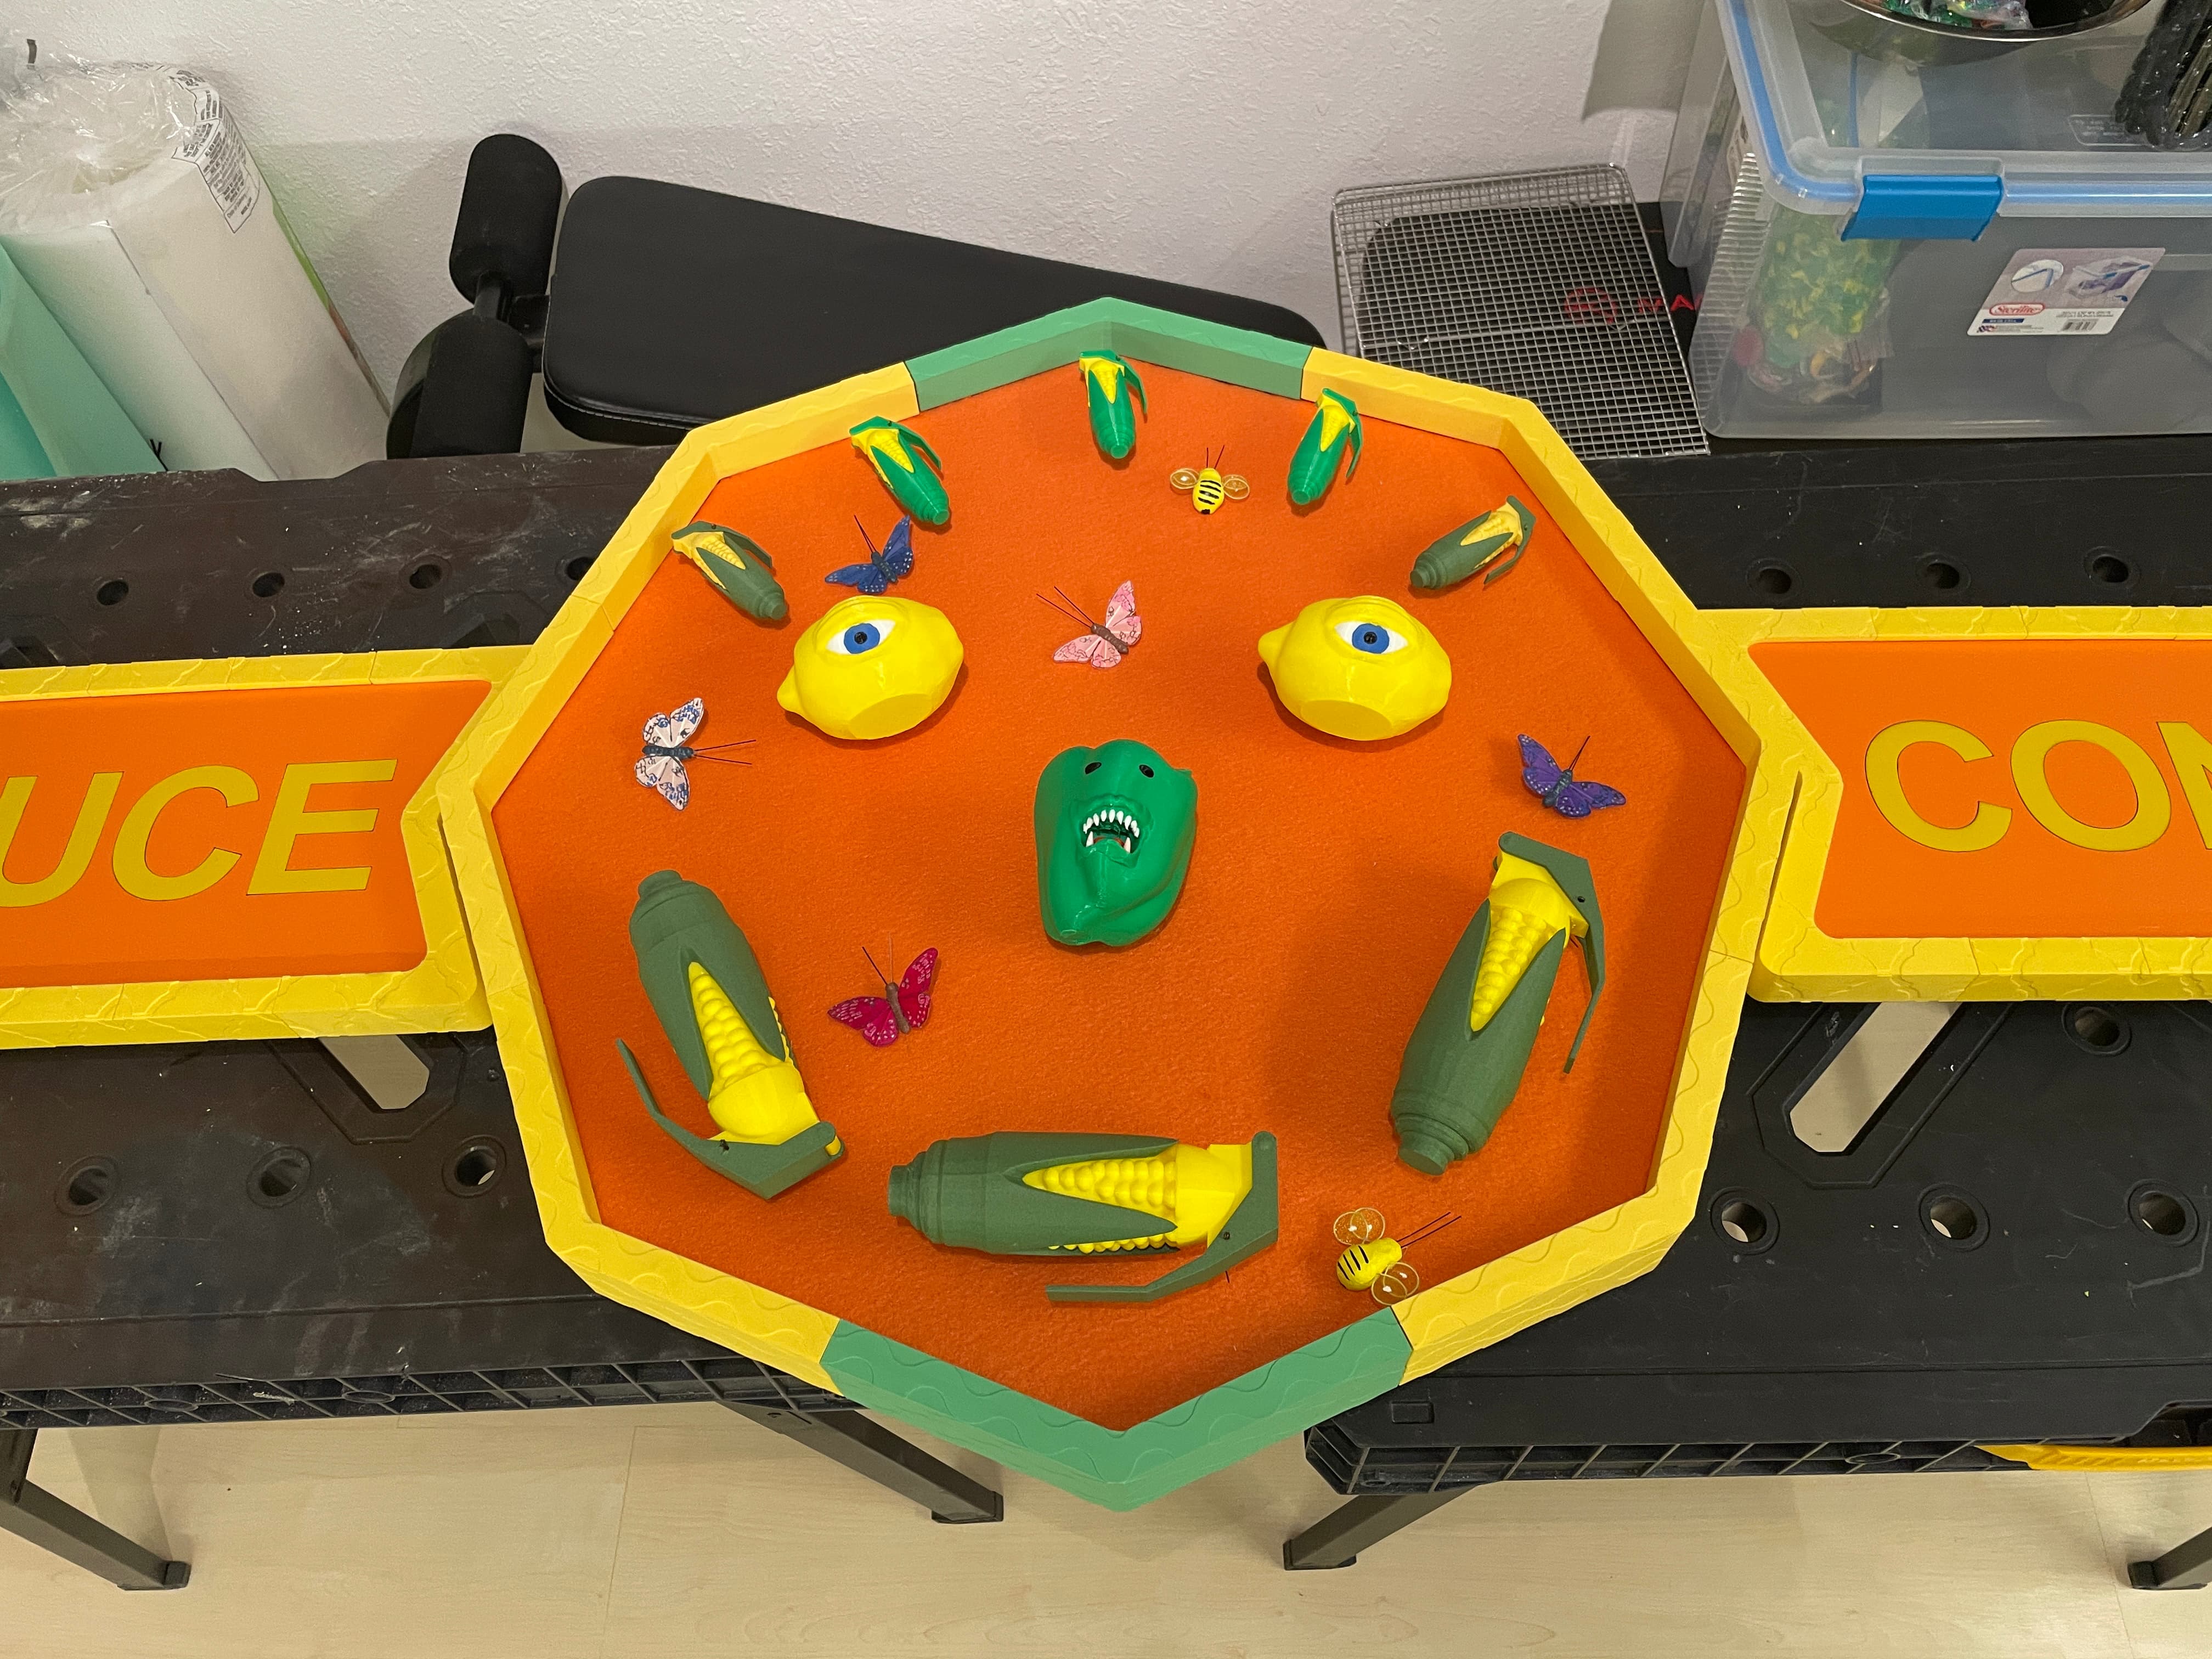
Add some butterflies and bees for embellishment.
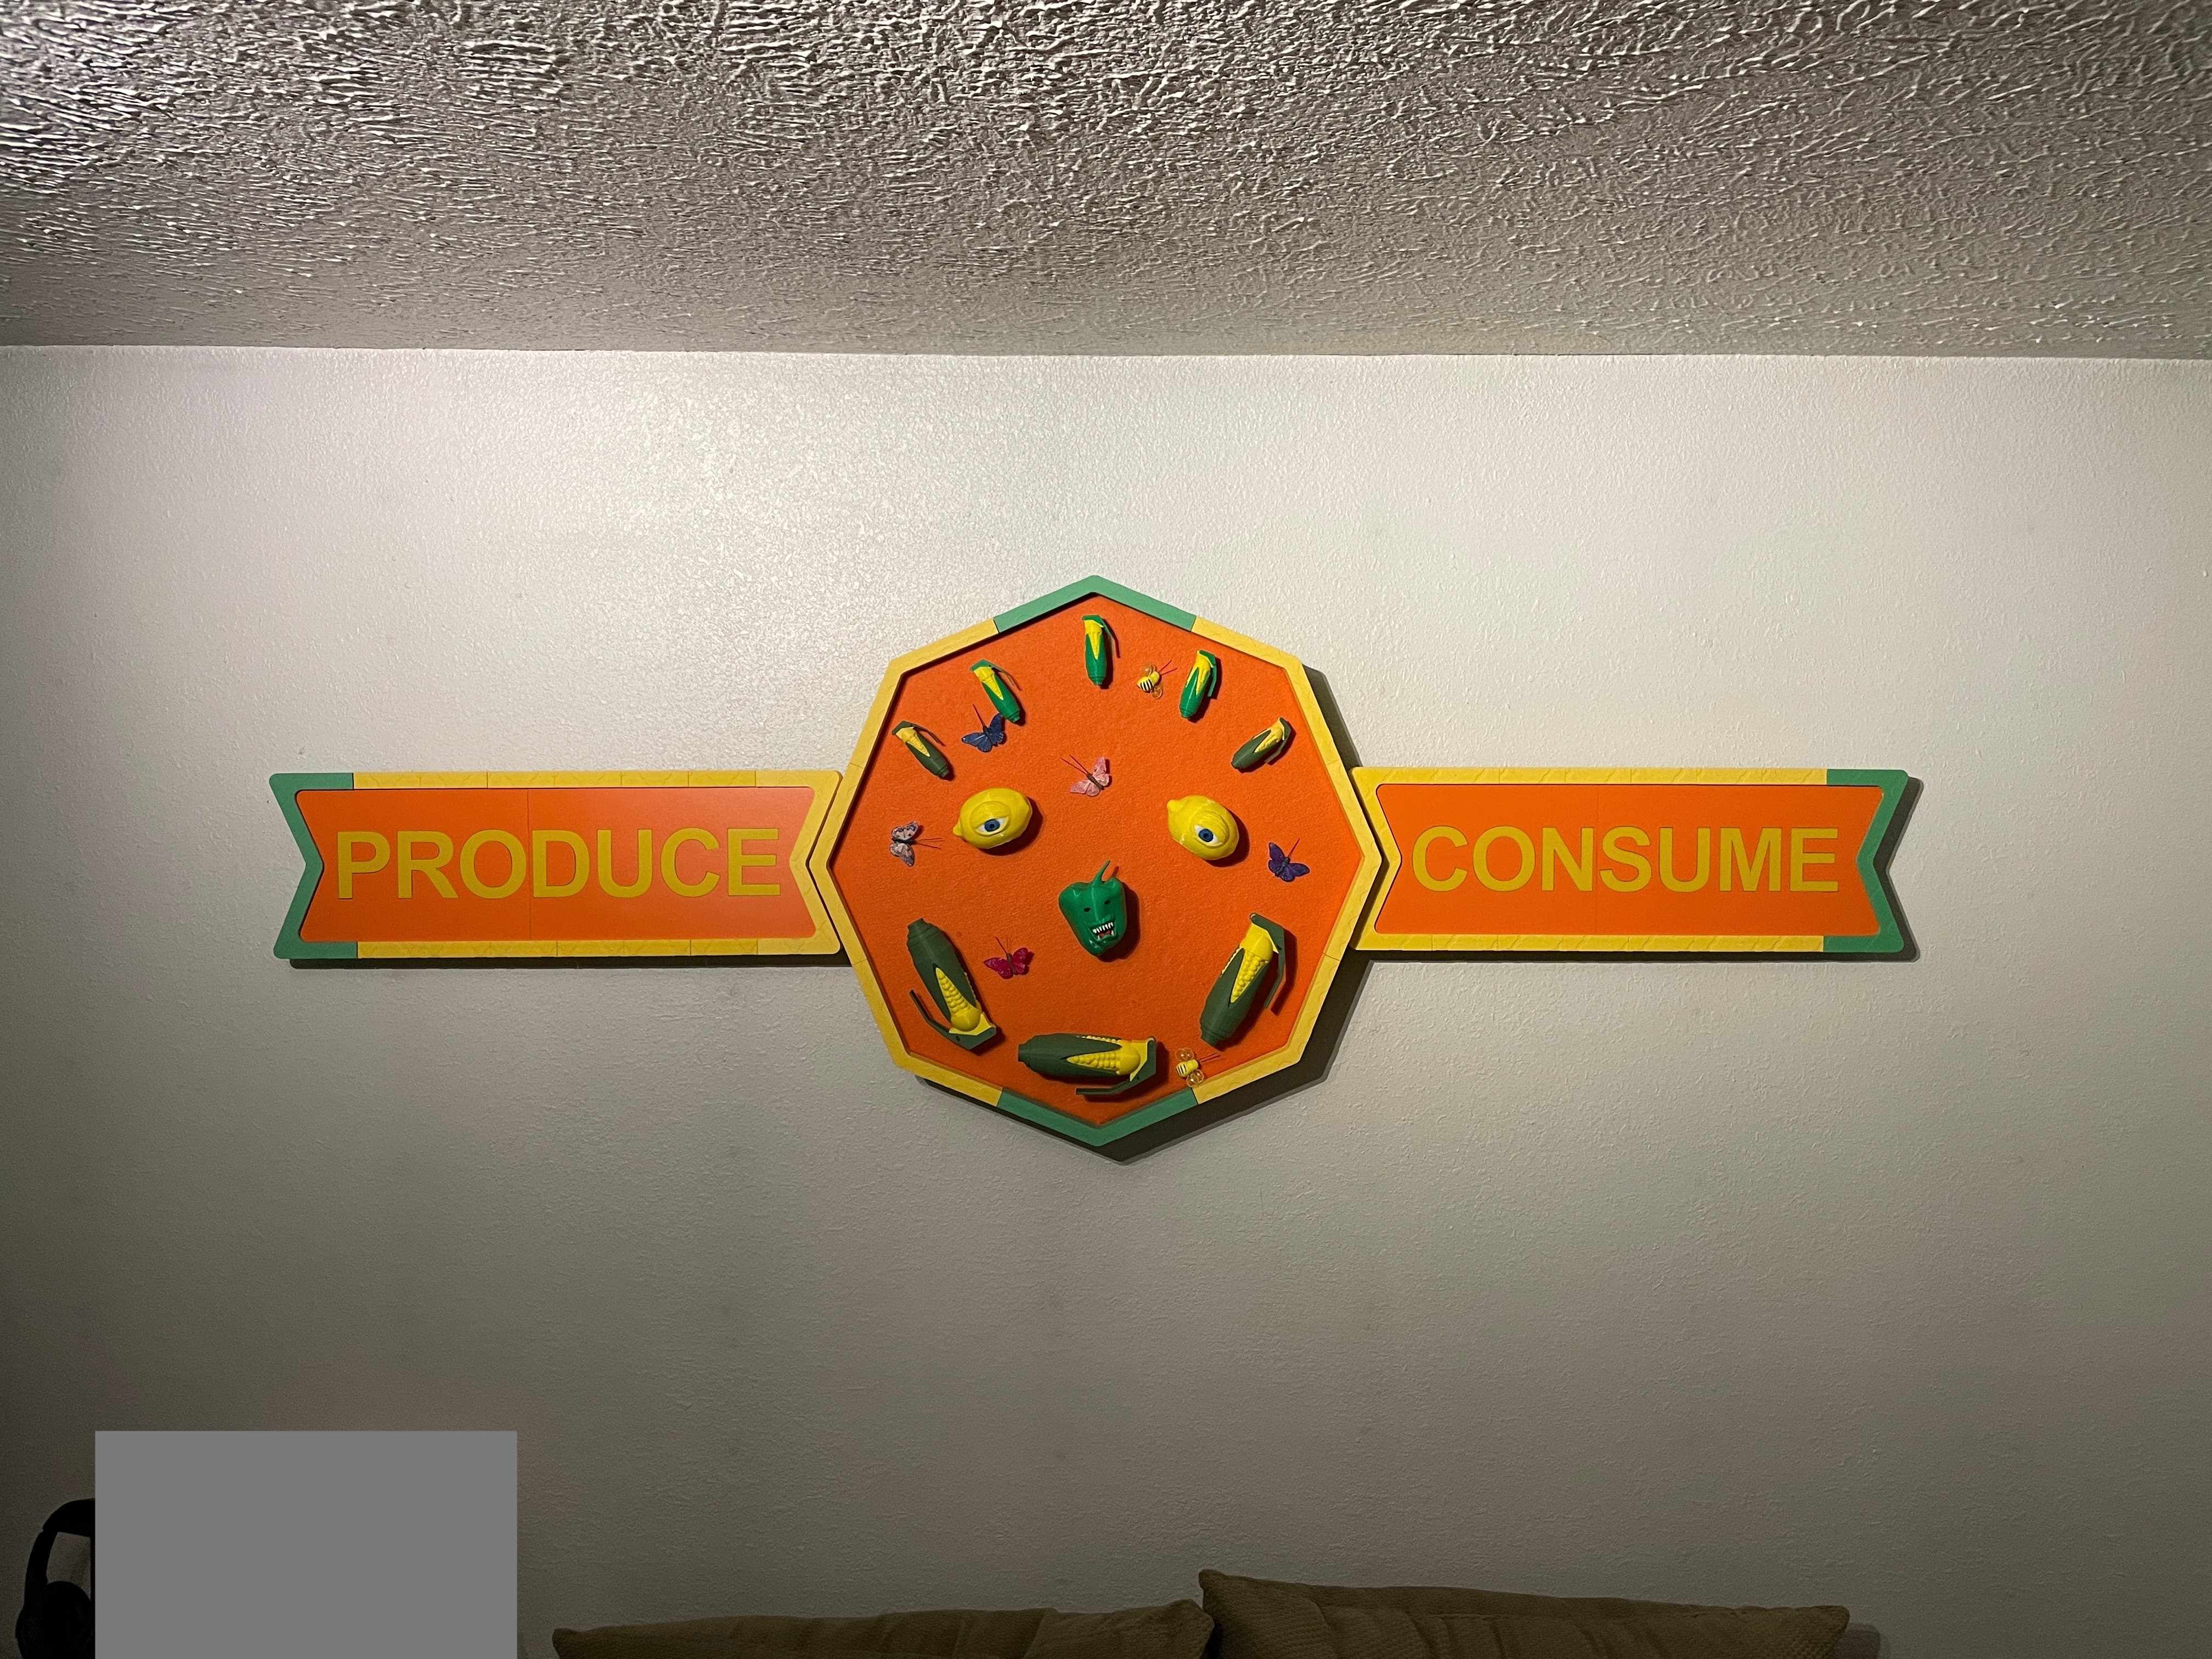
And final reveal -
Tweak the eyes and nose a little and call it done -
Yup, ridiculous project. But I leaned a ton about modeling the inset surface patterns on 3d pieces. And leveled up my Lighburn skills in designing 2d specifically for converting to 3d.
I’ll add some other lessons learned and details in a follow up. But this project completely met all my expectations, and I couldn’t be happier with it!
HL