I have that book and masquerade both 
1 Like
but of course you do! I spent so many hours poring over those puzzles as a kid.
Likewise the story of how the rabbit was found always made me mad. Cheaters man.
1 Like
Seriously, to go through all that to hide it, and think of the the team solved it, but then someone else cheated…
1 Like
I never get tired of seeing your trays. The bee looks fantastic. Thank you for sharing again. 
1 Like
Exquisite!
Thank you, as usual, for all of the notes on your process.
1 Like
Sweet!
1 Like
@evansd2 I need to learn from you on how to cut/do inlay work. I still haven’t figured out how to adjust for kerf. I know what it is but can’t get a tight-fitting box to save my life. This is BEAUTIFUL work!
2 Likes
It was a fun unexpected surprise.
2 Likes
I think this may be the best thing you’ve done yet. Beautiful!
2 Likes
So that is the secret? You own a clam pit? < /snark > Totally stunning as usual! ![]() Still wondering what folk could put in the trays that would not be overshadowed by the beauty of the trays themselves.
Still wondering what folk could put in the trays that would not be overshadowed by the beauty of the trays themselves.
2 Likes
Nice work. A piece of comb honey in the center of the tray would make for a good photo of your work and highlight the bee theme.
2 Likes
Gorgeous! The title of this post is terribly mundane and misleading. 
7 Likes
Here’s one of the end pieces:
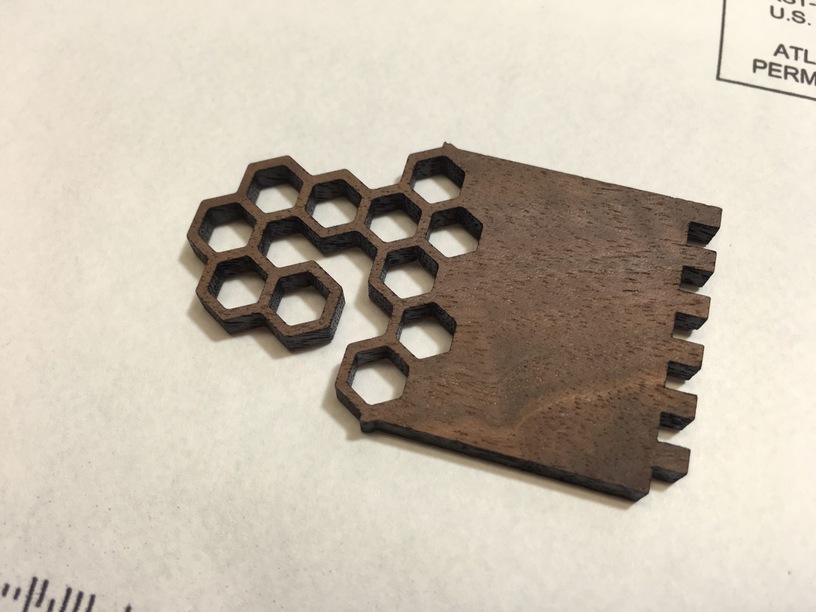
Figured Walnut
Unsanded and unfinished, so it’s not as rich-looking as the final product, but this should give you the idea.
19 Likes
I’ve said it before, I’ll say it again… You’re a master.
7 Likes
I can only imagine the satisfaction of joining those pieces. Not the inlaying of each individual honeycomb, though, or the bee’s stripes, but these larger pieces must have been some real pleasers
3 Likes
Gorgeous work, so inspiring!
1 Like
So, it’s all pretty satisfying really. It’s hard to place a stack rank on these things, but like the larger pieces: they are unstable without the hexagons. This is all hardwood, so those hex borders by themselves are pretty delicate – especially where it crosses the grain. It’s all one big interlocked mesh, and so you can’t really have the grid without the hexes.
That being said… The main body of the bee with wings and legs was pretty dang satisfying. It’s a really unexpected shape, and it just slotted right in. Some part of me was like “is this going to actually fit?” and of course it did. Good times.
12 Likes
even when i do the simple stuff (which all of mine is compared to this), i always fear when i cut that something just won’t fit and i’ll bust it trying to make it fit. which has happened.
i made a simple 2-piece box (sliding lid) out of BB last night. and i didn’t quite account for enough space for the lid to slide down. first time i’d tried that boxes.py setting and i figured that the default thickness was set at 3.0, and my wood was 2.95, so the default for the lid offset should probably be fine (0.05). nope. and i did 0.125 on the second try and it was still pretty snug. i would have been pretty frustrated it if had been something nice instead of BB.
4 Likes
That’s flattering but no, I’m keeping this one. I’ve given you all enough info so that you can design your very own, I’ve laid out my entire process and illustrated it over the course of several posts. Just search for “@evansd2 tray in:first #glowforge-project-examples”, you’ll find them no problem.
I’d say you’ll get even more satisfaction out of a design of your own choosing anyway!
10 Likes