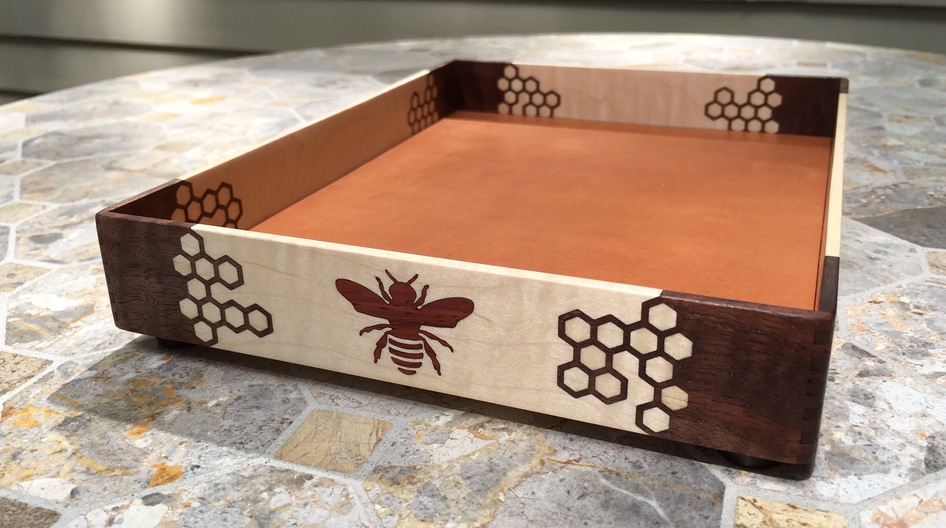
Hello, I am the keeper of the comb. You may look but not touch.
Figured maple, Figured Walnut, Padauk, Cowhide
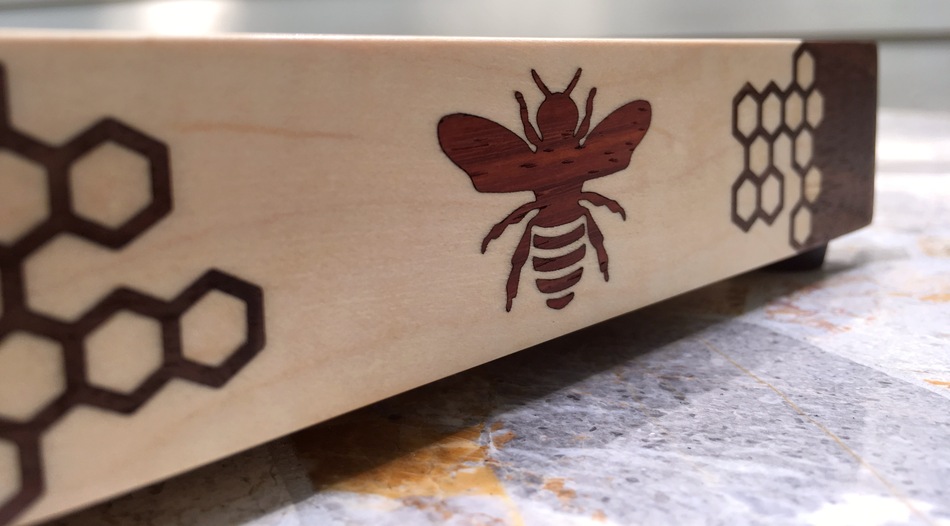
My exploration of trays is apparently not complete yet. This time, instead of an abstract geometric theme of spirals I decided to ground the design in more natural forms, specifically honeycomb.
I don’t have a lot of process details to share that I haven’t already in my other tray posts, you can search the forum for them if you want to dig deeper into how I do this sort of thing beyond what I share with the photos below.
Some notes:
- The inlay process was labor-intensive. Each hexagon of maple in the comb is glued in individually, and since it was figured maple, I kept the orientation of the pieces, but scrambled them to make the individual hexes shimmer at different angles.
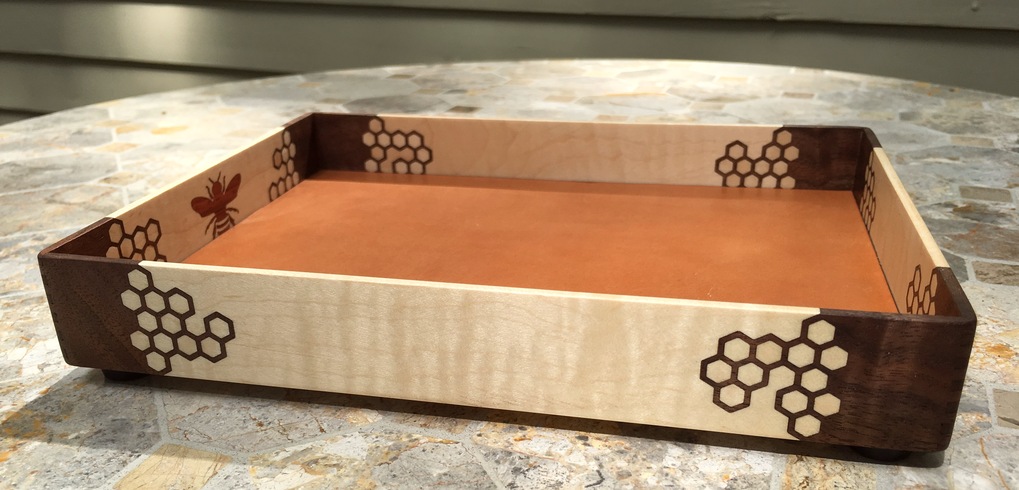
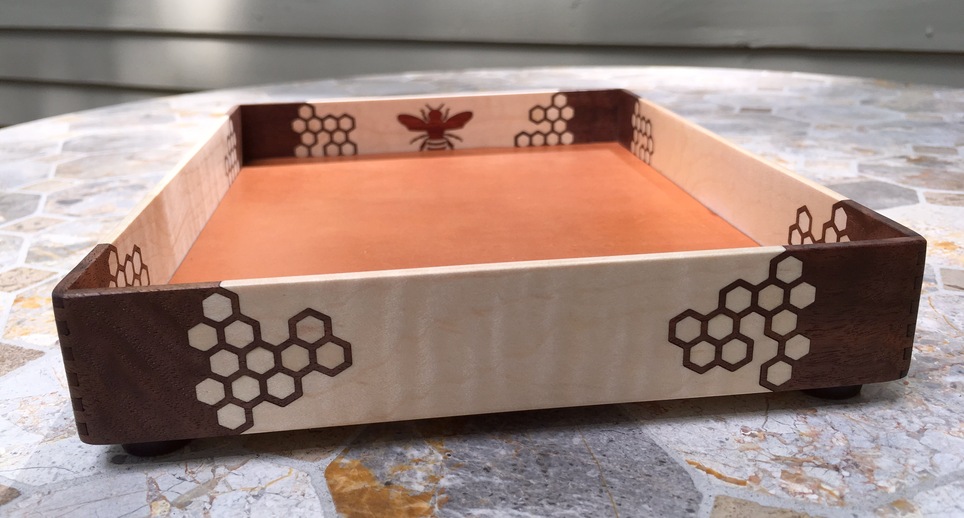
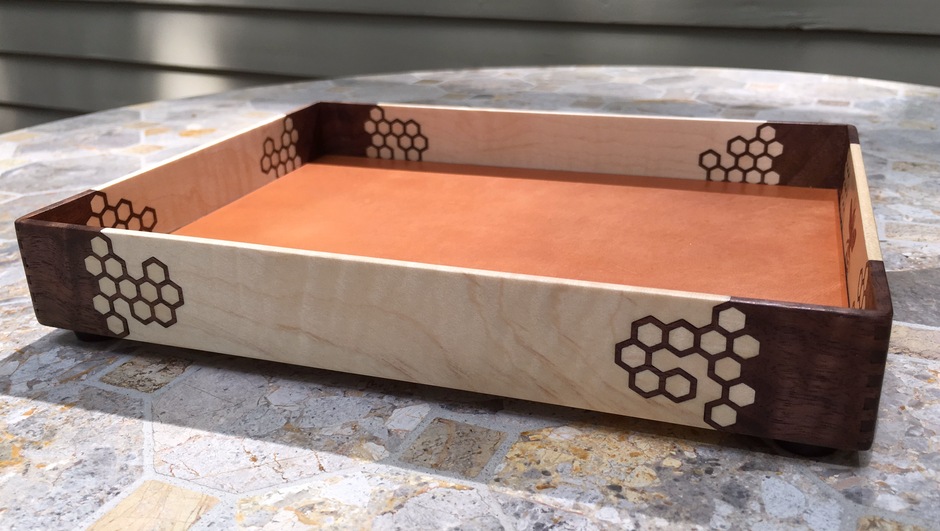
- Each side piece is unique. No two comb patterns are the same.
- The bee design was a free download, but as with
allmost free downloads, it was terrible on a technical level and required being completely re-drawn to have a clean path and true symmetry. (And to make it suitable for inlay, fixing too-thin elements and sharp angles) - Speaking of true symmetry, I wanted to idealize the keeper, so I drew just one half and then flipped and joined it. This has the effect of subtly making you realize it’s not an actual bee. I don’t know how else to explain it, the pure symmetry just makes your brain go “huh, that’s not real”. This seemed like a good plan so that no one ever got freaked out by a giant bee outline and smashed the tray.
 The end goal is “that’s obviously a bee” and “that’s obviously not really a bee” at the same time. How did I do?
 - The hardwoods were all sanded to 600 grit and finished with 2 very thin coats of Watco wipe-on clear satin polyurethane. I literally wipe it on and then immediately wipe it off to give the absolute thinnest coats I can manage. It saturates the wood well and leaves no surface artifacts.
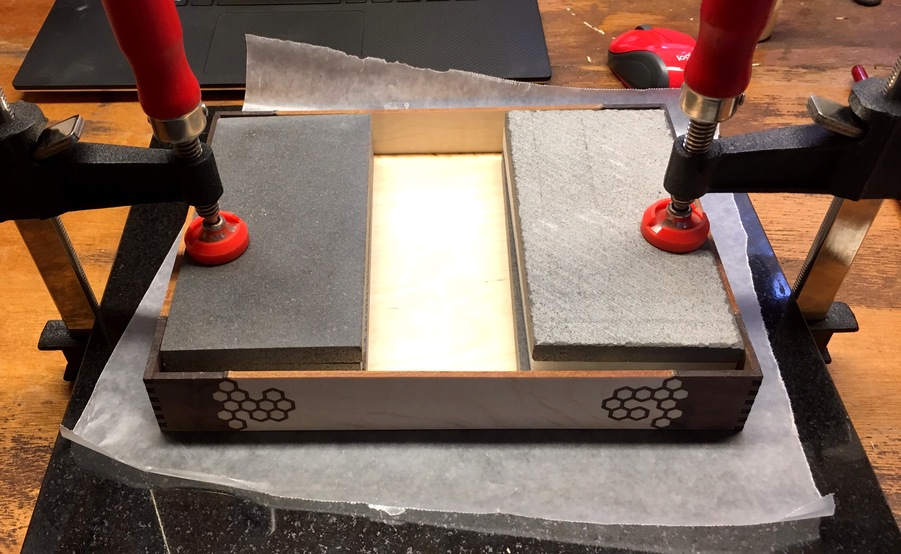
- As usual with my trays, I round my corners by hand with a sanding block, and the woods are all 1/8", with a double-stacked 1/8" baltic birch base that’s glued in.
–
The dimensions are roughly 6.5" x 8.5" x 1.5". The tray has small screw-in rubber feet to keep it off the table.
Figured maple, Figured Walnut, Padauk, Cowhide
Some detail of the side of the tray really lets you get a look at the figuring in the maple. It shimmers nicely in the light.
Figured maple, Figured Walnut, Padauk, Cowhide
The back face, with its figuring. Note that the combs are different from each side. This was a fun detail but definitely ups the labor factor, both on design and assembly phases.
Figured maple, Figured Walnut, Padauk, Cowhide
The 4th side. More figures.
Figured maple, Figured Walnut, Padauk, Cowhide
Some detail on the keeper. It never photographs well, but trust me when I say that the chatoyancy on the padauk really sells the entire piece. It shines almost like rich red copper.
Figured maple, Figured Walnut, Padauk, Rubber feet
So, that’s about it. Not much more to say about the finished piece, I’m really pleased with how it turned out.
A quick bonus pic or two about process.
I glue the base in and clamp it absolutely flat to ensure it sets flush with the base. I use a reference flat surface (a 12x12 stone tile from home depot) and clamp it down while it sets. This prevents any warp in the baltic from making the base uneven.
I also ensure that I don’t sand at weird angles and get thin spots on my sides by using sanding frames.
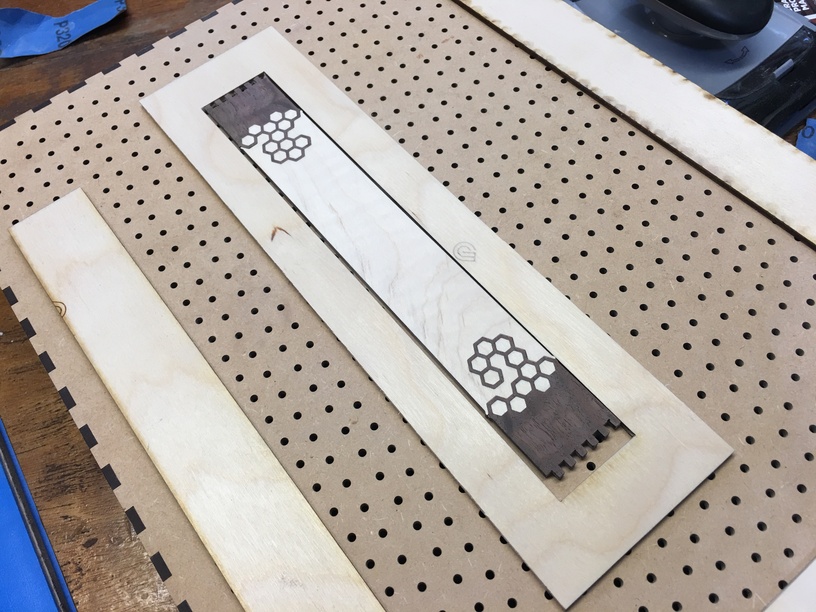
Pictured is one of the long sides inside a sanding frame. The frame is 1/8" baltic, and as I sand the surface it prevents me from getting off angle with the sander or sanding block. The baltic doesn’t stand up to much sanding, so I go through a new frame for each side. Before I started doing this, I was unable to safely use an orbital sander on the pieces for fear that I would oversand an edge and I’d get inconsistent thickness in the final result. With these frames, that worry is all but eliminated. I still keep an eye on it, but I haven’t had any trouble yet.
Eagle-eyed readers will spot very small protrusions on my sides at the junction between the maple and the walnut. These allow me to sand it flush and get a perfect interface on the clean edge. This process was outlined in a previous post about trays.
Even more eagle eyed readers may that all this sanding is happening on my sanding platform.


