How do I adjust the engrave depth? It has been engraving very deeply and I really am only looking for minimal engraving.
Thank you
1 Like
I’m gonna put in my 2 cents, but I’m sure there are others who can tell you more.
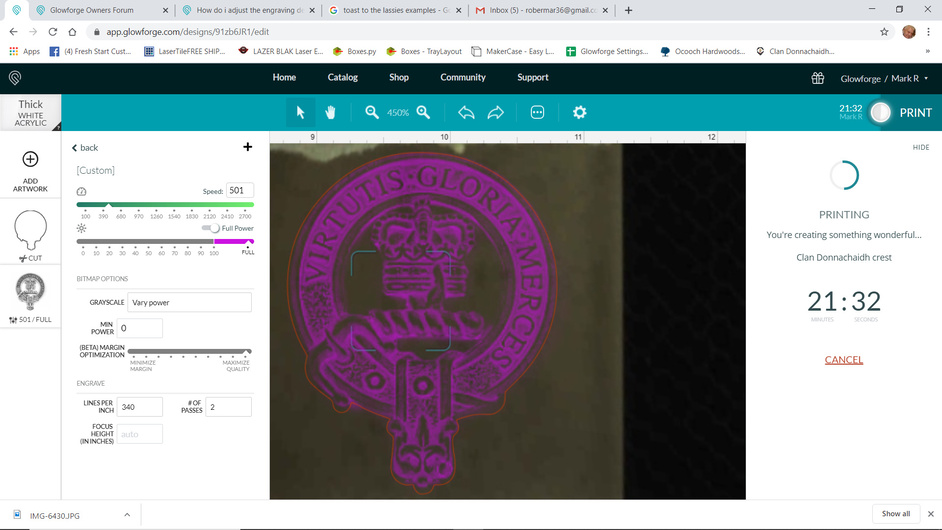
Several things you can do…increase your speed, decrease the power…and make sure the engrave is set to convert to dots instead of vary power.
3 Likes
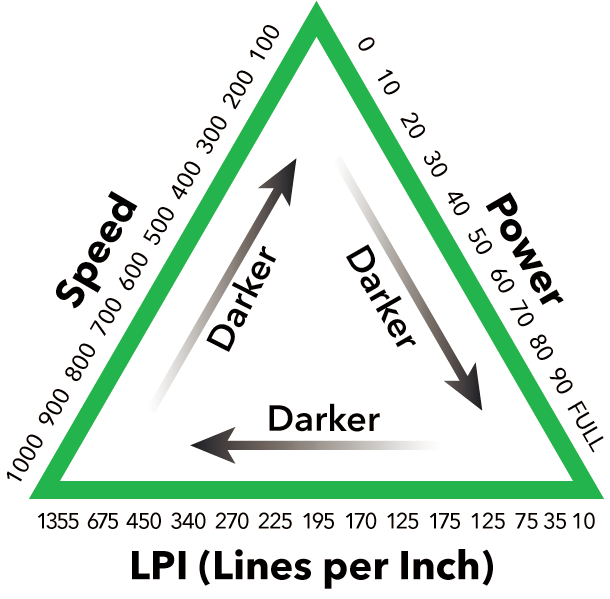
Reducing the LPI can also make the engrave less “deep”.
1 Like
What is LPI? sorry still learning and thank you again for helping me. 
I knew I was leaving something out
1 Like
Sry my bad thats the lines per inch setting. doing that might sacrifice some quality tho
I just responded on the other but what is LPI? and when you say convert to dots how? thank you for the help I am still learning
One - you need to run thru these tutorials.
Two - you need to understand how the settings for the laser work and what they allow you to do.
2 Likes
Hey quick question when you say set to convert to dots instead of vary power can I ask where or how? thank you again for all the help on my questions I appreciate it.
Same window as in the pic above, but up about 3 steps
Where it says “Grayscale”
So mine doesn’t give me this, is this only for bitmap because I have AI line art in outlines?
1 Like
Yes, I’m sorry I didn’t point that out, you will only have the vary power option on bitmaps, for a 3d engrave effect
Oh ok so when I am doing just an outline detail engrave just do the lower LPI increase speed and decrease power? Thank you again I appreciate all of you!
You won’t necessarily have to do all three…Just lowering the LPI will probably do the trick. But if not, then try one of the other two…I usually try increasing speed first, but it depends on the project.
2 Likes
Awesome thank you, I will try this :O)
1 Like
One thing that can be helpful is to create a cut and engrave test pattern that you can use any time you start working with a new material. Just a simple grid of squares where each one is a different speed/power setting. Then you will have that for reference any time you use the same material in the future.
At the very least it gives your scrap material a very noble purpose.
4 Likes
This is AWESOME!! thank you for the help you all are really great and this newbie appreciates you all!
3 Likes