How do I cut Illustrator svg?

Hello.
I have just bought a Gkowforge, but I do not know how to set up an Illustrator file for cutting. When I upload the cutline .svg, it is a different size to the print I want cut around, and it does not seem to automatically line up with the print design. Can anyone give any advice?

Hello and welcome to the community.

I don’t use Illustrator and am not really sure if I’m understanding your question, but it looks like the top two ‘wheels’ and that long rectangle shaped thing on the far left are in the out of bounds area. Notice how they are different colors?

4 Likes

I think there are three different issues here to address:

1. Files importing at the wrong size
2. Combining artwork into one file
3. Files loading in different positions

They’re related, but I want to address each of them.

First, make sure that when you save from Illustrator, you use the recommended settings. It is very important not to turn on “responsive”, as that will result in incorrectly sized artwork.

Next, you can avoid the whole issue of having to align things by creating a combined SVG file that has all of your artwork in it. You can include engraves, scores, and cuts all together, and then just import that single SVG into the Glowforge interface. If you want to separate out different steps, make them different colors (Glowforge ignores layers, but it will treat each color as a distinct operation).

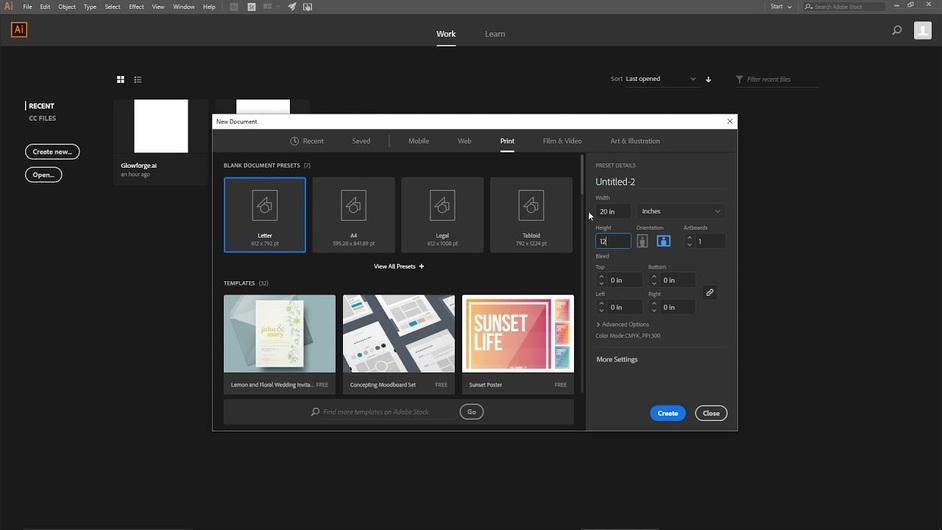
Finally, if you want to make sure that everything pops into the Glowforge interface in exactly the same place as you put it in your design, you can follow the instructions in the link above to create a 20" x 12" artboard. I created a video tutorial for setting up Illustrator a while back, though I should probably re-do it as some of these things have moved around in newer versions:
8 Likes

I think I misread part of your question. If you are expecting the Glowforge software to automatically snap your cut file to the picture you have printed out, that’s not a feature that’s currently available. You will have to line it up manually.

If you search the forum for “print and cut”, you can find previous topics where people have come up with creative ways to try to make this easier and more reliable.

https://community.glowforge.com/search?q=print%20and%20cut

5 Likes

Welcome to the forum.

I encourage you to work through the Glowforge tutorials to become familiar with the interface and function of the Glowforge. Then invest as much time as you can reading relevant threads here in the forum. You will find years of insight, experience and knowledge is available to you. Finally, I urge you to make practice cuts on cardstock and other inexpensive materials as you learn. Wasting expensive wood is disheartening.

As suggested, read about cut and print. Also, know that the lid camera is a tool for placing your design, but it is accurate to 1/4" and has a fisheye lens. Until you become very familiar with your machine, you will be frustrated trying to use it as a precise positioning tool.

I look forward to seeing your projects and I hope you will come back often to the forum.

4 Likes

If you put a 20x12" workspace into your illustrator file, the :glowforge: will automatically match that so there’s no chance of size variation.

I’ll echo @dklgood and suggest you run through https://support.glowforge.com/hc/en-us/articles/360033633354-Make-Your-First-Prints. It uses Inkscape as the example program rather than Illustrator, but the instructions are still incredibly helpful!

2 Likes

Remove any unnecessary fill colors, assign different colors to the elements you want processed differently, manually arrange all of your drawing elements so that they are as close together as possible, then export using PDF not SVG.

4 Likes

Quoted for truth. PDF eliminates some issues.

3 Likes

Thanks Chris. I will try put your suggestions.

1 Like

This topic was automatically closed 30 days after the last reply. New replies are no longer allowed.