I just need to know the steps I need to take.
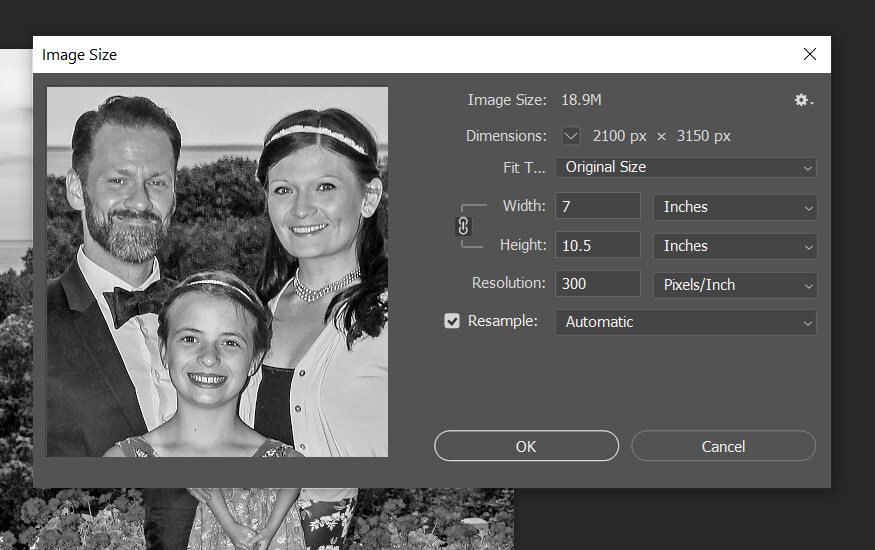
- open photoshop
- load you photo
- crop photo etc
4.go action then what do I do from there
I just need to know the steps I need to take.
It saves it as a PDF for you. Just upload it straight to the Glowforge.
thanks got it did see it before
ok I got it just had to reread everyhting. thanks JB
From: “eloise Ramos” eloise_ramos@yahoo.com
To: “Eloise Ramos” eloise_ramos@yahoo.com
Sent: Sun, Jun 7, 2020 at 7:16 PM
Subject: Noise in glowforge[https://photos.app.goo.gl/tbHKC2wxuGx6ocQZ9](https://photos.app.goo.gl/tbHKC2wxuGx6ocQZ9)
Hi there! Is there a particular setting you choose after uploading the PDF to print? I know this varys with material, but wondering if you choose “HD Photo” or “SD/HD Graphic” when printing. I searched the forum and having a hard time finding something to compare the two options.
Thanks!
This post is about preparing photos for engraving. There are lots of posts with photos of results of engraving on various materials along with settings in the Beyond the Manual category as well as others. Try searching photo engrave with your desired material and I suspect you will be rewarded with many results.
I understand that - and I use his Photoshop Actions for my photos. That’s why I’m asking, if he (@jbmanning5) has a particular setting. thanks!
My question is also in relation to HD Photo settings - as I could not find anything on the forum. I searched for “HD Photo” and only two posts came up - one of which is mine.
I go with manual settings. Since the settings vary by material, there really isn’t a point in selecting a PG setting and then changing it. It’s just an extra step in doing manual settings.
Graphic is for graphic art type stuff. Logos, etc.
I usually start at 1000 speed, 50 power, 225 or 270 lines per inch, convert to dots with a new material and then adjust power from there.
I’ll usually drop the max density down to 85. If there are some highlights I want to go a little harder on, I will increase the minimum density to around 8.
OH!!! I love this! Learning to do pictures like this is one reason I bought the glowforge. I wanted to add personlized gift like this to my etsy shop! I might have to ask you a few questions soon.
Tara
JB, before I purchase your Actions for Photoshop, please let me know if they will work with Photoshop 2021… I just want to make sure before purchasing!
Thanks so much for making your expertise available for us! You are immensely appreciated!
Rae
Absolutely!
This is crazy good information! I’ve been really struggling with engraving trying to figure out if it’s my photo, my settings, my wood or what. This really helped narrow in on the photo side of things. Thank you for the info and well written instructions. I will be buying your action file as well.
OMG!! Thank you so much. I have PhotoShop and have never used. I downloaded your Action Script and it literally WAS as easy as hitting PLAY - BOOM, Easy Peasy! AMAZING and saved me so much TIME and CONFUSION… Thank You - Thank You … and THANK YOU!
Hi there. This process, as a new Glowforger, helped tremendously. Thank you. It is also my first attempt at using Photoshop, so forgive my ignorance. I used a phot of our own for this project, when saved as a PDF, it was twice the size allowed for GF and it could not be loaded into GF. How do I handle that? I see when I save it as a JPG/PNG it drops the size significantly but I cant help but wonder if it negates the work done following the above process.
Thank you for any help on this!
-Blair
I use PDF because it respects the size of higher resolution/PPI images. For example, if you import a jpeg that you’ve saved at 300 PPI, the browser will display it at the native resolution of 96 pixels per inch, so it will be 3x too large. How big of an engrave is this and what resolution did you save at?
That shouldn’t exceed the 25mb limit.
I am 75MB, So I am not sure what I a doing to add so much size to this file. I literally downloaded Photoshop two days ago…Im certain I am missing something.
Thanks
for sharing all of this. I tried this out for a customer the other day and it turned out better than anything I’ve done in the past!