I originally posted this over on my website at Glowforge Projects: How to Prepare a Photo Engrave Using Photoshop and Engraving on the Glowforge Laser Cutter but thought it might make an OK addition here. I think all of the photos are carrying over - fingers crossed…
If you’re here, you are probably wondering how to get the best photo engrave out of your Glowforge 3D Laser Printer / Cutter. And you’re in the right place, because, besides cutting jigsaw puzzles, engraving photos keeps my machine busy. (A glimpse into the crystal ball, my next project will be bringing to market 3D engraved and hand painted puzzles.)
Laser engraving pictures is not without challenges! Much like the Instant Pot recipe you may be looking up next because you need an easy meal for the family since you’re so busy lasering, laser engraving photos is a lot like a recipe and making a dish: the way you edit your photo and the engraving material you choose (the ingredients) must come together with the right engraving settings such as power, speed and resolution (the cook time and temperature).
You and I are going to go on a walkthrough of the process involved in editing a photo for engraving on your laser. I use Photoshop but much of the process can be adapted to other programs like Affinity Photo (which has many of the same tools as Photoshop), and Gimp.
When I first started editing photos for laser engraving, I found that I was having to do the same thing over and over. When I wanted to make a change, I’d have to start over because the edits had already been committed to the source image. Annoying! It felt like a personal version of that movie, Groundhog Day.
To remedy this, I put together a series of Photoshop actions that automated the process of putting all of my tools into one place, made some pretty good guesses at the edits needed, and allowed all of the customization I wanted and needed.
Those actions kind of took on a life of their own as I had more ideas: creating cut lines automatically, exporting into a custom PDF so that the Glowforge app didn’t resize high-resolution pictures, test burns, and more. If you find this editing process of value but get tired of running through the motions, consider checking out the Photoshop actions. They make my editing time much more efficient.
Here is a picture of Rio for you to download, so you participate in the play by play:
Download Rio_Dog-Days-of-Summer.jpg (Right-click and Save)
Step 1:
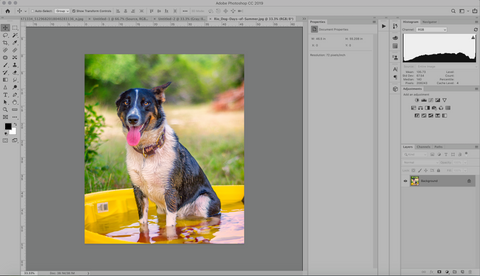
Load your hi-resolution image into Photoshop and double-click the background layer to make it an editable layer. Then, we will right-click on this layer and make it a “Smart Object.”
Step 2:
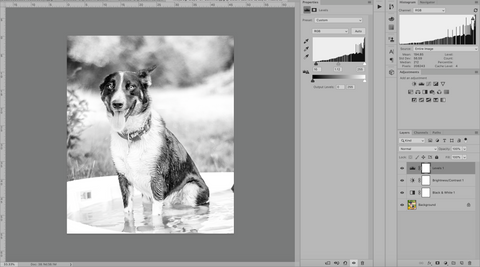
Create a new Black and White adjustment layer. I’ve already created the adjustment layer here, and it can be seen in the background behind the adjustment layer menu.
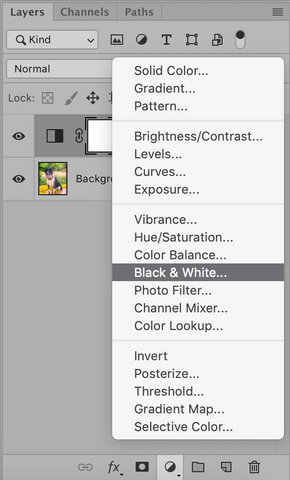
Creating an adjustment layer allows you to non-destructively edit, or make changes to your image, so that you can adjust as needed.
The Black and White mixer is a very powerful tool! It will allow us to modify how the color values are translated into black and white. To modify how these colors are mixed, double click the layer thumbnail, which is the small square that is black and transparent.
Double-clicking the layer thumbnail will open the properties dialog, which is where we can adjust how the colors are mixed.
The values that we will change will depend on the colors in the image and what we want either light or dark.
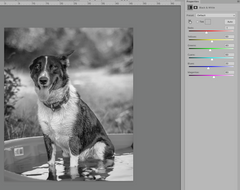
Here’s an example of how Rio changes when I modify how the color Red is mixed.
The image on the left shows the red slider at 0, and the image on the right shows the red slider at 88. Increasing the slider value lightens the colors that have red in them. Decreasing the slider value darkens the colors that have red in them.

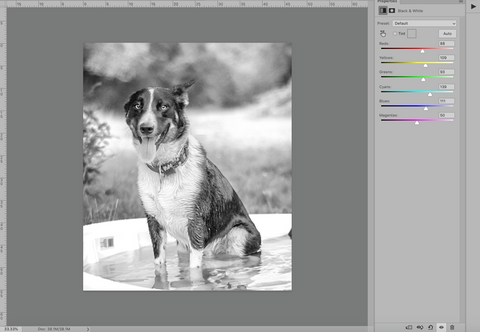
Going through each color available in the mix, you can modify the image to your liking. This example of Rio has a little bit of all colors (which is why I picked it - besides him being a pretty good lookin’ pup). By increasing the green slider, I can push the green foliage up so that it engraves lighter. Also, a small amount of blues and cyans were picked up in his fur. By increasing these values, I get more detail out of his dark fur.
My final Black and White settings for Rio look like this:
Step 3:
Create a Brightness / Contrast Adjustment Layer

I tend to keep these settings in the mid 20’s. They don’t drastically change an image but create subtle changes that help to lighten the overall image and increase contrast.

Step 4:
Make a Levels adjustment layer

Levels are a tool that can stretch and move the levels of brightness in an image based on the shadows, midtones, and highlights. It’s a little more complex than that, but, we’re not trying to write a book about Photoshop here - just how to laser engrave your image!
The levels adjustment tool will have 3 sliders. The slider on the left controls the brightness levels for the darker areas of the image, the middle slider controls the midtones, and the right slider controls the brightness in the highlights of the image. These will default to values of 0 (dark areas), 1.0 (midtones), and 255 (highlights).
For this image of Rio, I slid the left/dark slider to the right just a bit, I slid the midtones to the left just a bit, and I left the right slider/highlights alone. This helped to “push” the shadows up creating detail, created contrast in the mid-tones, and left the highlights alone.
Step 5:
Create a shadows and highlights smart layer. We will click on our source image layer to select it, go to Image > Adjustments > Shadow / Highlights.
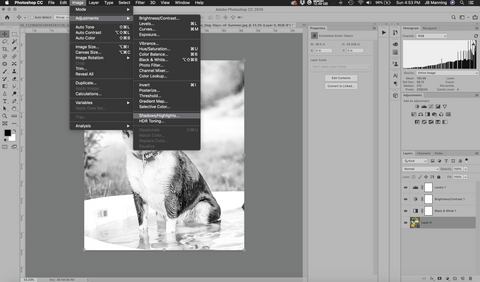
This is another very powerful tool that can extract a lot of detail out of both the shadows and highlight region of your photos, which ultimately creates contrast, which tends to make your engrave more realistic and interesting.
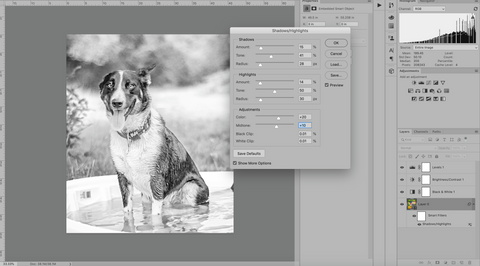
To edit the highlights and shadows for Rio, I did the following:
Shadows:
Amount: 15% (the total correct desired, or how much I’m going to push the shadows up)
Tone: 24% (how broad of a range in the shadows I want selected - a larger percentage increases the amount of dark areas affected)
Radius: 28 pixels (determines how large of a radius in pixels is affected by the adjustment)
Highlights:
Amount: 14%
Tone: 50%
Radius: 30 pixels
These settings allowed me to pull the highlights down, creating a lot of texture and detail in the white areas of his coat. It also pushed the dark areas of his fur up, creating more texture that we will see in the engrave.
Step 6:
Resize your image to the desired engrave size. Here, I generally copy all of the edits into a brand new file which leaves my original source image completely editable. This is part of what my actions do. 
To resize, click Image > Image Resize
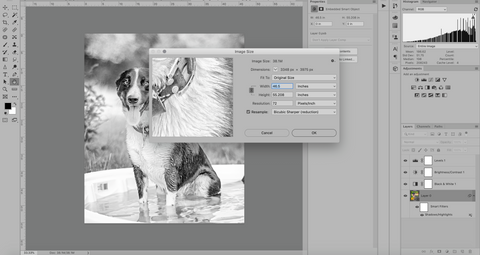
Without getting into all of the fancy details about resolution, image size, Photoshop and 72 PPI - you can see this is a big, high resolution image. We want to scale it down and increase the pixels per inch to get to a final engraveable image.
I make sure that my “resample box” is checked, as well as the “anchor link” between the width and height (this keeps the image from getting all stretched out funny). I know that I’ll want to engrave this image at 7" wide so I change the width to 7". The resolution is a debatable topic. Some insist that it must match the resolution/lines per inch you will be engraving at. Generally, this will be at 270 or higher. One thing is for certain - you do not want it to be less than the resolution than you are engraving it at!
Step 8:
Sharpen! Photographers that are engraving photos will hate this step. I did.
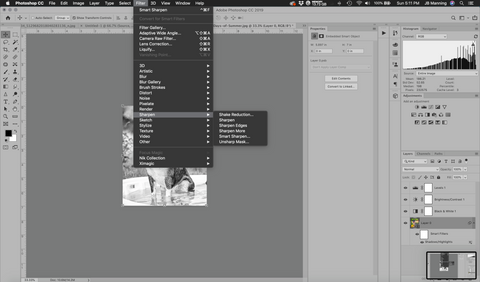
To create our sharpening effect, we will again click our source image layer, go to the menu and perform Filter > Sharpen > Smart Sharpen
Why do photographers hate this? All images are sharpened for printing, so we have a pretty good idea of what the sharpened photo should look like. Laser engraving requires sharpening the image beyond what you would sharpen it for Inkjet printing but less than the point where you say what the hell just happened?
A lot of recommendations say to just max out the sharpness. I don’t like this. Doing this creates halos around the subjects in your engraving and doesn’t look good. I tend to like values around what are depicted in the below screen shot, which are - in the 200%'ish range for amount of sharpening, around 2.5 to 3.5 in pixels affected, and I like to reduce the noise about 15-25% which smooths things out just a touch.
Step 9:
Save and Print.
Another thing that I figured out with my actions was how to save the image as a PDF that respected the Pixels Per Inch (PPI / Resolution) value that I set earlier. it involved a lot of custom settings… For now though, we can just Save As a Glowforge acceptable format (PDF, JPG, PNG).
When imported, it will come in too big and will need to be scaled back down. This is normal and a function of the web interface.
Our other (preferred) option is to import the image into a program like Inkscape or Illustrator and embed the image into a SVG or PDF file, where it will save and respect the resolution.
Conclusion
For comparison, here is what we started with and what we ended with:
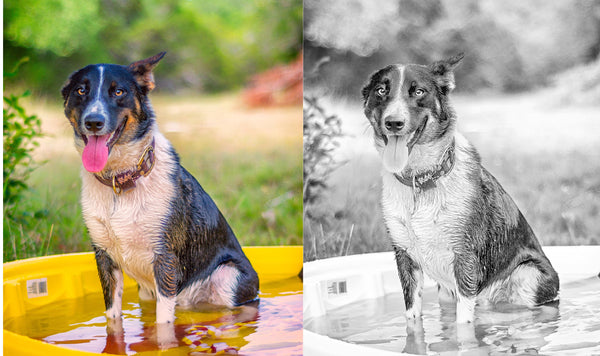
If this seems like a fair amount of work, well - it is. But, it’s also the best way to get edits specific to your image and not just good guesses. Every image doesn’t need this level of attention, but a lot do.
If you’re interested, check out my Photoshop Actions - which do all of these steps with pretty much the click of a button - and a lot more.
 (And incredible definition on the wet puppy fur!)


