I am trying to edit the acrylic embroidery floss organizer found on the Glowforge dashboard design. I want to specifically chnage the numbers from 1-20 to 21-40. Any idea how to do this? I’m super new to Glowforge. Thank you!
What you will need to do is 1. select the design 2. ungroup 3. change each number
I am assuming that you have the Premium subscription so you can simply change the numbers with the text tool. If you don’t have Premium, you will need to make a file with the numbers you desire and add it to the file in the interface or copy and paste numbers.
5 Likes
Hi!
Thanks for the suggestion as I do have the premium subscription. I did try this right away as it looked like it would ungroup the numbers for editing but I could not change them. I am going to have to try another approach.
beatheshopper
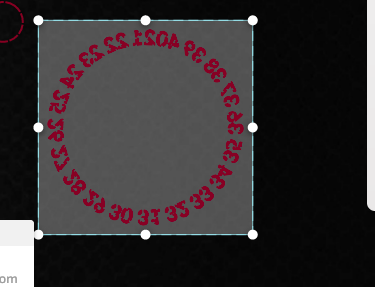
I just opened this design and the numbers can be individually changed or deleted. You can open a text box and type the number 21-40 and have them displayed in a circle. Flip the result so the numbers are properly oriented and then rotate and resize as needed to fit the floss circles. The picture below is the result.
2 Likes
Thank you for following up on this. I appreciate your additional information about this. I am going to jump on this project early this afternoon.
Did you copy and edit this outside of the premium subscription?
No, I opened a text box in the interface and typed the numbers in one line. I selected a circle for the text arrangement also in the premium text box. I flipped the text for reverse engraving as in the original design.
This topic was automatically closed 30 days after the last reply. New replies are no longer allowed.