Yeah, I was wondering how the ravioli gets the ruffled edges!
You have to pardon me, I don’t have my “Will it laser?” colored glasses yet. ![]()
![]() (facepalm)
(facepalm)
Everybody’s a critic. ![]()
14 Likes
Yeah! Now that’s more realistic  Fusion360, right?!
1 Like
That got a “snortle” out of me ![]()
3 Likes
Yes! Have to say, I didn’t know it would be possible to assign a different material to just a face of an object that already had a material applied to it, but there it is!
1 Like
Yeah, a bit more tedious But the realism is worth it!
1 Like
Wow!
This has been sitting in my todo folder forever…
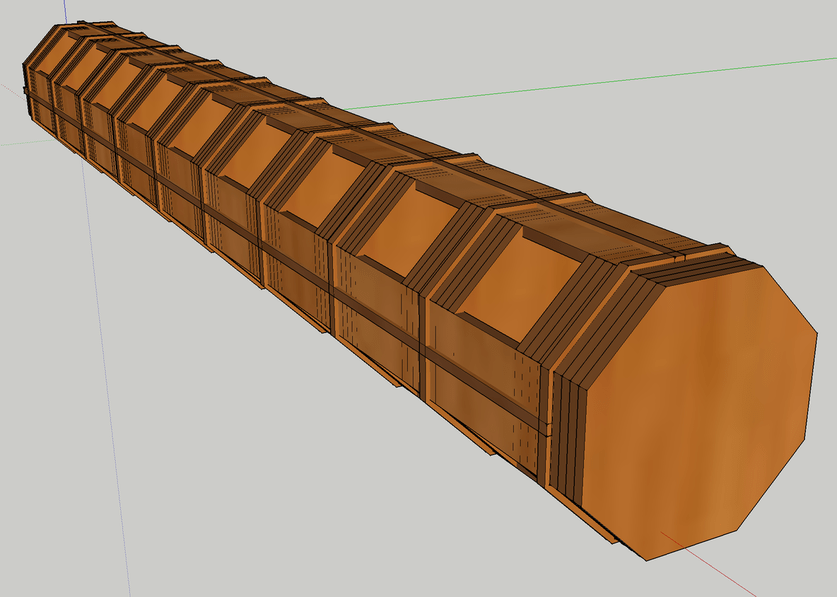
Just a rough sketch, would break all the corners etc when I brought it into illustrator.
17 Likes
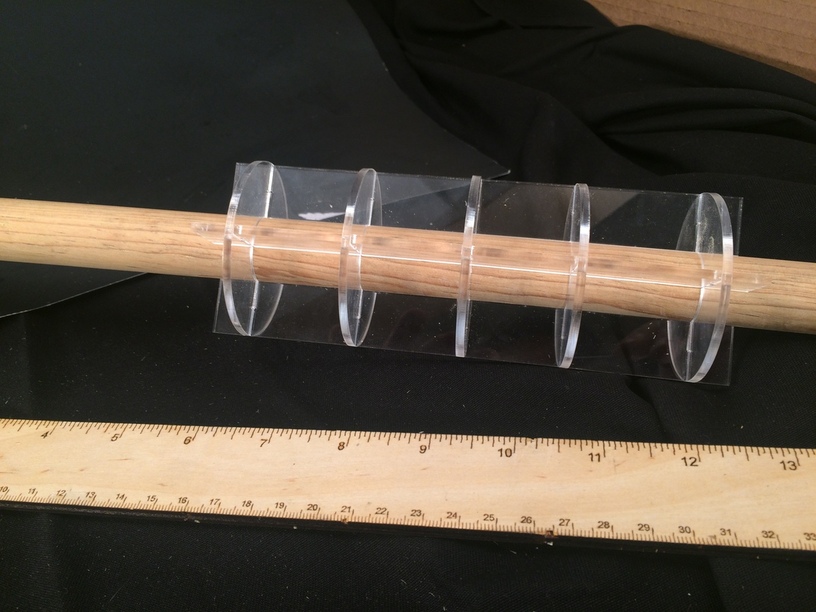
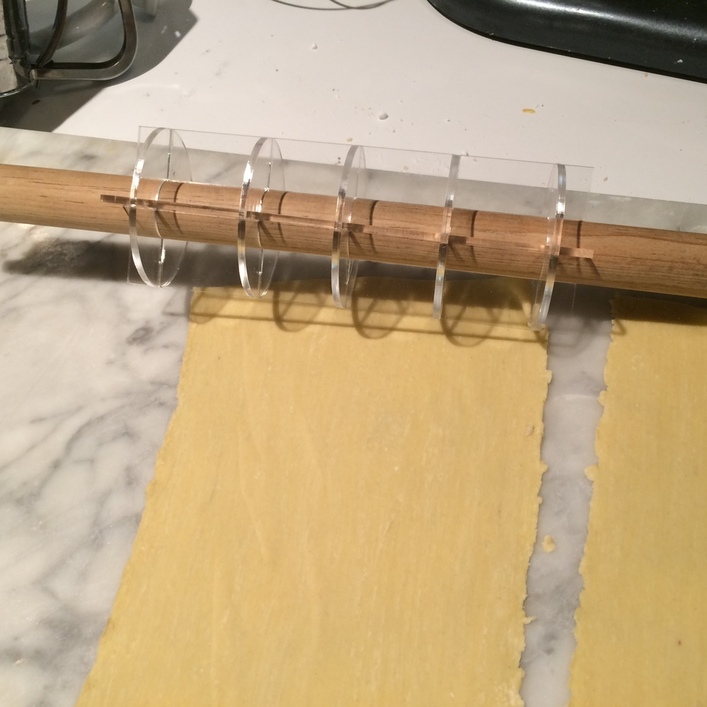
The ravioli rolling pins look good and helpful and I like the demo video at the top showing how one would work. Using Proofgrade 1/8" acrylic might do a good job for the slicers. Easy enough to put together over a broomstick. or thick dowel.
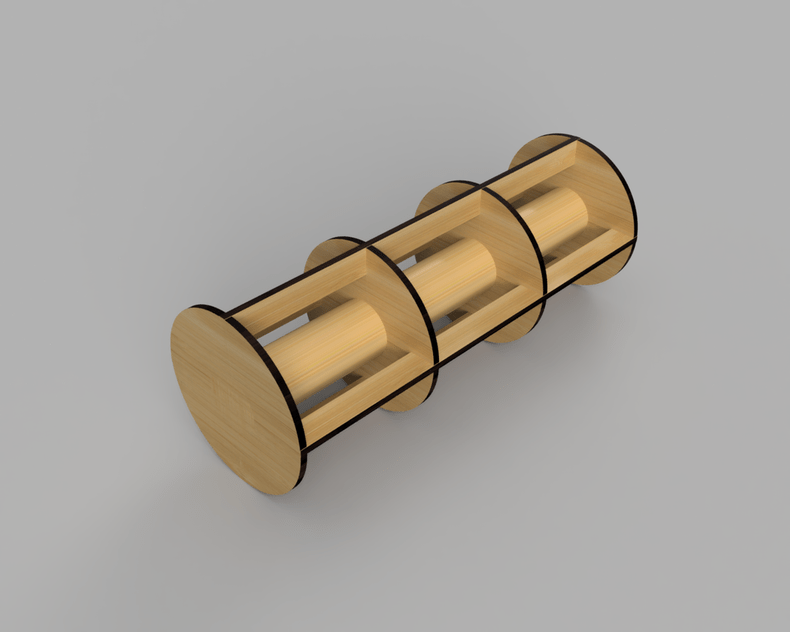
@mpipes looks promising but if you go ahead and make the lengthwise cutters as deep as the thickness of the round cutters and put them on the inside, when you slip it over the center dowel, everything will hold together without glue because the dowel will be pushing the long cutters.
Here is my rendition in 1/8" Proofgrade acrylic. It is very sturdy. I might get around to trying it out later on this evening but ravioli wasn’t on the menu. I stuck the cutters on a .93" broom stick. It is very tight in tolerances so I sanded down the broomstick (literally a broken broom handle that I used for poking a fire) just slightly to have it slide in.
The cutter is set for six inches which is the width of a sheet that comes out of my Kitchen Aide pasta rollers.
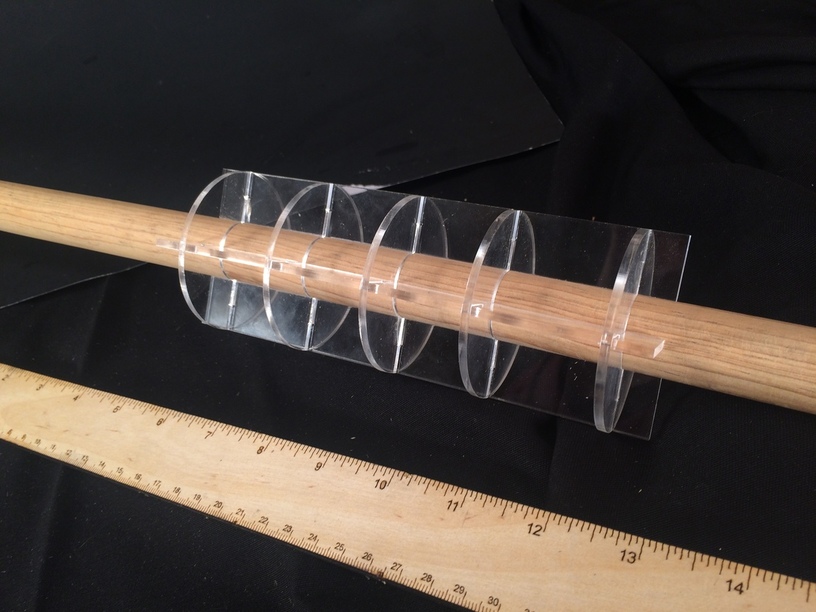
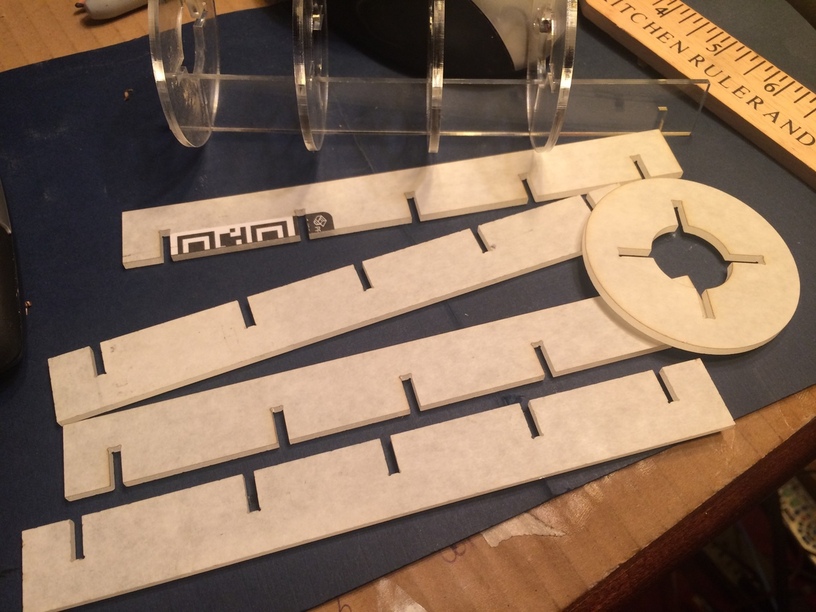
It’s is just two parts to cut out on the Glowforge plus a broom handle. Copy and paste the multiples to get five rounds and four horizontal cutters.
I put dog bones in the corners to relieve stresses.
And you have to be very careful and deliberate when assembling. Don’t force them. Put one horizontal blade into the five rings. Then do the next around the circle. Only slide in a little at a time. Make sure all the horizontals are going the same direction. I tried to make it symmetric but sometimes Inkscape isn’t as prece is placement as I think it is. I had to cut one extra blade because I forced it. Once it gets around the broom handle the compression works great and it is sturdy enough for the pasta.

All done in Inkscape. Took about 45 minutes from start of design to finished assembly.
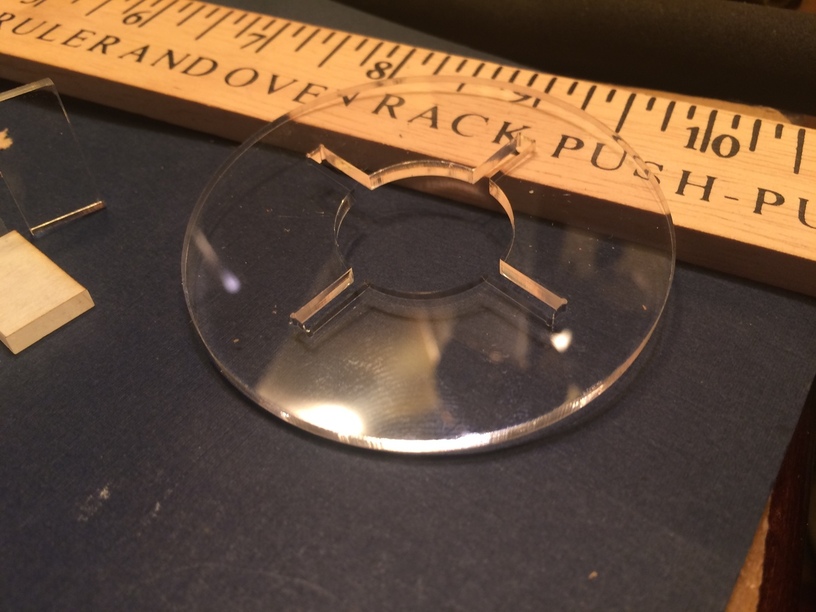
As a bonus: A pasta stamp/cutter.
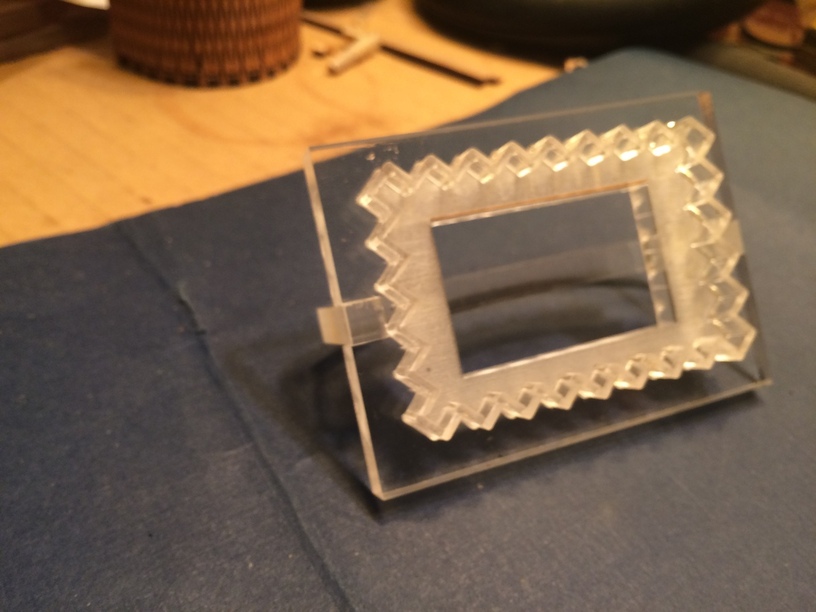

This is designed for my chemcast acrylic which is slightly thinner that the Proofgrade.
40 Likes
way cool!
3 Likes
@marmak3261 FTW
4 Likes
Ohmygosh, you are SO on top of every trend! I love the pasta roller as well as the bonus cookie/pasta cutter.
4 Likes
This guy has got it down.

11 Likes
He skipped the part where he laser engraved his logo on the end. 
@marmak, brilliant self-locking design. Can’t wait to see what you cook.
5 Likes
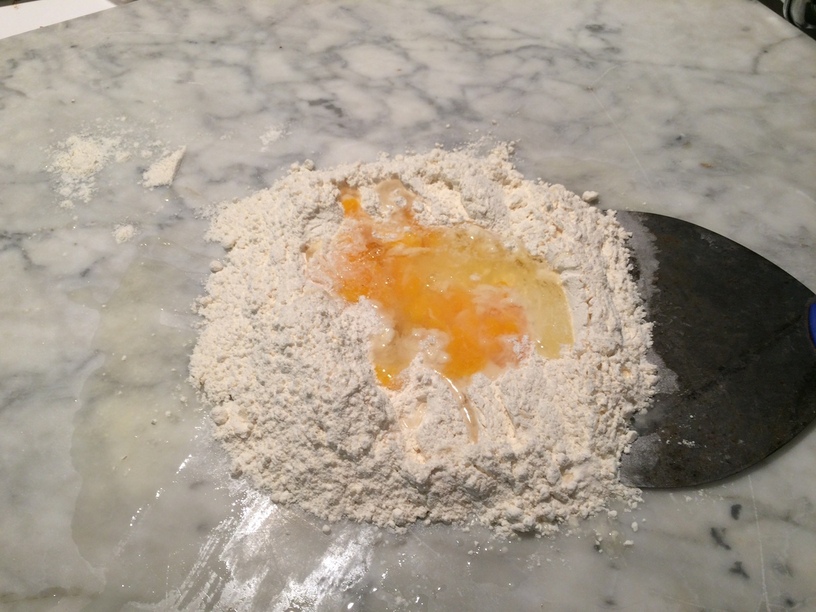
1 and 1/2 cup of flour, two eggs, good pinch of salt, half and eggshell of water. Mix together. It will seem dry to you. Don’t worry, keep mixing and kneeding. For a bench scraper I use a five inch wide putty knife. It mix it well with that and then use my hands for the final kneeding. takes about five minutes.

First pass through the roller at 1. Keep folding it over and passing it through to continue kneading the dough until it is smooth and is a full sheet.
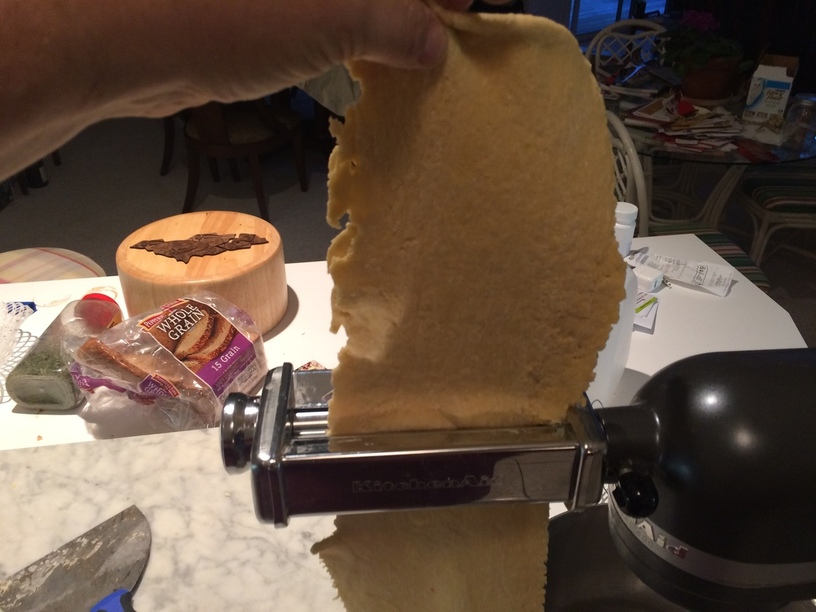
Go through the numbers thinning out the sheet up to four. Didn’t go get my calipers to measure thickness. Shouldn’t be too thick otherwise the ravioli get too doughy.
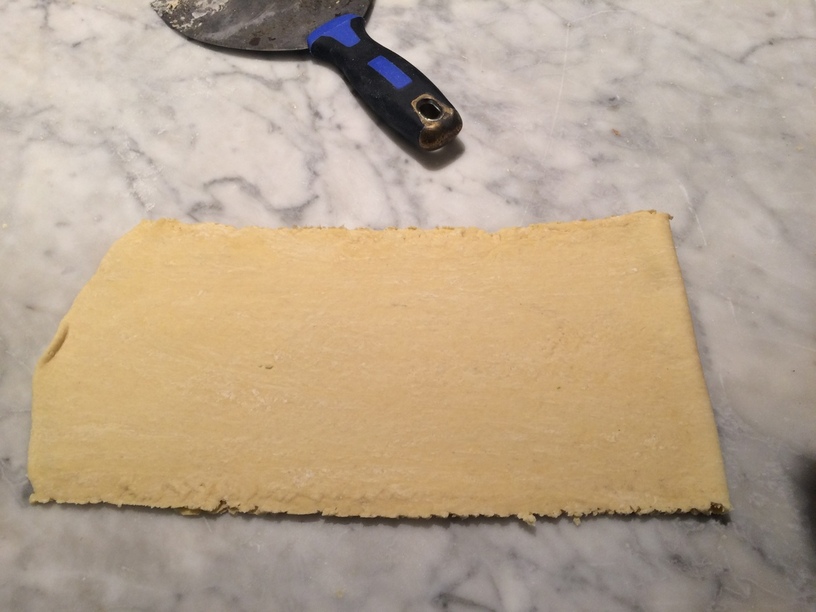
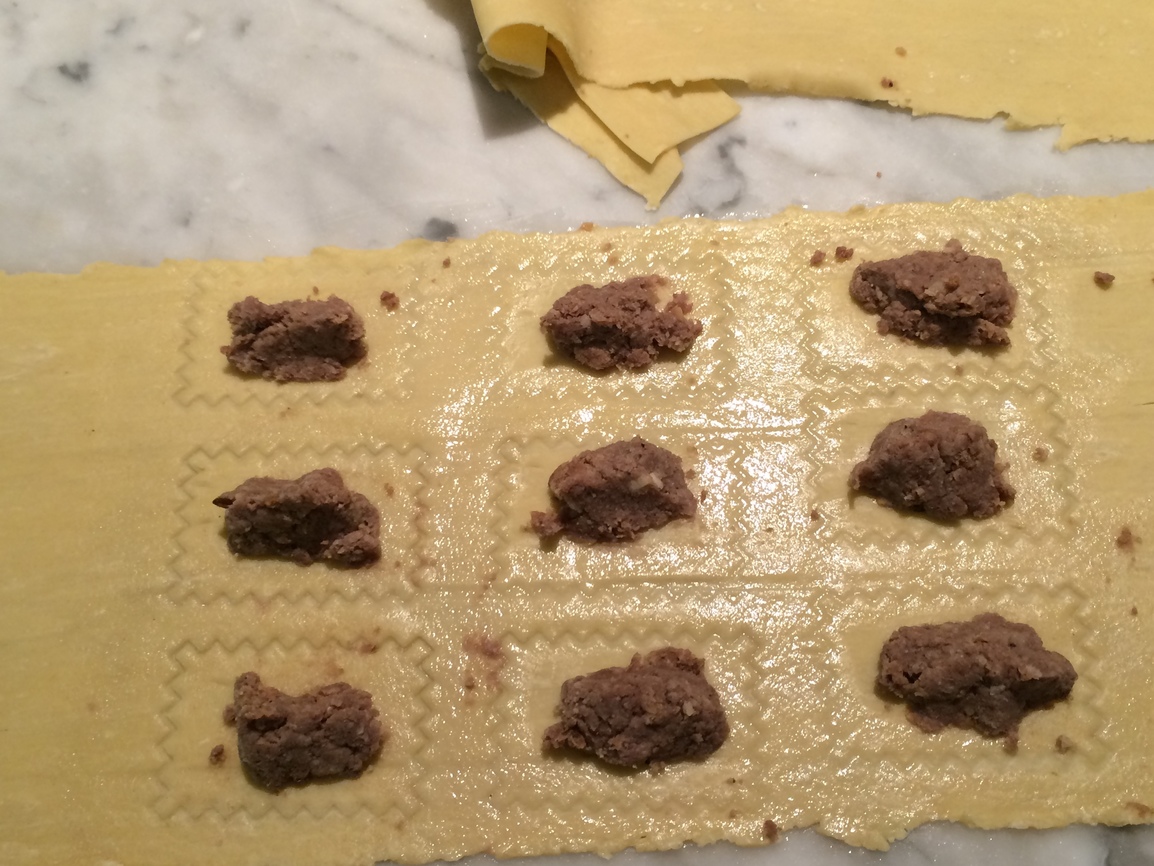
I wasn’t careful enough to get the dough the full width so I settled on three ravioli per pass.
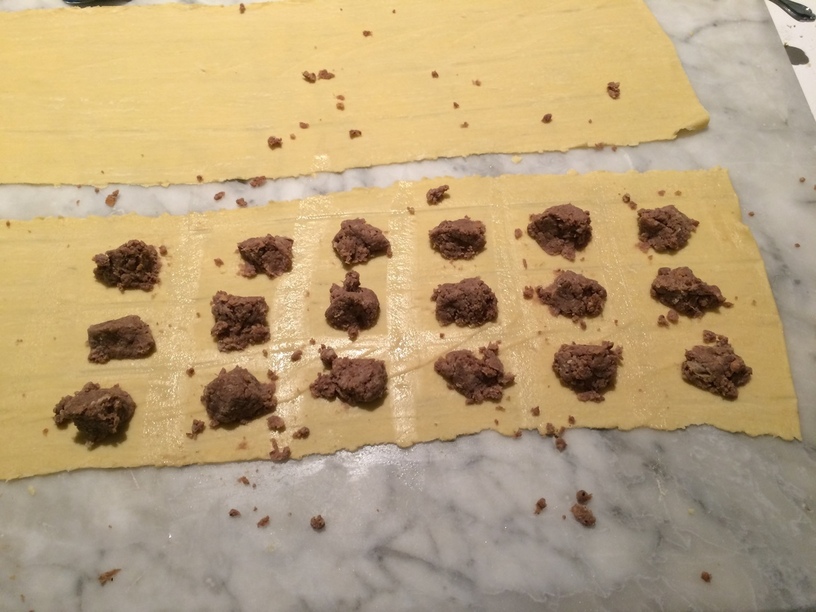
I had some canneloni filling in the freezer I thawed out to stuff the ravioli. The filling needs to be fairly dry. Drain the ricotta and add breadcrumbs and parmesan. If it’s too wet it will mess up the dough. I usually use leftover roast lamb for my canneloni filling. This was from Christmas.
Lighty brush water or egg yolk onto the pasta edges to help seal.
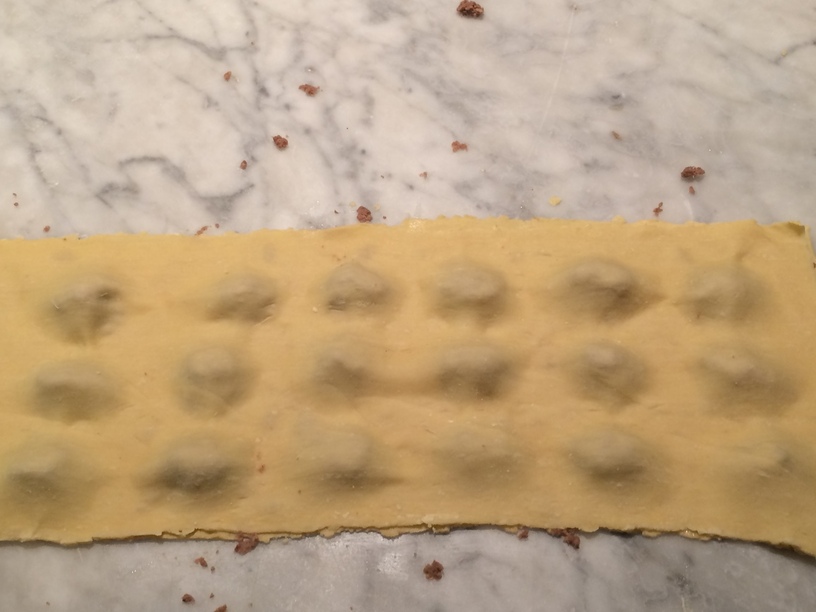
Lay out the top sheet on sheet and starting from the center press all around the filling. You don’t want big air pockets.
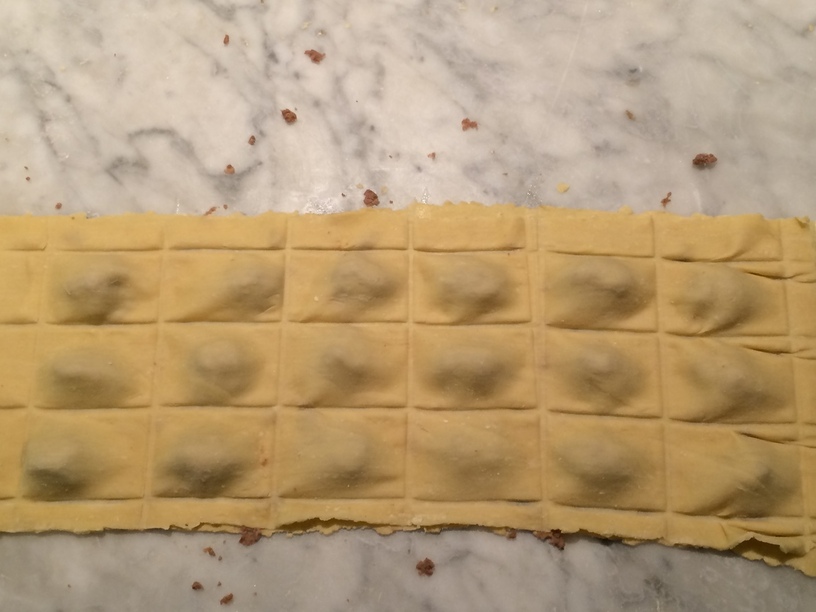
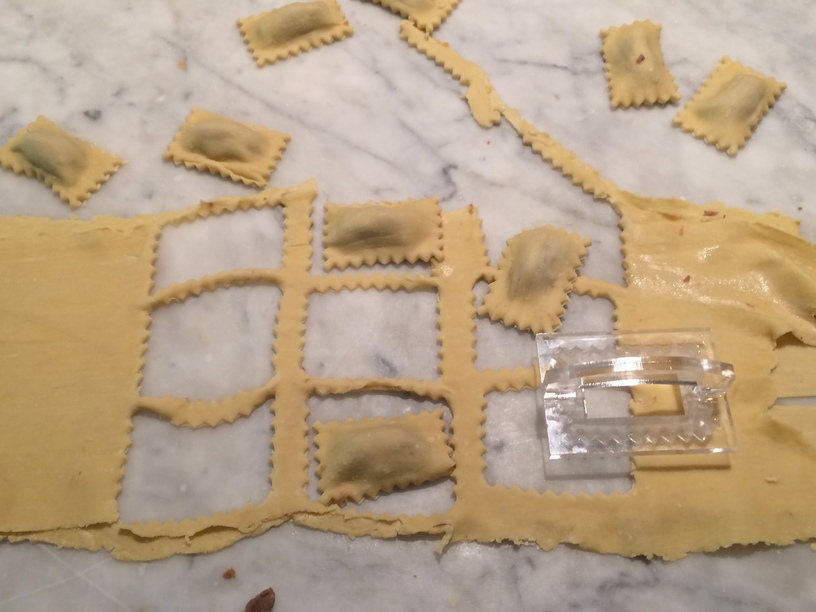
I’m not a big fan of ravioli rollers. Since I don’t make huge amounts, it’s works well to do them with an individual cutter. If you make them large, everyone gets four or five ravioli for the pasta course. But the acrylic roller did fine for sealing the edges. I went ahead and use a pizza cutter to finish the cut.
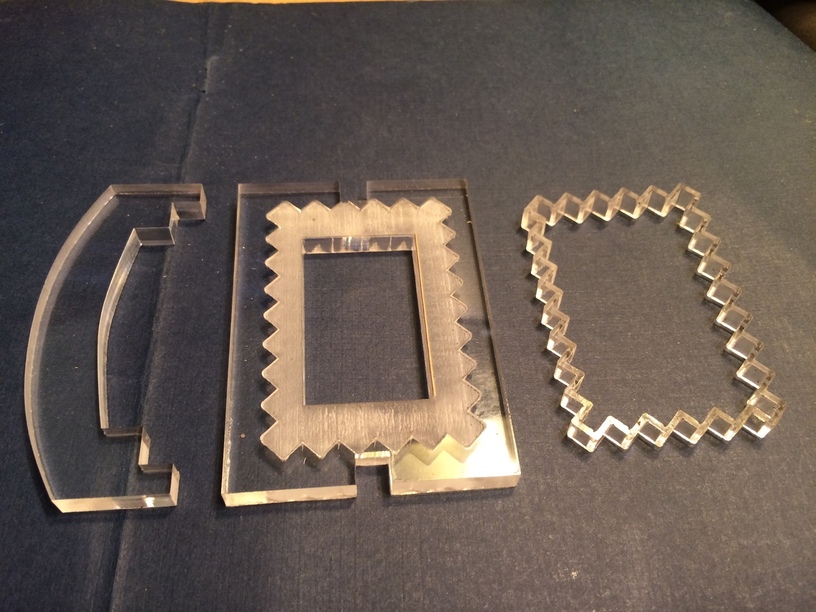
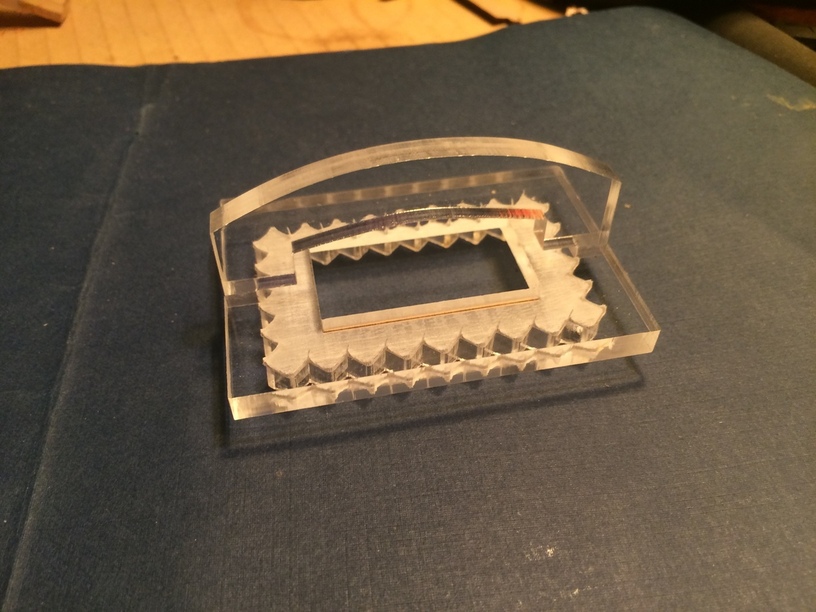
The stamp cutter gives you the nice crinkled edges. Something that you won’t be able to get using a cutter made like I made the roller. It also allows you to get a little more even around the filling. At least that’s what I prefer.
Lightly mark the dough and place filling in the center. Overlay the top, pressing in from the center to get the air out. Then cut out each shape with the stamp.
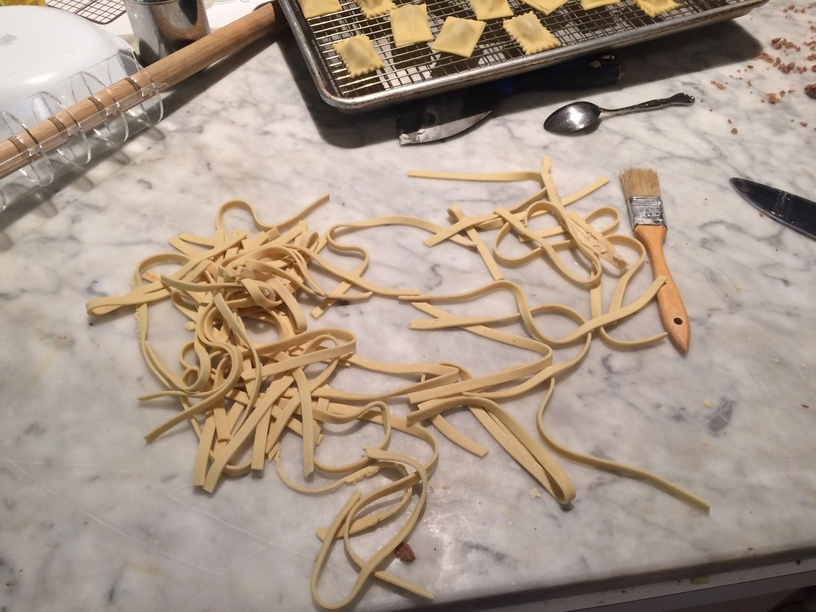
Remainder dough cut for thick noodles for chicken noodle soup or beef and noodles.
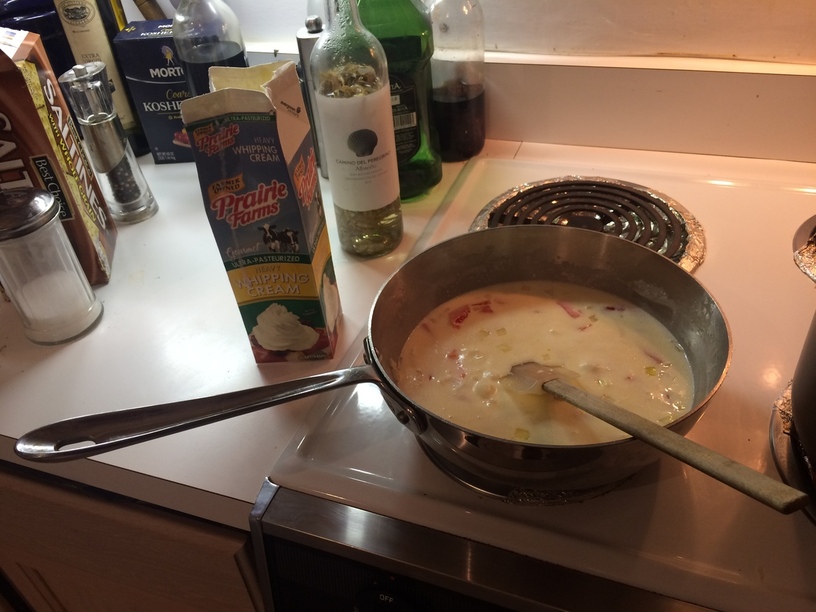
Cream sauce: heavy cream, butter, onion and red peppers. Reduce till the bubbles leave a hole.
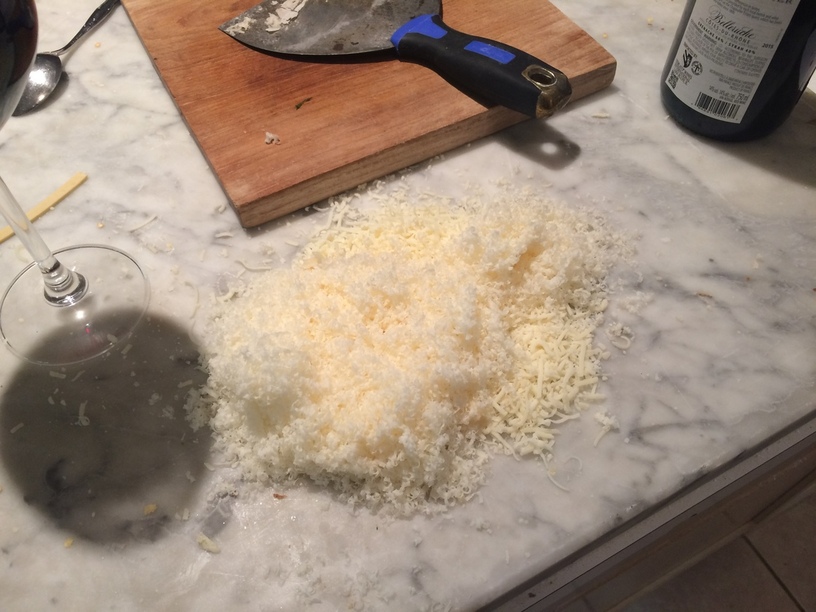
Fresh grated asiago and parmesan.
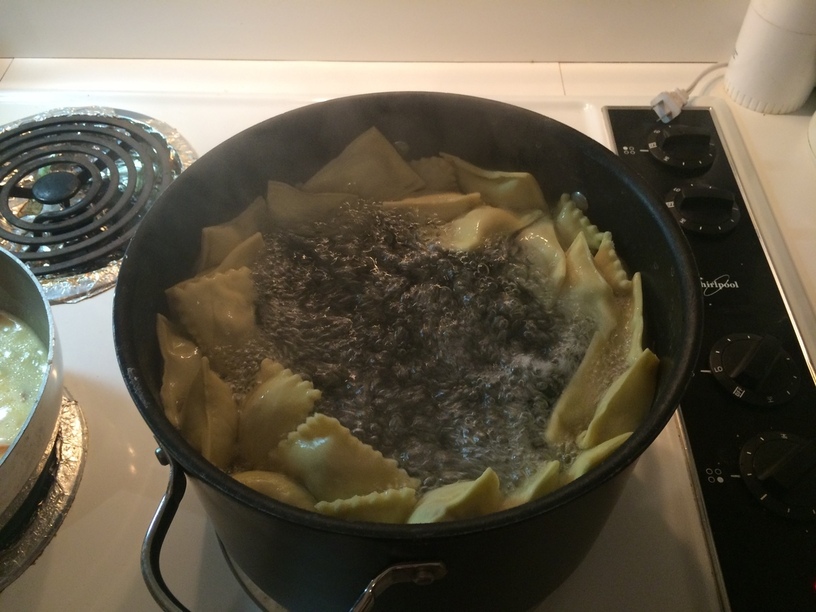
In the hot tub.
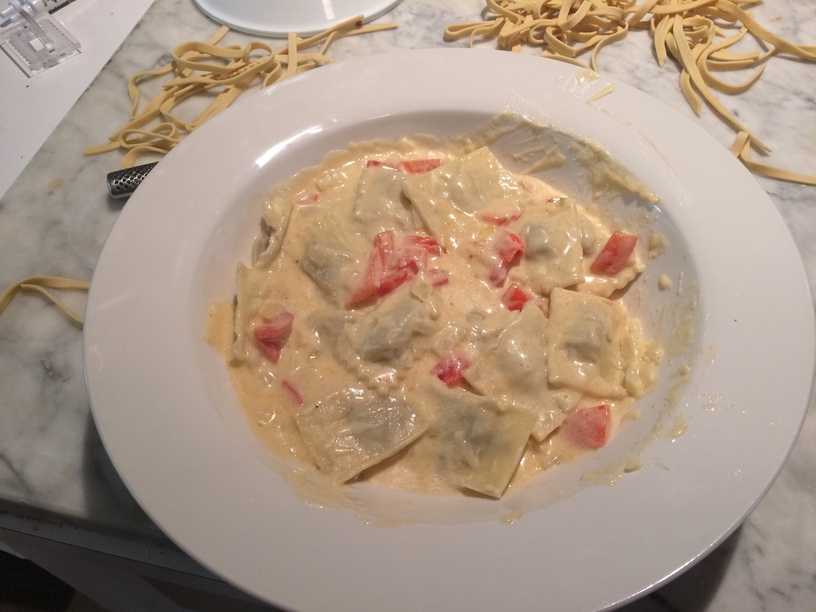
Dinner is served.
38 Likes
Now you’re just showin’ off! ROFL! (Looks wonderful!)
6 Likes
I already ate dinner but now I want a second dinner.
4 Likes
My brain read this as cannoli, and you threw me off with the roast lamb. I was like “Roast lamb is not dessert!!” LOL
Of all the things I miss about living in Missouri (and specifically, the St Louis area) is the Toasted Ravioli. Never understood “toasted” when they’re clearly deep fried, hahahaha.
6 Likes
Good heavens, that’s marvelous! I love making pasta, so this will go in my personal project hopper.
6 Likes
Me too!!
3 Likes
So nice to see the 'forged things in action, and they work great!
1 Like