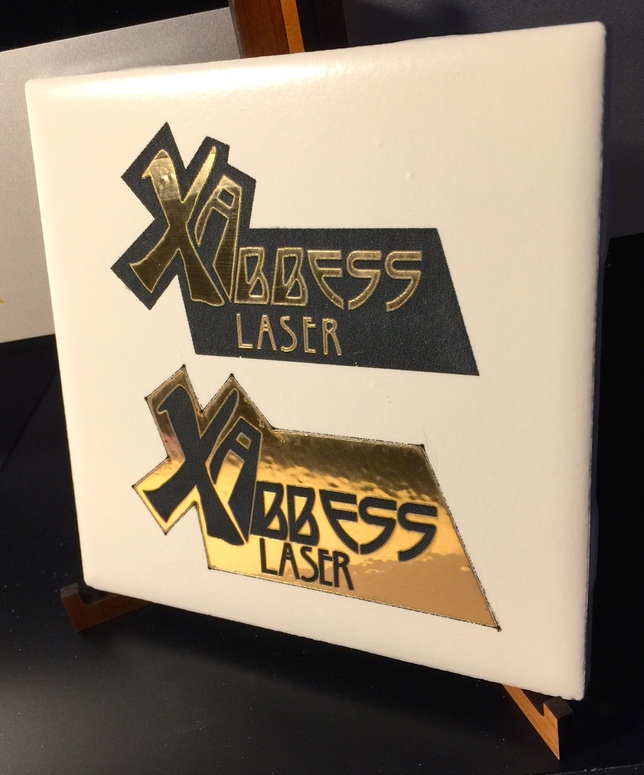
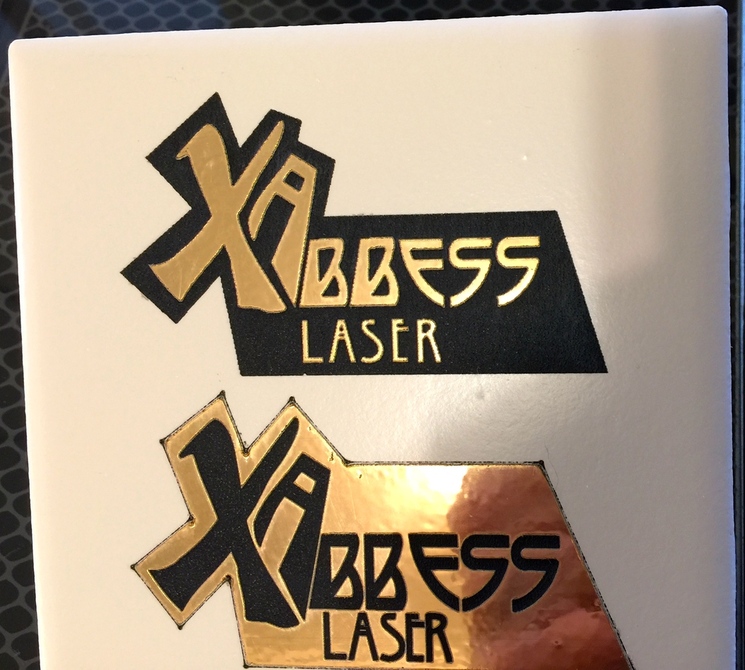
Just finished my test. I sacrificed a 4.25" x 4.25" Laser Tile to the gods of light to try with Laser Foil…and it works beautifully. I know the foil works with wood and with acrylic, so tile was my next thing. A tiny little wrinkle in the foil on the top one on the X…but hey, it was a test. I love it. I prefer the top one the most.
The black part of the tile is a bit more ‘matte’ finish than usual after being engraved, but it’s a nice touch. It was not masked and there wouldn’t be any wood smoke/resin on it anyway, so it’s clean. (a side tip here…Zeiss wipes clean the smoke residue off foil on wood very nicely).
I am curious though…if anyone has insight as to why the ‘corners’ of the score lines have those small divots…is it because of speed or power…or unavoidable?
Not easy to photograph, but these are the best ones.
Yes. It was pretty tough pulling the rest off…it’s really stuck on there. And I read that the longer it remains in contact with the surface, the stronger the bond.
And I have used printer foil extensively…and successfully on wood, as well.
(And the divots on the corners are caused by overburn at that spot when the laser pauses for a fraction of a second to change direction. There are ways to avoid it, it takes a bit of work in AI, but they might not be something you can do in AD, so I hate to mention it.)
I see them at stop and start points as well. It would seem a good idea when such points are coming up the laser could go from 100% to 50% or some known number but perhaps that is in a hopper somewhere that could be fixed and most folk would not notice.
Is there something written up about getting rid of the overburn in corners in in AI.
I am assuming something like on the other lasers that i looked at that shut off the power automatically in corners and line crossings.
No worries! I really sort of hate to care. Since you explained it though, I remember reading about that elsewhere on here, but it wasn’t (yet) first-hand experience for me.
@Xabbess Perhaps I’m being dim, but can’t work out what you’ve done to achieve such a dramatic effect.
Probably because I’m not familiar with the materials you’ve used.
Not that I know of, but if anyone is interested in persuing it, the secret lies with removing sharp point corners in the design before processing it. (Which consists of placing an additional node on either side of the corner node, deleting the corner node, and allowing the point to round out naturally. Then the head doesn’t pause to change direction. I used to do that with digital cutting files to prevent tearing in tight corners.)
I believe Illustrator has a corner-rounding function somewhere too - I use a plugin for complex files.
Just to make sure that I’ve got it right - is the effect produced by the gold foil, stuck on the tile, being engraved away, so that where the engraved area has vaporised the gold foil , it has also made the coating on the tile black ?
Hey…I’ve seen that before in AD…I’m pretty sure I have a choice of ‘corners’. Never knew what it was for, but I’ll bet that’s the equivalent to AI. I thought of that, too…if everything was slightly rounded, it wouldn’t need to function quite like it does. I’ll check it out sometime. Thanks!
…not at all, John! Maybe since Cyndi reminded you of the foil she gave you, you’ve now figured it out? It took me a long time and watching that demo video several times (the guy using the foil for that Harley Davidson logo) to figure out how to make my files. I made two for testing…one for vector and one for raster. The bottom one gets scored around the shape (no fill)…and the Xabbess (filled) gets engraved. The top one has the lettering with no fill or stroke, combined on a filled shape which gets engraved. Clear as mud?
This came out great! I am looking to experiment myself with Laser Foil and was wondering your insight on settings you used on the glowforge. Also I was wondering about ‘laser tile’ haven’t heard of this before, is there a special place to purchase this and does this tile allow for laser engraving directly on tile?