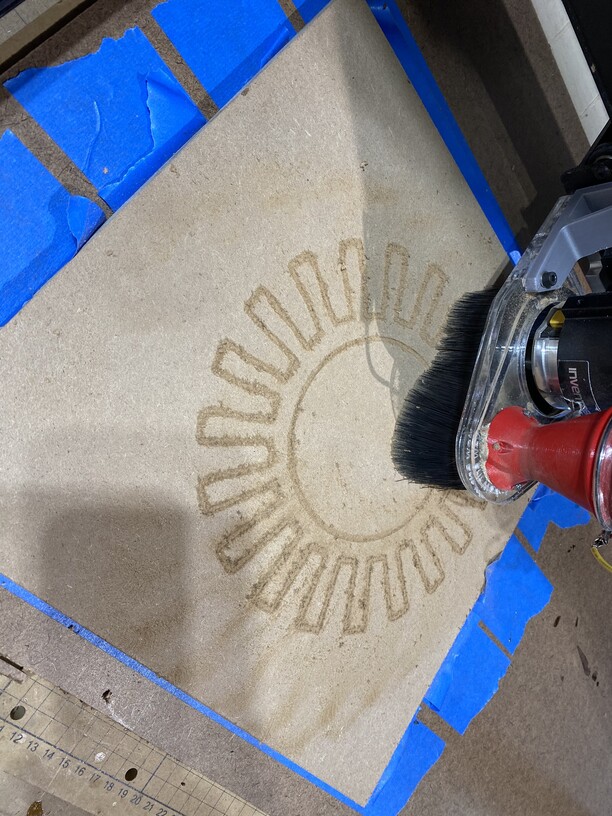
As you may remember, I’ve been doing some custom stuff for my friend’s garage, and realized they always have one of those disc brake clocks, but that involves an expensive brake rotor and they weigh 30-40lbs so you can’t just casually hang on the wall, but I wanted to make them myself. So I did an all-maker device project (use the best tool for each part). For materials I decided the easiest overall is MDF, because in general it is super cheap (well comparatively), when you screw-up you can generally fix things with a razor knife, wood putty or sandpaper. And for high precision parts I can cut it on the laser. As far as design I looked on-line and found a nice drawing of a high-performance brake rotor which was slotted and drilled (if we learned nothing from the flintstones it is that wooden brakes are terrible). So I did the slot/drill pattern as a circular pattern in OnShape, exported as a DXF into illustrator and back out as a SVG; since the size of the rotor is bigger than the Glowforge’s cutting area this went onto the x-carve, so I brought it into v-carve pro and set it up as a profile cut. But here is wheee I erred. On the depth of cut I dropped the “1” leaving my 0.125” as 0.25”: Oopsie! Well luckily for me I always put a wasteboard of 1/8” MDF under my stock so I don’t damage the machine’s wasteboard; and in this case I realized I needed a front and back rotor surface, I used a 1/16” Amana end mill. Next was the inside of the rotor which on a vented disk is a set of vanes that push air pulled in at the hub to the outside through channels. For this I chose 1/2” MDF and cut this with an 1/8” end mill. My poor dust collector couldn’t keep up with that mess, it did keep it contained at least.
Then off to paint and prime. In addition I needed to make the caliper. This part was made on the Glowforge with medium draftboard along with the brake pads. These all got primed with gray primer and painted with regular home-Depot spray paints (except the pads that’s tamiya gun-metal paint). For the piston cover where Porsche write the wording in white I did a multi-color print on the prusa. Not that it couldn’t be done on the Glowforge, but it’s zero effort on the prusa. The prusa red pla perfectly matches my chosen spray paint. I deliberately painted the red with overly thick coats to give a powder-coated texture.
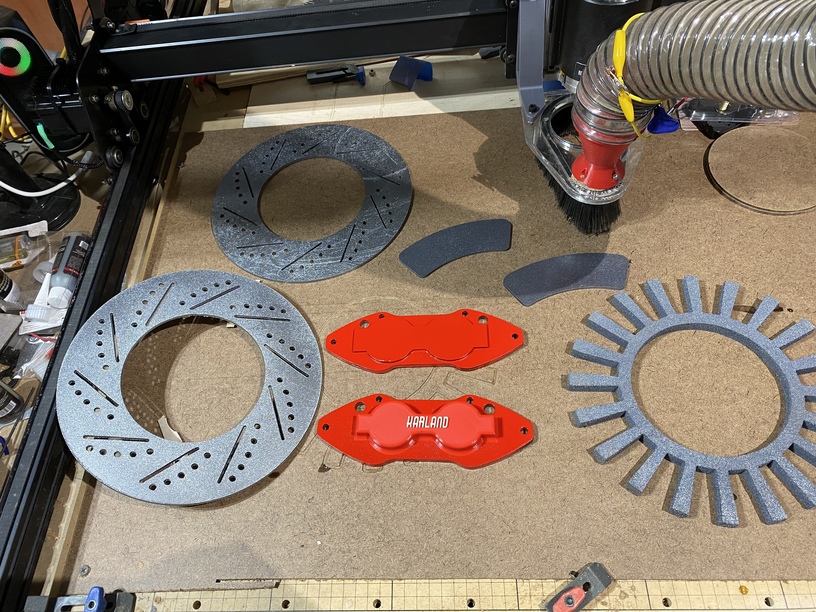
The layers were all glued with accelerator and CA glue. That steel paint really in person. Anyway, I attached the pads and using some small contour blocks on the Glowforge stacked them to make the caliper the right thickness.
Then I cut a set of rings and a plate at the top with the holes for the lug nuts and the clock-shaft to make the hub (which got the gun-metal paint. I got a cheap $7 clock mechanism at Amazon and attached that. I spray painted the hands which I didn’t realize until afterwards were coated with some paint-resistant coating (sanded and repainted)

