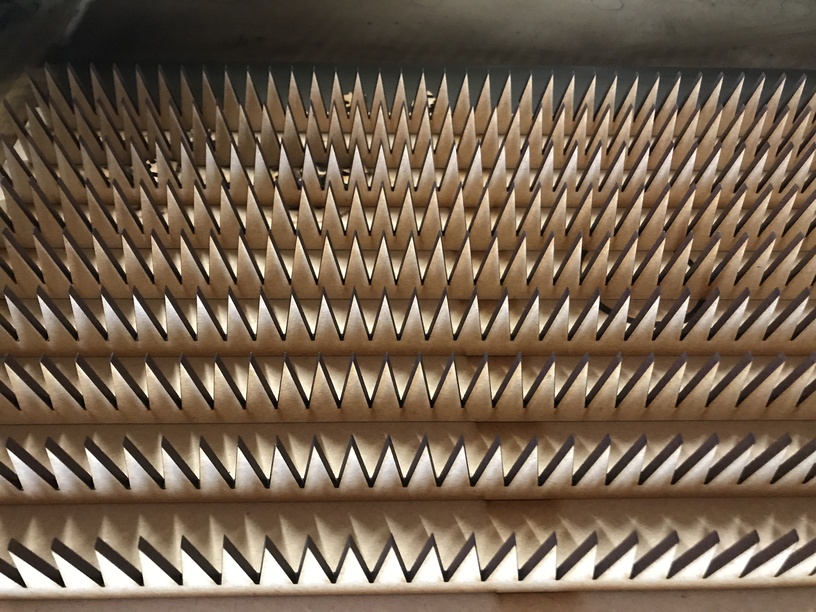
So instead of getting into nailing a gazillion pins into bed or complicated metal cutting etc. I thought “hang on - I have a laser!” So this is a wooden pin bed. Yes, it will wear out. Yes, it gets burn marks all over it. But so what - I can just cut another one.
The design is for 3mm draftboard/MDF. If anyone feels keen the whole thing could do with stretching to the full width of the bed. It also includes a wider pin pattern, not sure if that is more useful or not.
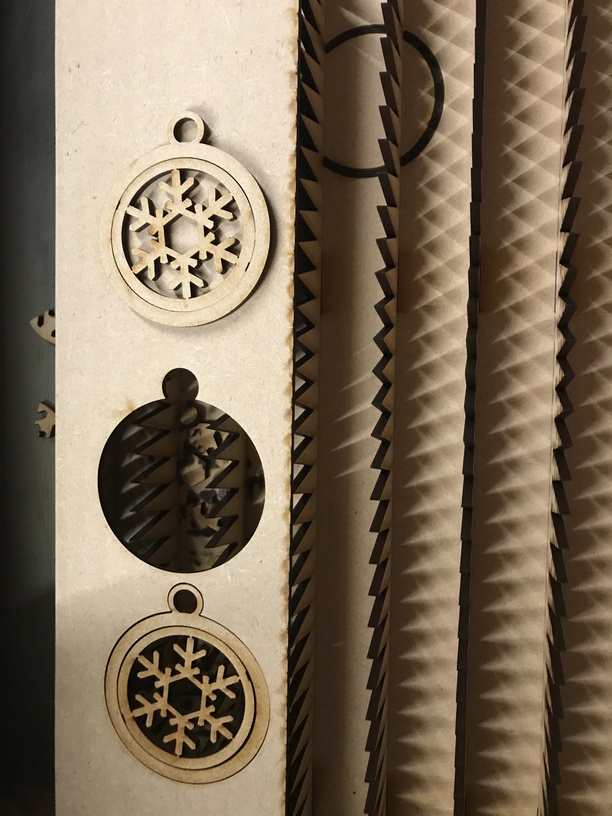
The top of the piece is scorched in the usual way, but the underside is completely clean - which is the whole point really. (Bottom item is top as cut, still in place. Top item is the reverse underside. The black circle is my test of what happens if the laser hits the base material - it scorches it badly :))
@tjones it helps with eliminating burn marks on the bottom side of material. When using a pin bed like this, you must really stay with the machine during the entire run. (Supposed to do that anyway, but we all know we all don’t do that every time.)
The risk, though usually minimal, is when something falls through, and falls wonky, and the portion sticking up can interfere with the air assist fan.
I do think that the solution is a bit overengineered. The result you’re seeing has two components:
reduced smoke residue on the back (reduced, not zero)
no flashback pattern
The reduced smoke residue is down to the fact that nothing traps the smoke against the bottom. The elimination of flashback is down to not having anything that can reflect the laser touching (or in very close proximity to) the rear surface.
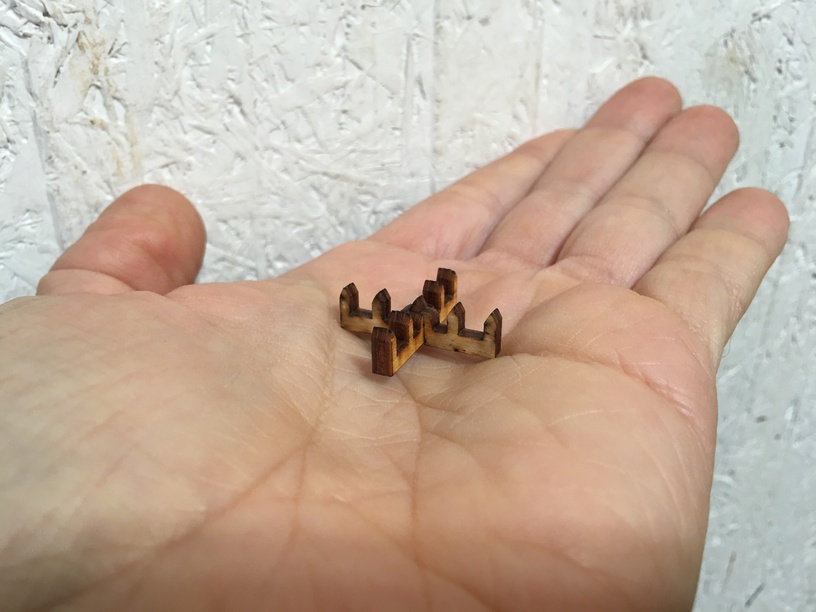
To that end I started to fool with your idea and came up with these guys:
The gist is that you make them, slot them together into little spiky X’es, and then use as many as you need on the crumbtray to raise your material up and support it. They’re 0.3" tall, so they will work easily with .125" materials, I use set focus to make things easier.
My results are almost identical to yours, you get no flashback pattern and vastly reduced smoke residue on the rear surface. Best of all, these little guys take up almost no material and are very disposable once they get damaged during use. Just throw them on the bed to elevate whatever you like and go.
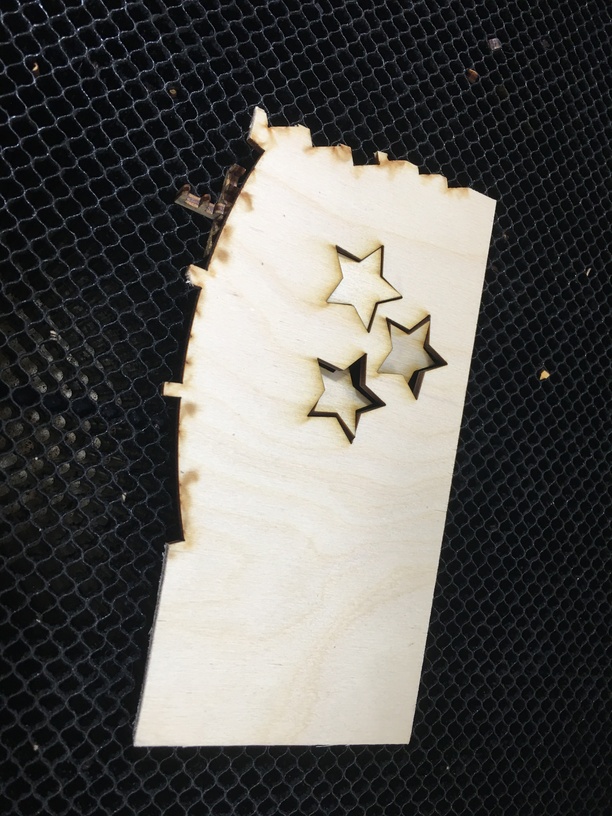
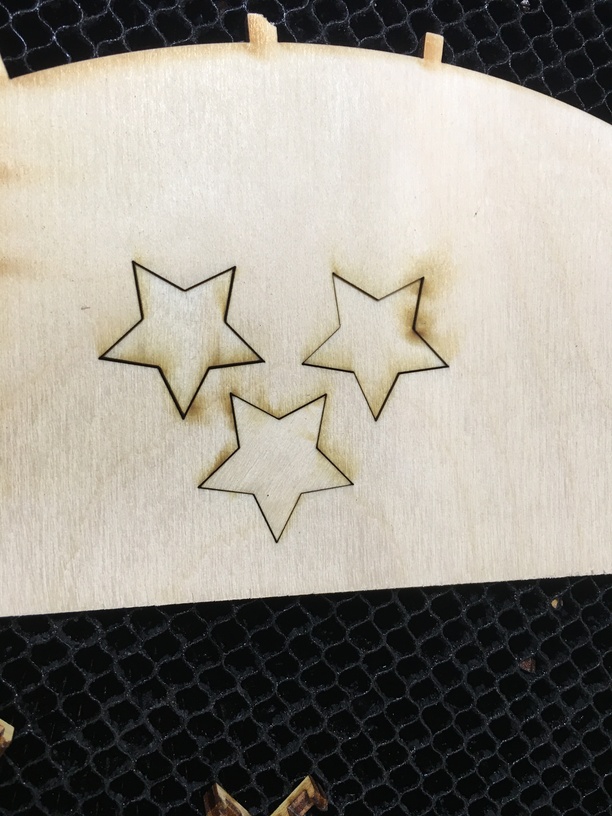
I thought about doing it that way, and it is convenient in one way. But what I like about my version is that small cut out bits fall completely away and you don’t need to pull them out after each run.
A lot of my work has sprues to hold the pieces in place because I ship flat pack kits. But the small holes are better cut away entirely.
I’m a noob… so maybe dumb question… what are the kind of things you’d want to swap a pin bed in, instead of the honeycomb tray that comes in the glowforge?
This is great! I’d love something like this to reduce the flashback on my acrylic puzzles, although a different design since all the pieces would fall through (good for you, not so much for puzzles!)
Great project! I bought a bunch of metal pikes with the intent to make a pin bed out of them, but I’ve just not got around to it. This inspires me to take a look at it again.


 (good for you, not so much for puzzles!)