I have a .13 thick sheet that I really want to make into the skeleton icon. The sheet has a colour top layered over clear part is Acrylic Styrene Copolmer which I think is extruded acrylic. That’s okay as I wanted the engraved part to be more clear looking.
Question: Anyway to “polish” the engraved part to reduce the banding after engraving at .13?
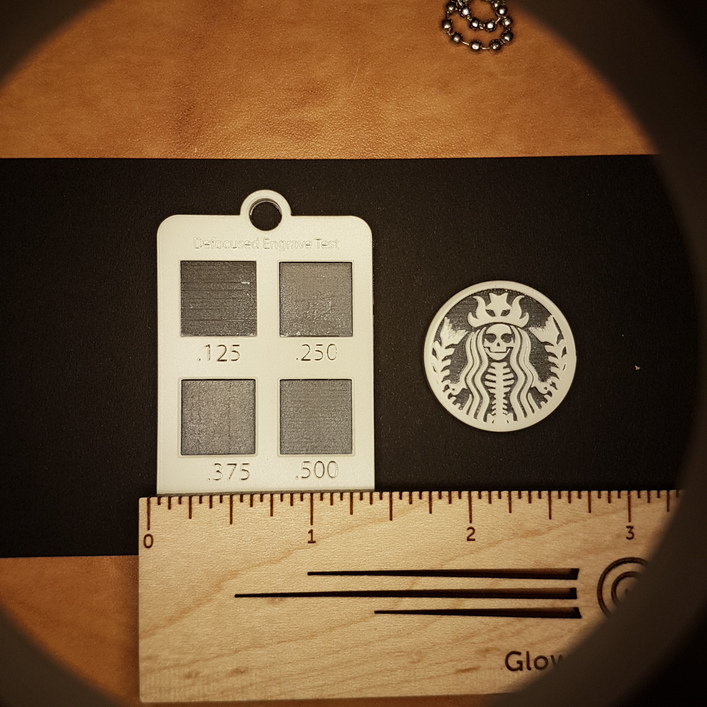
After many trial and error, I couldn’t find a setting I liked that was a good compromise. The best one is the photo and that was engraved at .13 focus but the lines bug me
I tried defusing and though .357 looked the best it doesn’t work on small detail engraved. Defocused doesn’t cut away the top part evenly as it angled (sloped) the edges and it took away detail
I’ve brushed on a light coating of acetone to smooth out acrylic before, but not sure how easy it’d be to control it on such a small piece. The acetone basically melts the top layer of the acrylic and smooths it out.
The detail is really small so probably would melt the skeleton if I put a flame to it. The vapor method I did with 3d prints, it would melt the skeleton too. Nice idea on one color acrylic though
It’s pretty immediate. Careful with the brushes though, if the bristles are plastic they’ll melt too. No need to ask me how I know. A little can go a long ways.
Oh a second pass I didn’t think off! I used proofgrade settings to get the colour layer off. What power is enough to just melt the stop laser you think?
Solvent idea wont work. My tiniest brush is too big
See above re: masking and vapor, but you could probably mask and brush or even dunk if you’re quick about it. Dunk, wait very short time, rinse solvent off, remove masking.
Keep in mind that a defocused engrave doesn’t polish, it makes a more uniformly frosted appearance. If you truly want polished (transparent) voids, I think vapor/liquid solvent is your best option. It won’t be easy.
Another possibility would be to make your own layered construction. Get thin white acrylic, cut it out and transfer it to a clear backing using glue or double-sided tape. (See recent post about this layered approach)
No, but @mpipes showed some pics a while back…
Puts a gloss back on the frosted engrave. A syringe is the only method of absolute control over quantity and placement I have found.
This can be freaking dangerous. We did something similar in an old crock pot. It worked wonders on 3D prints. Idk how much you have invested (batch size,effort,danger) but this may do the trick.
Well, I wasnt really planning on a vapor bath on this piece. I dont want to melt the the colour part. I tried using nail polish remover but it didn’t work. That just means I need a less diluted acetone solution. I may just syringe the acetone into the crevaces try and smooth out the lines. First must get syringes
 A little can go a long ways.