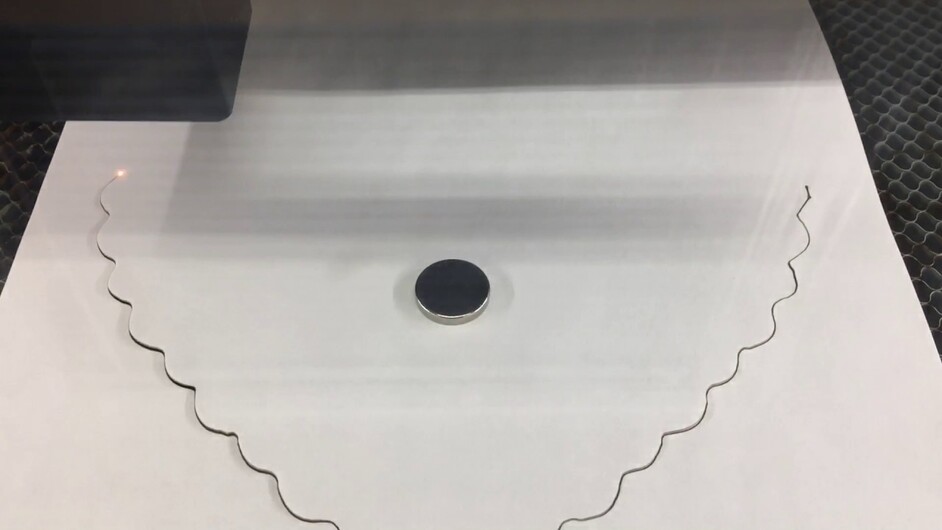
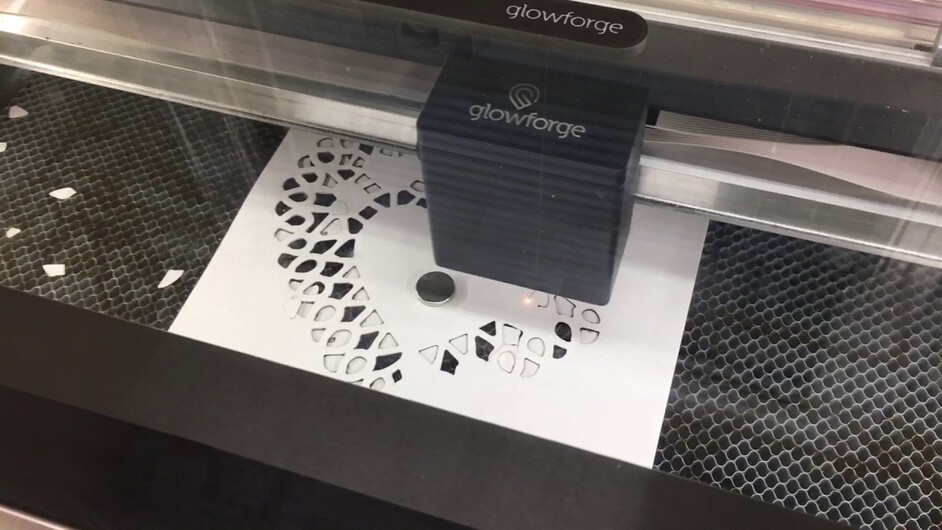
Just testing this now, and you’re right! Just by reordering the cut to first in the list (I had no idea you could reorder them) the cut worked perfectly.
Thanks!!
It better be. There are lots of reasons to engrave first and cut second. Alignment is a big one. Cut items can shift (yes, I know Dan has said they haven’t seen it even with paper but physics tells me that little bits of paper can become airborne when subject to an air current).
Ok, update… The cut worked perfectly this time when first in the list, the score was second and DID NOT work correctly. One side of the outline is faint, the rest is non-existent. The engrave was third and seems to have worked fine.
You might want to notify support@glowforge.com, just to make sure they know what’s going on.
It’s a pre-release unit and depending on when you received it, they might be aware of what’s causing it.
(But if it’s new, they need to know.)
Hey @iliketomakestuff! As Jules mentioned - please send an email to the support alias and we’ll get you fixed. What you’re describing should never happen, but there’s a bunch of reasons today that it might, ranging from bugs to production defects - @rita’s team can help you sort out the culprit.
That is definitely NOT the case. My valentines paper cuts had to be done a second time because of this. The fan blew the paper up into the bottom of the laserhead causing the cuts to be where they shouldnt, and almost caught fire.
Unless they have an option to turn the fan off that I dont have (which im pretty sure is the case), the amount of air that it moves is going to present a problem when cutting anything of that nature. I even had mine weighed down with magnets on every part that wasnt in the line of cuts.
Ultimately I had to go and move the outer perimeter cut to a second job to do after the interior cuts. It came out pretty good after that.
As @dan said, email support with any question, observation or issue. Include date and time of the print and as much info as possible. They love hearing from those of us with pre-release units about what we expect or don’t expect to happen. I have sent in a few observations about the UI from time to time too.
I have had this issue, especially in the beginning and support helped me work through it. It does help to order cuts first and engraves later. As @takitus mentioned, there may be some material shifting issues that you need to attend to. I know this issue is going to continue to get lots of attention in the forum.
One thing I noted with the Proofgrade that I had, if I had any doubts and needed it to work first time because it was my last bit of large stock, I just bumped the power up 5% and it always cut through. I have since been resupplied with Proofgrade and whatever magic they are doing on the back end, it’s not as much a concern, especially if I cut first.
Yeah. You could have colored me skeptical when Dan said it but he has a GF and I don’t so I was reserving judgement.
Well maybe not reserving. Just not expressing my prejudice and hoping I was wrong and he was correct. Thought maybe it was possible they’re pulling a vacuum (or at least a significant suction) through the bed to make it work.
I think it’s probably the case that they had the air assist turned off. The cut out pieces didn’t fly everywhere
You could try making a cutting mat. 
Cheap piece of thickish glass from a picture frame should work. Borosilicate if you want to go fancy. (Or Mic6, which I plan to try.) Couple of coats of Krylon Easy Tack Repositionable Spray Adhesive #7020, let it dry completely between coats, hit it with a T-shirt to take the tack down, and you have a reusable sticky mat for cutting paper on a laser.
That’s what we use to keep the paper from shifting in digital cutters. (They’re thin plastic of course, for the digital cutters…for a laser, we’ll need something non-flammable.)
If we’re going to try to turn a laser into a digital paper cutter, we’re probably going to have to stick the lightweight stuff down.
(Actually not a bad idea for a hopper item @dan , to sell as a later accessory. Lots of people are going to want to cut paper and thin fabric with the laser.) 
Yes, but that would probably wreak havoc with really delicate cuts and thin paper like @takitus seemed to be using. I’m hoping that a light to medium weight cardstock will perform well. I believe the material in the Glowforge valentine video was heavier stock. That could have well been the difference.
Here’s hoping its final performance on paper stock is better than this. Also worried about the issue that @iliketomakestuff had. All in all, not a very reassuring thread here.
Ah I don’t think it’s anything of concern. The cut before engrave thing was due to the bad batch of tubes(I’m pretty sure) which they’ve already fixed.
My issue was easily fixed by changing the cut order. I’m under the assumption that we will be able to turn air assist on/off on a per job basis from what we saw in the video. That will fix it no matter the order.
Worst case you can just unplug the fan =P
I recall @dan saying that “regular” paper is not recommended. I’m guessing he means 20 lb or the like.
The only thing I wasn’t able to cut on a mat (just like the one i propose making) is tissue paper. (Copy paper works, we cut it all the time. Even rice paper worked. Tissue was just too fragile.).
And even then, if you take a couple of reasonable precautions, it could probably be done. More Tee-shirt for thin papers. You just have to knock the tack way down for the thin stuff.
I think we’re going to have to try to be a little bit adaptable to cut paper with a laser. It’s not the ideal tool for the job. (Kind of makes me feel like we’re trying to swat a fly with a Buick!)
Like Bill said, heavy stiff cardstocks and chipboard should be no problem. For copy weight paper - there are simple things we can try that will likely work. 
That’s a pretty good idea! Even when a Cameo can do the trick easily, been able to do the same on the GF, with an official cutting (glass) mat is a plus.
I probably wasn’t clear here: the problem I haven’t seen is “if you cut the outside first and the inside second, you get worse results than the reverse”. That observation is just my personal observation on the (many) prints I’ve done. And it was in the context of “the outside/inside optimization is rarely helpful, so doing it automatically isn’t a priority for us, especially since you can do it manually”.
If you’re cutting paper, there is definitely a risk of airborne paper bits. UI control of air assist is already in the hopper.
sweeeeet
What? Those hearts look fantastic!
How fun to pick up/out all those cut out pieces that blew off. What lb. paper was that (seemed like 60 or less rather than a heavy cardstock - just curious) since some of those little cut outs really blew around. Nice job though and appreciate the videos !!!
Shop vac =).
Was regular printer paper

