OK I’m going crazy. We’ve cleaned everything three times, and re-positioned everything multiple times and here’s what’s happening: none of our cuts are cutting all the way through. Most of the cut will be fine but then one or two sections just won’t cut through resulting in us having to sand them or just lose the materials. So far we’ve tried PG draftboard, reg draftboard from Lowes, plywood, and white board. Seriously, I’m at a loss. Also whI’ve noticed is that when I do 2 passes, it’s making 2 cuts (they aren’t lining up). Any ideas?
Depending on what you are trying for example plywood white board, there can be imperfections in the material that will cause the laser to NOT cut all the way through. for example plywood can have putty where knots in the wood on the internal layers occur.
I have never tried whiteboard. I would assume you are cutting that from the back. I would think the reflective properties of the WB would cause problems.
so you used PG draftboard and it did not work? one major question is HOW was the material held to the crumb tray? if it is NOT completely flat that will give you trouble. The same for really any material. I have strong magnets I uses for the middle of spaces(far from any cut lines) they are wrapped in tape so that I can lift them up easy, and then stick to the side of the cart BEAMER resides on so they are out of the way.
Are you pinning or otherwise securing your materials down flat flat flat?
Since you’ve opened a support ticket by posting in P&S, you can save some time by printing a Gift of Good Measure on PG medium draftboard using PG settings, and posting photos of it front and back along with the date / time / timezone of the job. That will give them a known test and logs to look at, and get you back in operation sooner than waiting for them to ask for it. 
I’m so sorry to hear that you’re hitting this snag.
As @geek2nurse advised, performing a Gift of Good Measure print on PG draftboard can help us to narrow down what could be causing the trouble. When you have a moment, could you please do the following?
- Turn off your Glowforge, then turn it back on
- We included an extra piece of Proofgrade Draftboard with your materials shipment for troubleshooting. Place Proofgrade Draftboard in the bed and load the Gift of Good Measure design.
- Set the score and engrave steps to ‘ignore.’ Print the Gift of Good measure using the default settings. Allow the print to finish.
- When the print finishes, leave the lid closed and wait until the fans stop and the picture of the bed updates.
- Check the completed print:
-
- If the Gift of Good Measure fails to cut, please let us know the date and time of the print
- If the Gift of Good Measure cuts successfully, please try another print of the design you saw the issue with, and let us know the results.
- If the issue still occurs, please let us know the date and time of the finished print.
I would like to check over just a few more things. Could you do the following for me?
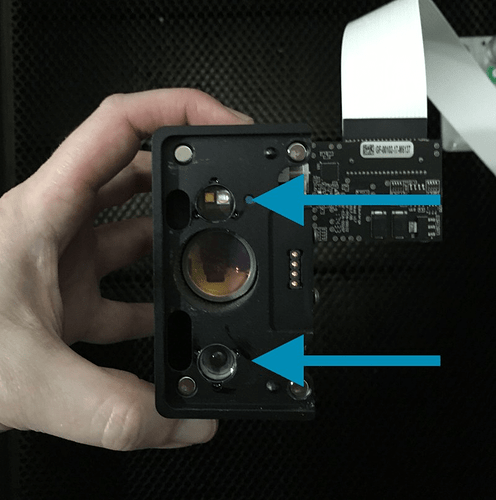
Please send photos of all your cleaned optical components, with special attention to any damage you might find:
- Both windows
- The printer head window, on the left hand side of the printer head
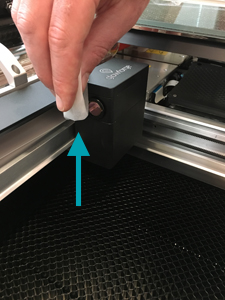
- The laser window on the inside left of the Glowforge
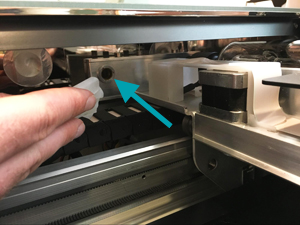
- The printer head window, on the left hand side of the printer head
- The printer head lens
- Both sides of the lens, top and bottom
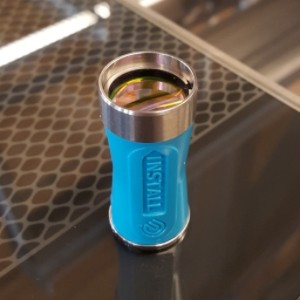
- Both sides of the lens, top and bottom
- The mirror inside the printer head
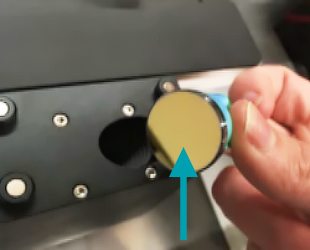
- The bottom of the printer head
Once we have those pictures, and can review the Gift of Good Measure print, we’ll send over the next best steps.
Fyi, i cut home depot 1/4” whiteboard often, from the front. It doesn’t cut any differently than unpainted mdf.
That is great to know! Thanks for that information.
Interestingly enough I have a sheet of it out in the garage right now. 
Sorry we couldn’t get back to everyone quickly, I had a little emergency going on the rest of the day. So- we were holding down everything with the pins we printed from a file on here. I think they were called Honeycomb holdown pins. As for the whiteboard, it was the kind that has the chalkboard on back. Thanks for the help everyone, I’m going to go run the gift of good measure and get my pics up!
Thank you for working through those steps, and for keeping us updated! I’ll review the print as soon as it is complete, and the images once you’ve had a moment to post them. Please let us know if you have any questions while working through the instructions.
It’s been a little while since I’ve seen any replies on this thread so I’m going to close it. If you still need help with this please either start a new thread or email support@glowforge.com.
