I have looked online and searched the forum but can’t find an answer to my problem. If it’s here and I’ve missed it, direct me where because I don’t want to duplicate help:-)
I bought a file (mandala)…I want to edit the file and just keep ‘part’ of the file. It’s a sea turtle with water/shell. i want to remove the water/shell. I clicked and got to the nodes but when i delete them, they are attached to my turtle and of course it becomes distorted. i tried to add a node and connect but I am such a novice in inkscape, I can’t figure it out! Is there a way to copy and paste ‘sections’ of nodes into my turtle i have copied and pasted from the outer layer.
Hope I’m making sense. i’ve tried for 3 hours to figure it out but need some help-probably a simple think i’ve made so complicated.
Thanks
This is really hard to describe but it is easy to do.
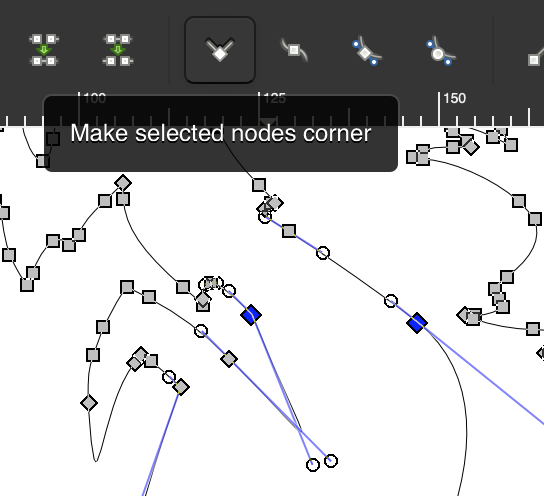
If you’re looking to make a copy then duplicate the path with what you want and then select the “end” nodes that you want to keep and turn them into “corners” (the first node type tool.) Then select the remaining nodes and delete them, and you can adjust the handles on those “end” nodes to direct the path to go where you want it to.
How do i know where the end nodes are?
when i click on all the nodes in one path and hit control copy and paste, it pastes the entire design.
Hang on, i used ‘break apart’ and may have figured it out…perserverence:-)
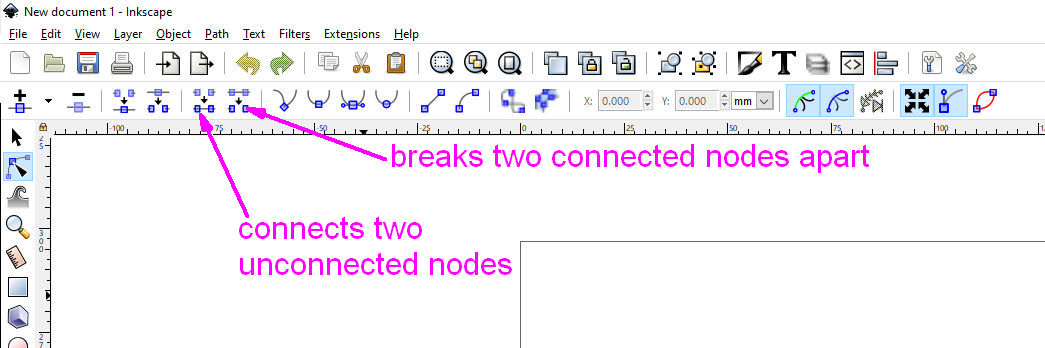
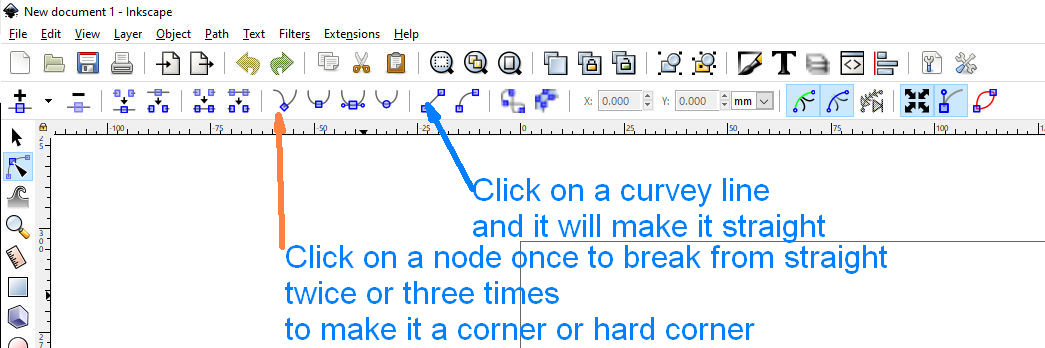
These are my most commonly used buttons in node editing, The break two nodes apart allows two pieces to be separated by break apart.
You choose. Wherever you want to cut away a part of a design.
Thank you both, this is helpful!!
Finally have Inkscape open.
There are so many ways to do different things, the “break path” tool mentioned above works as well.
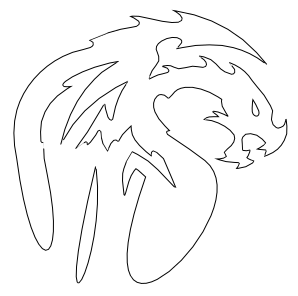
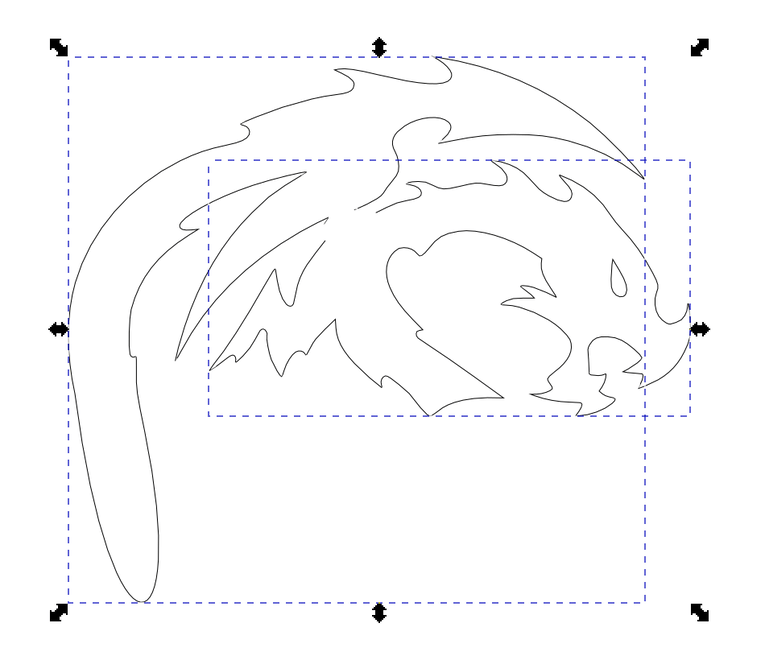
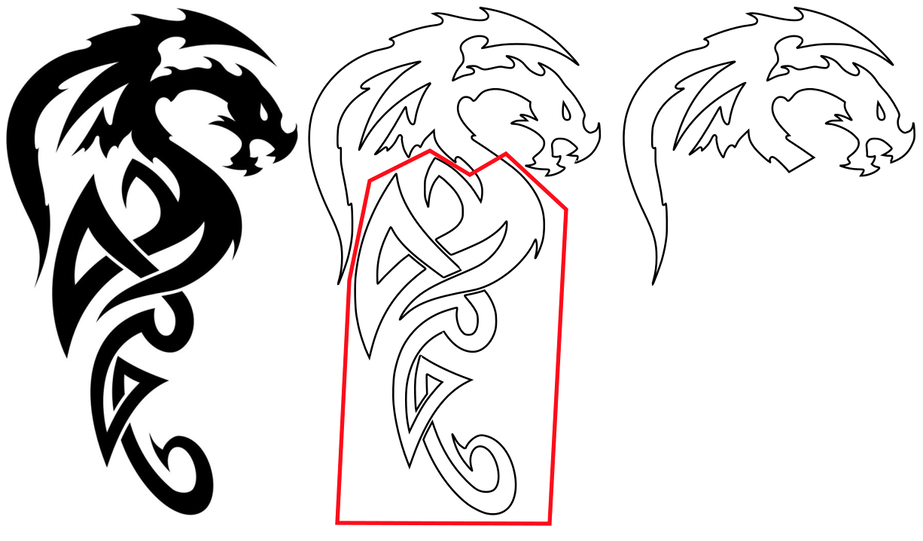
Say you want to just have the head off this dragon:

Use the node edit tool to draw a box around the parts you don’t want:
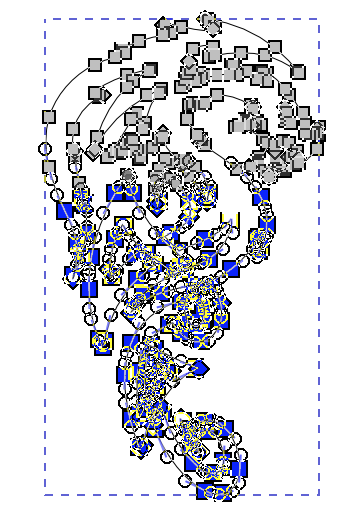
Delete them:
Now zoom in and find the nodes you want to be the bottom of the neck (or double-click to add new nodes):
The method I first described has you change those nodes to “corners” (first node type tool), then you can delete everything “beyond” those nodes:
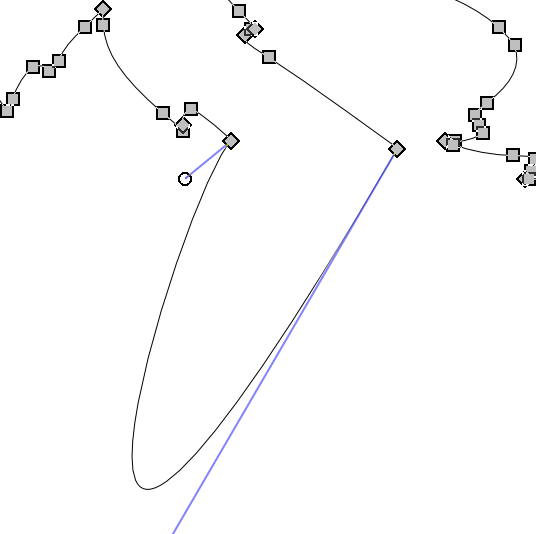
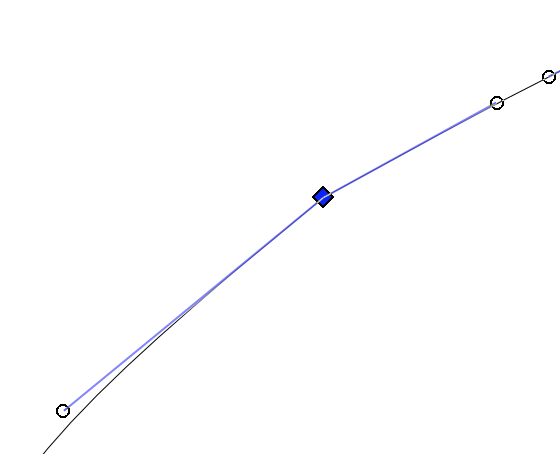
You’ve still got crazy handles, just drag them over to the adjacent node to square up the corners (or adjust as needed, if you want a smooth corner - I’ve made one of each:)

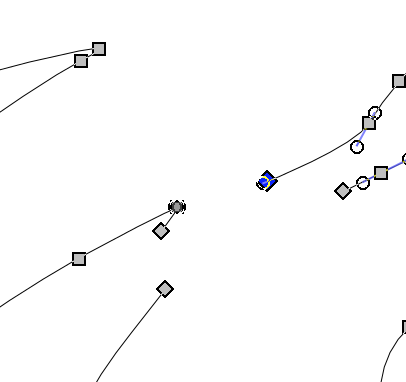
You can also break paths and join segments as pointed out above. To chop off the wing, find the most suitable nodes and choose “break path at selected node”:
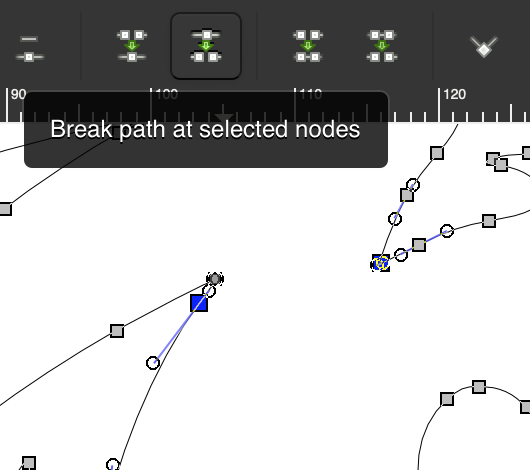
I separated those new endpoints to show what has happened by breaking the path:
The fastest way to clean up the unwanted part (the wing) is to use Break Apart, then just delete that separate path.
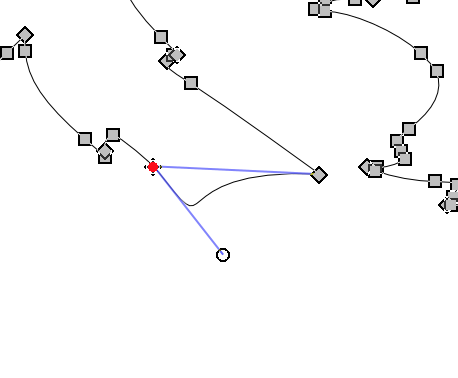
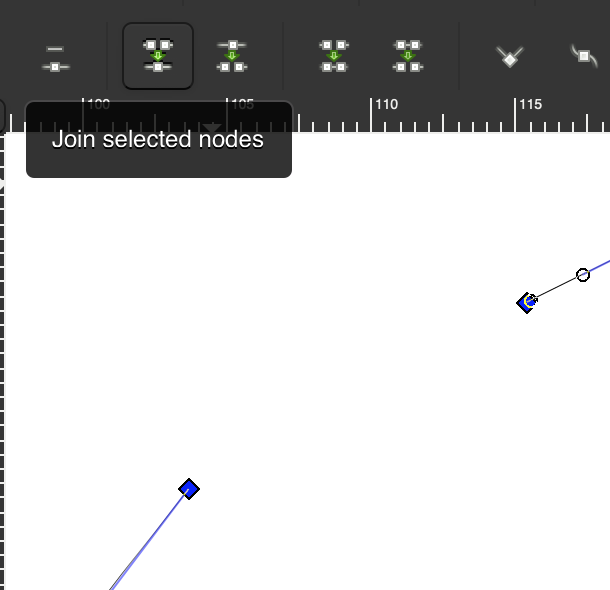
Now you need to close the path, you can draw a new segment, use the “Join selected nodes tool”, or drag one endpoint node over the other and use the join tool.
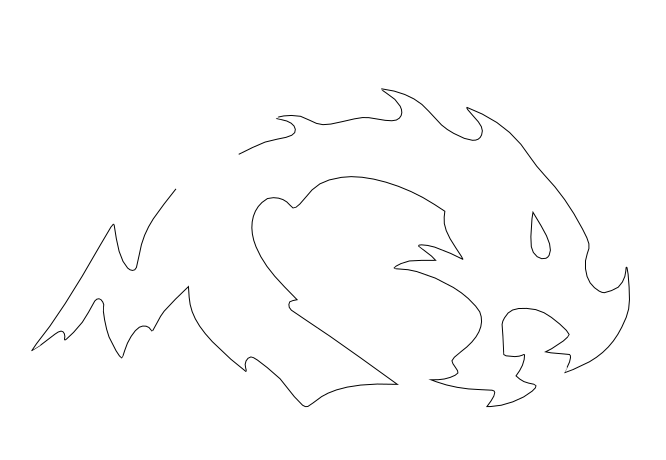
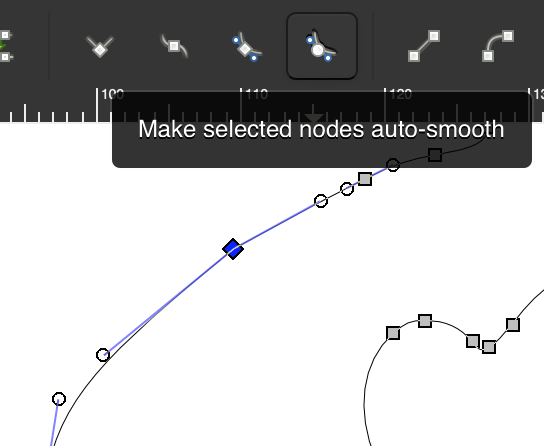
Just the “auto smooth” took to smooth out the curve, or manipulate the handles to give you the shape you desire…
Voilà!

Awesome tutorial, thank you so much! That makes sense and I’ve used some of those tools messing around so I actually know what you’re talking about:-)
Did you know there’s a setting in inkscape to stop it from trying to maintain the shape of a path when nodes are deleted? I love it so much.
I know about the “preserve shape” option but I haven’t found any benefit to turning it off.
If you can explain how to use it to preserve the corners when deleting a segment, go ahead - I just tried it and can’t find a way to leverage it (on or off, I leave it on.)
Personally, I despise the attempts to make a “simple” spline representing some complex sequence I’ve deleted. More often than not it seems to go off the rails. In general I just want the intermediate nodes to go away and have a linear connection between the two remaining nodes. I wasn’t aware it was possible until I found it while browsing the settings and I’ve left it on ever since.
Thanks for the info! I’ll give it a try.
I know you’re asking about Inkscape, but I know a different way in Illustrator.
I draw a shape around what I don’t want anymore. I select the shape and the item behind it. Pathfinder > Subtract.
So as with the dragon example above, I would have freeform drawn a shape around the body that I didn’t want. Selected the shape and the dragon. Pathfinder > Subtract. Then you don’t have to make new node connections.
I’m sure Inkscape has something like this.
Yup! It’s called Path/Difference. Another method, I use it all the time as well.
The problem in this case is that it takes as long to clean up and “correct” the edges/curves of the cut segments as it does to just do it by node manipulation in the first place. I don’t know what the OP’s original design was.
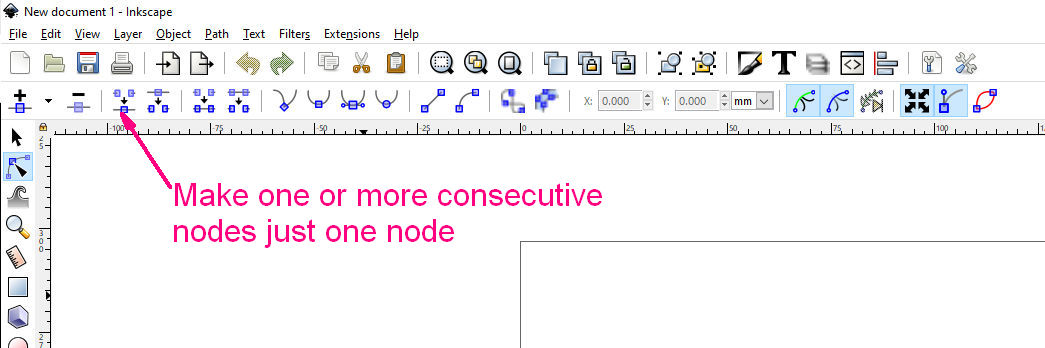
This shows the place if you grab a bunch oc consecutive nodes all but the first and last go away and the connect nodes will restore a straight line
I do use those controls, but turning off “preserve state” in general saves me steps.
What I am finding is that I want to select a large number of identical holes and make identical changes. They are coming as an exported path from Gimp so they are not able to be an array of clones. Often they come from single pixels that were a shade different so are tiny pixel sized triangles, so hard to go through and find them all once in Inkscape.
Use the magic wand tool to delete/fix the rogue pixels first.