Working with nodes in Inkscape:
courtesy @caribis2
11 Likes
I’ll add to that, “using clones to make your life easier”. Judicious use of clones will make your Inkscaping much easier and cut down on repetitive error-prone tasks.
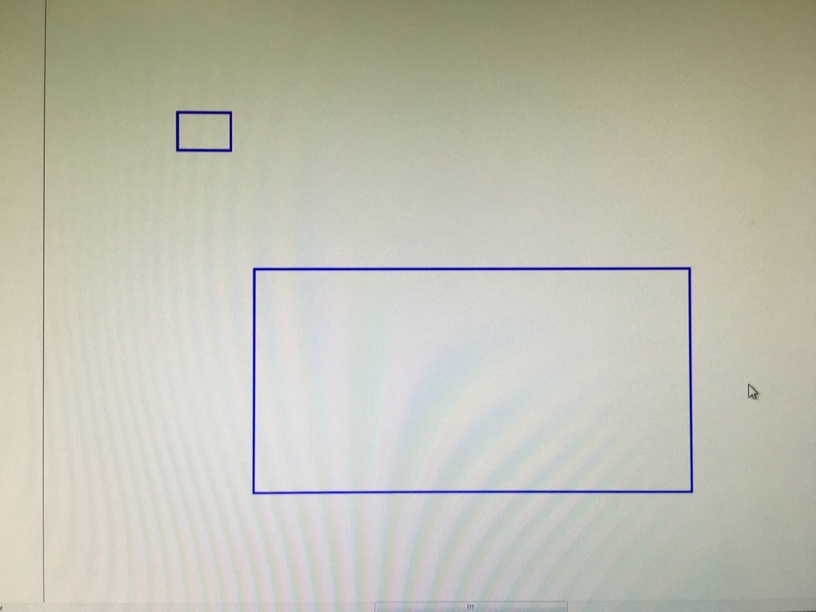
Start the same way as above, make your rectangles. Convert your rectangles to paths by using Path->object to path.
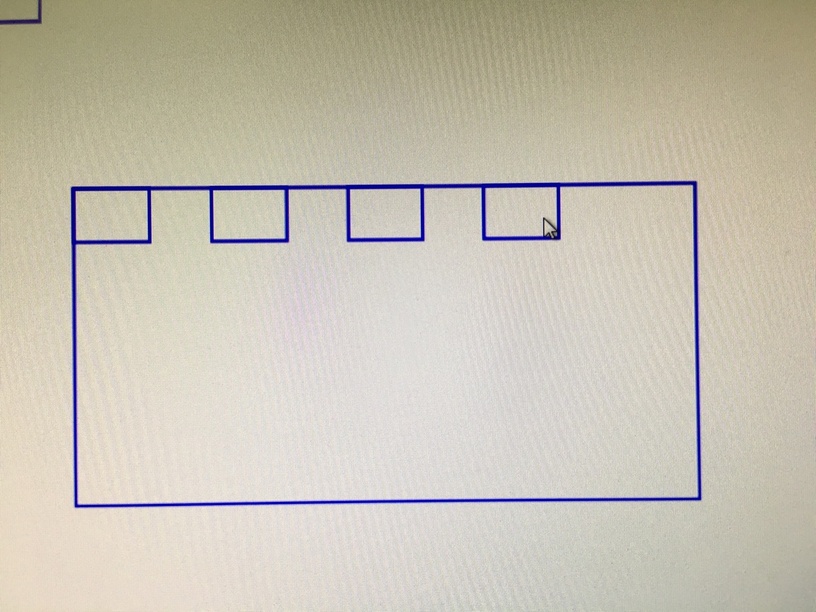
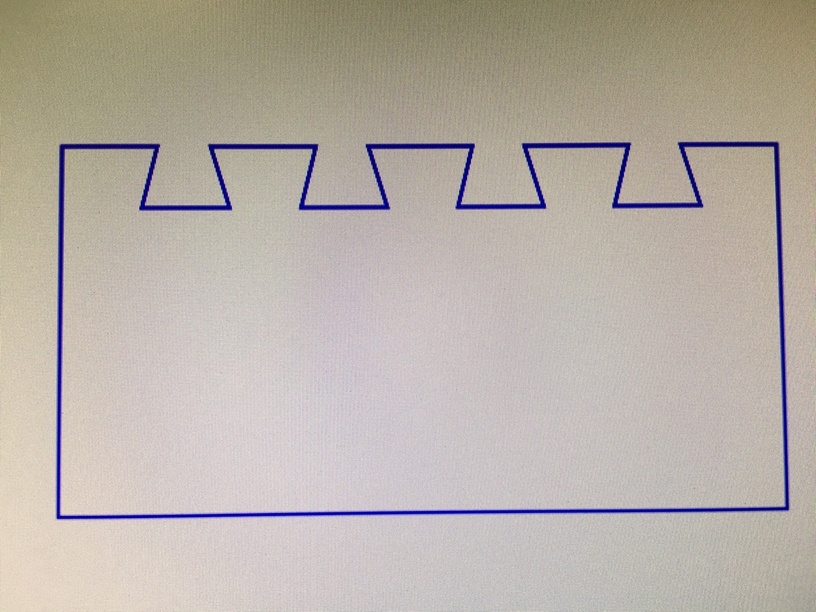
Make as many clones of your original rectangle as you like. The total should be “number of desired notches +1”. I chose to make 4 dovetails, so I’ll need 5 rectangles (you’ll see why in a minute, but it’s all about automatically spacing them). Note that I snapped two of them to the upper left and right corners of the larger rectangle. This is very important as it sets the overall width of your clone spread, which we’ll be automatically spacing in a moment. Remember, these are clones, not copy and pastes of the original.
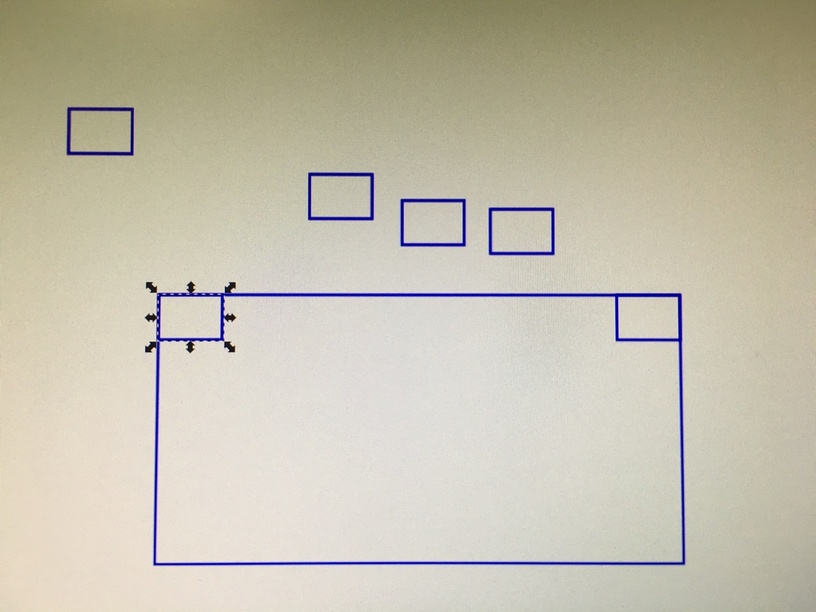
Use the alignment tools (Object->align and distribute) to center them vertically.
Use the alignment tools to space them evenly. (alignment tools are just the best.)
Delete one of the clones off the end – you’ll only need 4, I chose the upper right.
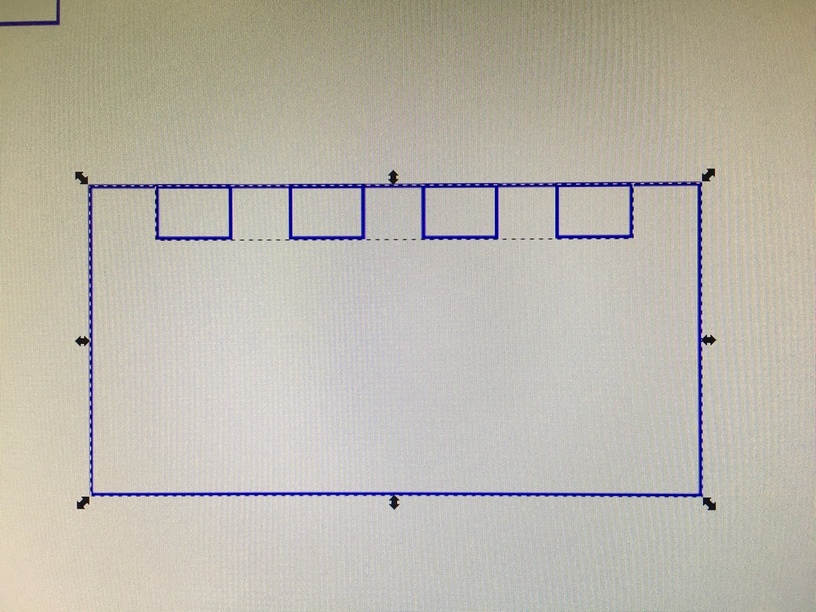
Group the 4 remaining clones, then use the vertical centering alignment tool to align with the center of your large rectangle. Remember you must group the clones first, or this won’t work.
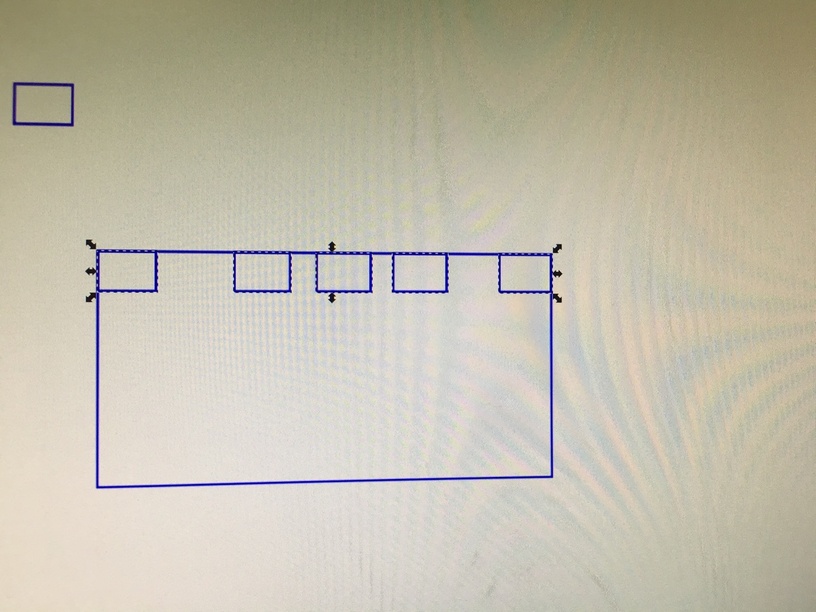
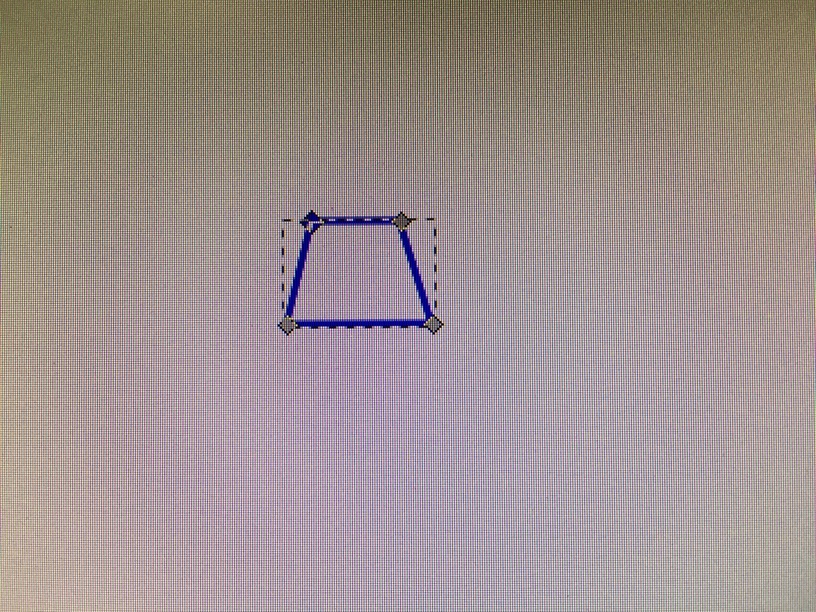
Go to your original small rectangle that you cloned way back. Convert it to a trapezoid by manipulating your nodes.
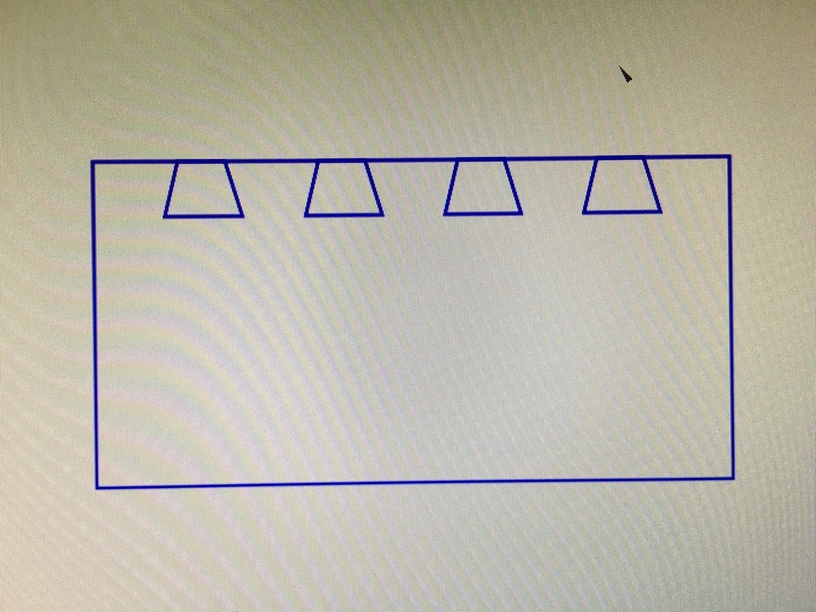
Almost there! Now we have 4 grouped trapezoid clones. There are a few steps to do here.
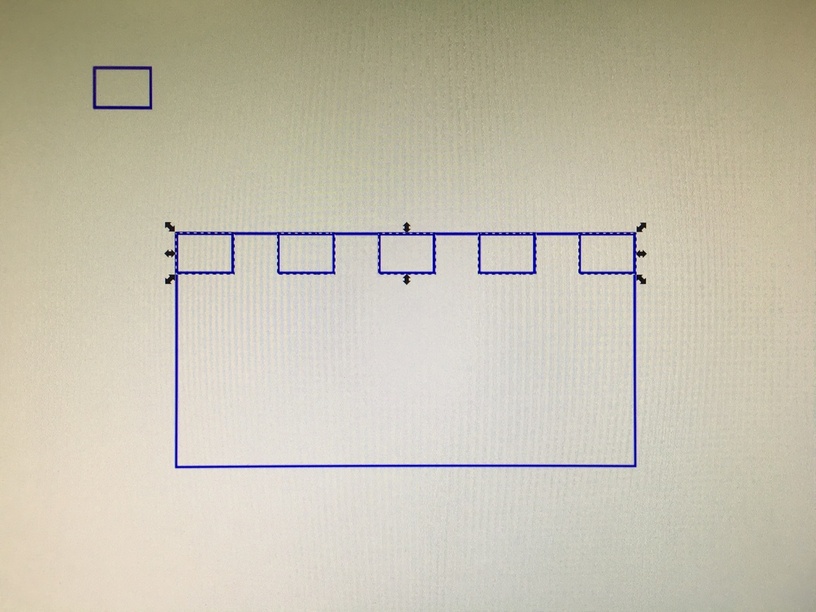
- Ungroup them.
- UNCLONE them, by either using the edit->clone->unlink clone menu or simply deleting your original rectangle(now trapezoid).
- Now you have 4 ungrouped trapezoid paths.
- Combine them with union or path->combine (control-K)
- Now you have one path of 4 trapezoidal shapes.
Select the large rectangle and your single path of 4 trapezoids. Select Path->difference. Voila, perfectly spaced, uniform dovetails.
14 Likes