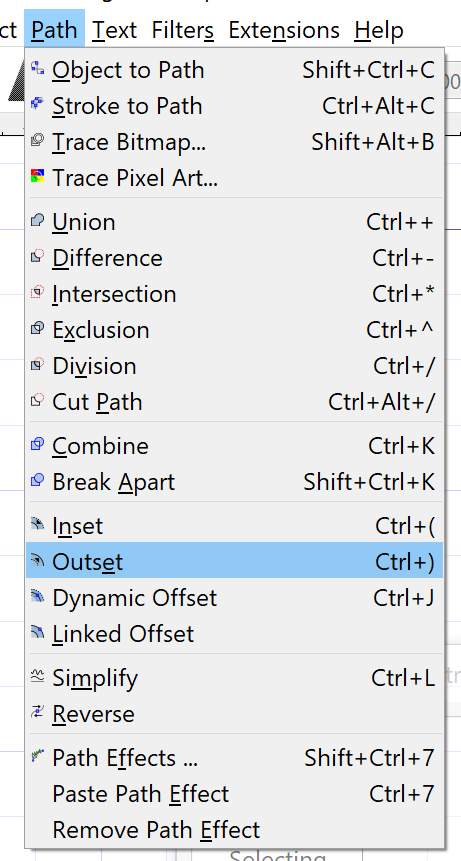
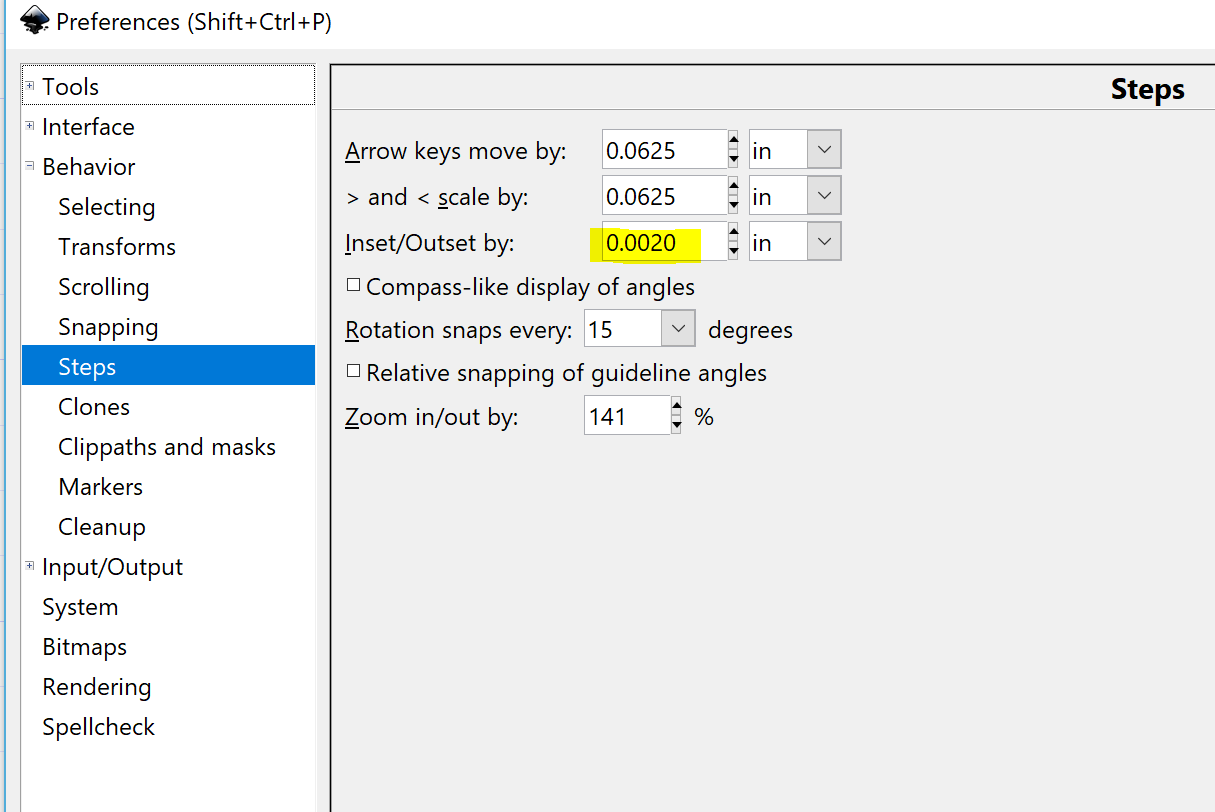
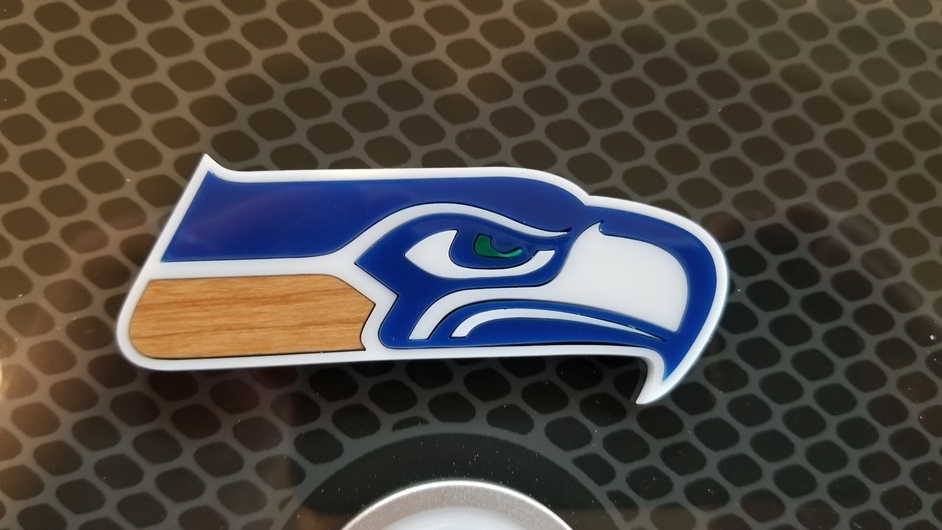
I experimented around and found .002 provided good results for proofgrade acrylic. I applied a single Outset to each piece in the design I wanted to try out (select all, apply Outset)…
That’s a pretty good use of offset. it works very well for some designs, but others not completely.
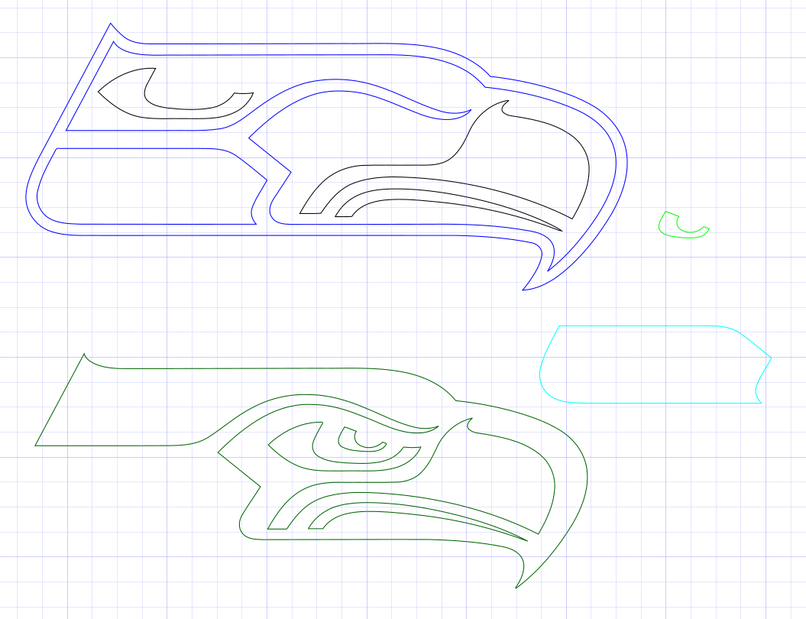
I haven’t been able to get Inkscape to render offsets for precision work in making inlays and relieves. The green eye is a good example of difficulty in using offset on a piece with complex outlines, especially with both convex and concave parts. I use stoke width and then stroke to path to get snug inlay pieces. You might try that for the eye.
Here is a link to an old topic that addresses some of these workflow issues. I got lots of ideas and help from the community, especially from @Jules for using stroke to path and @palmercr to show how OpenSCAD would do it. @dannyc’s post inspired by someone not on the forum though really fit my needs the best and allowed me to efficiently make inlay Scrabble letters.
I had heard somewhere that kerf compensation for a blinking light was an extremely convoluted process with half a dozen variables to take into account. But applying an Inset/Outset of 0.002" was all it took, huh? I’m floored!
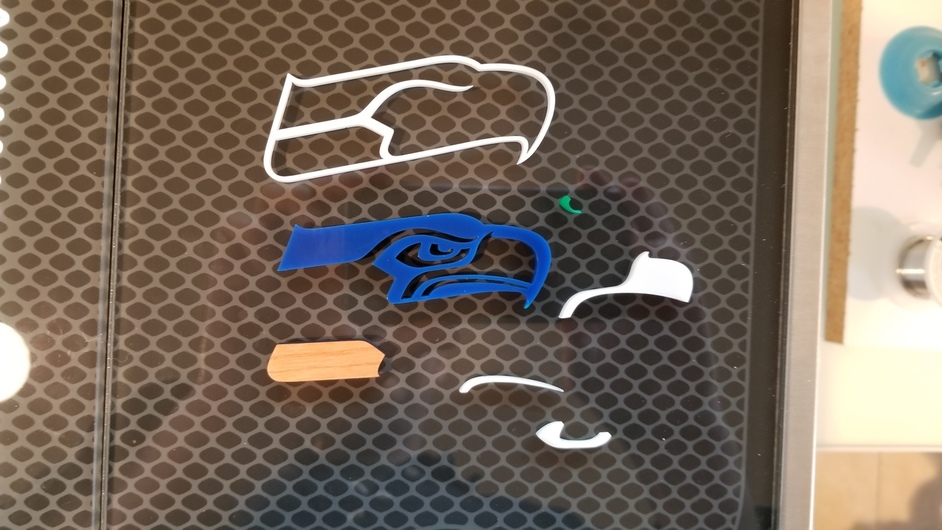
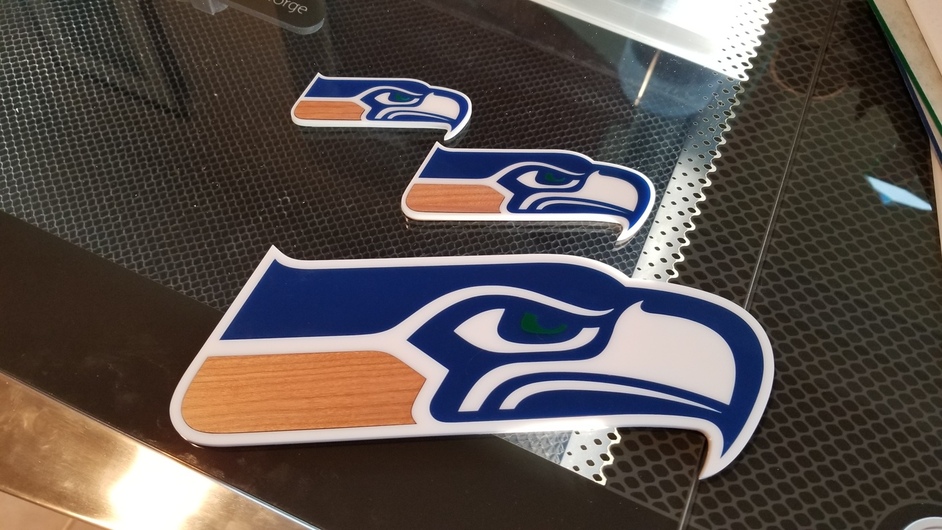
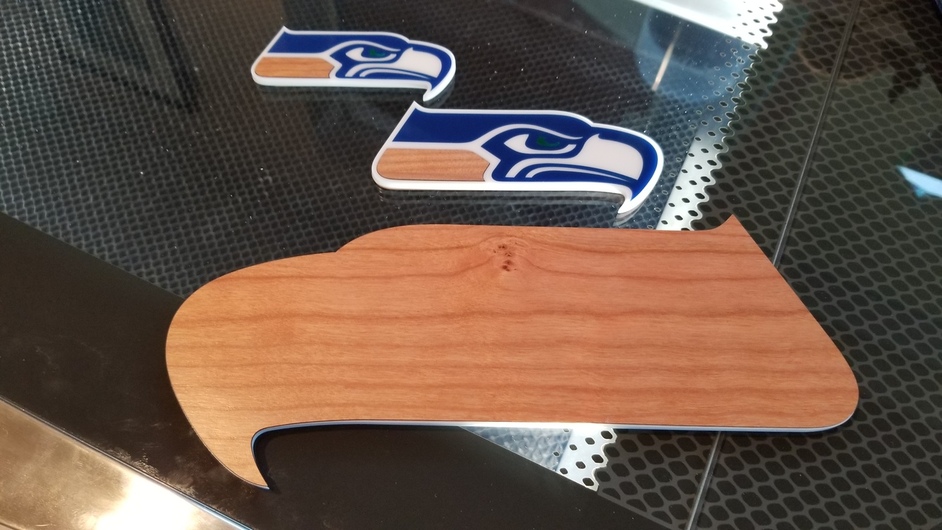
Used the same outset kerf settings while scaling up a bit. Also reversed the blue center piece for a little better fit. Then used some veneer to insure it all held together.
I did something similar using illustrator, I used a 0.007" path offset. The pieces were super snug, unfortunately the acryllic is a tad thinner than the wood so the wood sticks out a bit. Next I attempt an epoxy clear coat!