Beautiful piece! The inlay is especially lovely - and such a complicated design. You should be very proud of this one.
4 Likes
That is absolutely beautiful. The woods you chose really complement each other. And they’re not flaws, they’re FEATURES! 

3 Likes
This might not be as useful as you think. Kerf sizes change based on the material being used, in my experience you’re really better off using the final material all the way through when trying for highly accurate inlays like this.
That being said, you could probably save a great deal of material in two major ways:
- breaking apart your layers into different pieces and nesting the segments
With breaking your layers, you’ll end up with seams on the sides, which may not have been the right aesthetic that you wanted here, but you can turn that into a feature:
or a bit more fiddly…
Or the fiddliest ( not the same though, the technique doesn’t save materials here):
This kind of design change makes it so you don’t have to throw out a bunch of center cuts.
- packing your inlay pieces, especially the padauk. Maybe you did that already?
The idea is that you’d take your padauk inlay design and break it apart, then rearrange the pieces so they fit more tightly. You can save a large amount of material doing that, probably 75% or more in this case, just eyeballing the design.
10 Likes
My favorite kind of post … all tied up with awesome! It is so beautiful!!!
5 Likes
Beautiful! A whole lot more work than I’m willing to, but I sure love it when you and others do and show us the results!
4 Likes
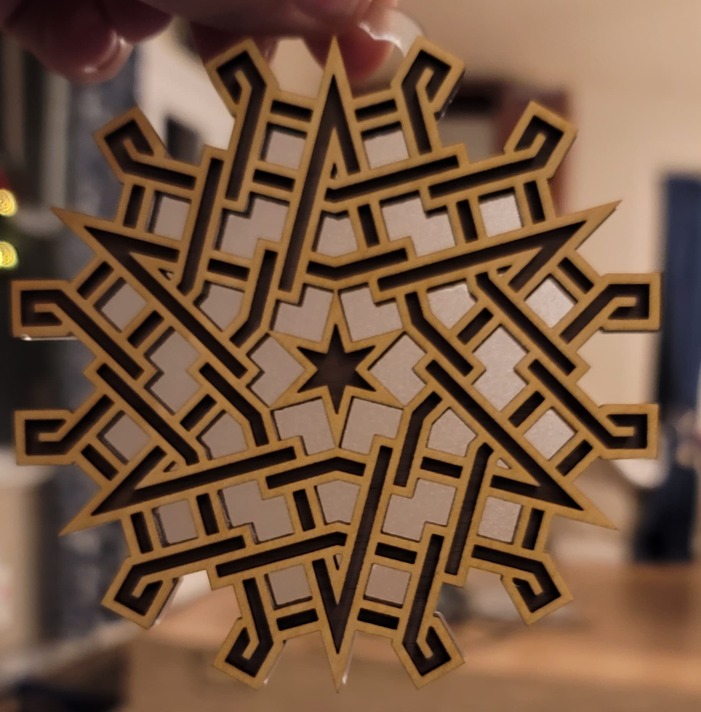
The layers were aligned with registration pins, which helped a lot. Ultimately, it was a lot of sanding that did the trick. I clamped the lid and the base together while sanding to ensure a smooth transition between the two
1 Like
That’s a good callout on the inlay. Where I would have benefited from a mock-up is in experimenting with the fluting. I could not wrap my head around how to go from the offset rounded hexagons to the smooth fluting. I initially figured that if I sanded down the highpoints and then flipped it over and sanded down the high points again it would work. Instead, I ended up with a slightly smaller rounded hexagon. Face palm moment, for sure.
I did pack the inlay. I was not able to pack it in as much as I otherwise could because I wanted to make sure that the grain still ran in the same direction as in the unpacked piece. Still saved ~50%.
One of the most challenging parts of the inlay was the little corner pieces of walnut.
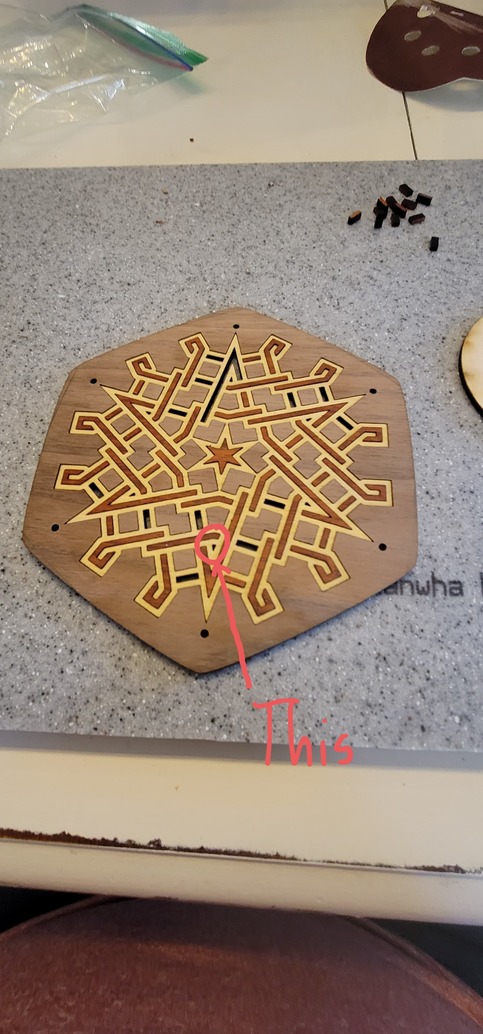
The piece is 1mm wide. When cutting, I kept getting too much char for the little pieces to be usable. I solved the issue by putting a sacrificial backerboard to reduce the flashback. That did the trick.
Thanks for the other input. I look forward to reading it.
5 Likes
I live by this. No mistakes, just features and design choices.
One of my, erm…features allowed me to make a 2nd project at the same time. I took what was left from the walnut and combined it with a first-pass mistake from the yellowheart. I deleted the wrong stroke in Inkscape which led to the yellowheart being too thin. Made for a beautiful layered ornament.
15 Likes
Something to remember is that you will always notice any small imperfection, but most people won’t see them. It all looks great to me, especially when considering the amount of work required.
7 Likes
Wow!! That is stunning! You can definitely see how much work went into it.
1 Like
Purty!
While the GlowForge is a magical device, it is the magicians that put in the time and creativity that truly make it magic. Nice work.
8 Likes
Just beautiful!
2 Likes
Absolutely exquisite. And now I have a new project to try.
Thank you so much for sharing!
2 Likes
This piece is simply beautiful! Love the shape and the way the layers look on the side.
Very beautiful (and hard) work. Well done.
Very beautiful work, you should be very happy with the results.