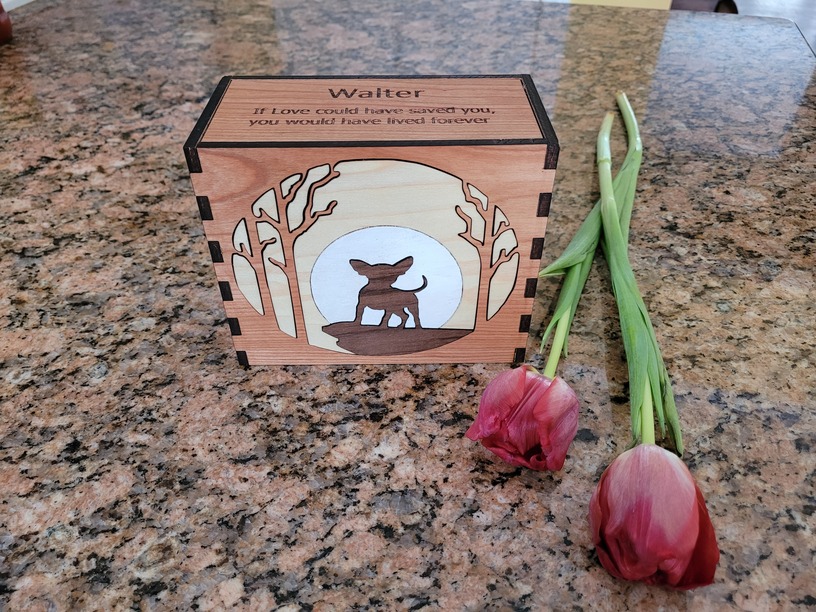
My husband and I are making a line of pet-related items. We love dogs are involved in animal rescue so it seemed appropriate. Anyway, this is my first item, an Urn I made for my sweet Chi Walter. It is inlaid using Maple, Cherry and Walnut. (The moon is painted).
I have been researching better ways to design inlay in inkscape but I kind of like the black around the pieces. At least it is acceptable to me until I get better … lol.
Thank you. We lost Walter a couple of years ago, just wanted to upgrade his resting place. We added a foam bed before screwing on the bottom plate so his ashes had a soft place to rest.
That is amazingly well done. I wish I’d had this thought for when my horse passed away a couple of years ago.
With the wood inlay, if you want to make the edges less visible, I’ve had good luck with mixing a bit of sawdust in with some wood glue, and smearing it along the seam. It’s only a useful trick if you’re sanding the pieces, of course - if you use prefinished material (like proofgrade), most folks don’t sand it.
Second trick that I’ve found when doing wood inlays on the Glowforge, is to do the full design in each material you’re going to use for the inlay. This makes it so that you use a complete file of all the cut lines on each type of material, and then combine the various materials in different ways to make the inlayed pieces - consequently, the seam is always the width of your laser. I find this works really well for doing an inlay class, because you use less materials (everyone in the class just trades pieces with another participant). I think it would also work well if you’re doing preconstructed pieces for sale, in a setting where you aren’t making each one unique - you’d end up with two or three variations on the same design, which have slightly different aesthetics because of which colors are in a given location. If you’re selling premade pieces at a craft festival, there will always be the person who says “do you have this box but in a (lighter/darker) wood?”, and if you don’t make the sale then, you might not get another chance.